Barco Coronis 3MP Installation & User Manual
Hide thumbs
Also See for Coronis 3MP:
- Installation & user manual (80 pages) ,
- Supplementary manual (4 pages) ,
- Brochure & specs (12 pages)
Table of Contents
Advertisement
Quick Links
Advertisement
Table of Contents

Related Manuals for Barco Coronis 3MP


Summary of Contents for Barco Coronis 3MP
- Page 1 B4100240 / 11 May 2004 ® Coronis Installation & User Manual...
-
Page 2: Table Of Contents
Using the VGA Capabilities of the BarcoMed 3MP2FH, 2MP2FH or 1MP2FH ....................18 Examples of PCI Slots ................18 Installing the BarcoMed 3MP2FH, 2MP2FH or 1MP2FH Display Controller ..................19 Running Multiple BarcoMed 3MP2FH, 2MP2FH or 1MP2FH Display Controllers in a Single Host ..............20 System manual Coronis 3MP... - Page 3 Advanced functions in the Adjustments menu ..........38 Maintenance ..................... 39 Troubleshooting ....................40 Technical specifications ..................41 Barcomed software driver installation ............43 Software Installation ..................45 Overview ....................... 45 Software ....................45 BarcoMed Software Installation Wizard ........... 45 System manual Coronis 3MP...
- Page 4 Software ....................... 47 Using the BarcoMed Product Installation Wizard ........47 Driver Installation ..................49 BARCO DPMS Screen Saver Installation ..........50 CORONIS Rotation Service Installation ..........52 Setting the Resolution of Your CORONIS Display Panel ......53 Reinstalling the BarcoMed Driver ............55 Installing the BarcoMed 3MP2FH, 2MP2FH or 1MP2FH Windows 2000 or Windows XP Software ..................
- Page 5 Amount of Time in each DPMS State ............87 Monitor Settings ..................88 Use As Logon Screen Saver ..............88 Getting started with the BARCO DPMS Screen Saver ........ 88 Using the BARCO DPMS Screen Saver ............. 89 Installing or Reinstalling BARCO DPMS ............93 Uninstalling BARCO DPMS ................
-
Page 6: Introduction
INTRODUCTION System manual Coronis 3MP... - Page 7 Introduction (This page intentionally left blank.) System manual Coronis 3MP...
-
Page 8: Introduction
Contents of the package Please refer to the packing list on the outside of the Coronis box. Please contact BARCO if the content of the package does not correspond to the list. Other relevant documents • MediCal Pro Installation and User Manual... - Page 9 (This page intentionally left blank.) System manual Coronis 3MP...
-
Page 10: Imaging Board Installation
IMAGING BOARD INSTALLATION System manual Coronis 3MP... - Page 11 Imaging board installation (This page intentionally left blank.) System manual Coronis 3MP...
-
Page 12: 3Mp2Fh Product Overview
• 2048 x 1536 @ 60 HZ (primary) • 1536 x 2048 @ 59 Hz The following resolution is also available when the OS is booted in VGA mode. • 640x480 @ Default Refresh Rate, 16 colors System manual Coronis 3MP... -
Page 13: System Configuration Guidelines
Because of the low power consumption and low heat generation of the 3MP2FH, multiple boards may be installed in adjacent PCI slots or adjacent to other PCI boards. Additionally there should be no need to modify either the PC’s power supply and/or cooling system. System manual Coronis 3MP... -
Page 14: Planning Your 3Mp2Fh, 2Mp2Fh Or 1Mp2Fh Installation
To install the BarcoMed Display Controller(s) in your system, you have to follow these steps: 1 Install the imaging board(s) in the PC 2 Install and connect the displays to the imaging board(s) 3 Install the BarcoMed driver software System manual Coronis 3MP... - Page 15 Imaging board installation (This page intentionally left blank.) System manual Coronis 3MP...
-
Page 16: Hardware Installation
Figure 1: The 3MP2FH, 2MP2FH or 1MP2FH Switch Locations There are four switches located at S1 on the 3MP2FH, 2MP2FH or 1MP2FH. The following table shows their locations and briefly describes their functions and default states. System manual Coronis 3MP... -
Page 17: Using The Vga Capabilities Of The Barcomed 3Mp2Fh, 2Mp2Fh Or 1Mp2Fh
32 bit or 64 bit slot with no loss of functionality. Figure 2 illustrates the types of slots so that you can correctly identify which one to use for the 3MP2FH, 2MP2FH or 1MP2FH. System manual Coronis 3MP... -
Page 18: Installing The Barcomed 3Mp2Fh, 2Mp2Fh Or 1Mp2Fh Display Controller
3MP2FH, 2MP2FH or 1MP2FH (the output farthest from the motherboard – “VID 1” in figure 3) using the provided DVI cable. For a dual-headed 3MP2FH, 2MP2FH or System manual Coronis 3MP... -
Page 19: Running Multiple Barcomed 3Mp2Fh, 2Mp2Fh Or 1Mp2Fh Display Controllers In A Single Host
This is due to the PC’s PCI bus control in the system BIOS, and not the BarcoMed display controller. It may become necessary, depending on how your PC’s BIOS configures the PCI bus, to switch your DVI display connections to achieve a linear desktop configuration. Figure 3: The Video Outputs. System manual Coronis 3MP... -
Page 20: Display Installation
DISPLAY INSTALLATION System manual Coronis 3MP... - Page 21 Display installation (This page intentionally left blank.) System manual Coronis 3MP...
-
Page 22: Safety Instructions
This equipment generates, paying particular attention to uses and can radiate radio cords plugs frequency energy and, if not receptacles. installed and used in accordance with instruction manual, may cause harmful interference to radio communications. System manual Coronis 3MP... -
Page 23: Overview
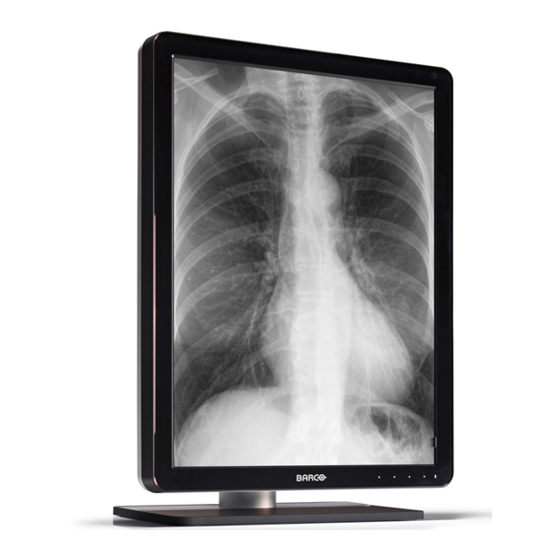
Display installation OVERVIEW Introduction The MFGD 3420, BARCO’s 21” 3 megapixel greyscale LCD display, guarantees perfect image quality in medical imaging applications. The display combines a TFT (thin film transistor) liquid crystal display panel structure and a built-in backlight with inverter for a better picture quality. -
Page 24: Package Contents
The MFGD 3420 display 12V DC power supply European power cord American power cord Chinese power cord Video cable This user manual Controls and connectors System manual Coronis 3MP... - Page 25 - The LED is orange when the display is in Stand-by power-saving mode. (2) Control wheel for stand-by switching and luminance control (3) USB-downstream connector (4) USB-upstream connector (5) DVI (video and data) input (6) 12V DC power input System manual Coronis 3MP...
-
Page 26: Installation
3 Pull the lower side of the cover towards you and simultaneously slide the cover downward. 4 Pull the red strap out of the fixation holes in the foot. You can better leave the cover off the foot while connecting the signal cables to the display. System manual Coronis 3MP... -
Page 27: Portrait Or Landscape Position
2 Connect the other end of the video cable to the video output of your video source (Computer graphics board with digital video output). Vid1 Vid2 Example of video connection in a Coronis dual head configuration System manual Coronis 3MP... -
Page 28: To Connect The Power
2 Slide the cover upward while moving the lower side of the cover towards the foot. 3 Press the cover to the foot so that both clips make a clicking sound. System manual Coronis 3MP... -
Page 29: Tilt And Swivel Positioning
You will have to select a resolution that corresponds to the panel orientation (landscape or portrait). Please refer to the possible resolutions in the Technical specifications. Note: The recommended resolution for best image quality is 2048 x 1536 or 1536 x 2048. System manual Coronis 3MP... -
Page 30: Operation
• To exit from a menu or move to a higher level of the menu structure, turn the control wheel to select EXIT. Next, click the control wheel shortly. If you do this when you are in the Main Menu, you exit the menu system. System manual Coronis 3MP... -
Page 31: Saving Changes
5 Turn the control wheel to adjust the Luminance Target value. 6 Click the control wheel to confirm the adjustment. 7 Turn the control wheel to select Exit. 8 Click the control wheel to return to the main menu. System manual Coronis 3MP... -
Page 32: Settings
SW version: .... Displays the current internal software version Display Lifetime: ..Indicates the total time the display has been operating, including the time in stand-by Backlight Lifetime: ... Indicates the total time the display has been operating, excluding the time in stand-by System manual Coronis 3MP... -
Page 33: Advanced Functions
Improper use of these functions may irreversibly damage the display. BARCO cannot be held responsible for the results or damage caused by improper use of these functions. This chapter describes only the Advanced functions in the OSD menus. -
Page 34: Advanced Functions In The Luminance Menu
I-Guard will not function properly anymore Burn-In Mode ..When switched on, the display will generate a white image when the video cable is unplugged Important: Disabling the I-Guard results in an uncontrolled image performance. System manual Coronis 3MP... -
Page 35: Advanced Functions In The Information Menu
(so, the total backlight lifetime) Backlight Runtime ... Indicates the time the backlight has been on since the last time it was switched off. This counter is reset to 0 after 1092 minutes. System manual Coronis 3MP... - Page 36 Vert.Front Porch: ..The vertical front porch of the input signal Vert.Sync: ....The vertical sync length of the input signal Vert.Back Porch: ..The vertical back porch of the input signal Vert.Frequency: ..The vertical frequency of the input signal System manual Coronis 3MP...
-
Page 37: Advanced Functions In The Adjustments Menu
In Advanced mode, the main menu contains an additional menu, Adjustments. This menu contains the submenu Miscellaneous. Miscellaneous Adjustments The Miscellaneous menu contains the following items: RS232 Address ..Turn the control wheel to change the internal display address. System manual Coronis 3MP... -
Page 38: Maintenance
It may be possible that dust particles have entered the display and are stuck to the rear of the glass. We recommend to let this cleaning procedure be done in a BARCO service center. However, when really necessary, you can perform the cleaning on site if you can work in conditions that are as clean and dust-free as possible. -
Page 39: Troubleshooting
Permanently dark or bright pixels can happen to TFT displays. 20 or less permanently dead pixels do not make out a good case for exchanging the unit. Please contact our Customer Service Department if the number of pixel faults exceeds the above-mentioned figure. System manual Coronis 3MP... -
Page 40: Technical Specifications
700 cd/m² (maximum) Contrast ratio 600/1 (in dark environment) Response time 25 ms (@ 25° C after 30 min warmup) Controls Push / turn control wheel for stand-by switching and brightness control Input connectors DVI dual channel System manual Coronis 3MP... - Page 41 Storage: 5% - 95% Due to our policy of continuous product improvement, the above specifications are subjected to change without notice. Barco shall not be liable for technical or editorial errors or omissions contained herein; nor for incidental or consequential damages whatsoever resulting from furnishing, performance or use of this material.
-
Page 42: Barcomed Software Driver Installation
BARCOMED SOFTWARE DRIVER INSTALLATION System manual Coronis 3MP... - Page 43 BarcoMed software driver installation (This page intentionally left blank.) System manual Coronis 3MP...
-
Page 44: Software Installation
Special Note: The CORONIS Rotation Service requires the Portrait Accelerator (PA) Option in order to function. The PA is included with the CORONIS 3MP Flat Panel Displays and is available as an option for the CORONIS 1MP and 2MP Flat Panel Displays. - Page 45 BarcoMed Software Installation Wizard to reinstall either the BarcoMed Display Controller Drivers or CORONIS Rotation Service and/or modify, repair or remove the BARCO DPMS Screen Saver from his system. The BarcoMed Display Controller Driver must be installed prior to installing either or both the BARCO DPMS Screen Saver or the CORONIS Rotation Service.
-
Page 46: Software Installation
Using the BarcoMed Product Installation Wizard To install your BarcoMed 3MP2FH, 2MP2FH or 1MP2FH Windows Display Controller Driver, BARCO DPMS Screen Saver and CORONIS Rotation Service for the first time follow the steps below. If you are reinstalling the drivers or installing a new driver release over an existing driver release, skip step 1 below: 1. - Page 47 4. By default all the software on the BarcoMed Software CD will be selected (figure 4 above). For the initial installation we recommend that you install all of the software. If you do not want to install a particular BarcoMed Software product, deselect it by clearing the System manual Coronis 3MP...
-
Page 48: Driver Installation
(see figure 7 below). Figure 7 If you want to change your selection, click “OK” to continue and then click “Back” on the next screen otherwise click “OK”. System manual Coronis 3MP... -
Page 49: Barco Dpms Screen Saver Installation
“Finish”. The wizard will now begin installing the next selected piece of BarcoMed Software. If you are working with the default selections, this will be the “Barco DPMS Screen Saver”. If the installation of the products you selected at the beginning is complete, click “Finish”... - Page 50 13. When the Windows Installer has finished installing DPMS, the “Installshield Wizard Completed” page will appear, click “Finish” to exit the BARCO DPMS InstallShied Wizard and return to the BarcoMed Product Install Wizard Welcome Screen. After returning to the BarcoMed Product Install Wizard Welcome...
-
Page 51: Coronis Rotation Service Installation
“Yes” to restart your computer. Special Notes: Even if Windows does not warn you that you must restart your computer before the new settings will take effect, you must restart your computer before the new settings will take effect. System manual Coronis 3MP... -
Page 52: Setting The Resolution Of Your Coronis Display Panel
Display Controller, no 3 party VGA card configuration, your system may look different. 3. Select a resolution from the list that is correct for the maximum number of display adapters installed even if you will later configure System manual Coronis 3MP... - Page 53 ( NOT the VGA Mode option ). Log in as usual. If you wish to change the number of CORONIS display panels you are using, this can be done using the “BarcoMed Driver Tab” of the Windows Display Control Panel. System manual Coronis 3MP...
-
Page 54: Reinstalling The Barcomed Driver
“Using the BarcoMed Product Installation Wizard” with the following changes. 1. Skip Step 1. 2. In Step 4, clear the checkboxes next to the BARCO DPMS and the CORONIS Rotation Service. 3. When the driver has finished installing, click “Finish”. Then click “Quit”. -
Page 55: Installing The Barcomed 3Mp2Fh, 2Mp2Fh Or 1Mp2Fh Windows 2000 Or Windows Xp Software
Windows installation process. To install your BarcoMed 3MP2FH, 2MP2FH or 1MP2FH Windows Display Controller Driver, BARCO DPMS Screen Saver and CORONIS Rotation Service for the first time follow the steps below. If you are reinstalling the drivers or installing a new driver release over an existing driver release skip to step 5: 1. - Page 56 The Wizard may prompt you to restart your system. If it does, click “Yes” to restart your system now. When your system restarts log in using an account with administrator privileges. Windows will again launch the “Found New Hardware Wizard” for each BarcoMed display controller it System manual Coronis 3MP...
-
Page 57: Driver Installation
(figure 12 below). Figure 12 If you want to change your selection, click “OK” to continue and then click “Back” on the next screen otherwise click “OK”. System manual Coronis 3MP... - Page 58 DualView “check” the checkbox next to “Enable the DualView device?”, and click “Next”. If you do not wish to enable DualView clear the checkbox next to “Enable the DualView device?”, and click “Next” to continue. Figure 13 System manual Coronis 3MP...
- Page 59 BarcoMed software driver installation Figure 14: DualView Disabled Figure 15: DualView Enabled System manual Coronis 3MP...
- Page 60 Click “OK” to continue. 10. When the screen shown in figure 16 or figure 17 appears, click “Yes” or “Continue Anyway” to continue. This screen may appear multiple times. Figure 16: Windows 2000 Digital Signature Not Found Warning System manual Coronis 3MP...
- Page 61 12. When the Driver Install Wizard tells you that it has successfully installed the selected driver, click “Finish”. The wizard will now begin installing the next selected piece of BarcoMed Software. If you are working with the default selections, this will be the “Barco DPMS Screen Saver”. System manual Coronis 3MP...
-
Page 62: Barco Dpms Screen Saver Installation
“Yes”. Note: Clicking “Cancel” will also return you to the BarcoMed Product Install Wizard, but will not delete the Barco Display Driver. The wizard will also begin to install the next selected piece of BarcoMed Software. -
Page 63: Coronis Rotation Service Installation
17. When the Windows Installer has finished installing DPMS, the “InstallShield Wizard Completed” page will appear, click “Finish” to exit the BARCO DPMS InstallShield Wizard and return to the BarcoMed Product Install Wizard Welcome Screen. After returning to the BarcoMed Product Install Wizard Welcome... -
Page 64: Configuring The Windows Desktop And Setting The Resolution Of Your Coronis Display
The colors setting for your high-resolution grayscale displays should default to 256 colors (8 bits per pixel). The palette mode for the your high-resolution grayscale displays should be set to Static Gray palette System manual Coronis 3MP... - Page 65 “Attached” and click the “Apply” button. Note: Since Windows will not let you detach the primary display connected to a particular controller, you may need to temporarily make another display the primary display. System manual Coronis 3MP...
-
Page 66: Enabling Or Disabling Dualview
If you wish to either enable or disable DualView at a later time, you may do so through the Monitor Configuration drop down menu on the BarcoMed Driver tab. Please refer to the BarcoMed Driver Tab chapter of this manual. System manual Coronis 3MP... - Page 67 BarcoMed software driver installation (This page intentionally left blank.) System manual Coronis 3MP...
-
Page 68: Barcomed Driver Tab
Double click on the rectangle that represents the BarcoMed Display Controller to bring up its property page. Click on the “BarcoMed Driver” tab (see figure 21 on the next page). Figure 20: BarcoMed Driver Tab under Windows NT 4.0 System manual Coronis 3MP... -
Page 69: Status
Palette Mode You may choose one of the following four Palette Modes: Color to Gray Compatibility Use this palette option for applications, such as Java, which require True Color support. Such applications may not work correctly when System manual Coronis 3MP... -
Page 70: Usermodifiable Color Palette
BarcoMed software driver installation using one of Barco’s three “Standard 8-bit (256-color)” palette modes. All applications that are designed to work correctly with 8-bit (256- color) modes should continue to work normally. Please note that dithering is not used while in this mode. The Enable... -
Page 71: Static Gray Palette With No System Colors
This complies with the Windows standard interface method. If you are unsure whether or not your application requires this “Static Gray Palette with NO System colors” mode, contact your application provider. System manual Coronis 3MP... -
Page 72: Drawing Modes
This would cause the Windows virtual desktop to be resized to fit on the three monitors, and you can move your cursor horizontally from one screen to the other. System manual Coronis 3MP... -
Page 73: Languages Supported
English (U.S) ( default ) Dutch German Korean Japanese Simplified Chinese Traditional Chinese To change between the languages select the correct region via the Regional Settings Control Panel in your machine’s Start > Settings > Control Panel. System manual Coronis 3MP... -
Page 74: Barcomed Hardware Tab
I f n I f n I f n I f n I f n I f n I f n I f n I f n I f n I f n I System manual Coronis 3MP... - Page 75 Double click on the rectangle that represents the BarcoMed Display Controller to bring up its property page. Click on the “BarcoMed Hardware Tab” (see figure 23 on the next page). Figure 22: BarcoMed Hardware Tab under Windows NT 4.0 System manual Coronis 3MP...
-
Page 76: Using The Barcomed Hardware Tab
Using The BarcoMed Hardware Tab Device Displays the current BarcoMed Display Controller, driver, and the currently selected display resolution. Identify Device: This button is for BarcoView Medical Imaging Systems (MIS) internal use only and is grayed out. System manual Coronis 3MP... -
Page 77: Pci Information
“Advanced ...” Button: By clicking on this button, the user can display more information about the BarcoMed Display Controller installed in the selected PCI slot. Utilities “Generate Report” Button: Clicking this button will start the BarcoMed Self Exam wizard. Please follow the guidelines in the wizard. System manual Coronis 3MP... - Page 78 BarcoMed Display Controller in order to update it’s firmware. This file will be provided by BarcoView MIS if and when a firmware update is required. Special Note: The BarcoMed Hardware Configuration Wizard is applicable only for AURA-based Display Controller(s). System manual Coronis 3MP...
- Page 79 BarcoMed software driver installation (This page intentionally left blank.) System manual Coronis 3MP...
-
Page 80: Barco Display Tab
1. Open the “Display Properties Control Panel” by right clicking on the desktop, then select “Properties”. 2. Under Windows NT 4.0, Click on the “BARCO Display Tab” (see figure 24 below). Figure 24: BARCO Display Tab under Windows NT 4.0... -
Page 81: Using The Barco Display Tab
Double click on the rectangle that represents the BarcoMed Display you are working with to bring up its properties page. Click on the “BARCO Display” tab (figure 25). Figure 25: BARCO Display Tab under Windows 2000 and Windows XP Using The BARCO Display Tab Displays... -
Page 82: Properties
Current Luminance Value: This is the current luminance value of the display. It may vary a bit from time to time, for the display continuously calibrates itself to meet the target luminance value. System manual Coronis 3MP... - Page 83 BarcoMed software driver installation Figure 26 System manual Coronis 3MP...
-
Page 84: Barco Dpms Screen Saver Overview
DPMS states as requested by the display controller. The default state for the BARCO DPMS Screen Saver is the Off state. In addition to simply entering the Off state after the work day, the user can specify that the display first go through two other DPMS Screen Saver states before going into Off state. -
Page 85: Barco Dpms Screen Saver Options
BarcoMed software driver installation BARCO DPMS Screen Saver Options From the “BARCO DPMS Screen Saver Control Panel” you can change many DPMS screen saver elements simultaneously. The DPMS screen saver elements in each scheme are work schedule, work day screen saver, DPMS settings after work day, and many additional options. -
Page 86: Screen Saver During Work Day
BarcoMed software driver installation Screen Saver During Work Day On CRT based displays, such as the Barco MGD series, a “regular” screen saver can be invoked during user inactivity during the work day. This “regular” screen saver and its settings can be chosen from the “Screen Saver During Work Day”... -
Page 87: Monitor Settings
If you have a Barco Medical Display, select “Barco Quick Start.” If a non-Barco display is being used, select the amount of time it takes your display to warm up via the “Monitor Setting”... -
Page 88: Using The Barco Dpms Screen Saver
Barco DPMS Screen Saver so that Windows will store the selection in the user’s profile. If a user does not select the BARCO DPMS Screen Saver as his screen saver, the next time he logs on to the system the screen saver selection may be blank. - Page 89 BarcoMed software driver installation Figure 27: Windows NT 4.0 Screen Saver Tab Figure 28: Windows 2000 Screen Saver Tab System manual Coronis 3MP...
- Page 90 BarcoMed software driver installation Figure 29: Windows XP Screen Saver Tab 3. Click on the “Settings” button. The “BARCO DPMS Screen Saver Control Panel” will open (figure 30 below). Figure 30: BARCO DPMS Settings Control Panel System manual Coronis 3MP...
- Page 91 “Properties” from the drop down menu; then select the “Screen Saver” tab. 2. Select the “BARCO DPMS Screen Saver” in the “Screen Saver” drop down menu if it is not already selected. 3. Click on the “Settings” button. The “BARCO DPMS Screen Saver Control Panel”...
-
Page 92: Installing Or Reinstalling Barco Dpms
8. Select the amount of time it takes for your display to warm up. If you have a Barco Medical Display, select “Barco Quick Start”. If you are using a non-Barco display, select the amount of time it takes your display to warm up via the “Monitor Setting” section. - Page 93 4. Click “Remove” on the Remove Program Screen of the Wizard. 5. When the Wizard has finished removing the program, click “Finish” on the InstallShield Wizard Completed Screen of the Wizard. 6. Click “Quit” to exit the BarcoMed Product Installation Wizard. System manual Coronis 3MP...
-
Page 94: Coronis Rotation Service
Rotating a single head on any given BarcoMed Display Controller will affect both of the heads connected to that display controller. If you change the physical orientation of one CORONIS display connected to any given BarcoMed Display Controller, the CORONIS System manual Coronis 3MP... -
Page 95: Installation Or Reinstallation
3. Type the following text in the dialog box: “cmd”. 4. Click on “OK”. 5. Type the following text in the command line window: “coronisrotationservice /uninstall” 6. When the program has finished, closed the command line window. System manual Coronis 3MP... -
Page 96: Medical Software Installation And Usage
MEDICAL SOFTWARE INSTALLATION AND USAGE System manual Coronis 3MP... - Page 97 MediCal software installation and usage (This page intentionally left blank.) System manual Coronis 3MP...
-
Page 98: Medical Software Installation
5 For all the displays in the system, define (if necessary) and select a Preset. 6 After selecting the Preset, MediCal starts consistency calibration automatically. 7 Define the Q/A task schedule. 8 Run the due tasks. Please refer to the MediCal User Guide for more information. System manual Coronis 3MP... - Page 99 MediCal software installation and usage (This page intentionally left blank.) System manual Coronis 3MP...
Need help?
Do you have a question about the Coronis 3MP and is the answer not in the manual?
Questions and answers