Planet VIP-000 User Manual
Internet telephone gateway
Hide thumbs
Also See for VIP-000:
- Quick installation manual (36 pages) ,
- Quick installation manual (36 pages)
Table of Contents
Advertisement
Advertisement
Table of Contents
Troubleshooting

Related Manuals for Planet VIP-000


Summary of Contents for Planet VIP-000
- Page 1 Internet Telephony Gateway VIP-000/200/400/400FS/400FO User’s Manual Rev 5.0...
- Page 2 Disclaimer PLANET Technology does not warrant that the hardware will work properly in all environments and applications, and makes no warranty and representation, either implied or expressed, with respect to the quality, performance, merchantability, or fitness for a particular purpose.
- Page 3 How to Use This Manual This manual was designed for the technical and non-technical users of PLANET Internet telephony gateway VIP-000/200/400/400FS/400FO. It contains information about the functions of VIP and in- structions for its installation, basic configuration and operation in related chapters, and introduces more advanced command line interface, firmware upgrade and appendix information.
- Page 4 VIP User’s Manual This appendix lists factory settings of VIP. Appendix D: Worksheets This appendix provides some work sheets that you may use before configuring VIP. Preface...
-
Page 5: Important Safety Instructions
VIP User’s Manual Important Safety Instructions Before plugging VIP into an electrical outlet, carefully read all the installation instructions in Chapter For your own safety and the safety of your equipment, always take the following precautions: Follow instructions and warnings in the documentation. Never push any object through the fan vent or other openings in the equipment. - Page 6 VIP User’s Manual Documentation Abbreviations Throughout this guide, the user will come across a number of abbreviations that are common throughout the industry. The user should be familiar with the following abbreviations: Address Translation and Parsing Manager ATPM Command Line Interface Digital Signal Processor DTMF Dual Tone Multi-Frequency...
- Page 7 VIP User’s Manual Notation Conventions Throughout this guide, different type styles and characters are used. These serve a variety of pur- poses as described below: Convention Description boldface Commands and keywords are in boldface. italic Arguments for which you supply values are in italics. courier Messages that VIP CLI displays are in plain courier font.
-
Page 8: Table Of Contents
Reset Button Rear Panel Chapter 2 Installing VIP Network Requirements Installing VIP Installing the telephony interface module (VIP-000 only) Connecting to the telephony devices Connecting to the Network Providing Power to VIP Assigning IP address to VIP Chapter 3 VIP Concepts... - Page 9 VIP User’s Manual 4.1.2 Clear DialPlan 4.1.3 Restore DialPlan 4.1.4 Save to NVRAM 4.2 View System Configurations 4.2.1 Firmware Version Information 4.2.2 H323 Parameters 4.2.3 Voice Coder Type 4.2.4 Voice Coder Information 4.2.5 Channel Parameters 4.2.6 Network Connection 4.2.6.1 DHCP Settings 4.2.6.2 PPPoE Settings 4.2.6.3 DDNS Settings 4.3 Configure System Settings...
- Page 10 VIP User’s Manual Designating IP Address Designating Port Number Command Reference Utility Commands clrscr download help ping Network Commands net reset net set gateway ip_addr net set http {on|off} net set telnet {on|off} net set ip ip_addr net set ip_preced ip_preced net set mask ip_mask net set speed {10|100|auto} net set user_pw password password...
- Page 11 VIP User’s Manual set h323 h245_tunneling set h323 imtc_dtmf {add|del} ip_addr set h323 in_fast_start {on|off} set h323 master_delay set h323 nat_call {on|off} set h323 out_fast_start {on|off} set h323 rtp_port_base port_base 7.10 Voice Coding Profile Configuration Commands 7.10.1 Common Coding Profile Configuration Commands set coding profile_id coding_type coding_type {on | off} set coding profile_id cp_tone_detect...
- Page 12 VIP User’s Manual 7.12 Tel Commands tel show pcm_gain_level tel show port [port#] tel show ring_freq tel set pcm_gain_level {1|2|3|4|5} tel set ring_freq {1|2|3|4} 7.13 E & M Signaling Commands E&M Common Signaling Configuration Commands set port port em clear_conf_detect set port port em clear_conf_wait_max set port port em clear_detect set port port em connected_min...
- Page 13 VIP User’s Manual Chapter 8 Upgrading and resetting VIP Firmware upgrade TFTP server configuration Trouble Shooting Tips CLI Commands in Download Mode help quit set ip ip_addr set gateway ip_addr set mask ip_mask start Restore default configuration System configuration default parameters Dialplan configuration default parameters: Appendix A Technical Specifications VIP Technical Specifications...
- Page 14 VIP User’s Manual Index Preface...
-
Page 15: Chapter 1 Overview
PBX system. PLANET VoIP (Voice over IP) system – VIP-000/ 200/ 400/ 400FS/ 400FO offer toll quality voice and real-time fax data over IP networks. With optimized H323 architecture, PLANET VIP series are ideal solution for various VoIP applications such as Headquarter and Branch Office communication, and IDD cost- effective solution. -
Page 16: Package Contents
The contents of your product should contain the following items: Internet Telephony Gateway 19” rack mountable version 90-240V AC power cord (VIP-000), AC-DC power adapter (VIP-200/400/400FS/400FO) 9-pin straight through RS-232 cable Rack mount brackets (2) and screws (4) (VIP-000 only) Quick Installation Guide User’s Manual CD... -
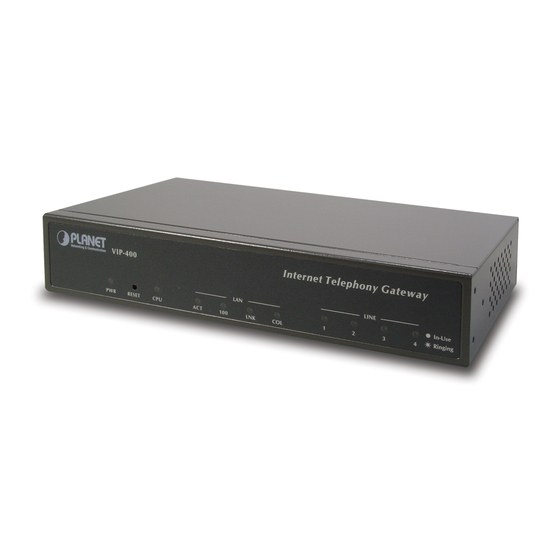
Page 17: Led Indicators
VIP User’s Manual Figure 1-5 VIP-400FO Front Panel LED Indicators The LED indicators on the front panel display the current status of VIP as described in the following table: Indicator Color Activity Indication Green Power is supplied to the gateway. SYSTEM Green Blinking... -
Page 18: Reset Button
Rear Panel The rear panel of VIP-000 has two slots allowing the installation of up to two Telephony-Interface- Modules (TIM) . Each module is equipped with 4 telephony interface ports. Depending on the type of the telephony interface module, the telephony interface ports may be connected to telephony de- vices, such as PBX, KTS, and telephone sets of central office. - Page 19 VIP User’s Manual Figure 1-8 VIP-400FO Rear Panel Overview...
-
Page 21: Chapter 2 Installing Vip
A, otherwise, VIP won’t function. Connecting to the telephony devices VIP-000 supports three types of TIM. One is FXO, FXS and the other is E&M. Each module has four ports for connecting to telephony devices. VIP-200 equips two FXS interface for connecting to regular analog telephone sets or FAX machine. -
Page 22: Connecting To The Network
VIP User’s Manual (FXS). VIP-400FS equips four FXS interfaces telephone set or FAX machine connections (FXS). VIP-400FO equips four FXO interfaces to have the great flexibility of PBX connection (FXO) VIP-FXO module is designed for connecting to PBXs (extension line) or central office switches (CO line). -
Page 23: Chapter 3 Vip Concepts
VIP User’s Manual Chapter 3 VIP Concepts VIP enables the transmission of voice and fax traffic over any IP network by digitizing voice and fax signals, encapsulating the information within IP packets, and then sending the packets across the IP network How VIP Operates The TIM inside VIP digitizes analog voice signals at 8 Kbps. -
Page 24: Hunt Group
VIP User’s Manual Hunt Group Instead of directly mapping a phone number to a destination, the ATPM first maps the phone num- ber to a group of destinations known as a Hunt Group. A hunt group is a group of destinations that For example, the customer support group of a company might have 20 peo- are equivalent. -
Page 25: Hunt Group Table
VIP User’s Manual Hunt Group Table The hunt group table maps a hunt group to a list of destinations. Hunt group sample Group id Type #Members Member ids ---------------------------------------------------------------------------- Destination Table The destination table maps a destination to a telephony port or the IP address of a remote VIP. Destination table sample Dest id Mode... -
Page 27: Chapter 4 Configuring Vip From A Web Browser
VIP User’s Manual Chapter 4 Configuring VIP from a Web Browser This chapter explains procedures for configuring VIP from the web browser. Http setting mode This section describes the processes for setting up Internet Telephony Gateway once it has been in- stalled. - Page 28 Restart your PC and Start your WEB browser. 6. In the Address box, enter the following: http://192.168.0.1 (Default IP address in VIP-000/200/400/400FS/400FO.) 7. Press enter to confirm and you should find the screen below. 8. The User Name is administrator (all lower case) .
-
Page 29: Dial Plan/ Dial Settings
VIP User’s Manual 4.1.1 Dial Plan/ Dial Settings Main Menu Function Briefings 1.Dial Plan Settings, which helps you configure the dial plan. You should complete the dial plan work sheets before working on this menu. 2.View System Configurations, which includes the specific information related to version, network, H.323, coder, and the channel of the gateway you are using. -
Page 30: Phone Number
VIP User’s Manual 4.1.1.1 Phone number Please select Main Menu\Dial Plan\Phone/Hunt Group/Destination Settings, we can find Phone/Hunt Group/Dest. Setting Menu. We are doing VIP telephone address table manage- ment. We can add (delete, find or list) desired telephone number mapping to hunt group at this menu. Telephone Telephone number to match. - Page 31 VIP User’s Manual To delete / find a Telephone, select the option and telephone, you can key in the phone number to find or delete. The right bottom screen will show the result. Configuring VIP from a Web Browser...
-
Page 32: Hunt Group
VIP User’s Manual 4.1.1.2 Hunt Group Please select Main Menu\Dial Plan\Phone/Hunt Group/Destination Settings, we can find Phone/Hunt Group/Dest. Setting Menu. We are doing VIP hunt group table management. We can add (delete, find or list) desired hunt group ID mapping to destination ID at this menu. If you want to make the port calls to the secondary receiver, you can click one “More Destinations”... - Page 33 VIP User’s Manual 4.1.1.3 Destination IP/ Destination Channel Please select Main Menu\Dial Plan\Phone/Hunt Group/Destination Settings, we can find Phone/Hunt Group/Dest. Setting Menu. We are doing VIP destination table management. One is Remote Destination IP, one is Remote Host Name and the other is Local Destination Channel.
- Page 34 VIP User’s Manual We can add (delete, find or list) desired destination ID mapping to Remote Destination IP, Domain Name or Local Destination Channel at this menu. Please back to Dial Plan Menu. Configuring VIP from a Web Browser...
- Page 35 VIP User’s Manual 4.1.1.4 Common Parameter Please select Main Menu\Dial Plan\Common Parameter Settings This Common Parameter Settings is the same as previous ATPM system parameters description. . Configuring VIP from a Web Browser...
-
Page 36: Clear Dialplan
VIP User’s Manual 4.1.2 Clear DialPlan Please select Main Menu\Dial Plan\Clear All Dial Plan Settings Clear All Dial Plan Settings will clear all the settings you made before. However, the 'Clear All' is only temporary if you do not store to the Flash Memory afterwards. That is, to restore all the settings from the Flash Memory, you need only to click on the 'Restore All En- tries' on the left frame, or to reboot the system... -
Page 37: Save To Nvram
VIP User’s Manual 4.1.4 Save to NVRAM Please select Main Menu\Dial Plan\ Save to NVRAM Ready to store Dial Plan settings to Flash Memory Please Back To Main Menu 4.2 View System Configurations Please select Main Menu\View System Config. Configuring VIP from a Web Browser... -
Page 38: Firmware Version Information
VIP User’s Manual View System Config. Function Briefings. Six options available 1.Firmware Version Information, which shows the versions of each firmware component 2.Network Settings, which shows the IP-related settings, and the status of associated management tools 3.H.323 Parameter Settings, which shows the H.323-related parameters associated with the gateway 4.Coding Profile Information, which shows the configurations related to a specific coding profile 5.Channel... -
Page 39: Voice Coder Type
VIP User’s Manual 4.2.3 Voice Coder Type Please select Main Menu\View System Config.\Coder Type The Voice Coder For Each Line Module: Voice coder is G.723 for Line Module 1. Voice coder is G.723 for Line Module 2. 4.2.4 Voice Coder Information Please select Main Menu\View System Config.\Coder Information Configuring VIP from a Web Browser... -
Page 40: Channel Parameters
VIP User’s Manual 4.2.5 Channel Parameters Please select Main Menu\View System Config.\Channel Parameters This command can show the desired channel setting of VIP. Configuring VIP from a Web Browser... -
Page 41: Network Connection
VIP User’s Manual 4.2.6 Network Connection Please select Main Menu\View System Config\Network Connection This command can display the type of connection currently enabled in VIP. 4.2.6.1 DHCP Settings Display current DHCP status in VIP Command Line Interface reference: net set dhcp net set dhcp command configures VIP to be DHCP client in order to obtain TCP/IP related pa- rameters from ISP while VIP is deployed in DHCP environment. -
Page 42: Pppoe Settings
VIP User’s Manual 4.2.6.2 PPPoE Settings Display current PPPoE status in VIP Command Line Interface reference: net set pppoe The net set pppoe command configures PPPoE related parameters while VIP is deployed in PPPoE environment. Syntax Description Turn on PPPoE client Turn off PPPoE client username PPPoE connection username provided by ISP... - Page 43 VIP User’s Manual PPPoE connection password provided by ISP password fix_ip Fixed IP address provided by ISP If PPPoE client is enabled/disabled, VIP has to be rebooted to make the PPPoE service started/stopped. Configuring VIP from a Web Browser...
-
Page 44: Ddns Settings
VIP User’s Manual 4.2.6.3 DDNS Settings Display current DDNS status in VIP Command Line Interface reference: net set dyndns Configuring VIP from a Web Browser... -
Page 45: Configure System Settings
VIP User’s Manual DDNS service can help users to find each other in dynamic/static IP environment, and enable two VIPs call each other with registered host names. To be fully functional, DNS server MUST be added into H323 configuration while DDNS service is enabled. DDNS clients supported in VIP are www.dyndns.org www.dtdns.com... - Page 46 VIP User’s Manual System Config. Settings Function Briefings Settings, which allows one to set the gateway's IP address, its subnet mask, and its Default Gateway IP address. H.323 Parameter Settings, which allows one to set the H.323 parameters, such as Fast Start Mode, Gatekeeper Mode, etc.
-
Page 47: Ip Settings
VIP User’s Manual 4.3.1 IP Settings Please select Main Menu\Configure System Settings\IP Settings This screen can setup your VIP IP Address, Subnet Mask and Default IP Gateway Address. These values will be valid after VIP reboot. 4.3.2 H323 Parameters Please select Main Menu\Configure System Settings\H.323 Parameter Settings There are H.323 General Parameter Settings, H.323 GateKeeper Settings, H.323 Aliases Settings. - Page 48 VIP User’s Manual Name: The default string is “Customer”. Display This field is to set the display name information that is carried in the H.323 setup messages. Up to 48 characters can be entered. Terminal Type: The default value is 60. This field is to set the H.245 terminal type, which is used as part of the master/slave determination process of H.245.
-
Page 49: H323 Gatekeeper Settings
VIP User’s Manual VIP will generate ring back tone before receiving Alerting message from remote gateway. (CLI only) Cisco T.38: This option is used for FAX transmitting while VIP interoperating with Cisco 5300. (CLI only) 4.3.2.2 H323 Gatekeeper Settings Please select Main Menu\Configure System Settings\H.323 Parameter Settings\H.323 Gate- Keeper Settings Gate Keeper Mode: The default setting is off. -
Page 50: H323 Aliases Settings
VIP User’s Manual 4.3.2.2 H323 Aliases Settings Please select Main Menu\Configure System Settings\H.323 Parameter Settings\H.323 Aliases Settings Alias: This field is to create or delete aliases that are registered with the gatekeeper. Configuring VIP from a Web Browser... -
Page 51: Chapter 5 Making A Call With Vip
VIP User’s Manual Chapter 5 Making a Call with VIP This chapter how to make phone calls from telephony devices connected to VIP directly or indi- rectly. Making a call with VIP FXS Module VIP has two slide-in modules. FXS module can connect to analogue phone directly, and FXO mod- ule can connect to PBX. -
Page 52: Making A Call With Vip Application Sample
VIP User’s Manual 2. Dial the phone number which is connected between PBX and VIP FXO module port. 3. When VIP is connected, the related LED will be lighted green. For Example: If the telephone set is connected to the third port of FXO in slot A. When the PBX is connected to VIP FXO port, the third LED will be green, it means on, in slot A of front panel. - Page 53 VIP User’s Manual Gateway B IP: 192.168.0.55, mask IP: 255.255.255.0, gateway IP 0.0.0.0 (virtual IP) Slot A plugs FXS module and slot B is empty Port 1 of FXS in slot A has a telephone set connected, its phone number is 550 Port 2 of FXS in slot A has a telephone set connected, its phone number is 551 Gateway A and Gateway B dial plan setting Gateway A address translation table...
-
Page 54: Making A Call Between Gateway A And Gateway B
VIP User’s Manual Group id Type #Members Member ids ---------------------------------------------------------------------------- VIPB destination table Dest id Mode Destination ------------------------------------------------------- Local PORT = 0 Local PORT = 1 H.323 Dest = 192.168.0.20/1720 TCP Making a call between gateway A and Gateway B Case 1: Gateway Phone to Gateway Phone, Gateway B phone 550 calls to Gateway A phone 200 Human operation at GW B... -
Page 55: Case 3: Pstn Phone To Gateway Phone
VIP User’s Manual 2.Gateway A is connected to PSTN Dial 12345678 1.PSTN communication is going Phone 12345678 is ringing Ring back tone is heard Phone 12345678 is ringing Phone 12345678 picks up Enjoy VoIP Enjoy VoIP The above process is the same as Gateway A phone 200 (201, 800,801) calls to phone A number (03) 12345678 Case 3: PSTN Phone to Gateway Phone, Phone A number (03) 12345678 calls to Gateway B phone 551... -
Page 56: Scenario I - Vip With Built-In Pppoe, Dhcp, And Ddns Clients
VIP User’s Manual environment together via built-in PPPoE, DHCP, and DDNS clients. Scenario I - VIP with built-in PPPoE, DHCP, and DDNS clients: Assuming second VIP, called VIP B, located on site B with default setting as well. First of all, it is re- quired to apply a DDNS name from http://www.dyndns.org respectively for VIPs on site A and site B. - Page 57 VIP User’s Manual VIP configuration (ADSL PPPoE connection) on site A: PPPoE section: net set pppoe on Please fill in username/password obtained from ISP. net set pppoe user_name [my_name] net set pppoe pw [my_password] net reset DNS server section: set h323 dns_ip 168.95.192.1 config activate DNS server settings will not take effect till system reboot.
-
Page 58: Scenario Ii: Vip Co Works With (Nat) Router Which Has Built-In Ddns Client
VIP User’s Manual After these modifications, users on site A are able to dial “66 + telephone number” to connect users on site B to have voice conversation. Users on site B are able to have voice communication via dialing number “77 + telephone number”... - Page 59 VIP User’s Manual <DMZ setting screen of XRT-401B> a) Enable DMZ feature in XRT-401B. b) Go to “Advanced” – “Firewall” Option menu, and find the “DMZ” function. c) Click on the “WAN IP“ tab to enable the desired IP address to destination VIP. d) Click “Apply”...
- Page 60 VIP User’s Manual Commands used on this topology: IP Configuration on VIP-000/200/400/400FS/400FO net set ip: setup IP address on VIP net set mask: setup IP mask in VIP net set gateway : assign gateway IP address in VIP show: display VIP network related parameters.
-
Page 61: Network Deployment
Dialplan settings atpm req atpm aadd 66 2 8 66 2 atpm hadd 66 2 66 Create an address entry for VIP-000 on site B atpm dadd 66 dns planetvip2.dyndns.org atpm done atpm store VIP configuration (cable connection) on site B:... - Page 62 VIP User’s Manual IP configuration : net set ip 192.168.0.88 net set mask 255.255.255.0 Please refer to your application environment to fill these parame- net set gateway 192.168.0.254 ters. net reset DNS server section set h323 dns_ip [dns_ip] DNS server settings will not take effect till system reboot. config activate config store Dialplan section:...
-
Page 63: Plar (Hotline) Connection Sample
(1234567) FXS 201 Scenario description: User on site A (VIP-000 A) wishes to have telephone calls to user (201) on Site B (VIP-000 B) to be automatically directed. Solution This can be achieved by setup a hotline (PLAR) on VIP-000 A. -
Page 64: Fxo To Fxo Plar Connection
Extension 702 Scenario description Extension 502 User (502) on site A (VIP-000 A) wishes to have telephone calls to extension (702) on Site B (VIP-000 B) to be automatically forwarded, after hearing dialtone from PBX B, user (502) dials 702 to talk to the extension 702. -
Page 65: Chapter 6 Troubleshooting Tips
VIP User’s Manual Chapter 6 Troubleshooting Tips This section provides solutions for problems you may possibly encounter while installing and connect- ing your Internet Telephony Gateway. Power (PWR) LED is not illuminate 1. Check the power adapter connection. 2. If the power adapter or power cord is connected to the gateway, check that the cord is se- curely plugged into the power socket on the rear of the console. - Page 66 VIP User’s Manual 1. Check the dial plan setting (address table, hunt group table and destination table) at the destination phone number There is no connected tone when dialing destination phone number 1. Check the IP network (Ethernet cable, Ethernet port and GW IP setting) is connected cor- rectly 2.
-
Page 67: Chapter 7 Command Line Interface
VIP User’s Manual Chapter 7 Command Line Interface VIP has a built-in command line interpreter and provide users a Command Line Interface (CLI). You can configure VIP by entering commands from the CLI. You can access the CLI from a VT-100 terminal or terminal emulator connected to the RS-232 port on the front panel or through a Telnet session. -
Page 68: Command Help
VIP User’s Manual Task Prompt Type None From the remote host, enter the telnet command telnet ip_addr followed by the IP address of VIP you want to ac- cess. When VIP prompts “Login:”, enter the user name Login: administrator “administrator” When VIP prompts “Password:”, enter the pass- Password: password... -
Page 69: Command Reference
VIP User’s Manual 7.6 Command Reference The following table list the CLI command in alphabetic order. Command Description atpm Dial plan management command clrscr Clear screen config Configuration management command download Download new revision code image from TFTP server help Display help screen Set or display network parameters ping... -
Page 70: Utility Commands
VIP User’s Manual 7.7 Utility Commands clrscr The clrscr command to clear the screen Syntax Description This command has no arguments or keywords download Use the download command to enter download mode for reading code image from a TFTP server and program it to flash memory. -
Page 71: Network Commands
VIP User’s Manual 7.8 Network Commands net reset Use the net reset command to reset VIP. The CLI will prompt you to confirm the command be- fore resetting VIP. Syntax Description This command has no arguments or keywords net set gateway ip_addr Use the net set gateway command to assign a default gateway (router) for VIP. -
Page 72: Net Set Ip_Preced Ip_Preced
VIP User’s Manual The new IP address will not take effect until VIP is reset. net set ip_preced ip_preced VIP allows you to set the 8-bit Service Type field in the IP header for all the voice packets it sends out. -
Page 73: Net Set User_Pw Password Password
VIP User’s Manual Enable the 10/100 Mbps auto-negoriation capablity. auto net set user_pw password password Use the net set user_pw command to change the password for Telnet user. Syntax description The new password. The password must be equal to or less than 7 password alphanumeric characters. -
Page 74: Net Set Pppoe
VIP User’s Manual Syntax Description This command has no arguments or keywords Example The following example shows how to display hardware configuration: ITG>net show hwstat <Enter> ****************** Hardware Configuration ****************** Flash: type-MX29L1611 64 sectors 64 KB/sector RAM: 8 MB 256K x 32 LAN: 100 Mbps half duplex. -
Page 75: Configuration Management Commands
VIP User’s Manual If VIP DDNS client is enabled, users MUST register a DDNS name from the sites listed above be- fore proceeding any further. Syntax Description Turn on DDNS client Turn off DDNS client sub commands: set dyndns add [serv_name] [host_name] [user_name] [password] Adding applied DDNS name into VIP database. -
Page 76: Config {Activate|Store|Erase
VIP User’s Manual Ÿ Temporary Ÿ Active Ÿ Non-volatile Storage (NVS) When a set command is entered and processed, it changes the parameter value in the Temporary area. This does not affect current operation of VIP, which is using the values in the Active area. The config activate command moves configuration data from the Temporary area to the Active area, where it can actually be used. -
Page 77: Show Version
VIP User’s Manual The following example shows how to display the H323 parameters: h323 display_name = Customer h323 h245_term_type = 60 h323 rtp_port_base = 30000 h323 out_fast_start = off h323 in_fast_start = off h323 h245_tunneling = off h323 cisco_t38 = on h323 callSignalPort = 1720 h323 nat_call = on... -
Page 78: Set H323 Allow_Call_Wo_Gk {True|False
VIP User’s Manual set h323 allow_call_wo_gk {true|false} The set h323 allow_call_wo_gk command is used to inform the H.323 stack to allow imcoming calls from a remote VIP which is not registered with a gatekeeper. Syntax Description true Allow calls from VIP that is not registered with a gatekeeper. Do not allow calls from VIP that is not registered with a gatekeeper. -
Page 79: Set H323 Display_Name Display_Name
VIP User’s Manual Initiates H.323 OLC under slave mode. Waits for H.323 OLC from maser under slave mode. Default set h323 display_name display_name The set h323 display_name command is used to set the display name information that is carried in the H.323 setup messages. Syntax Description The string to be is inserted into the Q.931 display information field display_name... -
Page 80: Set H323 Endpoint_Prefix
VIP User’s Manual set h323 endpoint_prefix This command is used to set the H.323 prefix that VIP uses when registering to an H.323 gate- keeper. After registering to a gatekeeper using the prefix, the gatekeeper will map all Admission Request with destination matching the prefix to VIP. set h323 endpoint_prefix alias Syntax Description H.323 alias of the prefix. -
Page 81: Set H323 H245_Term_Type Terminal_Type
VIP User’s Manual set h323 h245_term_type terminal_type The set h323 h245_term_type command is used to set the H.245 terminal type. The terminal type is used as part of the master/slave determination process of H.245. Syntax Description A numerical value designating the H245 terminal type. Typically, set- termmal_type ting the H.245 terminal type to a value less than 50 will force slave operation, and a value greater than 200 will force master operation... -
Page 82: Set H323 Master_Delay
VIP User’s Manual Syntax Description Set H323 Faststart mode on Set H323 Faststart mode off set h323 master_delay To be able to interoperate with certain H.323 terminals, such as Microsoft NetMeeting, the gateway can not send out H.323 open logical channel message to its counter H.323 terminal immediately af- ter completing H.323 maser slave determination phase. -
Page 83: Set H323 Rtp_Port_Base Port_Base
VIP User’s Manual Set H323 Faststart mode on Set H323 Faststart mode off set h323 rtp_port_base port_base The set h323 rtp_port_base command is used to select the starting port number for assignment of RTP ports. When a calls are made to remote VIPs, an RTP port is opened for each call. VIP uses the port_base as the RTP port number for the first call, the next call uses the next successive port, and so on. -
Page 84: Common Coding Profile Configuration Commands
VIP User’s Manual 7.10.1 Common Coding Profile Configuration Commands set coding profile_id coding_type coding_type Syntax description Type of the codcc as defined in the following table. coding_type Parameter Description G.711 PCM u-law coding g711_mu G.723.1 5.3 kbps coding g723_53 G.723.1 6.3 kbps coding g723_63 g729ab G.729 annex A, annex B 8kbps coding... -
Page 85: Voice Coding Profile Configuration Commands
VIP User’s Manual The coding profile is allowed, if the parameter that follows is “on”, for being used as voice coder. Voice The coding profile is not allowed, if the parameter that follows is “off”, for being used as voice coder. The coding profile is allowed, if the parameter that follows is “on”, for being used as fax coder. -
Page 86: Set Coding Profile_Id Min_Delay
VIP User’s Manual The maximum delay should be at least 2 packet times greater than the nominal delay. Refer to “set coding profile_id command for details about setting nominal delay. nom_delay” 2. The maximum delay for each coder is shown in the following table: Coding Type Maximum Delay G.711 μ-law... -
Page 87: Dial Plan Management Commands
VIP User’s Manual Coding type Sampling time G.711 μ-law 10 ms 20 ms 1,280 30 ms 1,920 G.723 30 ms 60 ms G.729AB 10 ms 20 ms 30 ms 40 ms 50 ms 60 ms Note: Size of the Voice Information Field (VIF), in bits, for a voice coder are related to the coding type and the rate the voice coder samples a voice frame (the packet time), as shown in the table above. - Page 88 VIP User’s Manual management atom hdel atpm hfind atpm hlist Address table Manage atpm address table atpm aadd management atpm adel atpm afind atpm alist System Manage atpm system configura- atpm slist tion atpm sys The following sections describe each sub command set and the commands. Command Line Interface...
-
Page 89: Database Update Control Commands
VIP User’s Manual Database Update Control Commands atpm done The atpm done command ends the atpm table update session and re-enables the address transla- tion. Syntax description This command has no arguments or keywords atpm erase The atpm erase command erases the dial plan database from the non-volatile memory. Syntax description This command has no arguments or keywords atpm purge {all|addr|dest|hunt}... -
Page 90: Atpm Store [Erase]
VIP User’s Manual atpm store [erase] The atpm store command store all atpm tables into non-volatile memory. Syntax description (Optional) Erase the non-volatile before storing the dial plan data- erase base. This option is not recommended except the very first time you use the atpm store command. -
Page 91: Atpm Ddel Dest_Id
VIP User’s Manual atpm ddel dest_id The atpm ddel command deletes an entry from the atpm destination table. Syntax description ID of a previously added destination entry to be deleted from destina- dest_id tion table. atpm dfind dest_id The atpm dfind finds and display an entry in the destination table. Syntax description dest_id ID of a previously added destination entry to be displayed. -
Page 92: Hunt Group Table Management Commands
VIP User’s Manual Hunt Group Table Management Commands atpm hadd hunt_group_id {1|2} dest_id [desi_id2] … Use the atpm hadd command to add an entry into the atpm hunt group table. Syntax description Hunt group ID. For each hunt group, you need to assign it a unique identifier hunt_group_id between 1 and 65536. -
Page 93: Address Table Management Commands
VIP User’s Manual This command has no arguments or keywords Example ITG>atpm hlist Group id Type #Members Member ids ------------------------------------------------------------------- ITG> Address Table Management Commands atpm aadd tel# min_digits max_digits hunt_group_id prefix_strip_len [prefix#] Use the atpm aadd command to add an entry into the atpm address table. Syntax description Telephone number to match. -
Page 94: Atpm Afind Tel
VIP User’s Manual atpm afind tel# The atpm afind finds and display an entry in the address table. Syntax description Number of a previously added entry in the atpm table to be displayed. tel# atpm alist The atpm alist displays all entries in the address table. Syntax description This command has no arguments or keywords Example... -
Page 95: Atpm Sys Dial_Time 1St_Digit_Wait Inter_Digit_Wait [Dial_Term_Digit]
VIP User’s Manual atpm sys dial_time 1st_digit_wait inter_digit_wait [dial_term_digit] Use the atpm sys command to set the time constraints for collection of dial digits. Syntax description The maximum time, in millisecond, allowed for entry of the entire dial_time string of dial digits. At expiration, ATPM starts address lookup. The maximum time, in millisecond, allowed between off-hook 1st_digit_wait and when the first dial digit is entered. -
Page 96: Tel Set Pcm_Gain_Level {1|2|3|4|5
VIP User’s Manual tel set pcm_gain_level {1|2|3|4|5} The FXO ports might be connected to central office switch or PBX via local loop which may of as long as several miles. For compensating signal distortion in the local loop, VIP’s PCM codec is de- signed in such a way that users might adjust it gain level before transmitting analog signal to the lo- cal loop. -
Page 97: E & M Signaling Commands
VIP User’s Manual 7.13 E & M Signaling Commands E&M Common Signaling Configuration Commands The E&M common signaling configuration commands are used to define common parameters used on all E&M interfaces, regardless of their mode of operation (Wink Start, Delay Start, or Immediate Start). -
Page 98: Set Port Port Em Connected_Min
VIP User’s Manual set port port em connected_min This command is used to determine the minimum period of time (in milliseconds) that a connection will be maintained. If the remote end disconnects during this interval, it will be acknowledged only at the end of this interval. -
Page 99: Set Port Port Em Guard_Out
VIP User’s Manual set port port em guard_all milliseconds Syntax description milliseconds Time in milliseconds, ranging from 0 to 65535. Default set port port em guard_out This command is used to set an additional period of time after guard_all when incoming calls will be accepted but outgoing calls will not be initiated for aborted call. -
Page 100: Set Port Port Em Size_Detect
VIP User’s Manual milliseconds Time in milliseconds, ranging from 0 to 65535. Default set port port em size_detect This command is used to specify the period of time the M-lead needs to be off-hook before an in- coming call is declared. set port port em size_detect milliseconds Syntax description milliseconds... -
Page 101: E&M Delay Start Signaling Configuration Commands
VIP User’s Manual E&M Delay Start Signaling Configuration Commands The E&M delay start signaling configuration commands are used to define parameters specific to E&M delay start interface. These commands apply to E&M Delay Start signaling protocol only. set port port emd in_delay_max This command is used to set the maximum duration of the delay signal response to the Seize De- tect (of incoming calls) on the M-lead. -
Page 102: Set Port Port Emd Out_Delay_Check
VIP User’s Manual set port port emd out_delay_check This command is used to set the period of time after going off-hook on the E-lead before checking the M-lead for the delay signal response. If the response is not seen at this time, the call setup process will continue immediately. -
Page 103: E&M Wink Start Signaling Configuration Commands
VIP User’s Manual Syntax description Perform Integrity Check No Integrity Check is performed Default E&M Wink Start Signaling Configuration Commands The E&M wink start signaling configuration commands are used to define parameters specific to E&M wink start interface. These commands apply to E&M Wink Start signaling protocol only. set port port emw in_wink_digit_ignore This command is used to specify the period of time that will be ignored after completing the wink and before digits will be accepted for incoming calls. -
Page 104: Set Port Port Emw In_Wink_Wait_Min
VIP User’s Manual Default 3000 set port port emw in_wink_wait_min This command is used to set the minimum delay before beginning the wink on the E-lead after de- tecting a line seizure on the M-lead for an incoming call. set port port emw in_wink_wait_min milliseconds Syntax description milliseconds Time in milliseconds, ranging from 0 to 65535. -
Page 105: Obsoleted Commands
VIP User’s Manual set port port emw out_wink_wait_max milliseconds Syntax description milliseconds Time in milliseconds, ranging from 0 to 65535. Default 8000 7.14 Obsoleted Commands Some of the CLI commands previously supported by version 2.0x software or older versions are no longer supported. -
Page 106: Chapter 8 Upgrading And Resetting Vip
Chapter 8 Upgrading and resetting VIP VIP series (VIP-000/200/400/400FS/400FO) are able to have system functionality enhancement via software upgrade. This must be operated in upgrade mode. In firmware upgrade mode, limited commands allow users to read new revision codes from a remote TFTP server and write into the built- in flash non-volatile storage. -
Page 107: Tftp Server Configuration
VIP User’s Manual TFTP server configuration 1. Execute TFTP server program, assign firmware file location, and save the path if necessary. (In this sample datagram, the file is assigned in c:\) (This part might vary on different kind of TFTP server.) 2. - Page 108 VIP User’s Manual ITG>download ============================== WARNING ============================== * Entering download mode will hang up all telephone connections * and all the configuration settings will lose. * Be certain all the configuration settings have been saved. ======================================================================= Do you want to enter download mode now (y/n)? [n] Boot loader V4.12 Loading TFTP loader.....
- Page 109 VIP User’s Manual Console session a) Connect VIP through the 9-pin RS232 female console (No password required) Under ITG> prompt, insert command: download to enter VIP firmware upgrade mode. b) Insert command: “start” and answer questions on screen to proceed firmware upgrade. c) When VIP prompts downloading firmware file into EEPROM, insert “y”...
-
Page 110: Trouble Shooting Tips
VIP User’s Manual Trouble Shooting Tips If following error (TFTP timeout error) occurs: ** Internet Telephony Gateway TFTP Loader Ver 4.10 ** EITGLoader>start IP address of the TFTP server? [192.168.0.7] File name? it4p315.img Starting download file: it4p315.imz TFTP device open failed. - TFTP server timeout while waiting for a response from the client. -
Page 111: Cli Commands In Download Mode
VIP User’s Manual CLI Commands in Download Mode Under download mode, the CLI supports the following commands: Command Description Display help screen help quit Terminate download mode, switch to normal operation mode. Change IP parameter Start downloading code from TFTP server start The following section describes each of the commands. -
Page 112: Set Mask Ip_Mask
VIP User’s Manual set mask ip_mask Use the set mask command to set the IP subnet mask for VIP. Syntax description ip_mask The subnet mask of your network. Note The new setting will not take effect until VIP is reset. start Use the start command to start downloading code from TFTP server. - Page 113 VIP User’s Manual A sample is attached below for reference. ITG>config erase The system configuration data will be erased from non-volatile storage permanently. Are you sure to erase it (y/n)? [n] System configuration records erased from flash ITG>net reset ============================== WARNING ============================== * Restarting the system will hang up all telephone connections * and all the configuration settings will lose.
-
Page 114: Dialplan Configuration Default Parameters
VIP User’s Manual Dialplan configuration default parameters: a) Log on VIP via telnet or console connection. b) At the ITG prompt, insert following commands: ITG>atpm erase ITG>net reset (Answer ”y” to reboot machine.) After rebooting, logon VIP. At the ITG> prompt, insert: atpm store to restore Dialplan default value into VIP. -
Page 115: Appendix A Technical Specifications
Built HTTP server allowing management from web browser Command line interface allowing management from VT-100 terminal or Management Telnet client Flash memory and built-in TFTP allowing software upgrade via network Software upgrade VIP-000: 90-240 VAC, 20 Watts, 50-60 Hz Power Technical Specifications... - Page 116 C (-4 to 149 Environmental Humidity: 10% to 85% (non-condensing) VIP-000: 44 x 445 x 275 (mm) VIP-200: 150 x 220 x 44 (mm) VIP-400: 150 x 220 x 44 (mm) Dimension (L x W x D) VIP-400FS: 150 x 220 x 44 (mm)
-
Page 117: Fxo Card Technical Specifications
VIP User’s Manual A.2 FXO Card Technical Specifications Signaling: Loop Start / DTMF No. of channels: Interface Connectors: 4 RJ-11 2-pin modular jacks. Line Impedance : Insertion Loss: 2 dB nominal. Frequency Response: 300Hz ~ 3400Hz +/- 2dB w.r.t. 1004Hz. Return Loss: 18 dB Input Level adjustment: -6 dB to +6 dB... -
Page 118: E&M Card Technical Specifications
VIP User’s Manual A.4 E&M Card Technical Specifications Type V, four wires A.5 Console Port The console port uses a DB-9 RS-232 connector. The supplied straight-through RS-232 cable con- nects the console port of VIP to a console PC or terminal. Pinout for the port is described in the fol- lowing table. -
Page 119: Fxo Port Pin Assignments
VIP User’s Manual A.7 FXO Port Pin Assignments The FXO Telephony Interface Module has 4 RJ11C/W modular jacks. The following diagram and table show the assignments of the pin for the RJ11 port. RJ-11 pin Signal Not connected Ring Not connected A.8 FXS Port Pin Assignments The FXS Telephony Interface Module has 4 RJ11C/W modular jacks. - Page 120 VIP User’s Manual Pin No. Color Scheme Symbol I/P, O/P sense Brown Blue M-lead I/P for E&M Yellow RRing 4W RX Ring, I/P for E&M Green TRing 4W TX Ring, O/P for E&M TTip 4W TX Tip, O/P for E&M Black RTip 4W RX Ting, I/P for E&M...
-
Page 121: Appendix B Cli Commands
VIP User’s Manual Appendix B CLI Commands B.1 Normal Mode Commands Command Description atpm aadd Add an entry to the address table atpm adel Delete an entry from the address table atpm afind Find and display an entry in the address tble atpm alist Display all entries in the address table atpm dadd... -
Page 122: Download Mode Commands
VIP User’s Manual net reset Reset the system net set gateway Set default gateway’s IP address net set http Turn on/off HTTP server net set ip Set IP address net set ip_preced Set IP precedence bits net set mask Set IP subnet mask net set speed Select Ethernet link speed net set user_pw... -
Page 123: Appendix C Factory Default Settings
VIP User’s Manual Appendix C Factory Default Settings The following table lists the settings of certain parameters before VIP is shipped. Parameter Default Setting Network IP address 192.168.0.1 IP subnet mask 255.255.255.0 Default gateway 0.0.0.0 IP precedence Ethernet link speed 10/100 auto-negotiation User ID for HTTP browser and Telnet client login administrator... - Page 124 VIP User’s Manual h323 nat_call h323 call_name null h323 local_alert h323 default_dtmf H323 V2 Signal h323 dns_ip null h323 gk_mode h323 h245_timeout 30000 h323 term_id null Voice codec Preferred voice codec G.723 6.3kbps TxVIF size (default voice codec=g.723) RxVIF size (default voice codec=g.723) Enabled Playout nominal delay 120 ms...
-
Page 125: Appendix D Worksheets
VIP User’s Manual Appendix D Worksheets D.1 IP Parameters Consult your network manager to obtain a static IP address for VIP, and the information about the IP subnet mask and the default gateway for your network. Fill out the following work sheet before configuring VIP. -
Page 126: Atpm Destination Table
VIP User’s Manual D.2 ATPM Destination Table Local Destinations Each telephony ports of VIP must be assigned a unique destination ID. Fill out the worksheet for local destinations by designating each port a unique destination ID, then use the CLI command atpm dadd dest_id port port# for each entry in the worksheet to add it to the destination ta- ble. - Page 127 VIP User’s Manual Remote Destinations Each remote VIP to be reached must be assigned a unique destination ID. Obtain the IP addresses of VIP at remote sites and fill out the worksheet for remote destinations by designating each remote atpm dadd dest_id h323 ip_addr VIP a unique destination ID, then use the CLI command [ip_port] for each entry in the worksheet to add it to the destination table.
-
Page 128: Atpm Hunt Group Table
VIP User’s Manual D.3 ATPM Hunt Group Table When Several destinations may be grouped together to form a hunt group. an incoming phone number matches the phone number of the hunt group, VIP attempts to terminate the call at each of the destinations in the hunt group one at a time until a call is successfully completed. -
Page 129: Atpm Address Table
VIP User’s Manual D.4 ATPM Address Table Each phone number to be recognized by VIP, must have its first digits match an entry in the ad- dress table. Fill out the address table worksheet and use the CLI command atpm aadd tel# min_digits max_digits hunt_group_id prefix_strip_len [prefix#] to add each entry in the worksheet to the address table. - Page 130 VIP User’s Manual Index Internet Telephony Gateway..1 A IP 1 ATPM ........7 K C KTS.......... 1 CNG ........1 P Concepts ......... 7 PBX ......... 1 D Protocols........1 desktop........5 R destination ....... 7 dial plan ........8 real-time........
Need help?
Do you have a question about the VIP-000 and is the answer not in the manual?
Questions and answers