Table of Contents
Advertisement
Quick Links
Advertisement
Table of Contents

Related Manuals for Planet VIP-000


Summary of Contents for Planet VIP-000
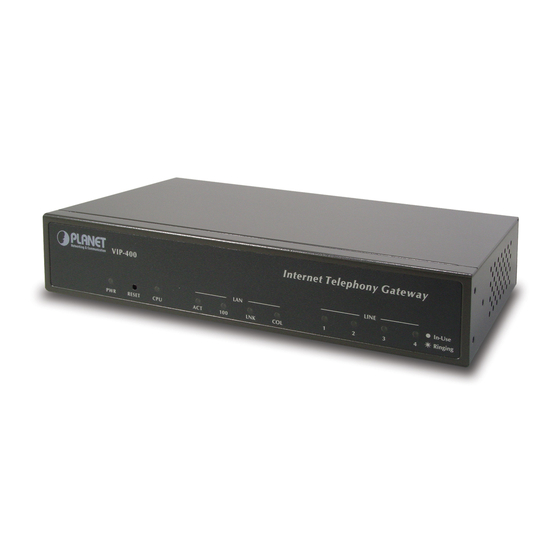
- Page 1 Internet Telephony Gateway Quick Installation Guide...
-
Page 2: Fcc Warning
Trademarks Copyright PLANET Technology Corp. 2001. Contents subject to revise without prior notice. PLANET is a registered trademark of PLANET Technology Corp. All other trademarks belong to their respective owners. FCC Warning This equipment has been tested and found to comply with the limits for a Class A digital device, pursuant to Part 15 of the FCC Rules. -
Page 3: Table Of Contents
4. CONFIGURAITON EXAMPLES ........25 4.1 T ............25 HE DEFAULT DIAL PLANS 4.2 ITG ITG ................27 4.3 C PLANET VIP ............31 ALL TO 4.4 C ........33 ONNECT TO AND ITS ISSUES 4.4.1 CP Tone Detection ............33 4.4.2 Call Security..............33 5. QUICK REFERENCE IN CD-ROM GUIDE ......35 5.1 C... - Page 4 This page intentionally left blank! PLANET VoIP...
-
Page 5: About This Guide
1. ABOUT THIS GUIDE Thank you for purchasing PLANET Internet Telephone Gateway, VIP-xxx, Voice over IP Gateway (ITG, in the following terms). You can now ease the cost of long distance call yet still get the voice in excellent quality. - Page 6 Telnet is also allowed, if you are familiar with the console command, you can also use Telnet to manage the ITG as well. The command is all the same in console interface. PLANET VoIP...
-
Page 7: Network Configuration
2. NETWORK CONFIGURATION This chapter shows you how to configure the ITG (Internet Telephony Gateway) to your network and/or Internet. We divide into two sections, through console interface and through Web Interface. 2.1 Console Interface & Commands 2.1.1 Start up 1) You can direct connect the RS-232 cable in the package to your PC’s COM port and the other end to ITG. -
Page 8: The Basic Command About Networking
(or power off/on) this will be changed. 2) The same as above, gateway and mask parameters will depends on your network’s configuration. The three parameters will need to check with your network administrator for a correct one. PLANET VoIP... -
Page 9: After The Network Setup
ITG>net set mask 255.255.255.0<enter> ITG>net set gateway 192.168.0.254 <enter> Incorrect IP address, Mask, and Gateway will result in the ITG failed to find the remote H.323 devices to have the calls. Please determine that the settings of Caution this ITG are correct. 3) Key in the net show command to double check the configurations. -
Page 10: Web Browser Interface
2) Start up the browser, in the address field, key in the address http://192.168.0.1. The pop-up screen should appear to ask for user name and password. The default values are: User name: administrator (all lower case) Password: 123 Then shows the main screen. PLANET VoIP... - Page 11 3) Click on “Configure System” button on left side and then select “IP Settings” the following screen appeared. Just key in the IP, mask and gateway and ‘save the changes’. 4) Then re-start the system to make the setting take effect. ITG Quick Installation Guide...
- Page 12 This page intentionally left blank! PLANET VoIP...
-
Page 13: Basic Configuraiton
There are two type of the voice port, FXO (Foreign eXchange Office) and FXS. (Foreign eXchange Station) On the printing of the RJ-11 port, you should find that. E&M module is also available for VIP-000. Please consult the local dealer. And in this guide, we will Hint focus on FXO and FXS. -
Page 14: The Logic Of Dial Plan
PBX extension port malfunction. 3.1.2 The logic of dial plan Before you start up set up the dial plan in the ITG, it is required to know some concepts about the ITG. And there are Phone number Hunt Group PLANET VoIP... - Page 15 Destination ID Destination 1) Phone Number The “Phone number” in the ITG is a set of digits. You can setup it to have better migration with your original system. This number will only map to one Hunt Group. Number Hunt Group ‘201’...
- Page 16 A H.323 VoIP gateway with a fixed IP or a fixed host name. Destination ID Destination ‘1’ ‘0’ ‘10’ ‘vip.planet.com.tw’ In this guide, we will use a dial table as like below: Number Hunt Group Dest. ID Destination Hint 192.168.0.2 ‘201’ is using default, ‘02’ is what we added. PLANET VoIP...
-
Page 17: Console Configuration & Commands
3.2 Console Configuration & Commands To start up the console management, we will show you some console commands first. There are some major commands behind the ITG prompt. 1) ITG>net 2) ITG>atpm 3) ITG>show 4) ITG>set The command “net” as described in the chapter before, you can setup the related network parameters. - Page 18 ‘886-2’. The Prefix Strip/Address here is to strip out or address more number to you dial. For example strip 4 digits 886-2-22199518 22199518 Remote ITG To address the number 2219 to the digits, 9518 2219-9518 Remote ITG PLANET VoIP...
- Page 19 Sometimes, if you thought your dial plan is correct but cannot reach the destination, please check that if you’ve strip out or address some more digits to Caution your number and cause the problem! 2) ITG>atpm hlist Now, let’s check the command “atpm hlist” to display the Hunt Group table.
- Page 20 Without this request, you will fail in using the following three commands. Hint During the ‘atpm req’ setup period, all the connection and dial process will be tear down. It is Caution strongly recommended leave all the connection before execute this command! 5) ITG>atpm aadd PLANET VoIP...
- Page 21 H.323 gateway. If you know its host name, you can either use like: ITG>atpm dadd 11 dns vip.planet.com.tw <enter> With DNS parameters, you also need to let ITG know a DNS server. We will show you how to set it Hint up in the following section.
-
Page 22: Show' Command
= off h323 g723_frame_rate h323 default_dtmf = H323 V2 Signal h323 dtmf_duration = 300 ms No Alternate IP Defined! h323 dns_ip = 168.95.1.1 Domain: dns.hinet.net h323 h245_timeout = 90000 h323 term_id = h323 gk_mode = off PLANET VoIP... -
Page 23: Set' Command
GK mode To enable connection with GateKeeper or not. If you are going to setup your ITG to work with another PLANET ITG. It is strongly recommended to use those default value. Those should offer the Hint optimal voice quality. - Page 24 To store it, your are required to have the command as below: Caution ITG>config activate;activate the setting right away ITG>config store ; store to the NVRAM After enter this command, you can directly have a try using the command ping. Hint ITG>ping www.yahoo.com PLANET VoIP...
-
Page 25: Configuraiton Examples
4. CONFIGURAITON EXAMPLES 4.1 The default dial-plans Without any configuration, your ITG will with the following basic information. Network: : 192.168.0.1 Mask: : 255.255.255.0 Gateway : 192.168.0.254 Dial Plan: Hunt Dest. Dest. Group 0 (local port #1) 1 (local port #2) (x-1) (X, from 2 to 8, varies with your ITG model) Base on this, if you have... - Page 26 Then dial ‘505’, your extension handset should rings right away This guide only uses default values. Once you familiar with making the dial plan, you can setup Hint your own, may be with one digit, ‘5’ and ‘505’ rings. PLANET VoIP...
-
Page 27: Itg To Itg
4.2 ITG to ITG The previous section shows you how to test your ITG without modify any settings. This section we will shows you how to connect two ITG together and make the call. Assume that we have a second ITG, called ITG B, with default setting as well. - Page 28 Now, once ITG A get a dialed number “02” it will direct to ITG B. The same to ITG B, ‘01’ will map to ITG A without doubt. ITG A ITG B Assume both ITGs have a FXS port in port#3 connect to a phone. To call each others. PLANET VoIP...
- Page 29 ITG A: Pick up handset and dial “02203”, where ‘02’ points to ITG B and ‘203’ for port 3 of ITG B. The phone in ITG B should rings. ITG B: Pick up handset and dial “01203”, where ‘01’ points to ITG A and ‘203’...
- Page 30 The same, in ITG B, after you dial “01-201”, you can do the same thing because “01201” is as like you pick up the extension handset 301. After all of above, your ITG can work to each other. Let’s do two things: PLANET VoIP...
-
Page 31: Call To Planet Vip
4.3 Call to PLANET VIP With above settings and steps, you should install your ITG to the Internet now. The following sections shows how to use command for you to call to PLANET office operator. The commands are: ITG>atpm req ITG>atpm dadd 11 dns vip.planet.com.tw... - Page 32 In regard to the DNS, please consult your network administrator to set up a host name of your own. Hint Then, you can inform all your caller using the domain name instead of a string of IP address. PLANET VoIP...
-
Page 33: Connect To Pbx And Its Issues
CP Tone. The PBX can not understand the Tone from ITG so, it still think the line is on and never hang up. Once this happened, please find a document form PLANET FTP site to fix the problem. The server is: ftp://ftp.planet.com or ftp://ftp1.planet.com.tw... - Page 34 2) Re-check the dial table. Check the dial table that only allowed number can make the dial. That is, remove the unnecessary numbers and restrict the maximum digit or prefix the allowed number inside ITG instead of let users dial the number herself /himself. PLANET VoIP...
-
Page 35: Quick Reference In Cd-Rom Guide
5. QUICK REFERENCE IN CD-ROM GUIDE This guide is used to help you startup your ITG settings. It is also recommended to check the CD-ROM manual for more details like the “Console Command”, “Web Setup”, and how to set the device back to default value. The followings show you where you can find the information from CD-ROM. -
Page 36: Default Settings
5.3 Firmware Upgrade To upgrade the firmware, you can refer to PLAENT Web site for the latest firmware and also the latest bulletins. They can be found in the following directory: ftp://ftp.planet.com.tw/voip/firmware and ftp://ftp1.planet.com.tw/bulletin PLANET VoIP...
Need help?
Do you have a question about the VIP-000 and is the answer not in the manual?
Questions and answers