Vertical Xcelerator IP IP2007 User Manual
Xcelerator ip
Hide thumbs
Also See for Xcelerator IP IP2007:
- User manual (120 pages) ,
- Supplementary manual (11 pages) ,
- Manual (8 pages)
Table of Contents
Advertisement
Quick Links
Advertisement
Table of Contents

Related Manuals for Vertical Xcelerator IP IP2007


Summary of Contents for Vertical Xcelerator IP IP2007
- Page 1 IP2007 User Guide...
- Page 2 Copyright © 2007 VERTICAL Communications, Inc. All Rights Reserved Vertical Communications and the Vertical Communications logo and combinations thereof are trademarks of Vertical Communications, Inc. Artisoft, TeleVantage, InstantOffice, Vertical Networks, XTS-IP, TeleniumIP and StarPlus are registered trademarks of Artisoft, Inc. All other brand and product names are used for identification only and are the property of their respective holders.
-
Page 3: Table Of Contents
Contents Contents Introduction IP2007 Product Description ..............1-3 Package Contents ................1-3 Identifying Buttons and Hardware .............1-4 Install & Connect the Phone Assembling the IP Phone ..............2-3 Setting Up the Stand ...............2-4 Connecting the Handset ..............2-5 Setting the PoE or PA Power Source Switch ........2-5 Connecting the Cables ..............2-6 Full Connection Example ..............2-6 Mounting the Phone On the Wall ............2-7... - Page 4 Contents Transfer .....................3-10 Blind Transfer .................3-10 Supervised Transfer ................3-10 Voice Mail Access ................3-11 Volume Adjustment ................3-11 Configuration Via Menus Menu ....................4-3 Startup ..................4-3 Menu Tree ..................4-4 Navigate in the Menu ..............4-5 Enable or Disable Settings ...............4-6 Numeric and Alpha Characters ............4-7 Saving the Configuration ..............4-7 Configuration Via Web Web ....................5-3...
-
Page 5: Introduction
Introduction Read the Introduction chapter to: review the contents of the IP2007 phone package identify the phone buttons and the hardware Xcelerator IP User Guide March 2007... -
Page 7: Ip2007 Product Description
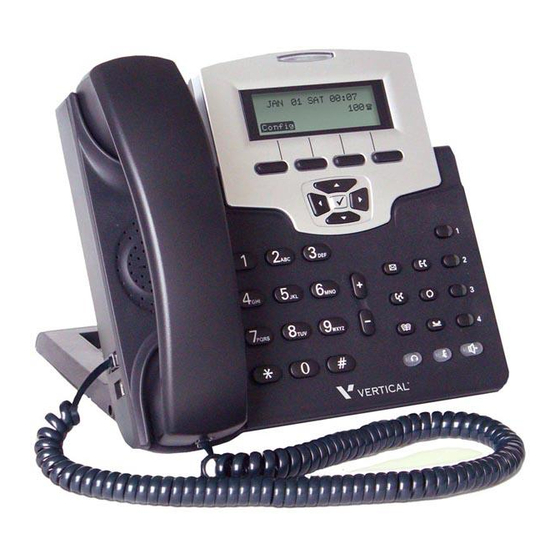
IP2007 Product Description Chapter 1 - Introduction IP2007 Product Description The IP2007 IP Phone is a fully featured IP phone integrating voice and data connectivity to the Xcelerator IP gateway. The IP2007 is feature rich SIP endpoint that provides a full suite of telephony features and a dual port 10/100baseT LAN switch to allow for a single wire to the desktop solution where the PC is connected through the second port on the IP2007 IP phone. -
Page 8: Identifying Buttons And Hardware
IP2007 Product Description Chapter 1 - Introduction Identifying Buttons and Hardware IP Phone Function Keys Part Name Description of Function Handset Phone Handset The LCD shows phone features such as the time, date, your phone number, caller ID, line/call status, and soft key tabs. - Page 9 IP2007 Product Description Chapter 1 - Introduction Part Name Description of Function Number Keys (1,2,3,4) These four keys can be used for line selection or programmable features. A green LED is associated with each key to indicate its line/call status. Transfer Key This key is used to transfer a call to another IP phone.
-
Page 10: Led Status Indicators
IP2007 Product Description Chapter 1 - Introduction LED Status Indicators Blinking ON/ Key/Indicator Color Static OFF Static ON Message No new Slow blinking for indicator messages new voice message indication Number keys Green Default Mode Headset: Headset/Handset During call Mode: Ringing cadence on Mode Handset: incoming call;... - Page 11 IP2007 Product Description Chapter 1 - Introduction IP Phone Rear & Side Views The following illustrates the rear and side views of the IP phone. Refer to the callout numbers, and associated simple description of the part in the following table. Part Name Description of Function LCD screen cover...
- Page 12 IP2007 Product Description Chapter 1 - Introduction IP Phone In/Out Ports Part Name Description of Function Reset Button The Reset Button is for system engineering use (The configuration will be reset to factory settings when pressed). Link/Activity LEDs The LEDs indicate the link status of the WAN and LAN ports. WAN Port RJ-45 Jack 100/10Mbps Ethernet port for connecting to IP network...
-
Page 13: Install & Connect The Phone
Install & Connect the Phone Read the Install & Connect the Phone chapter to perform the following functions: set up the IP2007 Phone, the phone stand, and the power source switch connect the handset and the cables mount the IP2007 Phone on the wall Xcelerator IP User Guide March 2007... -
Page 15: Assembling The Ip Phone
Assembling the IP Phone Chapter 2 - Install & Connect the Phone Assembling the IP Phone After removing the IP phone from the package, you will see the back of IP phone as shown in the following illustration. The phone (1) is already assembled with three frames. The U-type leg (3) is used with the big U-type frame (4) that has three step cavities for three angle positions. -
Page 16: Setting Up The Stand
Assembling the IP Phone Chapter 2 - Install & Connect the Phone Setting Up the Stand Refer to the following steps and the associated illustration to setup the stand of the IP phone. Step A Move the big U-type frame (4) downward. Step B Move the big U-type frame (4) downward to the flat level. -
Page 17: Connecting The Handset
Assembling the IP Phone Chapter 2 - Install & Connect the Phone Connecting the Handset Use the curled cord (1) to connect to the phone jack (3) at the bottom of the handset (2), as shown in the following illustration. Plug the other end of curled cord to the Handset jack (5) on the side of IP phone. -
Page 18: Connecting The Cables
Assembling the IP Phone Chapter 2 - Install & Connect the Phone Connecting the Cables To avoid any problems caused by power-on, the power source will be applied to the phone last. Do not plug the adaptor head to the wall socket if you are using Power adaptor. -
Page 19: Mounting The Phone On The Wall
Assembling the IP Phone Chapter 2 - Install & Connect the Phone Mounting the Phone On the Wall The IP phone can be used on the desktop or mounted on a wall. Print the screw alignment template (on the next page) and tape it on the wall to position the 3 screws provided at the right place for the mount-holes on the phone. -
Page 20: Resetting The Phone To Factory Defaults
Assembling the IP Phone Chapter 2 - Install & Connect the Phone Screw Alignment Template Resetting the Phone to Factory Defaults If you want to reset the configuration to the factory default settings, locate the Reset switch on the back of the phone and complete the following steps: Step A Remove the power source (adaptor or Ethernet cable) at the remote end. -
Page 21: Ip2007 Phone Features
IP2007 Phone Features Read the IP2007 Phone Features chapter to discover the many features of the IP2007 telephone, and to operate its basic user functions. Xcelerator IP User Guide March 2007... -
Page 23: Answer A Call
Answer a Call Chapter 3 - IP2007 Phone Features Answer a Call There are various ways to answer an incoming call: Lift the handset to answer the call. Press to answer the call in handsfree mode. Press to answer the call in headset mode. Auto Answer You can use the Auto Answer function to automatically answer all incoming calls when you are busy. -
Page 24: Call Forward
Call Forward Chapter 3 - IP2007 Phone Features Call Forward You can use Call Forward to redirect your incoming calls from your IP Phone to another number. You can set three different types of call forward as described in the following sections. -
Page 25: Caller Blocking
Caller Blocking Chapter 3 - IP2007 Phone Features Caller Blocking You can block up to 10 phone numbers from reaching your phone when a caller attempts to call you from one of these numbers. Phone & Web Access » Phone Menu = Left soft key to CONFIG > key >... -
Page 26: Do Not Disturb
Do Not Disturb Chapter 3 - IP2007 Phone Features Do Not Disturb You can enable the Do Not Disturb (DND) function, if you do not want any incoming calls to interrupt your work. All incoming calls will receive a busy tone when they call your phone number. -
Page 27: Lines And Calls
Lines and Calls Chapter 3 - IP2007 Phone Features Lines and Calls Lines The term "Line" in this manual represents how many phone numbers are supported on one phone. A phone can have more than one phone number so that the user can subscribe to different VOIP service providers. -
Page 28: Phone Book
Phone Book Chapter 3 - IP2007 Phone Features Phone Book provides users with a Phone Book, with each entry containing a user Xcelerator-IP programmed Phone Number and User Name. The phone number can be an extension number, phone number, or IP address. Up to 400 entries per station user is supported. Phone &... -
Page 29: Register To A Server
Register to a Server Chapter 3 - IP2007 Phone Features Register to a Server The phone should be configured before it can perform some basic functions. Although the phone can make a peer to peer VOIP call (the user must remember the IP address of the called party), it is desirable to have a centralized server to provide the directory service. -
Page 30: Speed Dial
3-10 Speed Dial Chapter 3 - IP2007 Phone Features Speed Dial You can preset 10 speed dial numbers for fast dialing. Use the following steps to use speed dial: 1. Lift the handset. 2. You will see "SPD" on the LCD menus. Press the soft key corresponding to the LCD menus display. -
Page 31: Voice Mail Access
Voice Mail Access 3-11 Chapter 3 - IP2007 Phone Features Voice Mail Access Ask your system administrator for the Voice Mail access number in order to access your voice mailbox. You will find the "MSG number" field blank; enter an appropriate number. If you have voice mail in your voice mailbox, you will see a voice mail icon on the left top corner of the LCD. -
Page 33: Configuration Via Menus
Configuration Via Menus Read the Configuration Via Menus chapter to learn how to navigate in the menus of your IP2007 telephone. Xcelerator IP User Guide March 2007... -
Page 35: Menu
Menu Chapter 4 - Configuration Via Menus Menu Startup You can use LCD menus to configure most settings of your IP phone. Press the LEFT soft key to start menu selection process. Xcelerator IP User Guide March 2007... -
Page 36: Menu Tree
Menu Chapter 4 - Configuration Via Menus Menu Tree - Menu Selection - 16. Admin - 1. Volume + Phone Number - Account + Ring Volume + Handset Speaker - Admin + Name + Handset Mic + Password + Handsfree Speaker - User + Handsfree Mic + Name... -
Page 37: Navigate In The Menu
Menu Chapter 4 - Configuration Via Menus This is the first display shown when you press the left soft key. Navigate in the Menu Use the Navigator Control key to scroll to a desired item. Press to enter the sub-tree for the selected item. Press to confirm and save the setting of a specific item. -
Page 38: Enable Or Disable Settings
Menu Chapter 4 - Configuration Via Menus Enable or Disable Settings You can enable or disable certain item settings. Use the up or down arrow toggle an item option. Example: Xcelerator IP User Guide March 2007... -
Page 39: Numeric And Alpha Characters
Menu Chapter 4 - Configuration Via Menus Numeric and Alpha Characters You can input numeric or alphabetic characters in certain menus, such as in the Phone Book. When you are on a menu that accepts characters, you will see "ABC" above the left soft key. -
Page 41: Configuration Via Web
Configuration Via Web Read the Configuration Via Web chapter to learn how to use your IP2007 telephone by using the web interface. Xcelerator IP User Guide March 2007... -
Page 43: Web
Chapter 5 - Configuration Via Web Access To access the phone configuration, enter the IP address in the Address field of your web browser, http://192.168.1.10. To confirm IP address -- If you are unsure about the IP address, you can verify the current IP address on your IP phone by pressing the Left soft key to access the CONFIG menu and using the down arrow to select the 5. -
Page 44: Information Page
Information Page Chapter 5 - Configuration Via Web Information Page The Information Page displays when you log into the phone's web page. This "view only" page shows general information regarding your IP2007 Phone. Network Information IP Type | Current IP | Subnet Mask | Default Gateway | Primary DNS | Secondary DNS Product Information Product Name | Software Version | MAC Address | Hardware Version Profile Status... - Page 45 Network Settings Chapter 5 - Configuration Via Web Network Parameters Internet Connection Items IP Type Select how this phone receives IP address - DHCP or Static IP; Default = DHCP IP Address Static IP address; Default = 0’s Subnet Mask Static Subnet Mask Default Gateway Static Default Gateway...
-
Page 46: Phone Settings
Phone Settings Chapter 5 - Configuration Via Web Phone Settings The Phone Settings page allows you to access the following phone categories: Volume Control Tones Used Phone Parameters Prefix Entry Settings Dial Plan Xcelerator IP User Guide March 2007... - Page 47 Phone Settings Chapter 5 - Configuration Via Web IP Phone Parameters Volume Control Handset Mic Set input level of handset microphone: 1-10. Default = 6 Handset Speaker Set output level of handset speaker: 1-10. Default = 6 Speaker Mic Set input level of hand-free microphone: 1-10. Default = 6 Speakerphone Set output level of hand-free speaker: 1-10.
-
Page 48: Software Upgrade
Software Upgrade Chapter 5 - Configuration Via Web Software Upgrade The Software Upgrade page allows you to access the following s/w upgrade categories: Server Items Firmware Files S/W Upgrade Parameters Server Items Server Type TFTP | FTP; Default = TFTP Server IP Address FTP server address;... -
Page 49: Personal Settings
Personal Settings Chapter 5 - Configuration Via Web Personal Settings The Personal Settings page allows you to access the following call categories: Call Forward Settings | Caller Blocking Settings | Speed Dial Entry Settings Personal Parameters Call Forward Settings Enable Always Forward & Turns on unconditional forward, all calls will automatically forward to Forward to user@[host] the number entered;... -
Page 50: Sip Page
5-10 SIP Page Chapter 5 - Configuration Via Web SIP Page ADMIN Function -- In order to access the SIP parameters, you must log in as a System Administrator. (Logging in as a station user will prevent this page from loading.) The SIP page allows an administrator to set up the following SIP parameters: SIP Proxy Server SIP Registrar Server... -
Page 51: Sip Parameters
SIP Page 5-11 Chapter 5 - Configuration Via Web SIP Parameters SIP Proxy Server SIP Proxy Server SIP proxy server address Outbound Proxy Server Outbound proxy server address Server Port Proxy server port; Default = 5060 SIP Secondary Proxy Server Redundant proxy server SIP Surviving Proxy Server Creates a SIP proxy loop to find available SIP proxy server... - Page 52 5-12 SIP Page Chapter 5 - Configuration Via Web Voice Mail Items Subscribe MWI Subscribe to voice mail server Voice Mail Server Voice mail server address MSG Number Default = voicemail Codec Settings Codec G.711u-law Set G.711u-law protocol preference: None | First | Second | Third | Fourth;...
-
Page 53: System Settings
System Settings 5-13 Chapter 5 - Configuration Via Web System Settings The System Settings page allows you to access the following system categories: Administer Settings Time Settings Xcelerator IP Feature Items Feature Key Settings Xcelerator IP User Guide March 2007... -
Page 54: System Parameters
5-14 System Settings Chapter 5 - Configuration Via Web System Parameters Administer Settings Administrator Name The name of the administrator; Default = admin Administrator Password The password for the administrator; Default = 1234 User Name The name of the station user; Default = user User Password The password for the user;... -
Page 55: Phone Book
Phone Book 5-15 Chapter 5 - Configuration Via Web Phone Book allows each user to store up to 400 name/phone number entries in their Xcelerator IP individual Phone Book. Once completed, you will be able to place a call to the desired person by clicking the Phone Book entry number next to the person’s name/number. - Page 57 Software Upgrade Read the Software Upgrade chapter to learn how to update your IP 2007 telephone with the latest software configuration. Xcelerator IP User Guide March 2007...
-
Page 59: Software Upgrade
Required Components Chapter 6 - Software Upgrade Required Components A working IP network that is established and configured for IP phone. A TFTP server that is configured on your network (example: TFTP32 server) Latest software image or configuration file. Environment Setup Prepare TFTP Server Make sure the TFTP server has been properly installed in the server. -
Page 60: Software Upgrade Procedure
Software Upgrade Procedure Chapter 6 - Software Upgrade Software Upgrade Procedure To upgrade the phone software via the Web: 1. On the Server computer, create a TFTP or FTP folder on the c: drive "root" directory. 2. Make sure the same Server IP address appears in both areas: IP2007 SIP Phone web page -and- TFTP/FTP software program... - Page 61 If you do not already have an TFTP program, you can go to the link provided and download an application for free … http://www.solarwinds.net/downloads Vertical Communications does not provide support for this TFTP product. For technical assistance, contact Solar Winds. Xcelerator IP User Guide...
- Page 63 Index Index Hold a Call [3-6] Hold/Resume/Navigation in Calls [3-6] Always Forward [3-4] Answer a Call [3-3] Auto Answer [3-3] IP Phone assembling [2-3] Function Keys [1-4] Basic Call [3-3] In/Out Ports [1-8] Busy Forward [3-4] Rear & Side Views [1-7] Buttons and Hardware, identifying [1-4] setting up the stand [2-4] wall mounting [2-7]...
- Page 64 Index Saving the Configuration [4-7] Screw Alignment Template [2-8] Software Upgrade Configuring Phone for TFTP Access [6-3] Environment Setup [6-3] Prepare TFTP server [6-3] Procedure [6-4] Required Components [6-3] Speakerphone/Headset/Handset [3-9] Speed Dial [3-10] Transfer [3-10] Blind Transfer [3-10] Supervised Transfer [3-10] Voice Mail Access [3-11] Volume Adjustment [3-11] Xcelerator IP User Guide...
Need help?
Do you have a question about the Xcelerator IP IP2007 and is the answer not in the manual?
Questions and answers