Table of Contents
Advertisement
Advertisement
Table of Contents

Related Manuals for Miele H 370-2


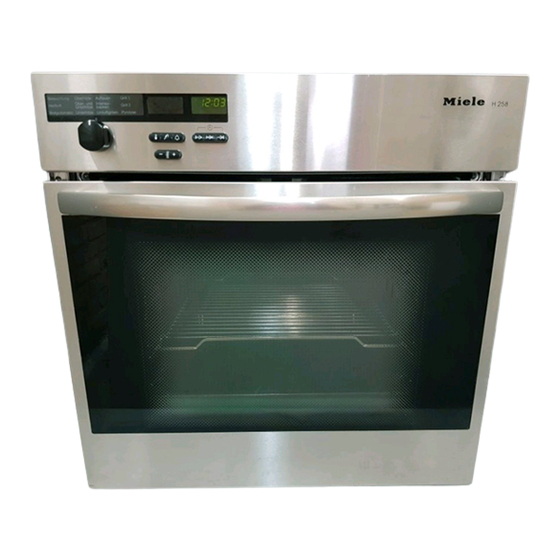
Summary of Contents for Miele H 370-2
-
Page 1: Operating Instructions
Operating instructions Ovens and cookers H 370-2, H 380-2 H 373-2, H 383-2, H 390-2 GiZWO To avoid the risk of accidents or damage to the appliance it is essential to read these operating instructions before it is installed or used for the first time. -
Page 2: Table Of Contents
......... 5 Features . - Page 3 ......... . 29 .
- Page 4 ..........69 .
- Page 5 a Oven function selector f Heating element for top heat and b Oven: display and pushbuttons grilling with roof liner c Timer: display and pushbuttons g Grill motor * d "+/–" Button with indicator light h Connection socket for core tempera- e Hob zone controls * ture probe (roast probe) * i Air inlet for fan...
- Page 6 a Oven function selector e Heating element for top heat and b Oven: display and pushbuttons grilling with roof liner c Timer: display and pushbuttons f Grill motor * d "+/–" Button with indicator light g Connection socket for core tempera- ture probe (roast probe) * h Air inlet for fan i Telescopic carriage/Runner heights...
-
Page 7: Features
There is a door contact switch above the right hand door hinge. In addition to operating the various If the door is opened during operation, cooking programmes to bake, roast the door contact switch automatically and grill the electronic controls also of- switches off the heating elements, and the fan if a "Fan"... -
Page 8: Accessories
These and other accessories are also available to order from your Dealer or the Miele Spare Parts Department. See "Extra Accessories" further on in this booklet for more details. The baking tray, grill pan and rack are... -
Page 9: Roast Probe
(depending on model) (depending on model) The roast probe enables the roasting process to be monitored simply and re- liably. See "Roasting with the roast probe" for details. When pushing the baking trays, grill pan / oven tray or rack into the oven, (depending on model) make sure that the telescopic car- riage is pushed completely in. - Page 10 (depending on model) Use the lever for lifting off the halogen lamp cover. See "Grilling with the rotisserie" for de- tails. Depending on model your appliance may be fitted with a catalyser. (depending on model) The catalyser is built in to the oven's cooling system.
- Page 11 Old appliances contain materials which can be reclaimed or recycled. Please The transport and protective packing contact your dealer, your local waste has been selected from materials which collection centre or scrap merchant are environmentally friendly for disposal about potential recycling schemes, and can normally be recycled.
- Page 12 This appliance complies with all rele- Before connecting the appliance to vant legal safety requirements. Im- the mains supply make sure that proper use of the appliance can, the voltage and frequency correspond however, present a risk of both per- to the rating on the data plate, other- sonal injury and material damage.
- Page 13 Miele Spare Parts dept. When working with "Conventional" heat- ing or when grilling, the element in the This equipment is not designed for...
- Page 14 Cover any food which is left in the necessary it can be obtained from the oven to be kept hot. This avoids Miele Spare Parts dept or a Miele spe- the food drying out. It also prevents cialist dealer. steam condensing and possibly lead- After using do not remove the roast ing to moisture damage in the oven.
- Page 15 Bake larger deep-frozen items such as pizzas on baking paper on Never leave the appliance unat- the rack itself or in the pizza pan (see tended when cooking with oils and "Extra accessories"). Placing them on fats as these are a fire hazard if allowed the baking tray or in the grill pan can to overheat.
- Page 16 When using kitchen appliances connected to sockets near the Before throwing an old appliance oven, ensure that the cable cannot away it must first be made unus- come in contact with the hot cooking able. Switch off and disconnect it from zones or get trapped in a hot oven the power supply, cut off the cable di- door, which could melt the cable insula-...
- Page 17 The operating lock can be activated to The oven can be programmed so that prevent the oven or hob being switched once a temperature has been chosen on unintentionally, by children for exam- the target temperature can only be low- ple.
- Page 18 After installation and before using the oven for the first time: When the appliance is first connected – Set the clock. to the power supply, or after a power cut "12:00" and the symbols "f" and – Switch the catalyser on. ")"...
- Page 19 have a slight smell on first use. Running the oven empty for at Your appliance has a catalyser built-in least an hour at a high temperature will to the ventilation system. dissipate this more quickly. When switched on, the catalyser re- ^ Turn the oven function selector to moves fat particles from the air circulat- "Fan Heat D".
- Page 20 This saves energy. More practical advice about these cooking functions is given in the "Baking", "Roasting" and "Grilling" sections of this book and in the Miele cookbook supplied with this oven.
- Page 21 This is quite normal. "Baking", "Roasting" and "Grilling" sections of this book and in the Miele cookbook supplied with this oven. Pre-heat the grill for at least 5 minutes with the oven door closed, before grill- ing.
- Page 22 The oven controls consist of the oven With the push buttons you can: function selector and pushbuttons. (depending on the model) – change the – change the , if the roast probe is used. – activate the Each push button has a matching sym- bol in the oven display.
- Page 23 – Defrost G For gentle defrosting of deep frozen – Light H foods. Turns on the oven light independ- – Intensive Bake F ently. H 390: All oven functions are dis- For recipes which require a moist played as soon as the function selec- topping, and a crisp base, e.g.
- Page 24 * the initial boosted temperature is approx. 230°C, continuation temperature 160°C If you wish to retain the temperature suggested by the system, this will be automatically adopted when the indica- tor light in the "+/–" button goes out and the oven starts heating up. in the oven is then displayed.
- Page 25 ^ Place food on an appropriate runner If the temperature recommended by the level in the oven. system is not suitable, it can be altered according to oven function within the ^ Turn the oven function selector to the following range: required setting.
- Page 26 With the "Fan Heat D", "Auto Roast E" and "Conventional A" heating systems, If you frequently work with a tempera- ture which differs from the factory rec- "rapid heat-up" is switched on automati- ommended one, it is also possible to cally if the temperature required is enter your own recommended tempera- –...
- Page 27 For some dishes it may be desirable to Pre-heating is only necessary in a few switch off "rapid heat-up" (pizza, bis- cases e.g.: cuits, small cakes). ^ Select the oven system and tempera- ture for the cooking process. – Pre-heat for foods which cook in less than 20 minutes and for foods such ^ "Rapid heat-up"...
- Page 28 If you are programming a cooking pro- When the oven is in operation the oven cess using the automatic timer, or if you lighting goes out approx. 15 seconds are cooking with the roast probe, the re- after pressing the last button. sidual heat is automatically used to ^ To switch the lighting back on for a save energy.
- Page 29 The minute minder can be used to time any activity in the kitchen, e.g. boiling – an audible tone sounds for approx. 5 eggs. (It cannot be used to switch the seconds. oven off at the end of a set time). –...
- Page 30 Some of the standard oven settings Proceed as follows: (which are set at the factory) have an ^ Turn the oven function selector to "0". alternative which you can select if re- ^ Open the oven door fully. quired. Each of these settings has an identification number which is followed ^ Turn the oven function selector to the by :0 or :1.
- Page 31 The oven function and tempera- The locking function for the oven ture can be changed at any is activated: after oven function time. and temperature have been cho- sen, and the indicator light in the "+/–" button has gone out, the oven function set can no longer be altered.
- Page 32 An audible tone sounds at the The audible tone at the end of a end of a cooking process (also cooking process is switched off applies to the Miele INFO CON- (also applies to the Miele INFO TROL unit if present). CONTROL unit if present).
- Page 33 The timer buttons can be used to – set for a cooking pro- cess – set the of a cooking process The timer can: – show the time of day, – set for a cooking pro- – switch the oven (and separately, cess where applicable, the hob front cook- ing zones) off, or on and off automati-...
- Page 34 When the appliance is first connected After selecting a cooking function or to the power supply, or after a power switching on a hob zone you can se- cut "12:00" and the symbols "f" and lect a cooking time. ")" will flash in the display. To enter a time you must keep the rele- The time can only be entered when vant timer button pressed in whilst op-...
- Page 35 The timer can be used to automatically switch the oven and both the front hob The time of day display can be switched off to save energy. cooking zones off, or set them to come To do this: on at a later time and then also be switched off.
- Page 36 At the – the oven heating switches off auto- matically. Please note it is not possible to use – an audible tone sounds for approx. this programme for hobs which have 5 seconds. the KSE 200 control unit. – the ")" symbol flashes at the same If a time is entered for a front cooking time.
- Page 37 At the end of cooking time – the hob cooking zone will switch off automatically, A time can be entered between 1 min- ute and 23 hours 59 minutes. – an audible tone sounds for approx. 5 seconds. ^ Turn the oven function selector or the hob zone control to the required set- –...
- Page 38 ^ Turn the oven function selector or the hob zone control to the required set- It is a good idea to set the oven to ting. switch on and off automatically for roasting. First enter the When baking the delay period set should not be too long! Otherwise bat- ter or dough will dry out and the raising ^ Press the "g"...
- Page 39 ^ Press the relevant button. Times which have been entered for a ^ As soon as the indicator light for the process can be called up at any time. "+/–" button goes out, you can Press the relevant button for the time change the time.
- Page 40 The following settings are recom- mended for baking: Several levels can be used at the same – Fan Heat D time for baking. The recommended po- sitions are: – Intensive Bake F 1 tray = 1st runner from the bottom –...
- Page 41 PerfectClean surfaces. rise are needed. It is usually necessary to pre-heat the oven when using this method. The Baking Chart and the Miele Place tins on the wire rack on runner Cookbook give suggestions for tem- perature, runner heights and times.
- Page 42 Madeira cake 150 – 170 50 – 60 Rich fruit cake – – – Victoria sandwich (tin) 160 – 170 20 – 25 Fudge brownies (tray) 160 – 170 25 – 30 Date and walnut cake – – – Cookies 150 –...
- Page 43 160 – 180 50 – 60 – – – 130 – 150 100 – 140 – – – – – – – – – – – – – – – 105 – 120 – – – – – – – –...
-
Page 44: Auto Roast E
We recommend the following settings if a more intensive browning effect is for roasting in the oven: desired. – Auto Roast E – Conventional A Auto roast E: When roasting on the rack or in an open tin make sure the roasting filter is fitted in front of the fan in the back of the oven before starting. - Page 45 The traditional British method is to allow 15 to 20 minutes to the lb, according to type of meat, plus approx. 20 minutes, adjusting length of time as roasting pro- ceeds, to obtain the required result. See the for suggested Do not select a higher temperature than that advised.
- Page 46 Using the roast probe enables the Please note: roasting process to be monitored sim- You can place the meat in a pot or on ply and reliably. the rack. Roasting bags or aluminium foil may The tip of the probe measures the also be used, but only when left open at at the centre of the meat the ends.
- Page 47 To do this: ^ Press the "e" button. ^ Enter the desired temperature using the "+" or "–" buttons. ^ Insert the plug of the roast probe into When the light in the "+/–" button goes the socket until you feel it engage. ^ Turn the function selector to the re- –...
- Page 48 If, when the residual time is displayed: – the oven or core temperature is al- tered, – or a different oven function is cho- sen, this will cancel all the residual time in- formation, and the actual temperature will reappear. If the oven door is held open for some time, the residual time will be recalcu- After a certain time the estimated...
- Page 49 As soon as the chosen core tempera- The timer can be used to delay the start ture has been reached of the cooking process. – an audible tone sounds for approx. When finished, cover the meat with alu- 5 seconds, and minium foil and allow to stand for approx.
- Page 50 Beef (approx. 1 kg) 60 – 80 70 – 90 60 – 80 Venison (approx. 1 kg) 75– 100 220 – 240 100 – 120 65 – 75 Leg of pork (approx. 1 kg) 75 – 100 100 – 120 80 –...
- Page 51 Put the roasting filter in front of the fan grille in the back of the oven. Pre-heat the grill for at least 5 min- utes with the oven door shut. Grilling with the oven door shut saves energy and minimizes cook- ing smells.
- Page 52 ^ Most items should be turned half way through cooking. Clean, wipe and season with pepper and herbs. Do not season meat with salt before grilling as this draws the juices out. For thin cuts of meat (e. g. chops or steak) ..275 °C Add a little oil if necessary.
- Page 53 ^ Secure the meat to the rotisserie spit from your Miele dealer or the Miele using clamps as illustrated making Spare Parts Department. sure it is held centrally. Meat should be balanced in the middle to give even rotation.
- Page 54 Pre-heat the grill for at least 5 minutes with the door shut before using. Beef steaks 3/4/5 5-10 Kebabs 8-12 8-12 Escalope 5-10 10-12 Liver 8-12 8-12 Burgers 10-15 10-15 Sausages 8-10 10-12 Chops 12-18 10-15 Fish fillet 10-15 12-16 Trout / Mackerel 16-20 20-25...
- Page 55 Small chicken 1.1 kg 240°C 30 - 40 mins Medium chicken 1.3 kg 240°C 45 - 60 mins Large chicken 1.8 kg 240°C 60 - 70 mins Marinated chicken portions 700 g 240°C 15 - 20 mins Chicken leg, Chicken breast 385 g 240°C 15 - 20 mins...
- Page 56 ^ Turn the function selector to "Defrost G" For defrosting meat and delicate food The time needed for defrosting de- we recommend defrosting at room tem- pends on the type and weight of the perature, i.e. without selecting an oven food, and at what temperature it was temperature.
- Page 57 Aluminium surfaces and controls A microfibre "E-Cloth" is available from may suffer discolouration or damage the Miele UK Spare Parts Department, if acids, alkalis or soiling are left on Part number 98013530, which is suit- able for cleaning surfaces such as them for too long.
- Page 58 – abrasive sponges, e.g. pot scourers using a proprietary non-abrasive clean- or sponges which have been previ- ing agent designed specifically for use ously used with abrasive cleaning on stainless steel, or with the Miele agents, E-Cloth. – stainless steel cleaners, Avoid: –...
- Page 59 Always remove all accessories, trays Wipe with a damp cloth. and racks which are not being used when using the oven to get the best Do not put the roast probe or the results and to keep cleaning of the baking carriage telescopic runners trays to a minimum.
- Page 60 Clean as soon as possible after each Before using for the first time remove use with a dishcloth, soft sponge (such any stickers from PerfectClean sur- as the Vileda sponge supplied with faces. ovens in the UK) or a soft nylon brush, and a solution of hot water and a little The enamelled surfaces of the oven in- washing up liquid.
- Page 61 Remove the catalytic back panel, The following cause lasting damage side liners (if fitted) and roof panel to the surface structure and reduce before using oven sprays. The the anti-stick effect and must not be chemicals used in oven sprays will used on PerfectClean surfaces: damage catalytic enamel rendering it ineffective.
- Page 62 The removable back panel, side liners Allow the oven to cool down before (if fitted) and roof liner are coated with a cleaning. Danger of burning! dark grey catalytic enamel. ^ Catalytic enamelled panels should be During fan operated cooking circulating cleaned using a solution of hot water air in the oven deposits oil and fat with a little washing up liquid applied...
- Page 63 Miele dealer or the Miele Spare Parts dept.
-
Page 64: Telescopic Carriage
To make cleaning easier you can – remove the oven door, – take out the telescopic carriage or the runners, – take out the back panel – take out the side liners (if fitted) – lower the top heating element. Please note : the oven door is heavy. - Page 65 (depending on model) Make sure the oven heating ele- ments are switched off and cool to avoid the danger of being burnt. ^ Pull on the fixing knob to release it. ^ Pull out the telescopic carriage and remove the side runners. ^ Take the guide rails out of the oven.
- Page 66 (depending on model) Make sure the oven heating ele- ments are switched off and cool. Make sure the oven heating ele- Danger of burning. ments are switched off and cool to avoid the danger of being burnt. ^ Remove the runners. ^ Pull on the fixing knob to release it.
- Page 67 ^ Remove the runners. ^ Lower the top heating element. Make sure the oven heating ele- ments are switched off and cool. Danger of burning. The catalytic panels and liners can be removed for cleaning if necessary. See "Cleaning and Care" for more infor- ^ Hold the roof liner firmly and unscrew mation.
- Page 68 When reassembling the catalytic side liners, ensure they sit correctly. ^ Put the runners or the guide rails of the telescopic frame back into place. ^ Ease the back lug into the opening in in the reverse order, care- the rear wall. fully ensuring all parts are correctly in place.
-
Page 69: Lever
^ the operating lock is activated. ^ the mains fuse has blown. Contact a qualified electrician or the Miele Ser- vice Department. ^ Use the lever to release the lamp cover from its frame. - Page 70 The glass cover is held in position by two metal brackets which are secured to the reflector. Do not push the metal brackets to the sides, as this would damage both the brackets and the reflector. It might also make it difficult to push the glass cover back into its frame again.
-
Page 71: Catalyser
Make sure the catalyser is switched on. See "Altering oven settings, setting 02". This is not a fault. If the door is opened during operation, the door contact switch causes the oven heating, and the fan if on "Fan" setting, to be switched off. ^ Push the glass cover back into the metal brackets with the cut out edge towards the rear. - Page 72 Product information sheets give a percentage result for standard brown- The lamp needs changing. ing tests. These refer to results for one The lamp must be changed by a Miele tray. service technician. If the item being baked is browning...
-
Page 73: Function Selector
^ If appears the oven has auto- matically switched itself off during use. This is a safety feature to protect This is not a fault. the oven if it has been operating for Check whether the function selector is an exceedingly long period. The still set to one of the functions. - Page 74 – your Miele Dealer which are shown on the data plate, visi- ble below the oven interior, with the oven door open. – the nearest Miele Service Depart- ment, (see address on the back If you have an oven and hob combina- page).
-
Page 75: Perfectclean
The following accessories may come as standard in some countries. They are available at extra cost from your Dealer or the Miele Spare Parts dept. The gourmet oven dish can be placed in the oven directly on the runners. It... - Page 76 – a receiver for the radio controlled clock signal, – the Miele Info Control. A receiver for the radio controlled clock signal is connected to the cooker or oven. Time of day adjustment occurs The telescopic runners provide three automatically on receipt of the signal.
- Page 77 If the socket is not accessible after in- stallation (depending on country) an Possible combinations: additional means of disconnection must Miele built-in ovens may only be com- be provided for all poles. bined with hobs and their respective For extra safety it is advisable to install...
- Page 78 are given Data relating to electrical connection on the data plate, visible when the oven will be found on the data plate, visible door is open. Please ensure that these when the oven door is open. Make sure match the household mains supply. that these figures comply with the main voltage.
- Page 79 Please quote these data, and the model and serial number when contacting the Miele Service dept. Connection of this appliance should be The wall oven is suitable for connection made via a suitable isolator which com- to an a.c.
- Page 80 Follow the relevant instructions for your specific model. Turn off the mains electricity supply to the isolator. ^ Install the hob, see separate instruc- tions. ^ Connect the cooker to the electricity supply by the isolator. ^ Align the cooker in front of the base unit.
- Page 81 The plugs on the cooker / hob and The plugs on the cooker / hob and the sockets on the hob electronic the sockets on the hob electronic control are colour coded. control are colour coded. ^ Insert the hob control knobs into the ^ Insert the hob control knobs into the control facia.
- Page 82 ^ Push the cooker into the housing unit as far as the oven trim and align. Do not fit insulation material inside the housing unit. This would hinder the intake of air to cool the appli- ance. ^ Open the oven door and using two screws secure the oven to the side walls of the housing unit through the holes in the oven trim.
- Page 83 ^ Push the cooker into the housing unit as far as the oven trim and align. Do not fit insulation material inside the housing unit. This would hinder the intake of air to cool the appli- ance. ^ Loosen the screws in the decor strips and remove the decor strips.
- Page 84 ^ Place the oven into the oven housing from any liquids that might spill unit as far as the oven trim and align. down from the worktop, and can be purchased from the Miele Spare Parts dept. Follow the relevant instructions for your specific model.
- Page 85 Do not fit insulation material inside the housing unit. This would hinder the intake of air to cool the appli- ance. Turn off the mains electricity supply ^ Open the oven door and using two to the isolator. screws secure the oven to the side walls of the housing unit through the ^ Connect the oven to the electricity holes in the oven trim.
- Page 86 Pay particular attention to the distances necessary in the following installation situations for the H 390:...
- Page 88 Alteration rights reserved / 22 / 0703 M.-Nr. 05 850 170 / V01 (H 370-2, H 380-2, H 373-2, H 383-2, H 390-2) This paper consists of cellulose which has been bleached without the use of chlorine.
Need help?
Do you have a question about the H 370-2 and is the answer not in the manual?
Questions and answers