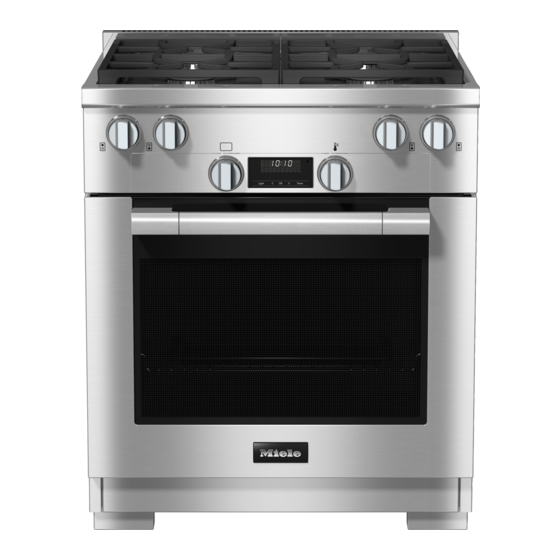
Miele HR 1124-3 AG Installation Instructions Manual

Miele HR 1124-3 AG Installation Instructions Manual

Hide thumbs Also See for HR 1124-3 AG:
Table of Contents

Advertisement

Installation Instructions
Range
To prevent accidents and damage to the range, you must read all
instructions supplied before installing or using the appliance.
en-US, CA
M.-Nr. 11 918 390

Advertisement

Table of Contents
loading

Summary of Contents for Miele HR 1124-3 AG

  • Page 1 Installation Instructions Range To prevent accidents and damage to the range, you must read all instructions supplied before installing or using the appliance. en-US, CA M.-Nr. 11 918 390...
  • Page 2 PRECAUTIONS TO AVOID POSSIBLE EXPOSURE TO EXCESSIVE MICROWAVE ENERGY PRECAUTIONS TO AVOID POSSIBLE EXPOSURE TO EXCESSIVE MICROWAVE ENERGY (a) Do not attempt to operate this oven with the door open since open-door operation can result in harmful exposure to microwave energy.
  • Page 3: Important Safety Instructions

    IMPORTANT SAFETY INSTRUCTIONS  WARNING Children and adults can tip over the range if has not been secured. This may lead to fatal injuries.  This range must be secured and connected using the anti-tip device according to the installation instructions. ...
  • Page 4 IMPORTANT SAFETY INSTRUCTIONS  WARNING: If the information in this manual is not followed exactly, a fire or explosion may result causing property damage, personal injury, or death. - Do not use or store gasoline or other combustible liquids or vapors in the vicinity of this or any other appliance.
  • Page 5: Table Of Contents

    Contents PRECAUTIONS TO AVOID POSSIBLE EXPOSURE TO EXCESSIVE MICROWAVE ENERGY ..................IMPORTANT SAFETY INSTRUCTIONS ............IMPORTANT SAFETY INSTRUCTIONS ............Notes on installation ..................16 Data plate ......................16 Distance to the range hood ................. 16 Scope of delivery....................16 Toe kick panel and splash guard..............16 Installation of the toe-kick ................
  • Page 6 Contents HR 1954-3 DF, HR 1955-3 DF, HR 1956-3 DF ............ 81 Detailed views of HR 1954-3 DF ................. 84 Detailed views of HR 1955-3 DF ................. 88 Detailed views of HR 1956-3 DF ................. 92 Anti-tip device....................96 Before installation....................96 Checking the installation niche ................97 Included accessories................... 99 Installation dimensions of locking bolt ..............99 Installing the Range with the anti-tip device ............
  • Page 7: Important Safety Instructions

    Both documents contain important information about installation, safety, use and maintenance. Miele cannot be held liable for damage occurring as a result of non-compliance with the instructions. Keep these installation instructions and operating instructions in a...
  • Page 8 IMPORTANT SAFETY INSTRUCTIONS When using the appliance, follow basic safety precautions, including the following: Read all instructions before installation and use of the oven to prevent accidents and machine damage. WARNING - To reduce the risk of burns, electric shock, fire, injury to persons, or exposure to excessive microwave energy: This appliance complies with current safety requirements.
  • Page 9 IMPORTANT SAFETY INSTRUCTIONS  Risk of Fire! Do not use this oven to store or dry combustible materials.  Persons who lack physical, sensory or mental abilities, or experience with the appliance should not use it without supervision or instruction by a responsible person. ...
  • Page 10 Unauthorized installation, maintenance, and repairs can cause considerable danger for the user. Installation, maintenance, and repairs should only be carried out by a Miele authorized technician.  Do not carry or lift the range by the oven door handle or the control panel! ...
  • Page 11 The function and operation of the protective measures provided in the domestic electrical installation and in this Miele product must also be maintained in isolated operation or in operation that is not synchronized with the grid power supply, or these measures must be replaced by equivalent measures in the installation.
  • Page 12 Any repairs not performed by a Miele authorized service technician will void the warranty.  Miele can only guarantee the safety of the appliance when original Miele parts are used. Faulty components must only be replaced with genuine Miele parts.
  • Page 13 - The appliance is properly installed (electric and water). - A damaged appliance is dangerous. Contact Miele to have it repaired immediately. - Turn off the water supply when the appliance is not in use for an extended period (e.g., vacation).
  • Page 14 IMPORTANT SAFETY INSTRUCTIONS  Only clean parts listed in these operating and installation instructions.  There is a delicate fiberglass seal around front of the oven compartment provide a seal for the glass on the inside of the oven door. This can be damaged by rubbing or scouring. If possible, refrain from cleaning this.
  • Page 15 Miele cannot accept liability.  Only use the Miele probe supplied with the appliance. If it is faulty, it must be replaced with a new original Miele probe.  The plastic on the probe can melt at very high temperatures. Do not use the probe when using the broiling operating modes.
  • Page 16: Notes On Installation

    Range. The drip tray covers the gap between Have this information available if you the oven cavity and the door. need to contact Miele so that any issues can be rectified as quickly as  Open the oven door. possible.
  • Page 17 *INSTALLATION* Notes on installation Disassembling the grill Reinstall by following these instructions in reverse order.  Danger of burning!  Place the frame  on the surface Burners must be switched off. Make burner. The recess for the igniter is sure the cooktop has cooled down.
  • Page 18: Optional Accessories

    Miele Range. The emission of vapors can soil and These can be ordered from www.miele- discolor surfaces above the island shop.com, Miele Customer Service, or trim.
  • Page 19 *INSTALLATION* Notes on installation Mounting the RBGAG All Gas Backguard The rear of the Range must be accessible. Mount the backguard before installing the anti-tip device and connecting the Range. a Backguard  Undo the screws from the island trim. b Rear backguard panel ...
  • Page 20 *INSTALLATION* Notes on installation  Secure the interior panel and the rear panel to the backguard with the screws supplied.  Secure the backguard to the Range with the screws supplied. Backguard 12" (305 mm) Backguard 20" (508 mm) a Backguard b Range ...
  • Page 21: Rbs Backsplash

     Pull back the island trim slightly until it can be removed. Reinstall the backguard by following these instructions in reverse order. RBS Backsplash The backsplash is intended for installation to a Miele Range Hood (DAR model). Observe the installation instructions of the Miele Range Hood.
  • Page 22: Installation Location

    *INSTALLATION* Notes on installation Installation location This Range is not intended for outdoor use. Ranges with a plumbed water connection must not be installed in rooms where there is a risk of freezing temperatures. The floor of the space where the appliance is to be installed must be flat, level, and made of a strong, rigid material.
  • Page 23: Range Net Weight

    *INSTALLATION* Notes on installation Range net weight The Range is heavy. Due to the size and weight of the appliance, installation should be performed by two people. Model Width Net weight incl. accessories HR 112x-3 AG 29 15/16" approx. 307 lbs (140 kg) HR 1421-3 E* (762 mm) HR 1622-3 i HR 1724-3 DF HR 192x-3 DF HR 113x-3 AG 35 15/16"...
  • Page 24: All Gas Range Dimensions

    *INSTALLATION* All Gas Range dimensions HR 1124-3 AG , ,  The shaded area represents the installation area for the connections: E = Electrical connection, G = Gas connection Dimensions Description  13" (330 mm) Maximum depth of upper cabinet  18" (457 mm) Minimum safety distance to bottom edge of upper cabinet ...
  • Page 25 (72 mm) Please observe a minimum safety distance of at least 12" (305 mm) from combustible surfaces located behind the appliance. For zero clearance installation the Miele Backguards will satisfy the required minimum safety distance to combustible surfaces. The Miele Backguard is available in 12" (305 mm) or 20" (508 mm) heights.
  • Page 26: Detailed Views Of Hr 1124-3 Ag

    *INSTALLATION* All Gas Range dimensions Detailed views of HR 1124-3 AG Side view of HR 1124-3 AG (x) = Depending on the appliance height adjustment: 5"–6 1/2" (127 mm–165.1 mm)
  • Page 27 *INSTALLATION* All Gas Range dimensions Detailed front side view of HR 1124-3 AG...
  • Page 28 *INSTALLATION* All Gas Range dimensions Front view of HR 1124-3 AG (x) = Depending on the appliance height adjustment: 5"–6 1/2" (127 mm–165.1 mm)
  • Page 29 *INSTALLATION* All Gas Range dimensions Rear view of HR 1124-3 AG E = Electrical connection G = Gas connection...
  • Page 30: Hr 1134-3 Ag, Hr 1135-3 Ag, Hr 1136-3 Ag

    *INSTALLATION* All Gas Range dimensions HR 1134-3 AG, HR 1135-3 AG, HR 1136-3 AG , ,  The shaded area represents the installation area for the connections: E = Electrical connection, G = Gas connection Dimensions Description  13" (330 mm) Maximum depth of upper cabinet  18"...
  • Page 31 (72 mm) Please observe a minimum safety distance of at least 12" (305 mm) from combustible surfaces located behind the appliance. For zero clearance installation the Miele Backguards will satisfy the required minimum safety distance to combustible surfaces. The Miele Backguard is available in 12" (305 mm) or 20" (508 mm) heights.
  • Page 32: Detailed Views Of Hr 1134-3 Ag

    *INSTALLATION* All Gas Range dimensions Detailed views of HR 1134-3 AG Side view of HR 1134-3 AG (x) = Depending on the appliance height adjustment: 5"–6 1/2" (127 mm–165.1 mm)
  • Page 33 *INSTALLATION* All Gas Range dimensions Detailed front side view of HR 1134-3 AG...
  • Page 34 *INSTALLATION* All Gas Range dimensions Front view of HR 1134-3 AG (x) = Depending on the appliance height adjustment: 5"–6 1/2" (127 mm–165.1 mm)
  • Page 35 *INSTALLATION* All Gas Range dimensions Rear view of HR 1134-3 AG E = Electrical connection G = Gas connection...
  • Page 36: Detailed Views Of Hr 1135-3 Ag

    *INSTALLATION* All Gas Range dimensions Detailed views of HR 1135-3 AG Side view of HR 1135-3 AG (x) = Depending on the appliance height adjustment: 5"–6 1/2" (127 mm–165.1 mm)
  • Page 37 *INSTALLATION* All Gas Range dimensions Detailed front side view of HR 1135-3 AG...
  • Page 38 *INSTALLATION* All Gas Range dimensions Front view of HR 1135-3 AG (x) = Depending on the appliance height adjustment: 5"–6 1/2" (127 mm–165.1 mm)
  • Page 39 *INSTALLATION* All Gas Range dimensions Rear view of HR 1135-3 AG E = Electrical connection G = Gas connection...
  • Page 40: Detailed Views Of Hr 1136-3 Ag

    *INSTALLATION* All Gas Range dimensions Detailed views of HR 1136-3 AG Side view of HR 1136-3 AG (x) = Depending on the appliance height adjustment: 5"–6 1/2" (127 mm–165.1 mm)
  • Page 41 *INSTALLATION* All Gas Range dimensions Detailed front side view of HR 1136-3 AG...
  • Page 42 *INSTALLATION* All Gas Range dimensions Front view of HR 1136-3 AG (x) = Depending on the appliance height adjustment: 5"–6 1/2" (127 mm–165.1 mm)
  • Page 43 *INSTALLATION* All Gas Range dimensions Rear view of HR 1136-3 AG E = Electrical connection G = Gas connection...
  • Page 44: All Electric Range Dimensions

    *INSTALLATION* All Electric Range dimensions HR 1421-3 E*, HR 1622-3 i , ,  The shaded area represents the installation area for the connections: E = Electrical connection, W = Plumbed water connection (HR 1622-3 i only) * Only available in Canada.
  • Page 45 (72 mm) Please observe a minimum safety distance of at least 12" (305 mm) from combustible surfaces located behind the appliance. For zero clearance installation the Miele Backguards will satisfy the required minimum safety distance to combustible surfaces. The Miele Backguard is available in 12" (305 mm) or 20" (508 mm) heights.
  • Page 46: Detailed Views Of Hr 1421-3 E

    *INSTALLATION* All Electric Range dimensions Detailed views of HR 1421-3 E Side view of HR 1421-3 E (x) = Depending on the appliance height adjustment: 5"–6 1/2" (127 mm–165.1 mm)
  • Page 47 *INSTALLATION* All Electric Range dimensions Detailed front side view of HR 1421-3 E...
  • Page 48 *INSTALLATION* All Electric Range dimensions Front view of HR 1421-3 E (x) = Depending on the appliance height adjustment: 5"–6 1/2" (127 mm–165.1 mm)
  • Page 49 *INSTALLATION* All Electric Range dimensions Rear view of HR 1421-3 E E = Electrical connection...
  • Page 50: Detailed Views Of Hr 1622-3 I

    *INSTALLATION* All Electric Range dimensions Detailed views of HR 1622-3 i Side view of HR 1622-3 i (x) = Depending on the appliance height adjustment: 5"–6 1/2" (127 mm–165.1 mm)
  • Page 51 *INSTALLATION* All Electric Range dimensions Detailed front side view of HR 1622-3 i...
  • Page 52 *INSTALLATION* All Electric Range dimensions Front view of HR 1622-3 i (x) = Depending on the appliance height adjustment: 5"–6 1/2" (127 mm–165.1 mm)
  • Page 53 *INSTALLATION* All Electric Range dimensions Rear view of HR 1622-3 i E = Electrical connection W = Plumbed water connection...
  • Page 54: Dual Fuel Range Dimensions

    *INSTALLATION* Dual Fuel Range dimensions HR 1724-3 DF , ,  The shaded area represents the installation area for the connections: E = Electrical connection, G = Gas connection Dimensions Description  13" (330 mm) Maximum depth of upper cabinet  18" (457 mm) Minimum safety distance to bottom edge of upper cabinet ...
  • Page 55  (72 mm) Please observe a minimum safety distance of at least 12" (305 mm) from combustible surfaces located behind the appliance. For zero clearance installation the Miele Backguards will satisfy the required minimum safety distance to combustible surfaces. The Miele Backguard is available in 12" (305 mm) or 20" (508 mm) heights.
  • Page 56: Detailed Views Of Hr 1724-3 Df

    *INSTALLATION* Dual Fuel Range dimensions Detailed views of HR 1724-3 DF Side view of HR 1724-3 DF (x) = Depending on the appliance height adjustment: 5"–6 1/2" (127 mm–165.1 mm)
  • Page 57 *INSTALLATION* Dual Fuel Range dimensions Detailed front side view of HR 1724-3 DF...
  • Page 58 *INSTALLATION* Dual Fuel Range dimensions Front view of HR 1724-3 DF (x) = Depending on the appliance height adjustment: 5"–6 1/2" (127 mm–165.1 mm)
  • Page 59 *INSTALLATION* Dual Fuel Range dimensions Rear view of HR 1724-3 DF E = Electrical connection G = Gas connection...
  • Page 60 *INSTALLATION* Dual Fuel Range dimensions HR 1924-3 DF , ,  The shaded area represents the installation area for the connections: E = Electrical connection, W = Plumbed water connection, G = Gas connection Dimensions Description  13" (330 mm) Maximum depth of upper cabinet ...
  • Page 61  (72 mm) Please observe a minimum safety distance of at least 12" (305 mm) from combustible surfaces located behind the appliance. For zero clearance installation the Miele Backguards will satisfy the required minimum safety distance to combustible surfaces. The Miele Backguard is available in 12" (305 mm) or 20" (508 mm) heights.
  • Page 62: Detailed Views Of Hr 1924-3 Df

    *INSTALLATION* Dual Fuel Range dimensions Detailed views of HR 1924-3 DF Side view of HR 1924-3 DF (x) = Depending on the appliance height adjustment: 5"–6 1/2" (127 mm–165.1 mm)
  • Page 63 *INSTALLATION* Dual Fuel Range dimensions Detailed front side view of HR 1924-3 DF...
  • Page 64 *INSTALLATION* Dual Fuel Range dimensions Front view of HR 1924-3 DF (x) = Depending on the appliance height adjustment: 5"–6 1/2" (127 mm–165.1 mm)
  • Page 65 *INSTALLATION* Dual Fuel Range dimensions Rear view of HR 1924-3 DF E = Electrical connection W = Plumbed water connection G = Gas connection...
  • Page 66: Hr 1934-3 Df, Hr 1935-3 Df, Hr 1936-3 Df

    *INSTALLATION* Dual Fuel Range dimensions HR 1934-3 DF, HR 1935-3 DF, HR 1936-3 DF , ,  The shaded area represents the installation area for the connections: E = Electrical connection, W = Plumbed water connection, G = Gas connection Dimensions Description  13" (330 mm) Maximum depth of upper cabinet ...
  • Page 67 (72 mm) Please observe a minimum safety distance of at least 12" (305 mm) from combustible surfaces located behind the appliance. For zero clearance installation the Miele Backguards will satisfy the required minimum safety distance to combustible surfaces. The Miele Backguard is available in 12" (305 mm) or 20" (508 mm) heights.
  • Page 68 (72 mm) Please observe a minimum safety distance of at least 12" (305 mm) from combustible surfaces located behind the appliance. For zero clearance installation the Miele Backguards will satisfy the required minimum safety distance to combustible surfaces. The Miele Backguard is available in 12" (305 mm) or 20" (508 mm) heights.
  • Page 69: Detailed Views Of Hr 1934-3 Df

    *INSTALLATION* Dual Fuel Range dimensions Detailed views of HR 1934-3 DF Side view of HR 1934-3 DF (x) = Depending on the appliance height adjustment: 5"–6 1/2" (127 mm–165.1 mm)
  • Page 70 *INSTALLATION* Dual Fuel Range dimensions Detailed front side view of HR 1934-3 DF...
  • Page 71 *INSTALLATION* Dual Fuel Range dimensions Front view of HR 1934-3 DF (x) = Depending on the appliance height adjustment: 5"–6 1/2" (127 mm–165.1 mm)
  • Page 72 *INSTALLATION* Dual Fuel Range dimensions Rear view of HR 1934-3 DF E = Electrical connection W = Plumbed water connection G = Gas connection...
  • Page 73: Detailed Views Of Hr 1935-3 Df

    *INSTALLATION* Dual Fuel Range dimensions Detailed views of HR 1935-3 DF Side view of HR 1935-3 DF (x) = Depending on the appliance height adjustment: 5"–6 1/2" (127 mm–165.1 mm)
  • Page 74 *INSTALLATION* Dual Fuel Range dimensions Detailed front side view of HR 1935-3 DF...
  • Page 75 *INSTALLATION* Dual Fuel Range dimensions Front view of HR 1935-3 DF (x) = Depending on the appliance height adjustment: 5"–6 1/2" (127 mm–165.1 mm)
  • Page 76 *INSTALLATION* Dual Fuel Range dimensions Rear view of HR 1935-3 DF E = Electrical connection W = Plumbed water connection G = Gas connection...
  • Page 77: Detailed Views Of Hr 1936-3 Df

    *INSTALLATION* Dual Fuel Range dimensions Detailed views of HR 1936-3 DF Side view of HR 1936-3 DF (x) = Depending on the appliance height adjustment: 5"–6 1/2" (127 mm–165.1 mm)
  • Page 78 *INSTALLATION* Dual Fuel Range dimensions Detailed front side view of HR 1936-3 DF...
  • Page 79 *INSTALLATION* Dual Fuel Range dimensions Front view of HR 1936-3 DF (x) = Depending on the appliance height adjustment: 5"–6 1/2" (127 mm–165.1 mm)
  • Page 80 *INSTALLATION* Dual Fuel Range dimensions Rear view of HR 1936-3 DF E = Electrical connection W = Plumbed water connection G = Gas connection...
  • Page 81: Hr 1954-3 Df, Hr 1955-3 Df, Hr 1956-3 Df

    *INSTALLATION* Dual Fuel Range dimensions HR 1954-3 DF, HR 1955-3 DF, HR 1956-3 DF , ,  The shaded area represents the installation area for the connections: E = Electrical connection, W = Plumbed water connection, G = Gas connection Dimensions Description  13" (330 mm) Maximum depth of upper cabinet ...
  • Page 82 (72 mm) Please observe a minimum safety distance of at least 12" (305 mm) from combustible surfaces located behind the appliance. For zero clearance installation the Miele Backguards will satisfy the required minimum safety distance to combustible surfaces. The Miele Backguard is available in 12" (305 mm) or 20" (508 mm) heights.
  • Page 83 (72 mm) Please observe a minimum safety distance of at least 12" (305 mm) from combustible surfaces located behind the appliance. For zero clearance installation the Miele Backguards will satisfy the required minimum safety distance to combustible surfaces. The Miele Backguard is available in 12" (305 mm) or 20" (508 mm) heights.
  • Page 84: Detailed Views Of Hr 1954-3 Df

    *INSTALLATION* Dual Fuel Range dimensions Detailed views of HR 1954-3 DF Side view of HR 1954-3 DF (x) = Depending on the appliance height adjustment: 4"–5 1/2" (101.6 mm–139.7 mm)
  • Page 85 *INSTALLATION* Dual Fuel Range dimensions Detailed front side view of HR 1954-3 DF...
  • Page 86 *INSTALLATION* Dual Fuel Range dimensions Front view of HR 1954-3 DF (x) = Depending on the appliance height adjustment: 4"–5 1/2" (101.6 mm–139.7 mm)
  • Page 87 *INSTALLATION* Dual Fuel Range dimensions Rear view of HR 1954-3 DF E = Electrical connection W = Plumbed water connection G = Gas connection...
  • Page 88: Detailed Views Of Hr 1955-3 Df

    *INSTALLATION* Dual Fuel Range dimensions Detailed views of HR 1955-3 DF Side view of HR 1955-3 DF (x) = Depending on the appliance height adjustment: 4"–5 1/2" (101.6 mm–139.7 mm)
  • Page 89 *INSTALLATION* Dual Fuel Range dimensions Detailed front side view of HR 1955-3 DF...
  • Page 90 *INSTALLATION* Dual Fuel Range dimensions Front view of HR 1955-3 DF (x) = Depending on the appliance height adjustment: 4"–5 1/2" (101.6 mm–139.7 mm)
  • Page 91 *INSTALLATION* Dual Fuel Range dimensions Rear view of HR 1955-3 DF E = Electrical connection W = Plumbed water connection G = Gas connection...
  • Page 92: Detailed Views Of Hr 1956-3 Df

    *INSTALLATION* Dual Fuel Range dimensions Detailed views of HR 1956-3 DF Side view of HR 1956-3 DF (x) = Depending on the appliance height adjustment: 4"–5 1/2" (101.6 mm–139.7 mm)
  • Page 93 *INSTALLATION* Dual Fuel Range dimensions Detailed front side view of HR 1956-3 DF...
  • Page 94 *INSTALLATION* Dual Fuel Range dimensions Front view of HR 1956-3 DF (x) = Depending on the appliance height adjustment: 4"–5 1/2" (101.6 mm–139.7 mm)
  • Page 95 *INSTALLATION* Dual Fuel Range dimensions Rear view of HR 1956-3 DF E = Electrical connection W = Plumbed water connection G = Gas connection...
  • Page 96: Anti-Tip Device

    *INSTALLATION* Anti-tip device Before installation We recommend removing the oven door before installing the range (see  WARNING “Removing the door” in the Operating Children and adults can tip over the Instructions) and all accessories from range if has not been secured. This the oven interior.
  • Page 97: Checking The Installation Niche

    *INSTALLATION* Anti-tip device Do not carry or lift the range by the oven door handle or the control panel! Checking the installation niche Install the anti-tip device on a surface capable of bearing significant weight, such as a concrete floor, concrete wall, or timber framing. The surface must be flat and level.
  • Page 98 *INSTALLATION* Anti-tip device  Check the floor surface.  Check the installation dimensions.  Check the building drawings for supply wires and pipework. Make sure that you do not damage any wires or pipes when drilling holes to attach the anti-tip device.
  • Page 99: Included Accessories

    *INSTALLATION* Anti-tip device  Mark the wall at the middle of the Included accessories space width. - 1 anti-tip device  Position the notch of the anti-tip - 4 screws device on the wall marking. - 4 plugs The anti-tip device must fit tightly on the floor or the wall.
  • Page 100 *INSTALLATION* Anti-tip device  Using four screws , secure the anti- The locking clamp extends through tip device  to the floor surface with the toe kick panel of the Range suitable bearing capacity, either to housing. It can be pulled out and the floor or wall.
  • Page 101: Disconnecting The Range From The Anti-Tip Device

    *INSTALLATION* Anti-tip device a Opening in the Range housing a Locking clamp b Anti-tip device bolt b Rear adjustment c Locking clamp with slot c Front adjustment The toe kick panel can only be  Align the Range. attached if the locking clamp  has been slid all the way into the ...
  • Page 102: Plumbed Water Connection

    Miele replacement might stagnate. Otherwise, the flavor hose, available from the Miele web of the food could be impaired. store, Miele Customer Service, or from your Miele dealer. The hose...
  • Page 103 Plumbed water connection Connecting the appliance to Connecting to the water supply the water supply line Disconnect the appliance from the power supply before connecting it to Make sure that the supply line is not the water supply. kinked or damaged. Turn off the water supply at the ...
  • Page 104: Electrical Connection

    Miele cannot be held liable for unauthorized work. Installation, maintenance, and repairs must only be carried out by a Miele authorized technician. The connection data (voltage and frequency) on the data tag of the...
  • Page 105 EN 50160 or an equivalent standard. The function and operation of the protective measures provided in the domestic electrical installation and in this Miele product must also be maintained in isolated operation or in operation that is not synchronized with the grid power supply, or these measures must be replaced by equivalent measures in the installation.
  • Page 106: Data Plate

    There you can find the model number, serial number and the connection data (voltage/frequency/maximum rated load) for your Range. Have this information available if you need to contact Miele so that any issues can be rectified as quickly as possible.
  • Page 107: Gas Connection

    The gas connection must be carried The gas connections must be out by a Miele authorized technician arranged in such a way that they are in accordance with local regulations not heated and damaged by the and the following codes: operation of the Range.
  • Page 108 *INSTALLATION* Gas connection The installation must comply with local regulations or, if there are no local regulations, the National Fuel Gas Code, ANSI Z223.1/NFPA 54. The gas pressure may not undershoot or exceed certain values. Make sure that the maximum gas 1/2" NPT pressure upstream of the gas pressure controller does not amount to more than 1/2 psi (3.5 kPA) for...
  • Page 109: Burner Ratings

    *INSTALLATION* Burner ratings Burner ratings HR 1124-3 AG Natural gas NG Btu/hr Simmer burner 12,500 Power burner 19,500 Browning burner 22,000 Bake burner 23,200 Total cooktop output 71,000 20.8 Maximum total output of Range 94,200 27.6 Liquid propane LP Btu/hr Simmer burner 12,500 Power burner 19,500...
  • Page 110: Burner Ratings Hr 1134-3 Ag

    *INSTALLATION* Burner ratings Burner ratings HR 1134-3 AG Natural gas NG Btu/hr Simmer burner 8,000 Power burner, rear 9,000 Power burner, front 19,500 Browning burner 22,000 Bake burner 25,500 Total cooktop output 84,500 24.8 Maximum total output of Range 110,000 32.2 Liquid propane LP Btu/hr Simmer burner 8,000...
  • Page 111: Burner Ratings Hr 1136-3 Ag

    *INSTALLATION* Burner ratings Burner ratings HR 1136-3 AG Natural gas NG Btu/hr Simmer burner 8,000 Power burner, rear 9,000 Power burner, front 19,500 Griddle plate 13,000 Browning burner 22,000 Bake burner 25,500 Total cooktop output 69,000 20.2 Maximum total output of Range 94,500 27.7 Liquid propane LP...
  • Page 112: Burner Ratings Hr 1724-3 Df

    *INSTALLATION* Burner ratings Burner ratings HR 1724-3 DF Natural gas NG Btu/hr Simmer burner 12,500 Power burner 19,500 Total cooktop output 71,000 20.8 Liquid propane LP Btu/hr Simmer burner 12,500 Power burner 19,500 Total cooktop output 71,000 20.8 Burner ratings HR 1924-3 DF Natural gas NG Btu/hr Simmer burner 12,500...
  • Page 113: Burner Ratings Hr 1934-3 Df

    *INSTALLATION* Burner ratings Burner ratings HR 1934-3 DF Natural gas NG Btu/hr Simmer burner 12,500 Power burner, rear 13,600 Power burner, front 19,500 Total cooktop output 98,200 28.8 Liquid propane LP Btu/hr Simmer burner 12,500 Power burner, rear 13,000 Power burner, front 19,500 Total cooktop output 97,000...
  • Page 114: Burner Ratings Hr 1936-3 Df

    *INSTALLATION* Burner ratings Burner ratings HR 1936-3 DF Natural gas NG Btu/hr Simmer burner 12,500 Power burner, rear 13,600 Power burner, front 19,500 Griddle plate 13,000 Total cooktop output 78,100 22.9 Liquid propane LP Btu/hr Simmer burner 12,500 Power burner, rear 13,000 Power burner, front 19,500 Griddle plate...
  • Page 115: Burner Ratings Hr 1954-3 Df

    *INSTALLATION* Burner ratings Burner ratings HR 1954-3 DF Natural gas NG Btu/hr Simmer burner 10,000 Power burner, rear 13,600 Power burner, front 19,500 Total cooktop output 125,200 36.7 Liquid propane LP Btu/hr Simmer burner 10,000 Power burner, rear 13,000 Power burner, front 19,500 Total cooktop output 124,000...
  • Page 116: Burner Ratings Hr 1956-3 Df

    *INSTALLATION* Burner ratings Burner ratings HR 1956-3 DF Natural gas NG Btu/hr Simmer burner 10,000 Power burner, rear 13,600 Power burner, front 19,500 Griddle plate 13,000 Total cooktop output 105,100 30.8 Liquid propane LP Btu/hr Simmer burner 10,000 Power burner, rear 13,000 Power burner, front 19,500 Griddle plate...
  • Page 117: Customer Service

    You can register your product and/or Miele dealer or Miele Customer Service. view the manufacturer´s warranty terms and conditions for Miele appliances and You can book a Miele Service Call vacuum cleaners at online at www.miele.com/service. www.mieleusa.com. Contact information for Miele Customer Service can be found at the end of this document.
  • Page 118: Caring For The Environment

    Consult with local authorities, dealers or Miele in order to dispose of and recycle electrical and electronic appliances. Miele assumes no responsibility for deleting any personal data left on the appliance being disposed.
  • Page 119: Copyrights And Licenses

    This software/these software components are protected by copyright. The copyrights held by Miele and third parties must be respected. In addition, the integrated communication module contains software components which are distributed under open source licensing terms.
  • Page 123 Customer Service. U.S.A. Canada Miele, Inc. Importer Miele Limited National Headquarters 9 Independence Way Headquarters and Miele Centre Princeton, NJ 08540 161 Four Valley Drive www.mieleusa.com Vaughan, ON L4K 4V8 www.miele.ca Customer Support Phone: 888-99-MIELE (64353) Customer Care Centre info@mieleusa.com...
  • Page 124 HR 1421-3 E, HR 1622-3 i, HR 1124-3 AG, HR 1134-3 AG, HR 1135-3 AG, HR 1136-3 AG, HR 1724-3 DF, HR 1924-3 DF, HR 1934-3 DF, HR 1935-3 DF, HR 1936-3 DF, HR 1954-3 DF, HR 1955-3 DF, HR 1956-3 DF en-US, CA M.-Nr. 11 918 390 / 00...

Table of Contents