Table of Contents
Advertisement
Advertisement
Table of Contents

Related Manuals for SOLE F60


Summary of Contents for SOLE F60
- Page 2 T T$ TABLE O F Product Registration ImDortant Safety Instruction_ IB_portant Electrical Information Important Operation Instructions Assembly instructions Folding Instructions Transport Instructions .Operation of Your New Treadmill Programmable Features Using Heart Rate Transmitter General Maintenance Service Checklist - Diaanosis Guide Manufacturer's Limited Warrant_...
- Page 3 SOLE will do all we can to make your ownership experience as pleasant as possible for many years to come. If you have any questions about your new product or questions about the warranty contact SOLE Fitness at 1-866-780-SOLE {7653).
- Page 4 UCTI WARNING - Read all instructions before using this appliance. DANGER -To reduce the risk of electric shock disconnect your SOLE treadmill from the electrical outlet prior to cleaning and/or service work. WARNING -To reduce the risk of burns, fire, electric...
- Page 5 Outlet connected to a permanent ground such as a properly -'" Tab of grounded outlet box cover. "_'Metal Sorew Grounding Whenever the adapter Screw used, it must be held in place by a metal screw. Grounded Outlet Grounding F60 TREADMILL...
- Page 6 If you feel the buttons are not functioning properly with normal pressure contact your SOLE dealer. IMPORTANT TYI UCTI A safety tether cord is provided with this unit and should be used at all times. It is for your safety should you fall or move too far back on the tread-belt.
- Page 7 PREVENTATIVE T Vacuum Under Motor Cover & Lubricate Deck Clean & Inspect Deck Inspect Belt Tracking for Lubrication Date Check Wiring (Every 90 hours (Monthly) Adjust (Every Other (Every Other Month) or sooner if dry) necessary Month) F60 TREADMILL...
-
Page 8: Assembly Pack C Hecklist
Flat Washer (8 pcs) Hex Head Bolt (8 pcs) #95. M5 x 15mm Button Head Socket Bolt (6 pcs) © #93.010 #94.3/8"x l-l/2" Split Washer (4 pcs) Button Head Socket Bolt (4 pcs) #96.5/16"x 3/4" Button Head Socket Bolt (4 pcs) F60 TREADMILL... -
Page 9: Assembly Tools
ASSEMBLY TOOLS #98. Combination M5 Allen Wrench #99. M6 L Allen Wrench & Phillips Head Screw Driver #100. 13mm Wrench F60 TREADMILL... -
Page 10: Assembly
Washers (76). Before attaching the hardware to Step 3, make sure the cables you just connected don't get pinched in between the steel tubing. If they do, this may cause issues that prevent the treadmill from operating properly. F60 TREADMILL... - Page 11 Cable (Middle) (43). Before attaching the hardware to Step 5, make sure the cables you just connected don't get pinched in between the steel tubing. If they do, this may cause issues that prevent the treadmill from operating properly. F60 TREADMILL...
- Page 12 #96. 5/16"x 3/4" Button Head Socket Bolt (4 pcs) Install Handrail Support (9) between Uprights (R-4 & L-5) and use Combination M5 Allen Wrench & Phillips Head Screw Driver (98) to tighten four Button Head Socket Bolts (96). F60 TREADMILL...
-
Page 13: To Fold The Treadmill
Press the tube with your foot at the yellow sticker to release latch. See picture to the right. TRANSPORTATION I T CT The treadmill is equipped with transport wheels that are engaged when the treadmill is folded. After folding simply roll the treadmill away. F60 TREADMILL... -
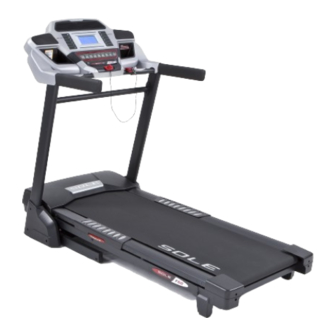
Page 14: Product View And Parts
,DOT M ATRIX DISPLAY CONTROL KEYS AUDIOINJACK (MP3, CD, OR CONTACT HEART SMARTPHONE) RATESENSORS GETTiGSTARTED F60 CONSOLE Power the treadmill on by plugging it into an appropriate wall outlet, then turn on the power switch located at the front of the treadmill below the motor hood. -
Page 15: Incline F Eature
2, 4, 6, 8, 1O, or 12 on the left hand side of console. The Incline Window display will indicate incline position as adjustments are made. F60 TREADMILL... -
Page 16: Message Window
Audio sources include MP3, iPod, portable radio, CD player or even aTV or computer audio signal.There is an audio patch cable included to and also a headphone jack (C_) for private listening. F60 TREADMILL... - Page 17 Stop, Enter and Display keys for 5 seconds; the display will show: Display mode - On. Use any of the Program, Incline or Speed A keys to change the setting to Off then press Enter. F60 TREADMILL...
- Page 18 PROGRAMMA The F60 has ten built-in programs: one Manual program, five preset profiles, two user defined programs (U1 & U2) and two Heart Rate programs (HR1 & HR2). Hill The Hill program simulates going up and down a hill.The workload will steadily increase and then decrease during the program.
- Page 19 Press Start to begin the program.The program will begin with a 3 minute warm-up. If you want to bypass this and go directly to the beginning of the program, press Start again. F60 TREADMILL...
-
Page 20: User Programs
Repeat the above process to program all segments for incline. Press the Start button to begin the workout and also save the program to memory. F60 TREADMILL... -
Page 21: Heart R Ate P Rograms
80% or 60%, respectively, of your MHR on a schedule approved by your physician. Consult your physician before participating in any exercise program. F60 TREADMILL... - Page 22 In this condition, your pace will feel harder. Again, this will show up in your RPE and you will train at the proper level for that day. F60 TREADMILL...
-
Page 23: Erratic Operation
Normally the transmitter will be oriented so the SOLE logo is right side up. The antenna that picks up your heart rate is very sensitive. If there is an outside noise source, turning whole machine 90 degrees may de-tune the interference. - Page 24 HR needs to go and what kind of physical shape you are in. People who are more fit will take longer to reach the target. F60 TREADMILL...
-
Page 25: Belt A Djustments
- that connects the motor to the front roller. If that belt is loose it feels similar to the walking belt being loose.Tightening the motor belt should be done by a trained service person. F60 TREADMILL... - Page 26 Proper belt tracking is an owner responsibility common with all treadmills. ATTENTION: DAMAGE TO THE RUNNING BELT RESULTING FROM IMPROPER TRACKING / TENSION ADJUSTMENTS IS NOT COVERED UNDER THE SOLE WARRANTY. F60 TREADMILL...
-
Page 27: Belt/Deck Lubrication
Drag the garment the length of the entire belt 1-2 times. Remove the garment. Do not lubricate with anything other than Sole Fitness approved lubricant. Your treadmill comes with one tube of"Lube"and extra tubes can be ordered directly from Sole Fitness or your authorized Sole Fitness dealer.You... - Page 28 AC household wall outlet. Household circuit breaker may be tripped. Treadmill defect. Contact your SOLE dealer. Tread-belt does not stay centered The user may be walking while favoring or putting more weight on either the left or right foot. If this...
-
Page 29: Calibration Procedure
When the child lock is enabled, the console will not allow the keypad to operate unless you press and hold the Start and Enter buttons for 3 seconds to unlock the console. Exit F60 TREADMILL... -
Page 30: Treadmill Warranty
SOLE Fitness P.O. Box 2037 Jonesboro, AR 72402-2037 Product features or specifications as described or illustrated are subject to change without notice. All warranties are made by SOLE. F60 TREADMILL... - Page 31 (or replacement repair proves impossible). The drive motor is warranted for lifetime from the date of purchase. Please see full Sole warranty page in the owner's manual for complete warranty details. This warranty does not apply when the Treadmill Exerciser is used commercially or for rental purposes.
Need help?
Do you have a question about the F60 and is the answer not in the manual?
Questions and answers