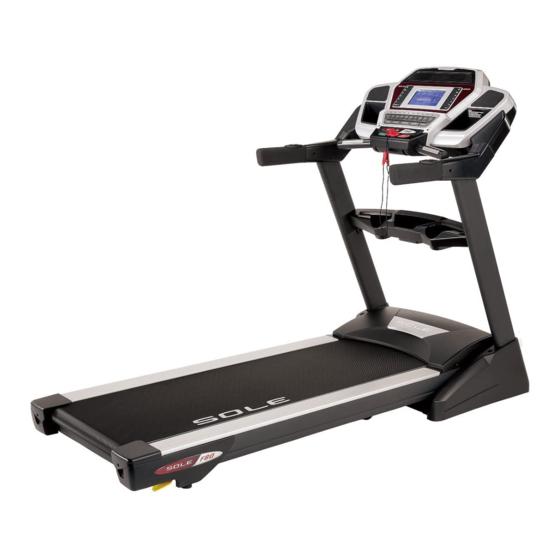
SOLE F80 Owner's Manual
Hide thumbs
Also See for F80:
- Owner's manual (39 pages) ,
- Owner's manual (23 pages) ,
- Owner's manual (28 pages)

Related Manuals for SOLE F80


Summary of Contents for SOLE F80
- Page 1 F80 / F83 / F85 TREADMILL OWNER’S MANUAL PLEASE CAREFULLY READ THIS ENTIRE MANUAL BEFORE OPERATING YOUR NEW TREADMILL...
-
Page 2: Table Of Contents
Folding Instructions Transport Instructions Operation of Your New Treadmill Programmable Features General Maintenance Service Checklist - Diagnosis Guide EXPLODED VIEW DIAGRAM/PARTS LIST F80 EXPLODED VIEW DIAGRAM/PARTS LIST F83 EXPLODED VIEW DIAGRAM/PARTS LIST F85 Manufacturer’s Limited Warranty Sears Warranty Page F80/F83/F85- Ver.A... -
Page 3: Product Registration
Please take a moment at this time to record below the name of the dealer, their telephone number, and the date of purchase for easy contact in the future. We appreciate your con dence in SOLE and we will always remember that you are the reason that we are in business. Please complete and mail your registration card today and enjoy your new treadmill. -
Page 4: Important Safety Instructions
IMPORTANT SAFETY INSTRUCTIONS WARNING - Read all instructions before using this appliance. DANGER - To reduce the risk of electric shock disconnect your SOLE treadmill from the electrical outlet prior to cleaning and/or service work. WARNING the treadmill plugged into the circuit. -
Page 5: Important Electrical Information
Whenever the adapter is used, it must be held in place by a metal screw. F80 / F83 / F85 TREADMILL... -
Page 6: Important Operation Instructions
These distractions may cause you to lose balance or stray from walking in the center of the belt; which may result in serious injury. NEVER mount or dismount the treadmill while the belt is moving. SOLE treadmills start at a ... - Page 7 F80 / F83 / F85 TREADMILL...
- Page 8 F80 / F83 / F85 ASSEMBLY PACK CHECKLIST HARDWARE STEP 2 #128. Speed Nut Clips (6 pcs) HARDWARE STEP 3 #130. 5/16” x 1/2” Button Head Socket Bolt (8 pcs) HARDWARE STEP 5 #113. Ø 10 mm #133. 3/8” x 1-3/4”...
- Page 9 Button Head Bolt (4 pcs) HARDWARE STEP 8 #120. 5 x 16mm Tapping Screw (6 pcs) ASSEMBLY TOOLS #131. Combination M5 Allen Wrench #132. M6 Allen Wrench & Phillips Head Screw Driver #30. Lubricant F80 / F83 / F85 TREADMILL...
-
Page 10: Assembly Instructions
F80 / F83 / F85 ASSEMBLY INSTRUCTIONS ASSEMBLY STEP 1 Remove the treadmill from the carton and position it on a smooth, level belt until you have removed the plastic wrap and Styrofoam from beneath the unit. Turning the unit on its side after removing the belt may cause... - Page 11 Before attaching the hardware to Step 5, make sure the cables you just connected don’t get pinched in between the steel tubing. If they do, this may cause issues that prevent the treadmill from operating properly. F80 / F83 / F85 TREADMILL...
- Page 12 ASSEMBLY STEP 5 HARDWARE STEP 5 #133. 3/8”x 1-3/4” Button Head Socket Bolts (4 pcs) #113. Ø 10mm Split Washers (4 pcs) Attach the Console Assembly (52) onto the Upright Tubes (4 & 5) and attach with four Button Head Socket Bolts (133) and four Split Washers (113). Tighten using the M6 Allen Wrench (132).
- Page 13 Tapping Screws (6 pcs) Attach the Console mast covers (62 & 63) to the Frame Base (2) with six Tapping Screws (120). Tighten screws using the Combination M5 Allen Wrench & Phillips Head Screw Driver (131). F80 / F83 / F85 TREADMILL...
-
Page 14: Folding Instructions
FOLDING INSTRUCTIONS Do not attempt to move the unit unless it is in the folded and locked position. Be sure the power cord is secured to avoid possible damage. Use both handrails to maneuver the unit to the desired position. TO FOLD THE TREADMILL ... -
Page 15: Operation Of Your New Treadmill
F83 / 85 CONSOLE COOLING FANS SPEED QUICK KEYS INCLINE QUICK KEYS SPEAKER SPEAKER FAN POWER SWITCH DOT MATRIX DISPLAY DISPLAY BUTTON CONTROL KEYS AUDIO IN JACK HEADPHONE JACK (MP3, CD, OR SMARTPHONE) CONTACT HEART RATE SENSORS F80 / F83 / F85 TREADMILL... -
Page 16: Getting Started
GETTING STARTED F80 / F83 / F85 CONSOLES Power the treadmill on by plugging it into an appropriate wall outlet, then turn on the power switch located at the front of the treadmill below the motor hood. Ensure that the Safety Key is installed, as the treadmill will not power on without it (see assembly step 7 for reference). -
Page 17: Incline Feature
You may also choose a more rapid increase / decrease by selecting desired key, 1, 3, 6, 9, 12, 15, on left hand side of console (incline). The incline window display will indicate incline position as adjustments are made. F80 / F83 / F85 TREADMILL... - Page 18 DOT MATRIX CENTER DISPLAY Twenty columns of dots, 8 high for F80 or 24 columns of dots, 10 high for F83/85 indicate each segment of a workout. The dots are only to show an approximate level (speed/incline) only an approximate percent to compare levels of intensity.
- Page 19 **ATTENTION** mode, for normal operation, press and hold the Stop, Enter and Display keys for 5 seconds; the display will show: Display mode - On. Use the Up arrow or Fast then press Enter. F80 / F83 / F85 TREADMILL...
-
Page 20: Programmable Features
U1 & U2) and two Heart Rate Control programs (H1 & H2). PRESET PROGRAMS Hill The Hill program simulates going up and down a hill. The speed and incline will steadily increase and then decrease during the program. F80 SPEED F80 INCLINE F83/85 SPEED F83/85 INCLINE Fat Burn The Fat Burn program is designed, as the name implies, to maximize the burning of fat. - Page 21 6. Press Start to begin the program. The program will begin with a 3 minute warm-up. If you want to bypass this and go directly to the beginning of the program, press Start again. F80 / F83 / F85 TREADMILL...
- Page 22 USER PROGRAMS 1. Select User 1 or User 2 via the Program keys then press Enter. Note that the dot matrix display portion will have a single row of dots at the bottom (Unless there is a previously stored program). If there is a program stored under the button that is pressed, it will be retrieved.
-
Page 23: Heart Rate Programs
60%, respectively, of your MHR on a schedule approved by your physician. Consult your physician before participating in any exercise program. With all SOLE Heart Rate Control treadmills you may use the heart rate monitor feature without using the Heart Rate Control program. This function can be used during manual mode controls the incline while you control the speed. - Page 24 RATE OF PERCEIVED EXERTION Heart rate is important but listening to your body also has a lot of advantages. There are more variables involved in how hard you should workout than just heart rate. Your stress level, physical health, emotional health, temperature, humidity, the time of day, the last time you ate and what you ate, all contribute to the intensity at which you should workout.
-
Page 25: Using Heart Rate Transmitter
Perimeter fence for a pet. Some people have problems with the transmitter picking up a signal from their skin. If you have problems try wearing the transmitter upside down. Normally the transmitter will be oriented so the SOLE logo is right side up. - Page 26 HEART RATE CONTROL PROGRAMMING CAUTION! Heart Rate Control programs are intended for wireless transmitter chest strap. Do not use Pulse Grip bar for Heart Rate Control. You must receive a strong/steady value in the heart rate window (See Using Heart Rate Transmitter section for instructions on how to use). The HR1 program has a default level that is 60% of your projected heart rate maximum.
-
Page 27: General Maintenance
- located under the motor cover - that connects the motor to the front roller. If that belt is loose it feels similar to the walking belt being loose. Tightening the motor belt should be done by a trained service person. F80 / F83 / F85 TREADMILL... - Page 28 Adjustments will become less of a maintenance concern as the belt is used. Proper belt tracking is an owner responsibility common with all treadmills. ATTENTION: DAMAGE TO THE RUNNING BELT RESULTING FROM IMPROPER TRACKING / TENSION ADJUSTMENTS IS NOT COVERED UNDER THE SOLE WARRANTY. F83 / F85 TREADMILL...
- Page 29 Do not lubricate with anything other than SOLE approved lubricant. Your treadmill comes with one tube of lubricant and extra tubes can be ordered directly from SOLE. There are commercially available lube kits, but the only one currently approved by SOLE is Lube-N-Walk.
-
Page 30: Service Checklist - Diagnosis Guide
16 gauge minimum. Low household voltage. Contact an electrician or your SOLE dealer. A minimum of 110 volt AC current is required. Tread-belt stops quickly/suddenly High belt/deck friction. See General Maintenance section on lubrication. - Page 31 Security - Allows you to lock the keypad so no unauthorized use of the machine is allowed. When the child lock is enabled, the console will not allow the keypad to operate unless you press and hold the Start and Enter buttons for 3 seconds to unlock the console. Exit F80 / F83 / F85 TREADMILL...
- Page 32 EXPLODED VIEW DIAGRAM F80 F80 / F83 / F85 TREADMILL...
- Page 33 Handpulse End Cap 1018039-5 1018040 1018041 Breaker Power Socket 1018042 1018043 On/Off Switch 1018044 Power Cord 1018045 n i t 1018046 n i t t i h n i t 1018047 1018048 800m/m_Computer Cable (Upper/Lower) 1018049 F80 / F83 / F85 TREADMILL...
- Page 34 LCD Transparent Piece 1018052-43 52~43 7.5" Water-resist Rubber 1018053 Motor Top Cover 300m/m_Speed Adjustment Switch W/Cable 1018054 1018055 300m/m_Incline Adjustment Switch W/Cable 1018056 Cushion 1018057 Ø × 1018058 Ø62 × Ø32 × 30L_Transportation Wheel F80 / F83 / F85 TREADMILL...
- Page 35 10180105 Ø " 8 × Ø × 10180106 Ø " 8 × Ø × 10180107 Ø × Ø × 10180108 Ø " 6 × Ø × t a l 10180109 Ø × Ø × F80 / F83 / F85 TREADMILL...
- Page 36 Beverage Holder 10180151 " 6 × _ " t l o 10180152 M5 × 1.5T_Split Washer 10180153 Logo Cover (R) 10180154 Logo Cover (L) 10180157 Rear Roller Cover (R) 10180158 Rear Roller Cover (L) F80 / F83 / F85 TREADMILL...
- Page 37 EXPLODED VIEW DIAGRAM F83 F80 / F83 / F85 TREADMILL...
- Page 38 100mm × 764 × 764_Connecting Wire (Black) 1018346 300mm × 764 × 764_Connecting Wire (White) 1018347 300mm × 764 × 764_Connecting Wire (Black) 1018348 800m/m_Computer Cable (Upper) 1018349 1150m/m_Computer Cable (Lower) 1018350 1200m/m_Computer Cable (Middle) F80 / F83 / F85 TREADMILL...
- Page 39 1018362 Frame Base Cover (R) 1018363 Left Handgrip Side Cap (L) 1018368 Left Handgrip Side Cap (R) 1018366 Right Handgrip Side Cap (L) 1018367 Right Handgrip Side Cap (R) 1018368 Rear Adjustment Base (L) F80 / F83 / F85 TREADMILL...
- Page 40 3.5 × 12 m/m_Sheet Metal Screw (8pcs Optional) 10183124 3 × 10 m/m_Tapping Screw 10183125 4 × 50m/m_Sheet Metal Screw 10183126 3.5 × 16 m/m_Tapping Screw 10183127 3 × 10 m/m_Sheet Metal Screw 10183128 M5_Speed Nut Clip F80 / F83 / F85 TREADMILL...
- Page 41 Drink Bottle (Optional) 10183150 Beverage Holder 10183151 5/16" × 3/4"_Button Head Socket Bolt 10183152 M5_Split Washer 10183153 Logo Cover (R) 10183154 Logo Cover (L) 10183157 Rear Roller Cover (R) 10183158 Rear Roller Cover (L) F80 / F83 / F85 TREADMILL...
- Page 42 EXPLODED VIEW DIAGRAM F85 F80 / F83 / F85 TREADMILL...
-
Page 43: Exploded View Diagram/Parts List F85
1018539-5 Handpulse End Cap 1018540 1200m/m_Sensor W/Cable 1018541 Breaker 1018542 Power Socket 1018543 On/Off Switch 1018544 Power Cord 1018545 100m/m_Connecting Wire (Black) 1018546 300m/m_Connecting Wire (White) 1018547 300m/m_Connecting Wire (Black) 1018548 800m/m_Computer Cable (Upper/Lower) F80 / F83 / F85 TREADMILL... - Page 44 1018561 Frame Base Cover (L) 1018562 Frame Base Cover (R) 1018563 Left Handgrip Side Cap (L) 1018565 Left Handgrip Side Cap (R) 1018566 Right Handgrip Side Cap (L) 1018567 Right Handgrip Side Cap (R) F80 / F83 / F85 TREADMILL...
- Page 45 10185122 3.5 × 12 m/m_Sheet Metal Screw (8pcs Optional) 10185124 3 × 10 m/m_Tapping Screw 10185125 4 × 50m/m_Sheet Metal Screw 10185126 3.5 × 16 m/m_Tapping Screw 10185127 3 × 10 m/m_Sheet Metal Screw F80 / F83 / F85 TREADMILL...
- Page 46 Drink Bottle (Optional) 10185150 Beverage Holder 10185151 5/16" × 3/4"_Button Head Socket Bolt 10185152 M5_Split Washer 10185153 Logo Cover (R) 10185154 Logo Cover (L) 10185155 Rear Roller Cover (L) 10185156 Rear Roller Cover (R) F80 / F83 / F85 TREADMILL...
-
Page 47: Manufacturer's Limited Warranty
TREADMILL WARRANTY E ective August 1, 2012 Maurice Pinco s Canada warrants all its Sole treadmills’ parts, for a period of time listed below, from the date of retail sale, as determined by sale receipt, or in the absence of a receipt eighteen (18) months from the original factory shipping date. Maurice Pinco s Canada’s responsibilities include providing new or remanufactured parts, at Maurice Pinco s Canada’s option, and technical support to our independent dealers and servicing organizations.
Need help?
Do you have a question about the F80 and is the answer not in the manual?
Questions and answers
What is code 11580493 on my SOLE F80
How do I turn off the speakers
The SOLE F80 treadmill does not have a specific option mentioned to turn off the built-in speakers directly. However, you can avoid sound by either unplugging the audio source from the Audio Input Jack or using the headphone jack for private listening, which disables the speakers.
This answer is automatically generated