
Subscribe to Our Youtube Channel
Related Manuals for Magic Chef CGB3740ADH


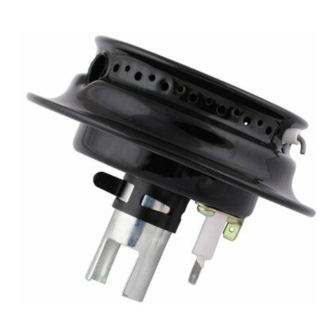
Summary of Contents for Magic Chef CGB3740ADH
- Page 1 Owner's Guide Self-Cleaning with ElectronicControl 8113P193-60 FOR CUSTOMER ASSISTANCE CALL 1-800-688-1120 (06-99-01)
-
Page 2: What To Do If You Smell Gas
Read all instructions before using this appliance. Thank You... for purchasing our cooking WARNING: If the information in this appliance. To help you obtain the maximum in cooking manual is not followed exactly, a fire or satisfaction, we offer these suggestions: explosion may result causing property 1[7 Read this manual before using the appliance. - Page 3 Turn off appliance and ventilating hood to avoid spreading The following instructions are based on safety the flame. Extinguish flame then turn on hood to remove considerations and must be strictly followed to eliminate smoke and odor. the potential risks of fire, electric shock, or personal injury. Have your appliance installed and properly grounded by a Use dry chemical or foam-type extinguisher or baking soda to smother fire or flame•...
- Page 4 Avoid touching oven vent area while oven is on and for NEVER heat an unopened container on the surface several minutes after oven is turned off. Some parts of the burner or in the oven. Pressure build-up may cause vent and surrounding area become hot enough to cause container to burst resulting in serious personal injury or burns.
- Page 5 iii)i)i)i)i)i)iMiii)i)i iiii)i)i)i)!)ilR)i)i il)iiiiiiil _:; ..ES'" _i_'_::i '':: _'_'_"i ''_" "i$"" "$'_":8""' " '"" " ":" i:i_'.)_:i'.i'.iS_$_S_¢i$_$i'.iSi$i'.!'.iS! $i:i$i$i$i$i:i$! $ !:!@;$i_:!:!$ !>::!:!:!:_i:_ i_$!:!:!$i$!:E Turn off all controls and wait for appliance parts to cool Use pans with flat bottoms and handles that are easily grasped and stay cool.
- Page 6 Press or press Press this pad and hold these to cancel all pads to enter operations time, oven except the TIMER. The temperature or Oven on to select HI or time of day will LO broil. reappear in the Preheat display.
- Page 7 ....i i!i!ii iriiiiiiii ii i !! !! i!i iiiii!!ii!!!!ii!ili!iiiii!iiiii!i!i!!ii!i 1. Press TIMER pad. The Control Lock-Out feature prevents the oven from being turned on. 2. Press or press and hold A or • pad until correct To activate: time appears in display, then STOP TIME and 1.
- Page 8 To prevent damage to the cooktop or pan, never operate "Yourrange is equipped with pilotless ignition. Be sure all surface controls are set in the OFF position prior to surface burner without a pan in place, never allow a pan to boil dry and never operate a surface burner on HIGH supplying gas to the appliance.
- Page 9 +++P+ +++++++ + ++++++i+ iiii++++ P++++ :_:_:_:_:_::::::_:_:_::::_::>:_:::::::_:_:_;:_;:::::::;:::::_:_:_:_:;::_`:::_::::;:_5:_:_::_:_::::_:_:::_:_ _ ,+, :; ,-;- :;_:_- :_::;,,_. .,_,+ .€+:,. -.:. ¢.- _ ; _;, :,.,,, _`_:_:::_:_:_:_;:_::::::;::_:;;::::;::::::_:::;_:_::_:::::;::::_:::::::::::::_::::_:_::::_:;_:_:_t_::::_::_` ,_;, Use a HIGH flame setting to quickly bring liquids to a boil A properly adjusted burner with clean ports will light within a few seconds.
- Page 10 Under n ocircumstances arethesurface burner The porcelain on the burner is durable but over time and assemblies t obetakenapart f orcleaning. Thesurface with use may gradually lose its shine. burner assembly c anberemoved t ocleantheburner box The sealed surface burners are secured to the cooktop area.
- Page 11 Ii i iiiiiiiii iiil iiliii iiiiiiiiiii!iiii!ii iii!i i iii iN iiiiii ii i ! i ii ili!i!iii!iiiiii i!ii ii i ii I Cookware which extends more than two inches beyond The pan material determines how evenly and quickly heat the grate, rests on two grates, or touches the cooktop may is conducted from the heat source to the food.
- Page 12 _,,...,,,,._.,.._, .._``'``_'```_`_"_`-_";`_`_`_-_`_`_`_;`--_`_`_`,_```LJ_`````_`_!!_!LU!`)__```` ,..,,..,..,,,,,. ,.,. ,.._,..,.., ..,,.._.._...,,.,......L,.:....,1,,..'L J ................ _J',',. ,,., _, .,..,. iii liE iii i!iii i!ii i i i @ !! ! i !! !! !! i!!!! j!!! i!i!i !!iii! ! i i i i!E i i !i Be sure oven control is set in the OFF position prior to •...
- Page 13 1.PressBAKE pad. BAKE -"-_tPi_ • BAKEindicator o ntheBAKEpad INDICATOR _ o,_l,^ will light. LIGHT • 000 will light in display. 2. Press or press and hold A or V pad to select oven temperature. • 350 ° will light when either pad is pressed. •...
- Page 14 ii_iiiiiiiii :':::;:_:;_;:_ "``:'_:::::_`:_;_;_:_:_*:':_*_:_*:_:.:*_:;:_;_:;_;_:;:;_:_:;:`:':;!_:_:;:::_:_:_":`:;_`_:_*_:_"_:_":`:_:_:_:*:_:_*:`:`:*:":`:*:`:iiii!ii iiiiiiiiiiiiiiiiiii_iiii!iiiiiiiUiiiiiiii__iii_i!ii_iii!_iiiiiii_._:_":':_":_:.:_:_:':`_:_:':_:_:'_:¢_:_:`:_:`:_:_`:_:`:_:_:_:_.':_*:':`:_: _':':_:_':_:':'_:_'_:"_ _:_"__:_.:`:.:_:_;.:.:_;_:_:::_:_:_:::::_:;_:_:_:_::::_:::_:_::_:_:::_:_:_:_:_:_:::_:_:::_:_:_:::_:_:_:._ iiiiii iiiiiiiiiiiii!iiiii iii:_':::_::'_;iiii ii i iii_:_::::::::::;:;:;:_;:;:;5:;:;:;:::::_;_:;:;;::_;:_:_;;::_;;::_ii iiiiiii iiiiiiii iiii ! iiHii iiiiiiiiii!iiii i! ii!!i!ii ii !ii! ! i!! !!i!iiii!iiii i ii ii Preheating is necessary for baking. Allow about 8 to 15 Cool(ware material plays an important part in baking minutes for the oven to preheat.
- Page 15 COMMON BAKING PROBLEMS AND WHY THEY HAPPEN • Oven not preheated. = Pans touching each other or oven walls. • Incorrect rack Cakes, cookies, biscuits too brown on bottom. position. • Incorrect use of aluminum foil. • Placed 2 cookie sheets on one rack. • Used glass, dark, stained warped or dull finish metal pans.
- Page 16 '5'i'_,'_...v ' '",_,._ ¢..:._,., • ,_-.'.. _. - _.:--:. - _:_ - -:_- - .:- _." ;_." ".:'-• • -. _ - ._ '-_._ - _"_. "__, _,'_ _._--.'._;: • -.. -,'_ ; --;._- . .'- - ..:.. -.._- -:-;. - :.:..'_:,:,:.:,:.:.:.:.:.:,:.Y.,:,:.:,:.:,_:,',._ -;._-.•...
- Page 17 lii i !i!iiiii iiiiiiiiiiii!i ii!iii!ililili!iii!ii!iliiiiiil i!ii! iii!i !ii i!i!i iiiiiii! iiiHiiiii iiiiii!iill !ii!ii!i!iiiiiiiiii The clock must be functioning and set at the correct time of day for this feature to operate properly. The Automatic Oven Timer Control is used to turn the oven on and off at a preset time of day.
- Page 18 o" ii_ii _iiiiii _ii _ i!iiiiiiiii _iii iiiiiiiiiiii_i_iiiii _ii__ii__ii _iiiiiiiiiiiiiii!ii _i iiiiiiiiiiiiiiiiiiiiiiiiii _i i_iili iii _ ! _i!_i_@i_!_ i_i_iiiiiiiiii iiiiili iiiii!iiiiiiiiiiiii!il 1. Press BROIL pad. INDICATOR • BROIL indicator on the BROIL pad will light. LIGHT BROIL _ • 000 will light in display. 2.
- Page 19 liiii!!iiiiiii iiiiii ii!iiiiiiiiiiiiiiiiiiiiii!iiiiiiiiiiiiiiiiii!iiiiiii iii iiiii iiiiii iiiiiiiiiiiiiiiiiii !iiiiiiiiiiiiiii iiiiiiii i iiiiiiiiiiiiiiiiiiii iiiiii iiiiiiiiiiiiiii the broiler insert with aluminum foil as this prevents fat Broiling is a method of cooking tender meats by direct from draining into pan below. heat. The cooking time is determined by the distance between the meat and the broil burner, the desired degree Trim excess fat and slash remaining fat to help keep meat of doneness and the thickness of the meat.
- Page 20 II I 1. Move door lock lever to locked position. 2. Press SELF-CLEAN pad. • CLEAN indicator on the SELF-CLEAN pad will flash. • 3:00 will light in display. • tf door is not locked, "dr" will appear in display. Lock door.
- Page 21 liiiiiiiiiiiiiiiiiiiiiiiiil ii!iii!iiiil !!iiilii !il ii i ii!iiiiiiiiiiiiiiiiiiiii!i!iiiii [ iiii iii ii!i!i!iii!ii !i! iliii! i !i! !!! iii! iiiil iii i iiiiiii ii! DURING CLEAN CYCLE AFTER CLEAN CYCLE BEFORE CLEAN CYCLE • The LOCK indicator will turn off As oven heats, the LOCK indicator •...
-
Page 22: Cleaning Chart
Read andcarefully followthemanufacturer's instructions. Cleaning Puff, Scrunge Scrub Sponges, or Scotch-Brite No Scratch, Cookware or Kitchen Sponge. Test a small i nconspicuous areausingaverylight Abrasive Scouring Pads- S.O.S., Brillo Steel Wool pressure toseeif thesurfacemayscratch ordiscolor. Thisis particularly i mportant forporcelain e namel, highly Soap, Scotch-Brite Pads. - Page 23 ..iii !! ii iiiii iiii i!iiii!!! ii ii i !i i ii!!iiiiii i i iiiiiiii!ii!!ii Do not cover drip bowls with aluminum foil. • Soap and water Drip bowls, chrome • Plastic scouring NOTE: Bowls can permanently discolor over time, if exposed to excessive (select models) pads heat, or if soil is allowed to bake on.
- Page 24 Oven interior Porcelain enamel is acid resistant, not acid proof. Therefore, when cool, wipe up sugary or acid spills (milk, fruit, tomato, etc.) as they occur. See pages 19-20 for self-clean oven. Oven racks • Soap and water 1. Clean with soapy water. 2.
- Page 25 _i:_!:`::_!:`::!:i:!_:_:_:_:_:_:_::!_:_;`:;_;!::`_;_:_:_$_;`:!_:_i:!:_:!:!:_i:i:!:!:!_i_!_!:_!_!:_!:_::`_1:_:!_:_!_!:!:!:!!_::_:_:_:``.:_:_:_:!:_:_ " ;i:_ " _.: _ .."_: " ..:: `_:_:_!:_:_!:_:.;:_._:_1_:_:_:_:_;_:_:_;_:::_::_:_:!_:_:_:!:_:!_:_;_:_.:_;;_;:_;_:_:_:_;_:_:_:_:i:_:_:_:_:_i:_:i_::i:_:w Burner grates must be properly The cooktop featuring conventional surface burners has a positioned before cooking. Burner grates lift-up cooktop for easy cleaning of the burner box area. are durable but may gradually lose their To raise the "lift-up"...
- Page 26 lii il i iill i!i ! iii !iiii!!iiii!i i!ii iii! ii!iiii iiiiil iU ii!iiiiiii!iii iiil ii i iiiiiiiiiiii iii!!ili!i! ii i iiiiii i!i!iiiii i:!_!ii_i:_È_:::_:_:_:_::_:::::_:_i_i_:_:_:_:_:i:i:_:_:_:_:_:_:_:i:i:_:_:!i_i_:_i!i!i_!i!:_:!_:_:_:_:i:i:i:_:i:i:_i_:_i_i!_ _i_i ii: i:_:_:i _::_::_!_:_:_::_:_::_:_:_;::_:::_:::::_:_::_::_:_:::::_:_;_:_:_:_;:_:_:_::::_:::_::_:_:r:_:_::_:_ i L:_:_:_::::;::_:::::::::_:_:_:::_: _i_!_i!!ii_iii_i!iiii_!Jii_i_i!!!ii_!Jii!ii!ii_i!iiiiiii!iiii_!i_!i!_i_i_iii_!ii_!!_ii!_!_ii It is important that air can circulate freely within the oven The two oven racks are designed with a safety lock-stop and around the food.
- Page 27 i i iiiiiiiiiiiiiiiiiiii i!iiiiiiiiii iiii iiiiiiiii! i iiiii ii i iiiiiiiiiiiil!iiiiiiiiiiiilkilili iiiii!!iii!iiiiiiiiiiiii!iiiiii To protect the oven door window: Do not place excessive weight on an open oven door or stand on an open oven door as, in some cases, it could 1.
- Page 28 iil;iiiii]!!ii!i!i!!iii i ii iiiiii ! !iip!iiiiii iiiii iiiiiii!iii!iii!! ii!ij!iiiiii ii i!Jiiii!iiiiiii i !!iiii!i iii!iii i The storage drawer at the bottom of the range is safe and Protect oven bottom against excessive spillovers especially convenient for storing metal and glass cookware. DO acid or sugary spillovers as they may discolor the porcelain.
- Page 29 Appliances which require electrical power are equipped with a three-prong grounding plug which Follow these procedures to remove appliance for cleaning must be plugged directly into a properly grounded or servicing: three-hole 120 volt electrical outlet. 1. Shut-off gas supply to appliance. 2.
- Page 30 iliiiiiiii!iliiiiii iiiiiiliiiiiii!i! iiili!iliiiiiiiiiiiiiiiiiiiliii iii!iiiii!iii!iiliiiiiiiiiii iiiii!! connect power, check circuit Surface burner fails to light a. power supply not connected breaker or fuse box air in the gas line b. see page 7 for instructions on bleeding air from the gas line clogged burner port(s) c.
- Page 31 Baking results not a. oven not preheated a. preheat oven 8 to 15 minutes satisfactory b. incorrect rack position b. see page 25 c. incorrect use of aluminum foil • food takes too long or c. see page 13 cooks too fast d.
- Page 32 WHAT IS NOT COVERED BY THESE WARRANTIES: HOW TO RECEIVE WARRANTY SERVICE: 1. Conditions and damages resulting from any of the 1. For authorized service, contact the dealer from whom following: you purchased the appliance, or call Maytag Appliances Sales Company at: 1-800-688-1120. a.
Need help?
Do you have a question about the CGB3740ADH and is the answer not in the manual?
Questions and answers