Table of Contents
Advertisement
Owner's Guide
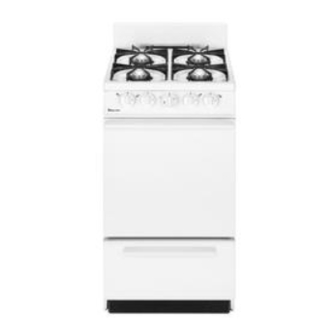
20-inch
Manual Clean
Gas Range
f
TABLE OF CONTENTS
IMPORTANT SAFETY INSTRUCTIONS
.........
2-4
• Cooktop
..................................
11
ABOUT YOUR COOKTOP
.....................
5-6
• Ignition system .............................
5
• Surface burners
..........................
5-6
• Cookware
.................................
6
ABOUT YOUR OVEN
........................
7-8
• Aluminum foil usage .........................
7
• Preheating
.................................
7
• Oven control .............................
7
• Cooking tips
...............................
8
CLEANING CHART
..........................
9-10
ABOUT YOUR RANGE ......................
11-13
• Grates
...................................
11
• Surface burners
...........................
11
• Oven door ................................
12
• Oven bottom ..............................
12
• Broiler drawer .............................
12
• Oven rack ................................
13
• Leveling legs ..............................
13
ABOUT SERVICE ...........................
14-15
• Troubleshooting
chart ...................
14-15
• How to remove range for cleaning and
servicing ................................
15
• Electrical connection
.......................
15
• Ignition system
............................
11
WARRANTY
..................................
16
FOR CUSTOMER
ASSISTANCE
CALL
1-800-688-9900
USA
1-800-688-2002
Canada
81 13P705=60
A/01/08
Advertisement
Table of Contents

Related Manuals for Magic Chef CPL1100BDW


Summary of Contents for Magic Chef CPL1100BDW
- Page 1 Owner's Guide 20-inch Manual Clean Gas Range TABLE OF CONTENTS IMPORTANT SAFETY INSTRUCTIONS ..• Cooktop ........• Grates ........ABOUT YOUR COOKTOP ..... • Surface burners ......• Ignition system ......• Oven door ........ • Surface burners ......•...
- Page 2 Thank You for purchasing our cooking WARNING: If the information in this appliance. To help you obtain the maximum in cooking manual is not followed exactly, a fire or satisfaction, we offer these suggestions: explosion may result causing property Read this manual before using the appliance. damage, personal injury or death.
- Page 3 Do not touch a hot oven light bulb with a damp cloth as the bulb could break. Should the bulb break, disconnect power Donotleave children alone or unsupervised near t he to the appliance before removing bulb to avoid electrical shock.
- Page 4 Onlycertain typesof glass, g lass/ceramic, ceramic, or Usecaution whenwearing garments m ade offlammable material to avoid clothing glazed utensils aresuitable forcooktop or ovenusage fires.Loose fittingor long without b reaking duetothesudden change in hanging-sleeved apparel temperature. should notbewornwhile Thisappliance hasbeentested forsafeperformance using cooking.
- Page 5 CAUTION: If the flame should go out during a cooking Your cooktop will feature either pilot ignition or pilotless operation, turn the burner off. If gas has accumulated and ignition. If the gas supply to the range is turned off, be sure all controls are set in the OFF position before a strong gas odor is detected, open a window and wait 5 re-supplying gas to the appliance.
- Page 6 Usea HIGH flamesetting toquickly bringliquids toa boil Cookware, including canning equipment, which extends orto begina cooking or canning operation. Thenreduce more than two inches beyond the grate, rests on two toa lower setting to continue cooking. N everleavefood grates, or touches the cooktop will cause a build up of unattended whenusinga HIGH flame setting.
- Page 7 • Donotcoveranentireovenrackor ovenbottom with 1.When cool, position rack aluminum foil.Thiswillreduce heatcirculation, result in oven. inpoorbaking andmaydamage theovenbottom. 2.Push in and turn OVEN TEMP • Donotcoverthebroilerinsert w ithaluminum foil.This knob to desired temperature. prevents f atfromdraining intothepanbelowandin- 3.Place food in center of creases flare-ups andsmoke.
- Page 8 Broiling is used for tender cuts of Use a reliable recipe and accurately Roasting is the method for cooking meat or marinated meats, poultry, measure fresh ingredients. Carefully large, tender cuts of meat follow directions for oven fish and some fruits and vegetables. uncovered, without adding moisture.
-
Page 9: Cleaning Chart
Readandcarefully follow the manufacturer's instructions. Non-Abrasive or Scratchless Plastic or Nylon Scouring Pads or Sponges - Chore Boy Plastic Testa smallinconspicuous areausing a verylight Cleaning Puff, Scrunge Scrub Sponges, or Scotch-Brite pressure t o seeifthesurface mayscratch or discolor. No Scratch, Cookware or Kitchen Sponge. Thisis particularly i mportant forporcelain e namel, h ighly Abrasive Scouring... - Page 10 Grates • Soap and water Grates are made of porcelain-coated steel. They can be cleaned at the sink • Non-abrasive with soap and water or in the dishwasher. To clean baked on soil, place a plastic pad damp soapy paper towel over the grate and let stand for 30 minutes. Use a non-abrasive plastic pad to scour stubborn soil.
-
Page 11: Ignition System
Youroven will feature either pilot ignition or pilotless To replace: Insert the two pins on the back of the cooktop ignition. If the gas supply to the range is turned off, be into the holes in the backguard. Lower the top into place sure all controls are set in the OFF position before applying pressure at the front edges to secure top to the re-supplying... -
Page 12: Cookware
To remove: When cool, loosen the two screws located along the front of the oven bottom. Slide the screws back • Besureallpacking material is removed f romoven to release the front of the oven bottom. Grasp oven before turning on. bottom, lift up and pull forward until rear tabs release. - Page 13 Rack Positions: • For optimum results, air must circulate freely within the oven and around the food. To help ensure this, place food in the center of the oven. Allow two inches between the edge of the pan(s) and the oven walls.
-
Page 14: Surface Burners
• DO not attempt to service this appliance yourself yo u know what caused the problem. Always replace unless directed tod0 s0 in this manual or the chart a blown fuse with one of the correct amperage, do below, Refer all other servicing to a qualified servicer not use a substitutel or call us at 1,800,688.9900. -
Page 15: Oven Door
Baking results differ from a. Oven seems hotter or cooler than a. Oven temperatures may vary previous oven. your previous oven. between the new and the old oven. As ovens age, the oven temperature often "drifts" and may become hotter or cooler. Also, newer ovens may operate differently from older ovens. -
Page 16: Warranty
MAYTAG ®MAJOR APPLIANCE WARRANTY LIM ITED WARRANTY For one year from the date of purchase, when this major appliance is operated and maintained according to instructions attached to or furnished with the product, Maytag brand of Whirlpool Corporation or Whirlpool Canada LP (hereafter "Maytag") will pay for factory specified parts and repair labor to correct defects in materials or workmanship.
Need help?
Do you have a question about the CPL1100BDW and is the answer not in the manual?
Questions and answers