Table of Contents
Advertisement
Quick Links
Advertisement
Table of Contents

Related Manuals for Janome CompuLock


Summary of Contents for Janome CompuLock
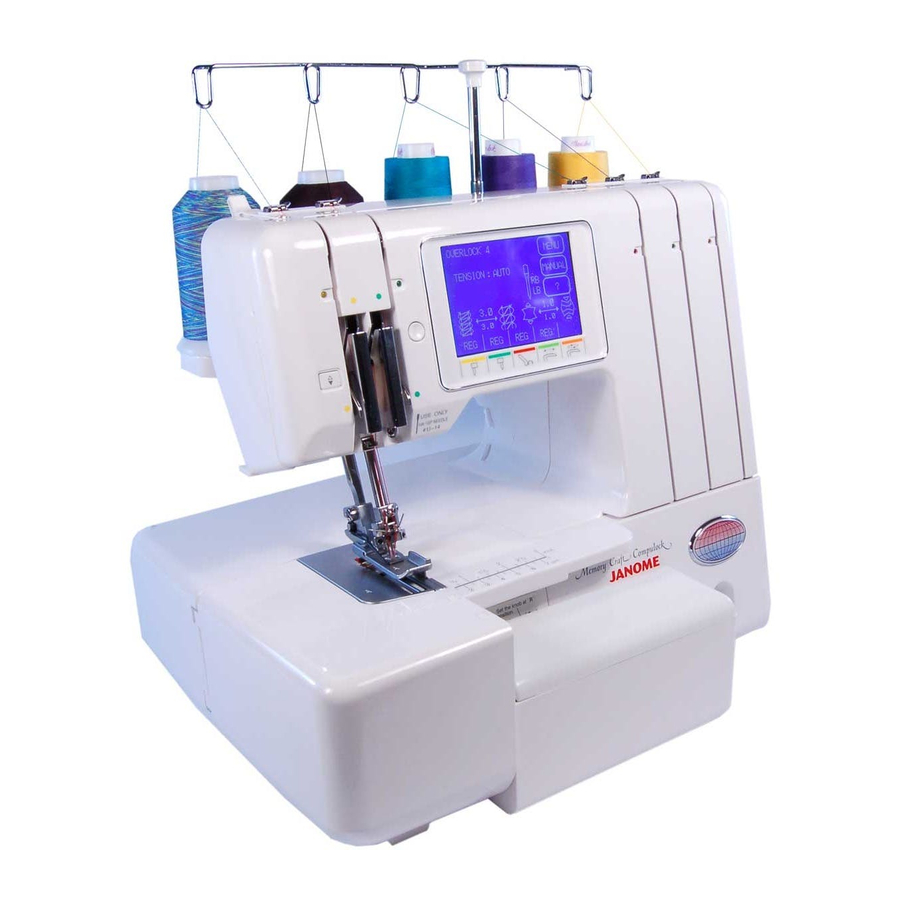
- Page 1 INSTRUCTION BOOK CompuLock...
-
Page 2: Important Safety Instructions
IMPORTANT SAFETY INSTRUCTIONS When using an electrical appliance, basic safety precautions should always be followed, including the following. Read all instructions before using this sewing machine. DANGER – To reduce the risk of electric shock: 1. An appliance should never be left unattended when plugged in. Always unplug this appliance from the electrical outlet immediately after using and before cleaning. -
Page 3: Table Of Contents
IMPORTANT SAFETY INSTRUCTIONS SECTION 1 PREPARATION • Names of Parts ...................... 3 • Attaching the Waste Chip Box ................4 • Storing the Accessory Box ..................4 • Standard Accessories .................... 4 SECTION 2 OPERATING INSTRUCTIONS • Plug in the Machine and Switch on Power ............5 •... - Page 4 4. OVEREDGE 2 (STANDARD), ROLLED HEM 2, FLATLOCK 2 (STANDARD), WRAPPED OVERLOCK 2 (STANDARD) ........32 5. OVEREDGE 2 (WIDE), FLATLOCK 2 (WIDE), WRAPPED OVERLOCK 2 (WIDE) ..........32 6. WRAPPED OVERLOCK 3 .............. 33 7. COVER STITCH ................33 8.
-
Page 5: Section 1 Preparation
SECTION 1 PREPARATION Names of Parts 1 Visual touch screen 2 Thread guide indication 3 Pressure adjusting dial 4 Screen sharpness adjusting knob 5 Up/Down needle position key 6 Side cover 7 Looper cover 8 Handwheel 9 Power switch 10 Differential feed dial 11 Stitch length dial 12 Extension table (A) 13 Double chain looper... -
Page 6: Attaching The Waste Chip Box
Attaching the Waste Chip Box Press the waste chip box against the looper cover and slide it to the left until the pin on the waste chip box slides into the hole on the side plate, as illustrated. 1 Waste chip box 2 Pin Storing the Accessory Box Insert the accessory box into the waste chip box. -
Page 7: Section 2 Operating Instructions
Sewing speed can be varied by the foot control.The harder press on the foot control, the faster the machine runs. Note: * The Compulock is equipped with a protective circuit to prevent overheating. The machine will stop automatically if it is running overloaded for a long time. -
Page 8: How To Turn Handwheel
How to Turn Handwheel Always turn the handwheel toward you (counterclockwise). 1 Handwheel Opening and Closing the Side Cover To open: Push the side cover to the left. To close: Push the side cover to the right and slightly toward the machine body. Side cover For Your Safety: Always close both the side and looper... -
Page 9: Opening And Closing The Looper Cover
Opening and Closing the Looper Cover To open: While pushing with the thumb to the right as far as it will go, pull looper cover toward you. To close: Lift looper cover and push against the machine. The looper cover snaps into the position automatically. -
Page 10: Attaching The Spool Cap And Net
Attaching the Spool Cap and Net 1 When you use a small thread spool, remove the spool holder from the spool pin. Then place the spool with its slit side up, and put a spool cap on top. 2 If the thread slips down from the spool while threading or sewing, put a net on the spool, as illustrated, to prevent jamming. -
Page 11: How To Set The Needles
How to Set the Needles * Please use a size 11 or 14 needle. * There are 4 holes for inserting needles, depending on the desired stitch selection. Make sure all 4 screws are tightened even if no needle is inserted in the clamp. 1 Needle 2 Flat side 3 Needle clamp screw (4 screws) -
Page 12: Safety System
Safety System You can operate the machine easily and safely because of the following major safety functions. The machine does not run when you pressed the foot control because... 1 The looper cover or side cover is opened when you start sewing. 2 Presser foot lifter is raised. -
Page 13: Four- Thread Operation
Four- Thread Operation Turn off the power switch before threading the machine. The machine has been threaded at the factory with short length of thread. To thread the machine with your own thread, tie it firmly to the upper end of the thread in the machine, then raise the presser foot and pull the other end. -
Page 14: Threading The Lower Looper
Threading the Lower Looper Open the looper cover. Raise the presser foot lifter. Place a spool of thread on the spool pin second from the right. * The points to thread for lower looper are marked in light green. * A convenient threading chart is placed on the machine body inside the looper cover. - Page 15 2 Slide the thread under the top cover thread guide second from the right side, as illustrated. 2 Top cover thread guide 3 Hold the thread at both ends and tug gently to ensure the thread is correctly inserted in the thread tension unit.
- Page 16 9 Turn the handwheel toward you to move the lower looper to the right side. Then, push down the lower looper thread guide (4) with your finger, as illustrated. In this way, the lower looper thread guide (4) and (5) are moved to the right for easy threading.
-
Page 17: Threading The Upper Looper
Threading the Upper Looper Open the looper cover. Raise the presser foot lifter. * Place a spool of thread on the center spool pin. * The points to thread for the upper looper are marked in red. * A convenient threading chart is placed on the machine body inside the looper cover. - Page 18 4, 5 4 Pass the thread through left side of the looper thread guide. 5 Pass the thread through the upper looper thread guide (1). 4 Looper thread guide 5 Upper looper thread guide (1) 6 Pass the thread through the looper thread take-up lever (upper).
-
Page 19: Threading The Right Needle
Threading the Right Needle Raise the presser foot lifter. Place a spool of thread on the spool pin second from the left. * The points to thread for the right needle are marked in green. * A convenient threading chart is placed on the machine body inside the looper cover. -
Page 20: How To Use Needle Threader
3 Hold the thread at both ends and tug gently to ensure the thread is correctly inserted in the thread tension unit. 3 Thread tension unit 4, 5 Pass the thread under the right needle thread 4, 5, 6 guide, then, pull it up and over the right take- up lever cover. -
Page 21: Threading The Left Needle
Threading the Left Needle Raise the presser foot lifter. Place a spool of thread on the far left spool pin. * The points to thread for the left needle are marked in yellow. * A convenient threading chart is placed on the machine body inside the looper cover. -
Page 22: Threading The Left Needle
3 Hold the thread at both ends and tug gently to ensure the thread is correctly inserted the thread tension unit. 3 Thread tension unit 4, 5 4, 5, 6 Pass the thread below the left needle thread guide then pull it up and over the left take-up lever cover. -
Page 23: Threading The Double Chain Looper
Threading the Double Chain Looper Open the looper cover. Raise the presser foot lifter. Place the spool of thread on the right side spool pin. * The points to thread for the double chain looper are marked in orange. * A convenient threading chart is placed on the machine body inside the looper cover. - Page 24 3 Hold the thread at both ends and tug gently to ensure the thread is correctly inserted in the thread tension unit. 3 Thread tension unit 4 Pass the thread through the right side of the looper thread guide. Looper thread guide 5 Pass the thread through the double chain looper thread guide (1).
-
Page 25: Changing To Two Or Three Thread Serging With Spreader
13 Draw the thread with a pair of tweezers through the hole in the double chain looper 10 cm (4") or more. Next, make sure that the needle thread is not tangled in the double chain looper. Close the looper cover. X = incorrect O = correct 13 Double chain looper... -
Page 26: Visual Touch Screen Operations
Visual Touch Screen Operations 1 Turn on the power switch. The menu screen appears on the visual touch screen. 2 Each time you press Page key, the visual touch screen changes, as illustrated. You can select the desired stitch by press- ing one of the stitch pattern keys on the three “pages.”... -
Page 27: Automatic Thread Tension Display Screen
Automatic Thread Tension Display Screen 1 When you select the desired stitch from stitch pattern keys, the thread tensions will be auto- matically set. Settings such as the stitch length and differen- tial feed ratio will be indicated on the visual display screen as well. -
Page 28: Stitch Package
Stitch Package 2.OVEREDGE 3 3.OVEREDGE 3 5.FLATLOCK 3 1.OVERLOCK 4 4.ROLLED HEM 3 STANDARD WIDE STANDARD 9.OVEREDGE 2 6.FLATLOCK 3 7.FLATLOCK 2 8.FLATLOCK 2 10.OVEREDGE 2 STANDARD WIDE STANDARD WIDE WIDE 12.OVERLOCK 3 13.OVERLOCK 3 11.COVER STITCH 14.ROLLED HEM 2 15.NARROW HEM STANDARD WIDE... -
Page 29: Standard Machine Settings For Automatic Thread Tension
Standard Machine Settings for Automatic Thread Tension * Type of thread: * The automatic thread tension setting on the visual touch REG: Polyester thread #60 screen is adjusted according to the following table such FINE: Polyester thread #90 as the stitch type, fabric, layers, etc. WOOLLY: Woolly nylon thread DECO: Decorative thread... -
Page 30: Stitch Pattern With Machine Setting
Stitch Pattern with Machine Setting The machine setting (needle setting positions, type of presser foot, chaining finger position and type of extension table) is indicated on the visual touch screen when you select the automatic thread tension or press the Information key. CHAINING PRESSER SPREADER... -
Page 31: Manual Adjustment Of Thread Tension
Manual Adjustment of Thread Tension You can adjust the thread tension by pressing the key to get the desired tension setting. The actual thread tensions for each thread are shown above the + / key on the screen. Memory Key: Memorize the manually set thread tensions. - Page 32 (To Memorize Settings) 1 After entering your fabric, thread and layers settings, press the MEM key to save them. 2 There are three memory locations. Choose MEM 1, MEM 2 or MEM 3. (The number of memory locations changes depending on the type of stitch.) 3 The formerly memorized settings will be displayed.
-
Page 33: Stitch Pattern And Threading
Stitch Pattern and Threading Depending on which stitch you have selected, the LED lights on the front of the machine will turn on to show you which threads should be used. Also, the visual touch screen will indicate the correct needle setting. Press information key to confirm the machine setting. -
Page 34: Overlock 3 (Wide), Overedge 3 (Wide), Flatlock 3 (Wide)
3. OVERLOCK 3 (WIDE), OVEREDGE 3 (WIDE), FLATLOCK 3 (WIDE), Needle setting position: LB (left back) 4. OVEREDGE 2 (STANDARD), ROLLED HEM 2 FLATLOCK 2 (STANDARD), WRAPPED OVERLOCK2 (STANDARD) Needle setting position: RB (right back) 5. OVEREDGE 2 (WIDE), FLATLOCK 2 (WIDE), WRAPPED OVERLOCK 2(WIDE), Needle setting position: LB (left back) -
Page 35: Wrapped Overlock 3
6. WRAPPED OVERLOCK 3 Needle setting position: LB (left back) RB (right back) 7. COVER STITCH Needle setting position: LF (left front) RF (right front) * The threading procedure that you can choose the needle thread first or the double chain looper thread. -
Page 36: Overlock 5
8. OVERLOCK 5 Needle setting position: LF (left front) RB (right back) The threading procedure is as follows: 1 Lower looper thread 2 Upper looper thread 3 Double chain looper thread 4 Left needle thread (LF) 5 Place a sewing test piece under the needle and lower the presser foot. -
Page 37: Double Chain
9. DOUBLE CHAIN Needle setting position: LF (left front) Threading procedure; 1 Double chain looper thread 2 Left needle thread Bring the left needle thread under the presser foot, put a sewing test piece on the needle plate and lower the presser foot. Turn the handwheel toward you to sew 2 to 3 stitches and pull the sewing test piece so that the double chain looper thread comes... -
Page 38: Section 3 Test Stitching
SECTION 3 TEST STITCHING Starting Sewing 1 Insert the fabric under the toe of the presser 1, 2 foot. (It is not necessary to raise the presser foot except when performing cover stitch or overlock 5.) 2 Turn the handwheel gently toward you a couple of turns and check the thread chain. -
Page 39: Securing Ends
Securing Ends To avoid unravelling, it is necessary to leave a thread chain about 5 cm (2”) long at the beginning and the end of the seam. To secure the beginning and end of a seam choose one of the following methods: At the Beginning A. -
Page 40: Thread Tension Adjustment
Thread Tension Adjustment Thread Tension (4 threads) Correct tension The illustration at left shows sewing results with correct tension settings. However, adjusting the thread tension may be required depending on the type of fabric and thread being used. To begin with, select the stitch pattern key and sew a test piece. - Page 41 Wrong tension The illustration shows sewing results when the upper looper thread tension is too tight and/ or lower looper thread tension is too loose. Remedy: Loosen upper looper thread tension and/or tighten lower looper thread tension. 1 Wrong side of fabric 2 Right side of fabric 3 Right needle thread 4 Left needle thread...
-
Page 42: Thread Tension (3 Threads)
Thread Tension (3 threads) (Standard stitch width) Correct tension The illustration at left shows sewing results with correct tension settings. However, adjusting the thread tension may be required depending on the type of fabric and thread being used. To begin with, select the stitch pattern and sew a test piece. -
Page 43: Rolled Hem 3
Rolled Hem 3, Narrow Hem and Picot Edge Adjusting the thread tension may be required depending on the type of fabric and thread being used. To begin with, select the automatic thread tension display screen of the each stitch patern to sew a test piece. If the tension balance on the test piece is not satisfactory, you can adjust the thread tension manually, as follows:... -
Page 44: Narrow Hem
Narrow Hem Correct Tension The illustration at left shows sewing results with correct tension settings. Wrong side of fabric 2 Right side of fabric 3 Right needle thread 4 Upper looper thread 5 Lower looper thread 6 Right needle thread tension Wrong tension The illustration shows the sewing results when t h eupper looper thread tension is too loose... -
Page 45: Thread Tension (2 Threads)
Thread Tension ( 2 threads) (Standard stitch width) Correct tension Adjusting the thread tension may be required depending on the type of fabric and thread being used. To begin with, select the stitch pattern key and sew a test piece. If the tension balance on the test piece is not satisfactory, you can adjust the thread ten- sion manually, as follows;... -
Page 46: Thread Tension (Cover Stitch)
Thread Tension (Cover Stitch) Correct tension Adjusting the thread tension may be required depending on the type of fabric and thread being used. To begin with, select the stitch pattern key and sew a test piece. If the tension balance on the test piece is not satisfactory, you can adjust the thread ten- sion manually, as follows. -
Page 47: Thread Tension (Double Chain)
Thread Tension (Double Chain) Correct tension Adjusting the thread tension may be required depending on the type of fabric and thread being used. To begin with, select the stitch pattern key and sew a test piece. If the tension balance on the test piece is not satisfactory, you can adjust the thread ten- sion manually, as follows;... -
Page 48: To Adjust Stitch Length
To Adjust Stitch Length Turn the stitch length dial until the desired stitch length appears on the screen. The larger the number, the longer the stitch. The stitch length can be adjusted from 1 to 5 mm. The amount of stitch length is indicated on the automatic thread tension and manual thread tension screen. -
Page 49: To Deactivate The Upper Knife
To Deactivate the Upper Knife 1 Turn off the power switch and unplug the machine. 2 Open the looper and side covers. 3 Pull out the upper knife release knob and slide it down along the guide until it comes to its lowest position. -
Page 50: Adjustment Of Cutting Width
Adjustment of Cutting Width When the cutting width is too narrow or too wide in relation to the seam width, adjust it as follows: 1 Turn off the power switch and unplug the machine. 2 Open the looper and side covers. 3 Turn the cutting width adjusting dial to move the cutting blades to the desired position. -
Page 51: Adjustment Of Chaining Finger Setting Knob
Adjustment of Chaining Finger Setting Knob Changing between Standard Serging or Rolled 1 Turn off the power switch and unplug the machine. 2 Open the looper and side covers. 3 Push the cutting width adjusting dial to the right as far as it will go, then move the chaining finger setting knob to the guide line “S”(for Standard serging) or “R”... -
Page 52: Adjusting Of Foot Pressure
Adjusting of Foot Pressure Depending on the type of fabric, the foot pressure may have to be decreased or increased. A : To increase B : To decrease 1 Pressure adjusting dial 2 Standard setting position 3 Setting mark Note: The standard setting of presser dial is that the standard setting position meets the setting mark,as illustrated. -
Page 53: How To Replace The Extension Table
How to Replace the Extension Table The visual touch screen will indicate when you should replace the extension table. Open the looper cover and pull off the extension table (A). Snap the extension table (B) onto the looper cover . Extension table (A) Looper cover Extension table (B) -
Page 54: Section 4 Maintenance
SECTION 4 MAINTENANCE Replacing the Light Bulb 1 Turn of the power switch and unplug the machine. Loosen the face plate set screw, and remove the face plate. To remove: 2 Pull out the lamp socket from the holder and remove the light bulb from the lamp socket. -
Page 55: Cleaning The Upper Knife Area
Cleaning the Upper Knife Area 1 Turn off the power switch and unplug the machine. 2 Open the looper cover. Brush the waste chips to the front with a lint brush. * You may also use a vacuum cleaner to clean the upper knife area or feed dog. -
Page 56: Oiling The Machine
Oiling the Machine Open looper cover and side covers. It is recommended to apply oil once a week in normal use, once in ten hours in continuous use. Apply a few drops of fine quality sewing machine oil to the parts indicated with arrows. Troubleshooting Condition Cause...
Need help?
Do you have a question about the CompuLock and is the answer not in the manual?
Questions and answers