Precor EFX556i Owner's Manual
Hide thumbs
Also See for EFX556i:
- Owner's manual addendum (2 pages) ,
- Owner's manual (114 pages) ,
- Manual del propietario del producto (91 pages)

Related Manuals for Precor EFX556i


Summary of Contents for Precor EFX556i
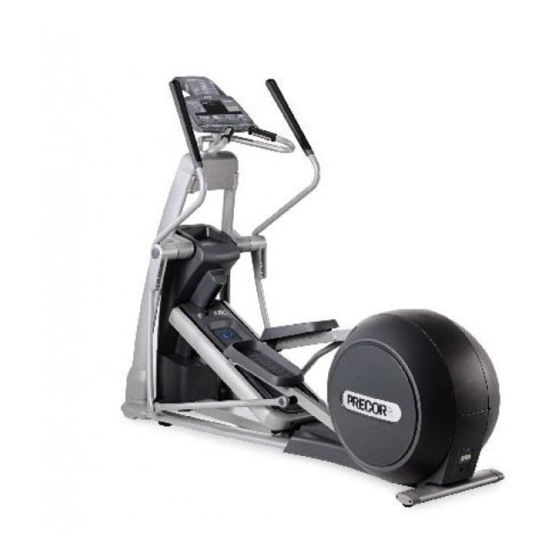
- Page 1 EFX 556i ® Commercial EFX Owner’s Manual...
-
Page 2: Important Safety Information
IMPOR IMPOR IMPORT T T T T ANT SAFETY INSTRUCTIONS IMPOR IMPOR ANT SAFETY INSTRUCTIONS ANT SAFETY INSTRUCTIONS ANT SAFETY INSTRUCTIONS ANT SAFETY INSTRUCTIONS ® When using the EFX , basic precautions should always be followed, including the following: • To ensure your safety and to protect the unit, read all the instructions ®... -
Page 3: Hazardous Materials And Proper Disposal
IMPOR IMPOR IMPORT T T T T ANT SAFETY INSTRUCTIONS IMPOR IMPOR ANT SAFETY INSTRUCTIONS ANT SAFETY INSTRUCTIONS ANT SAFETY INSTRUCTIONS ANT SAFETY INSTRUCTIONS Diagram 1 Avoid injury from the roller arm mechanism. Front cover Roller arm • Never place your hand(s) or feet in the path of the roller arm because injury may occur to you or damage may occur to the equipment. -
Page 4: Table Of Contents
Table of Contents Important Safety Information ...........2 Hazardous Materials and Proper Disposal ......3 Safety Approval ..............3 RFI — Radio Frequency Interference ........6 European Applications ............6 ® Self-powered Features ..........7 Obtaining Service ..............7 About this Manual ..............8 ®... - Page 5 Table of Contents, continued ® Exercising on the EFX ..................Using the Handlebars ............. 29 Using the Stationary Handrails ..........29 Pause, Cool Down and Exit Features ........29 Workout Tips ................30 Quick Steps to Working Out ........... 31 Cooling Down After a Workout ..........
-
Page 6: Rfi - Radio Frequency Interference
CAUTION: ® Per FCC rules, changes or modifications to the EFX expressly approved by Precor, could void the user’s authority to operate the equipment. Canadian Department of Communications This digital apparatus does not exceed the Class A limits for radio noise emissions from digital apparatus set out in the Radio Interference Regulations of the Canadian Department of Communications. -
Page 7: Efx ® Self-Powered Features
The serial number can be found on a label near the power receptacle on the rear cover. Refer to Diagram 2. If you have any questions regarding the ® 556i, use the model and serial numbers whenever you call your Precor dealer or servicer. Model number: EFX ®... -
Page 8: About This Manual
ABOUT THIS MANUAL ® Inside this manual, you will find instructions for installing and using the EFX 556i. ® To maximize the use of the EFX , please study this manual thoroughly. The manual uses the following conventions for identifying special information: Note: Contains additional information that applies to the preceding text. -
Page 9: Unpacking The Efx
Operation requires cable connection to a separate computer.) • Battery recharger If you are interested in obtaining Precor option kits for your unit, check with your dealer. To locate the dealer nearest you, call 1-800-786-8404. For customer support, see Obtaining Service on page 7. -
Page 10: Hardware Kit
HARDWARE KIT Carefully unpack the parts from the shipping container. Open the Hardware kit and make sure that you have the following items as shown in Diagram 3: (A) four stainless steel socket hex screws—upper column assembly (B) fourteen washers—upper column assembly (C) four nuts—upper column assembly (D) six black socket hex screws—handlebars (E) two hex screws—link arm assembly... -
Page 11: Acquire The Appropriate Tools
(Refer to Diagram 2 on page 7.) Write the serial number onto the Precor Limited Warranty card found on the back cover of this manual. Return to page 7 and write the number there as well. - Page 12 CAUTION: Do not stretch, crimp, or damage the cable. Excess cable may be gently pushed into the upper support tube. Cables damaged by improper installation will not be covered by the Precor Limited Warranty. Diagram 5 Connect the cable. Cable connector...
- Page 13 Diagram 6 Attach the handlebars. Handlebar Handlebar bracket Black screws (D) with washers (B) 5. Attach the handlebars. Diagram 6. Take the following steps: a. Remove the six black screws (D) and six washers (B) from the Hardware kit. Place a washer on each screw. b.
- Page 14 Diagram 8 Secure the rear handlebar linkage. Wrench tighten the screw. Once it is secured, use a torque wrench set at 200 in-lbs. Handlebar linkage c. Wrench tighten using a -inch socket wrench. Diagram 8. Important: Once the fasteners are secured, use a hex torque wrench to tighten the two linkage arm screws to 200 in-lbs.
- Page 15 Align the mounting holes and tighten the screws. See Diagram 10, #2. CAUTION: Do not overtighten the screws or you may inadvertently crack the plastic covers. Damaged covers due to improper installation will not be covered by the Precor Limited Warranty. ® Note: You have completed the assembly of the EFX 556i.
-
Page 16: Supplying Power To The Efx 556I
40 strides per minute must be maintained for several seconds before the Precor banner appears on the display. Once the banner appears, the user can press QUICKSTART or ENTER to begin working out. Refer to page 26, Exercis- ing on the EFX , for more information. -
Page 17: Testing The Heart Rate Display
5. If the heart rate display does not appear, press RESET to return to the Precor banner and then, ask someone else to try steps 2 and 3. If no heart rate number appears, you may need to disassemble the handrails or the upright support to check that the heart rate cables are fully engaged. -
Page 18: Club Information
Note: If your customers are interested in the learning more about the EFX, you may wish to direct them to the user manual available on Precor’s web site (www.precor.com). (The manual that appears on the web site does not contain the information found in this section.) -
Page 19: Selecting The Language
RESET, , RESET, Important: To access Club Custom mode, press RESET while the Precor banner is displayed. Within ½ second, begin pressing the key sequences. If the system does not detect a key press (within ½ second after RESET), it returns to the banner. Once you begin entering a key sequence, each key must be pressed within four seconds of the other or the Precor banner reappears and you have to begin again. -
Page 20: Determining The Units Of Measure
Note: The number keys, 6 and 5, may be pressed instead of using the keys, for example: RESET, 6, 5. Remember to begin at the Precor banner. After pressing RESET, the next key in the sequence must be pressed within ½ second. -
Page 21: Using Csafe Standard Equipment
Press ENTER once again and the ERROR LOG appears. Press the key to view the error messages. To return to the Precor banner, press ENTER or RESET. Note: To clear (delete) the error log, press and hold QUICKSTART for at least four seconds while viewing the list. -
Page 22: The Efx 556I Display
An brief explanation of each feature on the display console appears in Diagram 15. Look on the next page for a more thorough explanation. Note: If an error message should appear, call a Precor qualified service technician or service center. Refer to Obtaining Service , on page 7. -
Page 23: Smartrate Display
Feature on page 33. UPPER DISPLAY The Precor banner and program profiles appear in the large center display (LED matrix). Always start a workout at the Precor banner. During workouts, the profile appears in the center display and corresponds to the program you selected. As you proceed through your workout, your position is indicated by a blinking cell. -
Page 24: Lower Display
If the battery voltage is low or needs recharging, the words WARNING - LOW BATTERY appear after the PRECOR banner. The EFX continues to function even with a low battery, but user and program information is lost once the user stops pedaling. - Page 25 DISTANCE: The distance that you have travelled appears when you select this feature. Distance appears in 100th mile increments and can also appear in kilome- ters. (See Club Information on page 18.) The number shown in the display is not a conversion of strides, but relates closely to the user’s expenditure of energy.
-
Page 26: Keys On The Display Console
KEYS ON THE DISPLAY CONSOLE The Precor products have an easy-to-use keypad that is activated by the slightest touch. Remind users that they only need to “lightly touch” these ultra- sensitive keys. Each key on the display console’s keypad provides specific functions. Numeric keys (numbered 1, 2, 3..., through 0) let you enter data in answer to the display... - Page 27 Numeric Keys (0 through 9): During a workout, you can use the numeric keys to change the EFX’s resistance (from 1 to 20). Remember, if you use the numeric keys to change the resistance, you need to designate, within three seconds, whether you are increasing the resistance by pressing the key or decreasing the resistance by pressing the...
- Page 28 Note: The POLAR ® chest strap is available through your Precor dealer. Refer to Optional Equipment on page 9. The QUICKSTART key can be pressed any time during the Setup prompts. De- fault values apply after that point. See the table below: Press QUICKSTART at the...
-
Page 29: Exercising On The Efx
® Exercising on the EFX Once the EFX is assembled, it is ready to use. The easy-to-understand prompts let you select a program and specify how long you want to work out. Begin work- ing out and then, adapt the resistance level to meet your fitness goals. Refer to Programs on page 33. - Page 30 Displays the WORKOUT SUMMARY banner. See the infor- mation at the top of this page. At the Workout Summary banner, you This is what happens,... press RESET The display returns to the Precor banner and workout statistics are reset to zero. page 30...
-
Page 31: Workout Tips
QUICK STEPS TO WORKING OUT 1. For your heart rate to appear on the display, you need Put on the chest strap. (Available with the Precor to wear a POLAR ® chest strap or hold onto both touch- Heart Rate Option.) -
Page 32: Cooling Down After A Workout
Continue your 3. When you have completed a program that has a limited workout until program duration, a five-minute cool-down period automatically be- completion. gins. Hold onto the stationary handrail while the EFX re- duces the resistance by 20%. Note that you can always exit a program prematurely using the RESET key. -
Page 33: Programs
A label, on the accessory tray, explains how to begin a workout and shows the profiles of the available programs. Refer to Diagram 17. To choose a program, begin at the Precor banner and press ENTER. User-friendly prompts guide you through the program selections. Refer to Quick Steps to Work- ing Out on page 31. -
Page 34: Using The Smartrate Feature
Diagram 18 Target Zones HEART RATE TARGET ZONES MAX. HEART RATE Cardio Zone Weight Loss Zone 20 25 30 35 40 45 50 55 60 65 70 75 YOUR AGE ® USING THE SMARTRATE FEATURE Add the benefit of SmartRate to every program on the EFX. Using SmartRate as a visual cue helps you adjust your exercise routine to suit specific needs. -
Page 35: Manual Mode And The Quickstart
• pressing ENTER at the Precor banner. This causes the EFX to display sev- eral Setup prompts. At the program prompt, select the Manual program. The Manual program profile initially appears as a flat line. Use the keys or the numeric keys to adjust the resistance level. -
Page 36: Interval Program
INTERVAL PROGRAM The interval program on the EFX lets you select the rest and work intervals according to your training regimen. You set the resistance level for first rest and work interval and the software repeats the intervals throughout the program. At any point during the workout, you can change the settings of the current interval by simply pressing the or numeric keys. -
Page 37: Weight Loss Program
WEIGHT LOSS PROGRAM The Precor Weight Loss program incorporates the latest findings on fat-burning and weight loss through exercise. It is based on research at the world-renowned Cooper Institute for Aerobics Research and it is designed to help you burn the most fat during a 28-minute workout, while minimizing the risk of discomfort and injury. - Page 38 • the EFX provides a warm-up period before entering the five-minute Fitness Test. Instructions appear requesting that you begin pedaling at a constant stride rate of 70 strides per minute (SPM). The pace is increased until your heart rate reaches 55% of the maximum heart rate (220 minus your age) or the pace reaches 160 SPM.
-
Page 39: Fitness Test Scores
FITNESS TEST SCORES When the five-minute Fitness Test ends, a valid score is obtained and appears in the display. The level of fitness associated with your body’s cardiovascular fitness (VO2 Max) also appears. page 39... -
Page 40: Maintenance
Important: If you determine that the EFX is in need of service, move it away from the main workout area and place an large “Out of Service” sign on it. To order parts or to contact a Precor authorized service provider in your area, refer to Obtaining Service on page 7. -
Page 41: Storing The Polar Chest Strap
(110/120v or 220/240v). You can use the EFX while the battery recharger is plugged in. The display functions a bit differently when the battery recharger is used. It returns to the Precor banner instead of appear- ing blank when a user stops working out. -
Page 42: Replacing The Battery
REPLACING THE BATTERY The EFX battery is built to last for a long time. However, if you feel that the battery may need replacing, check with an authorized service technician. Refer to Ob- taining Service on page 7. CAUTION: The battery stored inside the EFX contains hazardous materials and must be disposed of according to Hazardous Waste Regulations. - Page 51 Notes:...
- Page 52 Notes:...
- Page 53 We are confident that you will be pleased with your purchase and that your new Precor equipment will help satisfy your customers’ fitness needs, while helping you meet your business goals. To allow us to serve you better, please take a few moments to complete and return your warranty registration.
-
Page 54: Warranty
What other brands of cardio equipment do you currently offer (check all that apply): Life Fitness True Cybex StarTrac Other ______________________________ What other Precor equipment do you currently offer (check all that apply): ® Cycle StretchTrainer Treadmill Stair Climber Strength Machine... - Page 55 INCLUDING THE WARRANTY OF MERCHANTABILITY OR FITNESS FOR A PARTICULAR PURPOSE THAT APPLY the original warranty period only. To claim under this warranty, the buyer must notify Precor or TO ANY PARTS DESCRIBED ABOVE ARE LIMITED IN your authorized Precor dealer within 30 days after the date of discovery of any nonconformity DURATION TO THE PERIODS OF EXPRESS WARRAN- and make the affected product available for inspection by Precor or its service representative.
-
Page 56: Specifications
Precor web site: www.precor.com NOTICE: Precor is widely recognized for its innovative, award winning designs of exercise equipment. Precor aggressively seeks U.S. and foreign patents for both the mechanical construction and the visual aspects of its product design. Any party contemplating the use of Precor’s product designs is hereby forewarned that Precor considers the unauthorized appropriation of its proprietary...
Need help?
Do you have a question about the EFX556i and is the answer not in the manual?
Questions and answers
find serial number on Precor EFX 556i.