Table of Contents
Advertisement
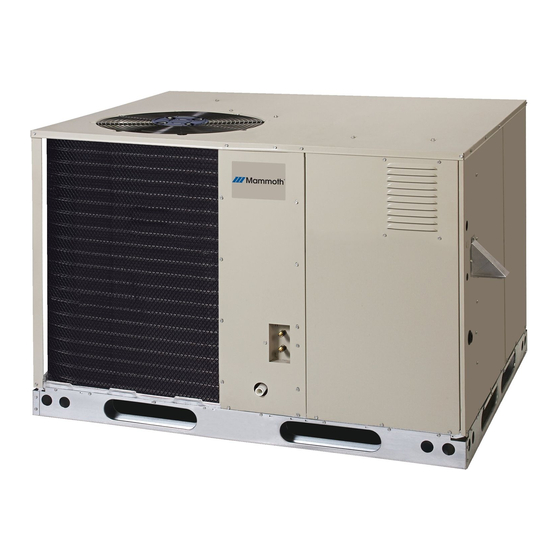
P6 Series
Single Package Convertible
Air Conditioner
Single Package Convertible
Air Conditioner
These
instructions
are primarily
intended
to assist
qualified
individuals
experienced
in the proper installation
of heating and/or air conditioning
appli-
ances. Some local codes require licensed installation/service
personnel for this
type equipment.
All installations
must be in accordance
with these instructions
and with all applicable
national and local codes and standards.
Read these instructions
thoroughly
before starting the installation.
Follow all
precautions
and warnings
contained within these instructions
and on the unit.
Advertisement
Table of Contents

Related Manuals for Nordyne P6 Series


Summary of Contents for Nordyne P6 Series
- Page 1 P6 Series Single Package Convertible Air Conditioner Single Package Convertible Air Conditioner These instructions are primarily intended to assist qualified individuals experienced in the proper installation of heating and/or air conditioning appli- ances. Some local codes require licensed installation/service personnel for this type equipment.
-
Page 3: Table Of Contents
TABLE OF CONTENTS OWNER INFORMATION ....................... OPERATING INSTRUCTIONS ...................... GENERAL SPECiFiCATiONS ...................... SAFETY CONSiDERATiONS ....................... Literature, Labels, and Tags ....................Pressures Within The System ....................iNSTALLATiON REQUIREMENTS ....................Equipment Check ......................... Requirements and Codes ..................... Unit Dimensions ........................Unit Location ......................... Air Filter Requirements ...................... -
Page 4: Owner Information
OWNER INFORMATION The system will not operate, regardless of the thermostat temperature setting. OPERATING INSTRUCTIONS To Operate the Indoor Blower Continuously== To OperateYour Air Conditioner for Cooling = Set the thermostat fan switch to ON (See Figure 1) 1. Set the thermostat system switch to COOL or AUTO and the thermostat fan switch to AUTO. -
Page 5: General Specifications
3. For free air flow, make sure your return registeris not covered andthatthe filter is WARNING: clean. 4. Check thecondenser coilandmakesureitis Improper installation, service, cleanandnotclogged withgrassor leaves. adjustment, maintenance cause explosion, fire, electrical shock Ifyourairconditioner stillisn'tworking, c allyour or other hazardous conditions which nearest c ontractor. -
Page 6: Unit Dimensions
Center of Gravity Height (in inches) Model No. Unit P6SD with base rails without base rails Weiqht 26.0 37.7 35.3 29.5 26.5 37.7 35.3 29.5 30.0 27.5 41.7 39.3 24 9/10 _ 3/4" NPT Female Drain Connector DOWNFLOW SUPPLY DUCT OPENING 47 1/2 _-CG... -
Page 7: Unit Location
© Figure 3. Minimum Clearances Conditioning Systems" (NFPA 90B), these instructions and all applicable local codes. NFPA publications are available by writing: National Fire Protection Association • i Securing Screw i l i Batterymarch Park Quincy, Maine 02269 .Ll j Unit Location This... -
Page 8: Internal Air Filter Assembly Removal
Condensate Drain m Condensate is removed from the unit through the 3/4" female pipe fitting located on the front side of the unit. (See Figure 4.) Install a 2 inch condensate trap in the drain line of the same size and prime with water.When connecting rigid drain line, hold the female fitting with a wrench to prevent twisting. -
Page 9: Rooftop
Figure 6. RoofTop Installation upright position at all times. For rooftop instal= The roof must be capable of handling the weight lations, remove and discard the two supports of the unit. (See Figure 2) for unit weights. attached beneath the unit. Reinforce the roof if required. -
Page 10: Unconditioned Spaces
Unconditioned Spaces m All duct work codes and ordinances, and with the current passing throughunconditioned s pacemustbe revision of the National Electric Code NFPA 70 properly or in Canada CSA C.22.1 =Canadian Electrical insulated to minimize duct losses and prevent condensation. Use insulation with an Code Part 1. -
Page 11: Blower Speed
Provide power supply (or supplies) for the unit in Verify the required speed from the airflow accordance with the unit wiring diagram, and the data found in table 1. Place appropriate wire unit rating plate. Connect the line-voltage leads on the appropriate motor speed tap for the to the corresponding terminals on the contactor... -
Page 12: Wiring Diagram
Brown Orange FROM BLOWER RELAY Green ACCESSORY HEAT PLUG FROM CONTACTOR ECONOMIZER .© PLUG Black (Optional, Check Gray Thermostat Instructions) Yellow -"_ Blue iNDOOR FROM TRANSFORMER THERMOSTAT SUB-BASE Typical Wiring (Field Supplied) for 1=Stage Cool, 1=Stage Heat Optional Outdoor Thermostat (Field Supplied) Brown .. -
Page 13: System Check
The options available for each unit are shown in continuously. Check for air delivery at the the heater kit installation instructions. register(s). Ensure that there are no obstructions at the registers or in the duct work. Set thermostat fan switch to "Auto." Install the heater kits as directed... -
Page 14: Routine Maintenance
iNSTALLiNG FILTERS iN THE FAC= WARNING: TORY iNSTALLED FILTER RACK Single Packaged Air Conditioners Remove access panel screws from return air shipped fully charged with R=410A panel. (You may want to loosen the unit's Top Panel screws that are located near the top refrigerantand ready installation. -
Page 15: Package A/C Blower Curves
P6 Series Blower Curves Model Number External Static Pressure Drop - inches water column P6SD- 1109 High 1610 1562 1504 1442 1365 1295 1214 Medium 1367 1320 1271 1205 1138 1065 * Low 1153 1102 1043 1758 High 2361 2278 2218 2141 2066... - Page 16 Cooling Charging Charts (cont.) P6SD-X48 Charging Chart - Cooling Remove refrigerant when above curve ._ 460 -_ 420 _- 380 "O '5 360 o- 340 "i FAdd refrigerant when below curve-e-_ iiii iiii iiii iiii iiii iiii iiii iiii iiii iiii iiii iiii...
-
Page 17: Wiring Diagrams
208/230 Volt Three Phase 60Hz Convertable Packaged Air Conditioner NOTES: 1. Disconnect all power before servicing. 1. Couper le courant avant de faire letretien. 2 For supply connections use copper conductors only= 2. Employez uniquement des conducteurs en cuivre 3. Ne convient pas aux installations de plus 3. - Page 18 2081230 Volt Three Phase 60Hz Convertible Packaged Heat Pump NOTES: 1, Disconnect all power before servicing, 1, Couper le courant avant de faire letretiem 2. For supply connections use copper conductors only. 2. Employez uniquement des conducteurs en cuivre. 3. Not suitable on systems that exceed 15gv to ground.
- Page 20 INSTALLER PLEASE LEAVE THESE INSTALLATION INSTRUCTIONS WITH THE HOMEOWNER. Intertek Ill Illlllll Illlllllll III Ill 7088440 Specifications and illustrations subject to change without notice and without incurring obligations. (02/06) NORD_I_E 7088440 O'Fallon, MO...
Need help?
Do you have a question about the P6 Series and is the answer not in the manual?
Questions and answers