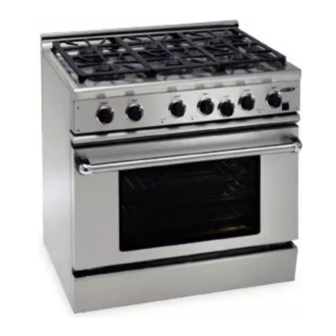
DCS RDS-486GD Use And Care Manual
Professional rds range
Hide thumbs
Also See for RDS-486GD:
- Use and care manual (74 pages) ,
- Installation manual (30 pages) ,
- Use and care manual (74 pages)
Table of Contents
Advertisement
Quick Links
Advertisement
Table of Contents

Related Manuals for DCS RDS-486GD


Summary of Contents for DCS RDS-486GD
- Page 2 A MESSAGE TO OUR CUSTOMERS Thank you for selecting this DCS Dual Fuel Range. Because of this appliance's unique features we have developed this Use and Care Guide. It contains valuable information on how to properly operate and maintain your new appliance for years of safe and enjoyable cooking.
-
Page 3: Table Of Contents
TABLE OF CONTENTS SAFETY PRACTICES ..............................MODEL IDENTIFICATION ............................. BEFORE USING YOUR APPLIANCE ........................COOKTOP USE ................................9-12 Burner Use ................Burner Efficiency and Flame Characteristics ..........Wok Ring ................. 11-12 GRILL USE ..................................12-13 GRIDDLE USE ................................14-15 OVEN .................................. -
Page 4: Safety Practices
SAFETY PRACTICES AND PRECAUTIONS When properly cared for, your new DCS Appliance has been designed to be a safe, reriable cooking appliance. When using this restaurant caliber appliance, use it with extreme care, as this type appliance provides intense heat and can increase the accident potential. - Page 5 SAFETY PRACTICE AND PRECAUTIONS • Be certain to use only dry pot holders: moist or damp pot holders on hot surfaces may cause burns from steam. Do not use a towel or other bulky cloth in place of pot holders. Do not let pot holders touch hot burners, or burner grates.
- Page 6 SAFETY PRACTICESAND PRECAUTIONS • Place oven racks in desired position while the oven is cool.If a rack must be moved while the oven is hot, do not let the pot holders contact the hot interior of the oven. • Use care when opening the oven door; let hot air or steam escape before removing or replacing foods.
-
Page 7: Model Identification
MODEL IDENTIFICATION 48" RDSRANGE MODELS RDS-484GG RDS-486GL RDS-486GD RDS-485GD 36" RDS RANGE MODELS RDS-366 RDS-364GL RDS-364GD 30" RDS RANGE MODELS RDS-30S... -
Page 8: Before Using Your Appliance
• Two removableRackSupports • One,Two-piecebroil pan NOTE: If any ore missing, contact DCS at (888) 281-5698. Please be prepared with your Model No., Serial No. and description of problem. 2) Place the oven racks in the proper position before turning on the oven. -
Page 9: Before Using Your Appliance
BEFORE USING YOUR APPLIANCE • Donotusealuminumfoiltocovertheovenracksortolinetheovenbottom. Heat can be trapped beneath the foil, this can cause damage to the oven and the food may not cook correctly. 3) Before baking or broiling: One at a time turn the oven and broiler burners for 20 to 30 minutes each. This burns off the manufacturing oils used by the factory. -
Page 10: Cooktop Use
COOKTOP USE BURNERS Your new professional gas range is equipped with burners typical of those used in restaurants. These burners are designed for maximum cleanability and controllability. The large cap spreads the simmer heat out Brass- to avoid too much heat being concentrated on the center Port of the pan. -
Page 11: Burner Efficiency And Flame Characteristics
COOKTOPUSE BURNER EFFICIENCY AND FLAME CHARACTERISTICS It is necessary to keep the burner ports and the igniters clean for proper lighting and efficient performance of the cooktop burners. Proper Flame Height burner flame should burn completely around the burner with no excessive noise or lifting.The flame should be blue in color and stable with no yellow tips. -
Page 12: Wok Ring
A Wok ring is provided with your new DCS appliance. The ring is cast iron, and has a porcelain enamel finish. It can be used with the DCS model CW wok and most Fig. 6 (305 & 485 models) commercially available woks. To use the ring, place it on the grate over the desired burner. -
Page 13: Grill Use
COOKTOP USE Top View of Wok Ring -- Fig.8 GRILL USE GRILL Side A Side B The two grill grates are reversible (see fig. 9). Place the side with the two grooved tabs towards the back of the cooktop. The grill grates are made of durable porcelain enameled cast iron. -
Page 14: Grill Use
This is normal and does not affect the cooking. Do not replace the radiant tray/ceramic rods with alternates. Contact DCS for genuine factory-direct replacement parts 1-888-281-5698 or see page 1 for contact information. -
Page 15: Griddle Use
GRIDDLE USE The built-in griddle on your cooktop is made from Type 304 stainless steel, highly polished to provide a smooth cooking surface.It is normal for it to darken with use as oils cook onto the surface to provide a stick resistant base or _seasoning" Since the griddle is made from stainless steel,the surface will not... -
Page 16: Oven Use
GRIDDLE USE USE OFTHE GRIDDLE Before starting to cook on the griddle, be sure the drip tray and liners are in place. Preheat griddle for 15 minutes with the control knob set to the temperature suggested on the cooking chart. When the griddle is preheated, the HEATING light will turn off. -
Page 17: Convection Baking
OVEN USE CONVECTION BAKING Convection baking is baking with a fan at the back of the oven circulating the hot air in a continuous pattern around the food. This circulating hot air heats and browns the surface of the food more effectively than in a standard oven. - Page 18 OVEN USE Aluminum pans work best for all types of baked goods. For the best browning, use a pan with a dark or dull finish that absorbs heat, when baking pies and breads. A shiny finish works best for cakes and cookies, since it reflects some of the heat and provides a more tender surface.
-
Page 19: Preheating
OVEN USE PREHEATING Preheating takes about 10 to 15 minutes depending on the temperature set. Preheating is usually necessary for foods baked at high temperature for a short period of time, i.e. drop cookies. The oven heating light wile turn offwhen the oven has reached temperature. SETTING THE 12"... -
Page 20: Oven Racks
OVEN USE 27" & 24" OVENS The larger 27" selfcleaningconvectionoven is locatedon the right side of a 48" RDSRangeor isthe only oven on a 36" Range. The oven comesstandard with (3) oven racksand three positionroller assisted racksupports.A porcelainized steelbroiler pan isincludedwith this oven. NOTE: About the miler assisted rack supports (27"... -
Page 21: Broiling
OVEN USE HIGH ALTITUDE BAKING Recipes and baking times vary if you are baking at a high altitude. For accurate information write to the Agriculture Extension Service, Colorado State University, Fort Collins, Colorado 80521. Specify the type of information and the baking mode (convection bake or bake) you need i.e. cakes, cookies, breads, etc. -
Page 22: Slow Cooking / Low Temperature Cooking
OVEN USE Using a Meat Thermometer to Broil To accurately determine the doneness of a thick steak or chop (1-1/2 inches thick or more), use a meat thermometer. Insert the point of the thermometer into the side of the meat to the center. Cook the first side to 90oF for rare meat. -
Page 23: Suggested Temperatures To Keep Food Hot
OVEN USE SUGGESTED TEMPERATURES TO KEEP FOOD HOT Food Oven Food Oven Temperature Temperature Beef Lamb and Veal Roasts 170O-200OF Rare lS0O - 155°F Pancakes and Waffles 200 ° - 22SoF (covered) Medium 155° - 170oF Potatoes Well Done - 170° - 180OF Bacon 200°... -
Page 24: Proofing And Self-Cleaning Modes
PROOFING / SELFCLEANING MODE 12"OVEN PROOF MODE This feature of the 12" Proofing Oven maintains a warm, draft free environment useful for proofing yeast leavened products. SETTING THE 12" OVEN FOR PROOFING 1) Place dough in dish in the small oven. 2) Press"PROOF"Selector button •... -
Page 25: Oven Door Lock During Self-Clean
OVEN SELF CLEANING MODES OVEN DOOR LOCK DURING SELF-CLEAN oo0o When the clean cycle starts, the lock light turns on, and the automatic door lock cycle begins. frame Do Not attempt to open the door when the lock light is on. You can stop the cycle by pushing the off button. -
Page 26: Setting The Oven For Self-Clean
OVEN SELF CLEANING MODE • Turn on the ventilator hood above the range and leave it on until after the oven has completed the self-clean cycle. SETTING THE OVEN FOR SELF CLEAN 1) Push the"CLEAN" Selector Button. 2) Set Oven Control Knob to "CLEAN". •... -
Page 27: Care And Maintenance
CARE AND MAINTENANCE WHEN CLEANING THE RANGE OR cooIcroP: Be careful cleaning any part of this appliance while hot. All partsofthe appliancecanbe cleanedwith hot soapywater,rinsed,driedand buffedto a shinewith a soft,heavypilecloth. Alwaystry this first,as it isthe mildest cleaningprocedure. 1) Use the mildest cleaning procedure first. Some brands of cleaners of the same type are harsher than others, read their directions. - Page 28 CARE AND MAINTENANCE BURNERS For proper lighting and performance keep the burners clean. It is necessary to clean the burners if they do not BrassRing light even though the igniter dicks, if Locating Pin Main there has been a severe boil over, or when the flame does not burn blue.
- Page 29 CARE AND MAINTENANCE DRIP TRAYS AND DRAIN TUBES If you have a griddle or a grill there will be a tray liner. The drip trays are made of stainless steel. The drip trays are on rollers so they are easy to remove and replace.
-
Page 30: Oven And Door Interior
CARE AND MAINTENANCE BACKGUARD This is made of stainless steel. Use the mildest cleaning procedure first. Hot soapy water, rinse and dry. If the panel has food soil remaining, try a general kitchen cleaner, such as Fantastik ®,Simple Green ® or Formula 409 ®. -
Page 31: Oven Light Bulb Replacement
CARE AND MAINTENANCE OVEN RACKS AND RACK SUPPORTS All of the oven racks and 12"rack supports are chrome plated steel. The roller assisted rack supports in the main oven are stainless steel. To remove the 12"Oven rack supports, first remove the oven racks, then grasp the rack supports and pull up and out. -
Page 32: Parts Identification
PARTS IDENTIFICATION ITEM DESCRIPTION ITEM DESCRIPTION Grill Grill C ontrol Knob Burner Grates 12"Oven C ontrol Knob Griddle Burner Control Knob GrillGrates Oven Rack Slides 27"oven Control Knob 12"Oven OurnbCatch T ray Griddle C ontrol Knob Oven Heating E lement 12"Oven D oor 0yenLight S witch Oven Rack S lides... -
Page 33: Parts Identification
PARTS IDENTIFICATION ITEM DESCRIPTION Oven Ught Oven Heating Element Broil Convection Fan Baffle _ermostat Bulb PushButtonSelector Switch Root F eet(notshown) Wok(notshown) Ceramic R ods ( notshown) Radiant Tray (notshown) WokRing (notshown) -
Page 34: Howto Obtain Service
• Isthe burnerhead assembly alignedcorrectly? (Seepage 27,fig. 14) • isthe manualshut-offvalveopen?Thisis usuallylocatedwhere the gascomesout of the wall. For warranty service, please contact DCS Customer Service Representative at (888) 281-5698, Monday thru Friday, 6 am - 4:30 pm PST. Before you call, please have the following... -
Page 35: Warranty
One (1) Year Coversthe entire product,parts and labor Five (5) YearSurfaceburners, o ven burners,partsonly Ten (10) Year Porcelain oven,porcelaininnerdoor panel,partsonly DCS WILL PAY FOR: All repair labor and replacement parts, for parts found to be defective due to materials or workmanship. - Page 36 NOTES...
- Page 37 NOTES...
Need help?
Do you have a question about the RDS-486GD and is the answer not in the manual?
Questions and answers