Table of Contents
Advertisement
Quick Links
Advertisement
Chapters
Table of Contents

Related Manuals for SoundMax SM-CDM1042


Summary of Contents for SoundMax SM-CDM1042
- Page 1 SM-CDM1042 CD/MP3-RECEIVER CD/MP3- Instruction manual...
-
Page 2: Table Of Contents
Dear customer! Thank you for purchasing our product. For safety, it is strongly recommended to read this manual carefully before connecting, operating and/or adjusting the product and keep the manual for reference in the future. Table of contents TABLE OF CONTENTS ..................... 2 IMPORTANT SAFEGUARDS .................... -
Page 3: Important Safeguards
Important safeguards Read carefully through the manual to familiarize yours with this high-quality sound system. Disconnect the vehicle's negative battery terminal while mounting and connecting the unit. When replacing the fuse, be sure to use one with an identical amperage rating. Using a fuse with a higher amperage rating may cause serious damage to the unit. -
Page 4: Installation/Connections
Installation/Connections First complete the electrical connections, and then check them for correctness. If you are not confident working with electrical wiring, removing and reinstalling interior panels, carpeting, dashboards or other components of your vehicle, please call your dealer in order to have the unit professionally installed. - Page 5 Installation method A After inserting the holder into the dashboard, select the appropriate tab and bend them inwards to secure the holder in place. Insert fingers into the groove in the front of frame and remove it. Insert the levers supplied with the unit to the grooves at both sides.
- Page 6 Installation method B Note: Outer trim frame, hook, and mounting sleeve are not used for this installation. This is only intended as a general guide; contact the vehicle's manufacturer for specific instructions. This method of installation uses the screw holes at the sides of the unit and the holes of the existing vehicle mounting bracket.
- Page 7 To detach the front panel The front panel of the unit may be removed as a theft deterrent. After removing the front panel, use the case provided to keep the front panel from getting damaged. 1. Press the OPEN button to flip down the front panel. 2.
-
Page 8: Connection Scheme
Connection scheme Notes: In spite of having any kinds of speaker system, must use 4 ohms impedance of speaker to reduce the distortion during high volume level. Prohibit to make the conductors of auto antenna and ground touch with each other. -
Page 9: Accessories
Accessories Name Hexagon nut M5 T (3.5 mm) Mounting box (0.6 mm) Left key (1.0 mm) Right key (1.0 mm) Metal bar (0.8 mm) ISO connector Plain washer =5 mm Carrying case Outer trim ring Spring washer =5 mm Screw 5X5 mm Screw 5X25 mm... -
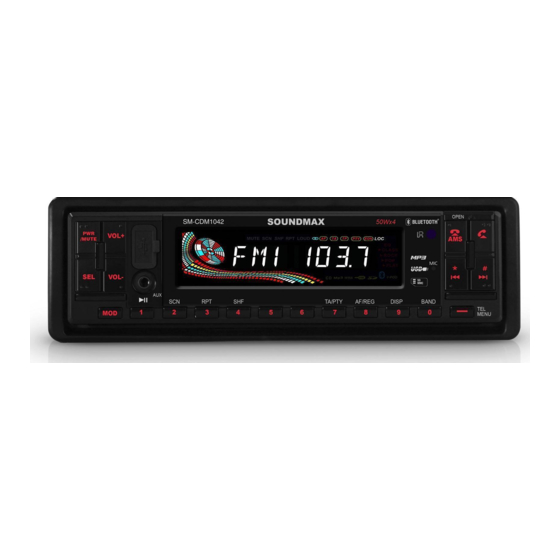
Page 10: Panel Controls
Panel controls Front panel 1. PWR/MUTE button 2. SEL button 3. MOD button 4. AUX in jack 5. No 1/PLAY/PAUSE button 6. No 2/SCN button 7. No 3/RPT button 8. No 4/SHF button 9. No 5 button 10. No 6 button 11. - Page 11 Inner panel Press the OPEN button on the front panel to flip it down. 26. SD/MMC-card slot 27. Disc slot 28. EJECT button 29. Light indicator 30. RESET button...
- Page 12 Remote Controller (RC) 1. MODE button 2. POWER button 3. No 2/SCN button 4. No 1/PLAY/PAUSE button 5. No 4/SHF button 6. No 8/AF/REG button 7. No 7/TA/PTY button 8. PREVIOUS/* button 9. SEL/ENTER button button 11. TEL MENU button 12.
- Page 13 Changing the battery Press the catch and at the same time pull out the battery tray. Insert the 1 x lithium battery, type CR2025 (3V) battery with the stamped (+) mark facing upward. Insert the battery tray into the remote control. Warning: Store the battery where children cannot reach.
-
Page 14: General Operations
General operations Power button Press any button (except OPEN) or insert disc to switch the unit on. Press POWER button for several seconds to switch the unit off. Volume control Press VOL+/VOL- buttons to adjust the volume level. Audio settings adjustment Press SEL button until the display shows: VOL =>... - Page 15 During AF search, PI stations and non-RDS (Radio Data Station) stations with strong signal will be masked, in the latter case, the non-RDS stations may cause interference, resulting the real AF to be masked due to the misjudgment of the radio under interference. Press VOL+/VOL- buttons to select the desired mode: MASK DPI and MASK ALL.
- Page 16 BEEP OFF: the beep is disabled. STEREO/MONO: FM stations are usually listened in stereo mode. However, if the signal weak or reception is not as good, switching to MONO mode usually improves the overall sound quality. Choose FM STEREO or MONO audio effect. LOCAL/DX: In urban settings, most stations are strong enough and stations are usually listened in LOCAL mode.
- Page 17 Information display Press DISP button to operate as the conversion of each display mode as follows: - In case of receiving a RDS station In radio mode: PS -> CT -> FREQ -> P TY In CD mode: CD -> CT -> (ID3 TAG) -> PS -> FREQ -> PTY * In case of no receiving CT or PTY Information, the display shows as “NO CLOCK”...
-
Page 18: Radio Operations
Radio operations Note: RDS (Radio Data System) service availability varies with areas. Please understand if RDS service is not available in you area, the following service is not available, either. To select a radio band In radio mode, press the BAND button repeatedly to select a radio broadcasting band you need. FM 1 =>... - Page 19 Press a preset button (1-6) briefly to recall the stored station. In case of RDS mode, the strongest AF is selected after AF searching. Auto store/Preset scan Preset scan: Press the AMS button to scan each preset station in the memory of the current band. Finally the radio will play the first preset station.
-
Page 20: Rds Function
RDS function Press AF/REG button to switch ON or OFF the RDS function. Setting RDS mode Whenever RDS is switch on, symbol “AF” appears on the display. Program name is displayed on receiving a RDS station. “AF” starts blinking if the broadcasting signals getting worse. Regional Program Operation Press AF/REG button for 2 seconds to switch on or off region mode. - Page 21 When you select the PTY SPEECH GROUP, the preset numbered buttons are shared as follows: Button Program No1/PLAY/PAUSE NEWS, AFFAIRS, INFO No2/SCN SPORT, EDUCATE, DRAMA No3/RPT CULTURE, SCIENCE, VARIED No4/SHF WEATHER, FINANCE, CHILDREN SOCIAL, RELIGION, PHONE IN TRAVEL, LEISURE, DOCUMENT Listening to Traffic Announcement Press TA/PTY button to turn on mode and a traffic announcement is transmitted.
-
Page 22: Cd/Mp3/Wma Operations
CD/MP3/WMA operations This unit can play disc types: CD/CD-R/-RW. Compatible with formats: MP3/WMA. Loading/Removing the disc Press OPEN button to flip down the front panel. Insert the disc into the disc slot with the printed side facing up; the unit will play the disc automatically. Press EJECT button to eject the disc. Switching to CD/MP3/WMA mode When a disc is inserted in the unit, press MODE button on the RC or MOD button on the unit to switch to the CD/MP3/WMA mode. - Page 23 Repeat track Press No3/RPT button to set the unit to repeat the same track. Press it again to stop the repeat function. When playing MP3 or WMA disc, press this button for two seconds to play all tracks in the current folder repeatedly.
- Page 24 Note: You can also select a track directly, after access serial number search mode, press and hold VOL+/VOL- buttons to select the number of your favorite track with high speed. Finally press SEL button to confirm and play the selected track. Folders/Files Navigate search mode: a) In playback of discs with MP3 or WMA format, press the AMS button twice to access the file search mode, the “FILE-SCH”...
- Page 25 c) Press and hold SEL button to confirm and play the selected file. If there is no such file on the current disc “NO MATCH” will be shown on the LCD display. ID3 information of MP3 file In playback of MP3 discs, if you press the BAND button repeatedly, the folder name, file name, title, artist and album information will be scrolling on the LCD display.
-
Page 26: Mixed-Cd Operations
Mixed-CD Operations The unit can play the mixed-CD disc (when disc contains both CD audio tracks and MP3/WMA files). When you insert a mixed-CD disc into the CD slot, it starts to play the CD audio tracks. If you want to switch between CD audio tracks and MP3/WMA files, press and hold No5 button or No6 button. -
Page 27: Usb Device Operations
USB Device Operations The unit is equipped with a USB port on the front panel of the unit, you can insert a USB flash memory in the USB slot. When you insert a USB flash memory in the slot, the unit will search the MP3 files and start to play them automatically. - Page 28 Title/ Artist/ Album: 32 byte support. Multi card reader not support. USB 2.0 support. Note: USB format supports 2.0. Capacity: from 1 GB. SD cards brands: Canon, Fuji film, Palm, Motorola, Microsoft, IBM, HP, Compaq, Sharp, Samsung, etc. Capacity: up to 4 GB. MMC cards brands: Ericsson, Nokia, Motorola, HP, Palm, Sanyo, Microsystems, etc.
-
Page 29: Mp3 Overview
MP3 overview Notes on MP3 MP3 is short for MPEG Audio Layer 3 and refers to an audio compression technology standard. This product allows playback of MP3 files on CD-ROM, CD-R or CD-RW discs. The unit can read MP3 files written in the format compliant with ISO 9660. However it does not support the MP3 data written by the method of packet write. -
Page 30: Bluetooth Function
Bluetooth Function 1. Pairing 1.1 Press and hold MODE button on the RC or MOD button on the unit for two seconds to access pairing mode. 1.2 During pairing, please activate your mobile phone and input pairing code “1234” and confirm in your mobile phone. - Page 31 3.1.3 Press the button to execute dialing. 3.2 Dial the last number 3.2.1 In connect status, press the button to activate the bluetooth mode. 3.2.2 Press the button to find out the last dialing number. 3.2.3 Press the button to execute dialing. 3.3 Dial the preset number 3.3.1 In connect status, press the button to activate the bluetooth mode.
- Page 32 7. Bluetooth menu wizard In connect status, press the TEL MENU button repeatedly to view bluetooth menu. The structure of the bluetooth menu as follows: PRENUM: Preset number list. RECV: Received call list. DIAL: Dialed call list. MISS: Missed call list. AUTOANS (MANUANS): Switch auto answer or manual answer.
- Page 33 Select auto answer or manual answer the coming phone by pressing VOL+ or VOL- button and press button to confirm. e) Adjust the bluetooth speaker volume You can adjust the volume level of bluetooth speaker by pressing VOL+/ VOL- button. 8.
-
Page 34: Esp Function
ESP function This unit has the electronic shockproof (ESP) function. CD disc: 40 seconds MP3 disc: 120 seconds WMA disc: 300 seconds Anti-theft system This unit is equipped with a slide-down detachable and mask panel. Panel can be detached and taken with you, helping to deter theft. -
Page 35: Cleaning
Cleaning Cleaning the cabinet Wipe with a soft cloth. If the cabinet is very dampen (not dropping wet) the cloth with a weak solution of soapy water, and then wipe clean. Cleaning discs Fingerprints should be carefully wiped from the surface of disc with a soft cloth. Unlike conventional records, compact discs have no grooves to collect dust and macroscopic dirt, so gently wiping them with a soft cloth should remove must panicles. -
Page 36: Troubleshooting Guide
Troubleshooting guide Symptom Cause Solution No power The car ignition is not on. If the power supply is properly connected to the car accessory switch the ignition key to "ACC". The fuse is blown. Replace the fuse. Disc cannot be loaded. There is a disc inside the unit. -
Page 37: Specification
Specification General Power supply 12 V DC Current consumption max. 15 A Maximum power output 50 Wx4 channels Fuse 15 A Dimensions (L x W x H) 178 x 50 x 160 mm Supported storages D/CD-R/CD-RW/USB/SD/MMC FM stereo radio Frequency range 87.5 - 108.0 MHz Usable sensitivity I.F. - Page 38 ......................38 ..................39 ..................40 ....................44 ....................45 ....................46 ....................50 ..................... 54 RDS......................56 CD/MP3/WMA ................59 ................ 63 AUX IN......................63 SD/MMC ..................63 ..................64 3 ........................66 BLUETOOTH....................68 ESP ......................72 ..................... 72 ................
- Page 43 OPEN,...
- Page 45 M5 T (3,5 (0,6 (1,0 (1,0 (0,8 5X25 5X29,3...
- Page 46 PWR/MUTE No 1/PLAY/PAUSE No 2/SCN No 3/RPT No 4/SHF No 5 No 6 No 7/TA/PTY No 8/AF/REG No 9/DISP No 0/BAND TEL MENU PREVIOUS/* NEXT/# OPEN AMS/ 21. IR 23. LCD 24. USB VOL+/VOL-...
- Page 47 OPEN, SD/MMC- EJECT RESET...
- Page 48 MODE POWER No 2/SCN No 1/PLAY/PAUSE No 4/SHF No 8/AF/REG No 7/TA/PTY PREVIOUS/* SEL/ENTER TEL MENU 3/RPT No 5 No 6 No 9/DISP NEXT/# No 0/BAND VOL+/VOL- AMS /...
- Page 49 (CR 2025 3V), – 6...
- Page 50 (POWER) OPEN) POWER, VOL+/VOL-, SEL, : VOL ( ) => BAS ) => TRE ( ) => BAL ( => FAD ( VOL+/VOL-, : TA SEEK/ALARM, MASK DPI/ALL, TA VOL, RETUNE L/S, EQ MODE, LOUD ON/OFF, CLK FORMAT, VOL LAST/ADJ, V-ADJ, BEEP ON/OFF, STEREO/MONO, LOCAL/DX.
- Page 51 ALARM: MASK : MASK DPI MASK ALL. VOL+/VOL-, MASK DPI: MASK ALL: RDS. TA VOL RETUNE: Retune-S Retune-L – TA Seek. RETUNE S: TA SEEK 30 RETUNE L: TA SEEK 90 Retune TA SEEK. EQ MODE: EQ MODE : DSP OFF, DSP POP, DSP ROCK, DSP CLAS, DSP FLAT.
- Page 52 VOL LAST: VOL ADJ: SEL, V-ADJ. VOL+/VOL- BEEP BEEP: BEEP ALL: BEEP OFF: STEREO/MONO: LOCAL/DX: LOCAL ( DISTANT « » PWR/MUTE, VOL+/VOL-. MODE : RADIO, CD, USB, SD, AUX BT AUDIO. , USB...
- Page 53 DISP; DISP; VOL+ VOL- DISP, : PS ->CT ->FREQ ->PTY CD: CD ->CT ->(ID3 TAG) ->PS ->FREQ ->PTY “NO CLOCK” “NO PTY”. : “NO CLOCK” ->FREQ->”NO PTY” CD -> “NO CLOCK” -> FREQ -> “NO PTY” : CT = clock time ( ) FREQ = frequency ( OPEN, RESET...
- Page 54 RDS ( BAND, : FM 1=> FM 2 => FM 3 => MW1 => MW2. NEXT PREVIOUS, «SEARCH». NEXT PREVIOUS, «MANUSEEK». «SEARCH». (18 FM, 12 MW) NEXT/PREVIOUS. (1-6), PI, PS, AF.
- Page 55 (1-6), RDS, AMS, AMS.
-
Page 56: Rds
AF/REG, RDS. «AF». RDS. «AF» AF/REG REG. TA/PTY, PTY MUSIC GROUP ( ) => PTY SPEECH GROUP ( => GROUP PTY OFF ( PTY MUSIC GROUP PTY SPEECH GROUP PTY MUSIC GROUP, No1/PLAY/PAUSE POPM, ROCKM No2/SCN EASYM, LIGHT M No3/RPT CLASSICS, OTHER M No4/SHF JAZZ, COUNTRY... - Page 57 NATION M, OLDIES FOLKM PTY SPEECH GROUP, No1/PLAY/PAUSE NEWS, AFFAIRS, INFO No2/SCN SPORT, EDUCATE, DRAMA No3/RPT CULTURE, SCIENCE, VARIED No4/SHF WEATHER, FINANCE, CHILDREN SOCIAL, RELIGION, PHONE IN TRAVEL, LEISURE, DOCUMENT TA ( TA/PTY, PI, PS, TP, TA, AF, EON – –...
- Page 58 – EON: Enhanced Other Networks EON (...
-
Page 59: Cd/Mp3/Wma
CD/MP3/WMA : CD/CD-R/-RW. : MP3/WMA. OPEN, EJECT, CD/MP3/WMA MODE CD/MP3/WMA. PREVIOUS, NEXT, PREVIOUS NEXT No1/PLAY/PAUSE No2/SCN... - Page 60 No3/RPT No4/SHF MP3/WMA: => => => AMS, «TRK-SCH». SEL, VOL+ VOL-. «TRK 001» «1» VOL+ VOL- «0», VOL+ VOL-.
- Page 61 «0», VOL+ VOL-. SEL, VOL+ VOL-, SEL, AMS, «FILE-SCH». SEL, VOL+ VOL-. «FOLD 001», «001» VOL+, VOL– SEL, SEL, VOL+ VOL-, VOL-. AMS, «FOLD-SCH». SEL, VOL+ VOL-. «A». VOL+ VOL-, «A»; «NO MATCH». AMS, «CHAR-SCH». SEL, VOL+ VOL-. «A». VOL+ VOL-,...
- Page 62 «A»; «NO MATCH». BAND, 1.0/2.0.
-
Page 63: Aux In
MP3/WMA MP3/WMA No6, No6, AUX In MODE AUX. SD/MMC SD/MMC SD/MMC SD/MMC MODE SD/MMC CD/MP3/WMA /USB ». -
Page 64: Usb
MODE CD/MP3/WMA /USB ». USB/SD/MMC SD/ MMC, 2 1 (SD/MMC). FAT 12/ FAT 16/ FAT 32 FAT 12/ 16 ( , 500 FAT 32 ( , 500 : 32 : 32 (id3tag ver 2.0) - Page 65 USB 2.0. USB: USB 2.0. : Cannon, Fuji film, Palm, Motorola, Microsoft, IBM, HP, Compaq, Sharp, Samsung, MMC: : Ericsson, Nokia, Motorola, HP, Palm, Sanyo, Microsystems,...
- Page 66 MPEG 3 CD-ROM, CD-R ISO 9660. «.mp3». «.mp3», « MP3» « », PC « » « » 256. VBR, . VBR: CD-R CD-RW, 44,1 ISO 9660,...
- Page 67 CD-R MP3 CD-R CD-RW CD-R CD-RW CD-R CD-RW ID3TAG.
-
Page 68: Bluetooth
Bluetooth MODE bluetooth «1234». «PAIR OK» «PAIR ERR». BAND; bluetooth «CONT OK» «NO CONT». bluetooth BAND. 3.1.1 bluetooth. 3.1.2 «0~9» 3.1.3... - Page 69 3.2.1 bluetooth. 3.2.2 3.2.3 3.3.1 bluetooth. 3.3.2 «1~6», TEL MENU; Bluetooth...
- Page 70 TEL MENU bluetooth. PRENUM: RECV: DIAL: MISS: AUTOANS (MANUANS): TALK 29: Bluetooth. TEL MENU bluetooth. VOL+ VOL-. TEL MENU, «EMPTY». VOL+ VOL-, 0~9, SEL,...
- Page 71 VOL+ VOL-; bluetooth bluetooth VOL+/ VOL-. 9. BT AUDIO A2DP, bluetooth, MODE AUDIO.
-
Page 72: Esp
(ESP). : 40 : 120 : 300... - Page 75 « ». RESET.
- Page 77 12 , . 15 D/CD-R/CD-RW/USB/SD/MMC 87,5 – 108,0 10,7 522 – 1620 – 18 . 2000...
Need help?
Do you have a question about the SM-CDM1042 and is the answer not in the manual?
Questions and answers