
Related Manuals for SoundMax SM-CDM1037


Summary of Contents for SoundMax SM-CDM1037
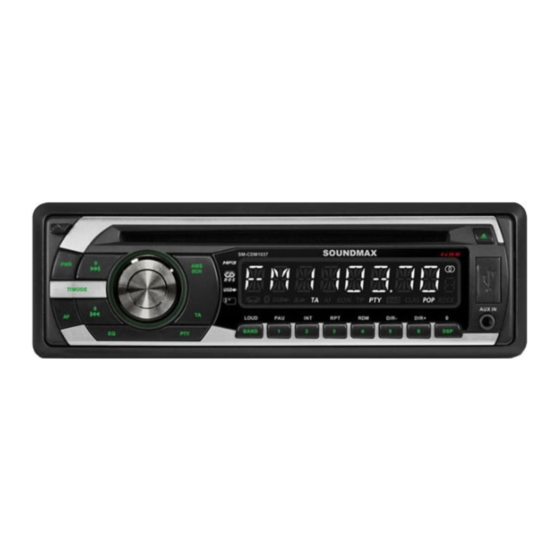
- Page 1 SM - CD M 1 0 3 7 CD / M P3 r ece iv e r CD / M P3 - " " I n st r u ct ion m a n u a l...
-
Page 2: Table Of Contents
D e a r cu stom er ! Thank you for purchasing our product . For safet y, it is st rongly recom m ended t o read t his m anual carefully before connect ing, operat ing and/ or adj ust ing the product and keep the m anual for reference in t he fut ure. Ta ble of con t e n t s TABLE OF CONTENTS .............................. -
Page 3: I Mportant Safeguards
I m por t a n t sa fegu a r ds ‚ Read carefully t hrough t his m anual t o fam iliarize yourself wit h t his high-qualit y sound syst em . ‚ The beginning of operat ion is t he m om ent of the unit installat ion. Before use t he device in wint er it is recom m ended to heat up t he passenger com par tm ent during 20 seconds or t o t he operat ion tem perat ure. -
Page 4: Accessori Es
Acce ssor ie s Receiver 1 pc Front panel 1 pc Carrying case 1 pc Connect or 2 pcs Mount ing parts: Hexagon nut 1 pc Mount ing sleeve 1 pc Release keys 2 pcs Metal bar 1 pc Outer t rim fram e 1 pc Plain w asher 1 pc... -
Page 5: I Nstallati On/ Connecti On
I nst a lla t ion/ Con ne ct ion ‚ Choose t he m ount ing locat ion where t he unit will not int erfere wit h the norm al driving funct ion of t he driver. ‚ Before finally inst alling t he unit, connect t he wiring and m ake sure that t he unit works properly. - Page 6 I nstall t he sleeve into t he dashboard; ensure it is inst alled wit h t he correct side and t here are no obst acles ( wires, dashboar d elem ent s, etc) for t he unit inst allat ion. Aft er installing the sleeve int o t he dashboard, bend tabs fit t ing to the size of t he dashboard t o fix t he sleeve in place.
- Page 7 2 . D I N REAR- M OUN T ( M e t hod B) For t his m ethod, use t he screw holes in t he lat eral sides of t he unit. Fix t he unit w it h t he help of t he fact ory radio m ount ing bracket s.
- Page 8 Conn e ct ion diagr am N ot e s: ‚ I n spit e of having any kinds of speaker syst em , m ust use 4 ohm s im pedance of speaker t o reduce t he dist ort ion during high volum e level. ‚...
- Page 9 Using t he I SO Conne ct or I f your car is equipped with t he I SO connect or, t hen connect t he I SO connect ors as illust rat ed. For connect ions wit hout t he I SO connect ors, check t he wiring in t he vehicle carefully before connect ing, incorrect connect ion m ay cause serious dam age t o this unit .
-
Page 10: Control Elements
Cont r ol e le m e n t s Fr ont pane l OPEN but t on PWR but t on 9/ NEXT but t on SELECT but t on/ VOLUME regulat or AMS/ SCH but ton Disc slot Display EJECT but t on 7/ MODE butt on... -
Page 11: Lcd Layout
I nner p a ne l Press OPEN but t on on t he front panel t o detach it . 1. RESET but t on ( hole) 2. SD card slot 3. Disc slot Pressing RESET hole will erase the clock set t ing and st ored stat ions. LCD la you t 1. -
Page 12: General Operati Ons
Ge n e r a l ope r a t ions Pow er but t on Press PWR but t on on t he panel t o swit ch the unit on. Press t his but t on t o swit ch t he unit off. Volum e cont rol Rot ate VOLUME regulat or t o adj ust volum e level. - Page 13 Loudness cont rol Press and hold LOUD/ BAND but t on unt il LOUD ON is displayed. LOUD funct ion is t o em phasize the bass out put . Press and hold t his but t on again t o switch loudness off. Equ alize r se t t ing Press repeatedly EQ button to choose bet ween sound effects: FLAT = >...
-
Page 14: Radi O Operati Ons
Ra dio ope r a t ion s Ba n d sele ct ion Press repeatedly LOUD/ BAND but ton t o select your desired radio band in radio m ode: FM1, FM2, FM3, FM4 ( OI RT) , MW1 ( AM1), MW2 ( AM2). Each band can store up t o 6 preset st at ions, for t he t otal of 36 preset m em ory stat ions. - Page 15 Ra dio D a t a Syst em RDS ( Radio Dat a Syst em ) service availabilit y varies wit h areas. Please underst and if RDS service is not available in you area, t he following service is not available, eit her . AF ( Alt er n a t ive Fr equ en cies) fu n ct ion Press AF but t on t o t urn t he AF funct ion on or off.
- Page 16 but t ons t o choose different m usic program s. Each num ber but t on will show 3 different speech program s for you t o choose. When PTY is selected, t he radio st arts t o search corresponding PTY inform at ion, and st ops if t he corresponding PTY inform at ion is det ected.
-
Page 17: Di Sc/ Usb/ Sd Operati Ons
D isc/ USB/ SD ope r a t ions I nse r t / Ej e ct discs ‚ I nsert a disc int o t he disc slot wit h label side up. The disc will be aut om at ically loaded int o t he unit . The first file in t he root folder will be played. - Page 18 Pla y / Pa use Press PAUSE/ 1 but t on t o pause the playback, press one m ore t im e t o resum e norm al playback. I nt r o pla yba ck When I NT/ 2 but t on is pressed, t he first several seconds of each t rack on t he st orage is played. Press again t o st op int ro and listen t o t rack.
- Page 19 ‚ Searching from root directory: Press AMS/ SCH but t on 3 t im es, t hen root direct ory search m ode is act ivated. Press PREVI OUS/ NEXT butt ons or rot ate VOLUME regulat or to select a file or folder nam e from t he list .
-
Page 20: Handli Ng Compact Di Scs
H a n dlin g com pa ct discs ‚ Do not insert anyt hing ot her t han a CD int o t he CD loading slot. ‚ Do not use cracked, chipped, warped, or ot herwise dam aged discs as t hey m ay cause skipping or noise dam age t he player . -
Page 21: Troubleshooti Ng Gui De
Tr ou ble sh oot in g gu ide Below is a t able describing sim ple m easures t hat can help you elim inate m ost problem s likely t o em erge when t his unit is in use. I f below m easures do not help, t urn t o a service center or t o the nearest dealer. Sy m pt om Ca use Solu t ion... -
Page 22: Speci Fi Cati On
Sp e cificat ion Ge n e r al Power supply 12 V DC Current consum pt ion < 15 A Fuse 15 A Maxim um power output 4 x 50 W Dim ensions/ Net weight 178 x 50 x 160 m m / 1.2 kg Tem perat ure range - 20 - + 60... - Page 23 " " " " " " " " " " " " " " " 1 " " " " " " " ................................23 " ..........................24 " ............................25 ..........................26 " ............................31 " " ..........................32 "...
- Page 24 " ‚ " " " " " " ‚ " " " " " " " " " " " " " " " " " " " " " " " " " " ‚ " " " " "...
- Page 25 " " " " " " " " " " " " " " " " " " " " " " " " " 7 21 " " 7 5 " " " " "...
- Page 26 " ‚ " " " " " " " " " " " " , " " " " " ‚ " " " " " " " " " " " " " " " " " " " "...
- Page 27 " " " " " " " " " " " " " " " " " " " " " " " " " " " " " " " " " " " " " " " " "...
- Page 28 " " " " " " " " " " " " " " " " " " " " " " " " " " " " " " " " " " " " " " " " "...
- Page 29 " ‚ " " " " " " " " " " " " ‚ " " " " " " " "...
- Page 30 " I SO " " " " " " I SO, " " " " " " " " " I SO " " " " " " " " " " " " " " " " " " ( + ) - - - "...
- Page 31 " " OPEN 9/ NEXT SELECT/ VOLUME AMS/ SCH " " EJECT 7/ MODE 8/ PREVI OUS LOUD/ BAND 1/ PAU 2/ I NT 3/ RPT 4/ RDM 5/ DI R- 6/ DI R+ 0/ DSP 24. USB-...
- Page 32 " " OPEN, " " ) RESET " " " " " " " RESET " " " " " " " " " " " " " " " " " " " " " " " Rock " "...
- Page 33 " " " " " " " " " " " " " " " " " VOLUME, " " " " " " " " SELECT : BAS ( ) = > TRB " " " " " ) = > BAL ( ) = >...
- Page 34 ‚ " " " ‚ " " " ERR (« » ). " " " " " " " " " " " " " " PREVI OUS NEXT, " " " " " " PREVI OUS " " " "...
- Page 35 " " " " " " " " " " " " " " " " " " " " " " " " " " " " " " " " " MP3-...
- Page 36 " " " " " " " " " LOUD/ BAND, : FM1, FM2, FM3, FM4 " " " " " ( OI RT) , MW1 ( AM1) , MW2 ( AM2) . " " " " ‚ " " "...
- Page 37 RD S " " " " " " " " " " RDS ( " " " " " " " " " " AF ( " " " " " " " " " " " " " " "...
- Page 38 " PTY ( " " " " " RDS, " " " " " " " " PTY, " " " " " 1- 6, " " " " " " " " " " " " " " " "...
- Page 39 " " " / USB/ " ‚ " " " " " " " " " " " " " " " " " " ‚ " " " " " " " " " " " EJECT. " " "...
- Page 40 " " " " " " " " NEXT PREVI OUS, " " " " " " " " " " " " " " " " " " " " " " I NT/ 2, " " " " "...
- Page 41 2/ I NT D, E, F, 2 7/ MODE S, T, U, 7 3/ RPT G, H, I , 3 8/ PREVI OUS V, W, X, 8 4/ RDM J, K, L, 4 9/ NEXT Y, Z, Space, 9 5/ - DI R- M, N, O, 5 0/ DSP _, - , + , 0...
- Page 42 " " ‚ " " " " " " " " " ‚ " " " " " " " " " " " " ‚ " " " " " " " " " " " ‚ " " "...
- Page 43 " " " " " " " " " " " " " " " " " " " " " " " " " " " " " " " " " " " " " " " " " “...
- Page 44 " " " " " " " " " " " " " " " " " " " " " " " " " " " " " / 1,2 " " - 20 - + 60 " – + / - 30 "...
- Page 45 " – 18 " > 55 " RCA ( 2 " " " " " " " " " " " " " " " " " " " " " " " " " " " " " " ( "...
Need help?
Do you have a question about the SM-CDM1037 and is the answer not in the manual?
Questions and answers