Table of Contents
Advertisement
Quick Links
Advertisement
Table of Contents

Related Manuals for SoundMax SM-CDM1038


Summary of Contents for SoundMax SM-CDM1038
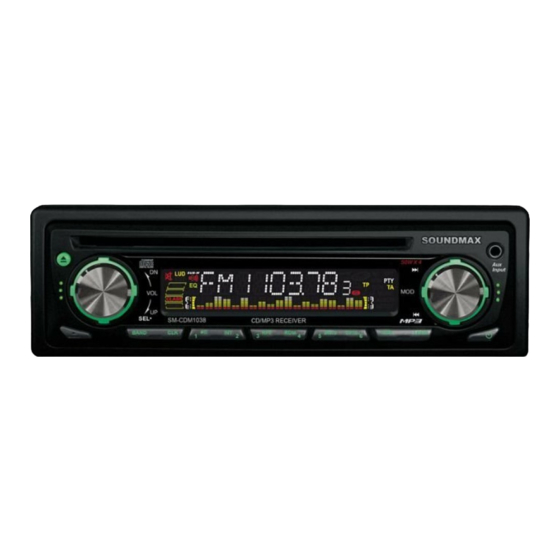
- Page 1 SM- CDM1038 CD/MP3-RECEIVER CD/MP3- Instruction manual...
-
Page 2: Table Of Contents
Dear customer! Thank you for purchasing our product. For safety, it is strongly recommended to read this manual carefully before connecting, operating and/or adjusting the product and keep the manual for reference in the future. Table of contents Table of contents ....................2 Important safeguards ..................3 Installation/Connections ..................4 Panel controls....................8... -
Page 3: Important Safeguards
Important safeguards · Read carefully through this manual to familiarize yourself with this high-quality sound system. · Use only in a 12-volt DC negative-ground electrical system. · Disconnect the vehicle's negative battery terminal while mounting and connecting the unit. · When replacing the fuse, be sure to use one with an identical amperage rating. Using a fuse with a higher amperage rating may cause serious damage to the unit. -
Page 4: Installation/Connections
· Do not install the unit in place where it is exposed to direct sunlight (including the faceplate), in order to avoid high heat. · The faceplate is a precision piece of equipment that contains sensitive electronic components. Do not subject it to excessive shock. ·... - Page 5 · Insert the levers supplied with the unit to the grooves at both sides. The unit can be installed or removed from the dashboard. 1. Dashboard 2. Nut (5mm) 3. Spring washer 4. Screw (5 x 25mm) 5. Screw 6. Strap 7.
- Page 6 Din rear-mount (method 2) Installation using the screw holes at both sides of the unit. 1. Select a position where the screw holes of the main unit are fitted for aligned, and tighten the screws at 2 positions at each sides. Use either truss screws (5 x 8mm) or flush surface screws (4 x 8mm), depending on the shape of the screw holes in the bracket.
- Page 7 Electrical connections...
-
Page 8: Panel Controls
Panel controls Disc eject. Volume Up (+) / Down (-). Push to select VOL/ BAS/ TRE/ BAL/ FAD. Push more than 2 seconds to Menu mode. MP3 track/ file/ character search Disk tray Display 1-6 radio preset: press to tune in a preset station. Hold for more than 2 seconds to store station. - Page 9 Disc playback: Intro play (10 seconds). Disc playback: Track repeat play. Disc playback: Track random play. Disc playback: MP3 track 10 down. Disc playback: MP3 track + 10 up. F/PS button: automatic scan/Store. Loudness. MODE button Power on: press any button on the panel except to turn on the unit.
-
Page 10: Menu Function
Menu Function Press the POWER button to turn the unit on, the display will show a message to indicate it is ready to use. Press the BAND for the radio mode, press MODE to select between Aux, Radio mode and CD/MP3 play. - Page 11 B. Press the VOL knob to increase or decrease the sound level of front or rear speaker. BEEP ON/OFF mode Press SEL button for 2 seconds, the display will show DSP OFF. Press the SEL button continuously until the display show BEEP ON, press the volume up/down button to toggle between it and BEEP OFF, then leave the unit idle for your desired setting to take effect.
- Page 12 DSP mode Press and hold the SEL button for 2 seconds, the display will show DSP OFF. Press the volume up/down button to choose EQ effect. POP => ROCK => CLASSIC => FLAT => DSP OFF After you have reached your desired effect, leave the unit idle in order for the new setting to take effect.
-
Page 13: Random : Play In Random Order
Automatic Store / Preset Scan (1) AUTOMATIC SCAN & STORE Press "F/PS" button for more than 3 seconds, the receiver will automatically scan and save stations for the 3 FM bands. (2) RESET Press "F/PS" button for less than 1 second, the receiver will reset the station setting to the default. -
Page 14: Mp3 Play Back
MP3 Play back CD Electronic Shock Protection 12or 45 seconds The electronic shock protection is ideal for driving uneven road. Press the Sound Select button for 2 seconds, the display will show "DSP OFF". Press the button again so that "ESP 12" will be shown on the display indicating that Electronic Shock Protection for 12 seconds will be activated. - Page 15 FILE SEARCH Press the "F/PS" Button twice and the display will show "FILE SCH". At this moment, press the Sound select button so that the current folder will be shown. Rotate the encoder volume to choose your desired folder and press all the way down to confirm. The input folder will be searched and play.
-
Page 16: Mp3 Overview
MP3 Overview Notes on MP3 · MP3 is short for MPEG Audio Layer 3 and refers to an audio compression technology standard. · This product allows playback of MP3 files on CD-ROM, CD-R or CD-RW discs. · The unit can read MP3 files written in the format compliant with ISO 9660. However it does not support the MP3 data written by the method of packet write. - Page 17 Notes on creating your own CD-Rs or CD-RWs containing MP3 files · To enjoy high quality sound, we recommend converting to MP3 files with a sampling frequency of 44.1 kHz and a fixed bit rate of 128 kbps. DO NOT store more than 256 MP3 files per disc.
-
Page 18: Anti-Theft System
Anti-Theft System This unit is equipped with a slide-down detachable panel. Removing this panel makes the radio totally inoperable. Place the detachable panel into the case. Switch off the power of the unit. Remove the detachable panel. Gently press the button of the case and open the cover. Place the panel into the case and take it with you when you leave the car. -
Page 19: Handling Compact Discs
Handling compact discs · Dirty, scratched or warped discs may cause skip ping or noise. · Handle the disc only by the edges. To keep clean do not touch its surface. · Discs should be stored in their cases after use to avoid scratches. ·... -
Page 20: Cleaning
Cleaning 1. Cleaning the cabinet Wipe with a soft cloth. If the cabinet is very dampen (not dropping wet) the cloth with a weak solution of soapy water, and then wipe clean. 2. Cleaning discs Fingerprints should be carefully wiped from the surface of disc with a soft cloth. Unlike conventional records, compact discs have no grooves to collect dust and macroscopic dirt, so gently wiping them with a soft cloth should remove must panicles. -
Page 21: Components
Components Nut 5 mm 1 pc Spring washer 2 pcs Screw M5x25 mm 1 pc Screw 1 pc Plain washer 2 pcs Strap 1 pc Operating instructions 1 pc. 2 pcs. Mounting collar 1 pc. Wire connector 1 pc. Removable face plate case 1 pc. Trim plate 1 pc. -
Page 22: Troubleshooting Guide
Troubleshooting guide Car's engine switch is not on. Turn your car's key to ACC or ON. General Cable is not correctly connected. Check connection. No power or no Fuse is burnt. Replace fuse. Check volume or mute on / off. sound If above solutions cannot help, press the RESET button. -
Page 23: Specification
Specification 12V DC (11V-16V), Test voltage 14.4V, negative General. Power supply: ground Maximum power output: 50Wx4 channels Rated power output (RMS): 25Wx4 channels (4 10% T.H.D.) Suitable speaker impedance: 4-8 ohm Pre-Amp output voltage: 2.0V(CD play mode: 1KHz, 0 dB, 10 K load) Fuse: 10A/5A... - Page 24 MP3 Play back...
- Page 25 · · 12 . · · · · · · · · ·...
- Page 26 · ·...
- Page 27 · (5 x 25 ·...
- Page 28 ·...
- Page 30 VOL/BAS/TRE/BAL/FAD. AUX. : FM1, FM2, FM3, MW1, MW2.
- Page 31 3 10 3 +10 F/PS: MODE...
- Page 32 POWER BAND MODE Aux, Radio CD/MP3. POWER VOL, BAS. TRE. BAL.
- Page 33 FAD. BEEP ON/OFF DSP OFF. BEEP ON LOUD LOUD LOUD ON, CLK,...
- Page 34 CLK, DSP OFF. POP => ROCK => CLASSIC => FLAT => DSP OFF BAND 3 FM (FM1, FM2, FM3) (MW1, MW2)
- Page 35 . 3 FM , F1, F2 . 2 MW , MW1 "F/PS" "F/PS" << <<...
- Page 36 "RPT ON.". "RDM ON" .
- Page 37 CD (12 "DSP OFF". "ESP 12" , "ESP 45". "F/PS" , "TRK SCH". SEL, "TRK"...
- Page 38 "F/PS" "FILE SCH". SEL, "F/PS" "CHAR SCH". SEL, · MPEG 3 · CD-ROM, CD-R CD-RW. · ISO 9660. · .mp3 . · .mp3 , ·...
- Page 39 · 256. · · · . VBR:...
- Page 40 CD-R CD-RW, MP3. · 44,1 · · ISO 9660, · CD-R · MP3 CD-R CD-RW · · CD-R CD-RW CD-R CD-RW · 1. ID3TAG. ·...
- Page 41 POWER OPEN,...
- Page 42 · · · · · · · · · ·...
- Page 44 (5 25...
- Page 45 30 , NO FILE: ERR-7: ERR-10: ERR-11: ERR-3: ERR-4: RESET...
- Page 46 14,4 (RMS): 10 % .D.) / 10 CD: 1 , 10 / 1.7 ESP: CD (40 ), MP3 (120 ) 87.5 108.0 / 12 = 50 ) / 50 / 55 522-1620 = 20 - 20 / > 80 0.2 % (1 / >...
Need help?
Do you have a question about the SM-CDM1038 and is the answer not in the manual?
Questions and answers