Table of Contents
Advertisement
Quick Links
Advertisement
Table of Contents

Related Manuals for Epson R-D


Summary of Contents for Epson R-D
- Page 1 ® User’s Guide...
- Page 2 Seiko Epson Corporation. The information contained herein is designed only for use with this Epson product. Epson is not responsible for any use of this information as applied to other products.
-
Page 3: Table Of Contents
Contents Introduction Main Features ........1 Safety Instructions . - Page 4 Installing the Software....... .44 EPSON PhotoRAW ......44 EPSON RAW Plug-In .
- Page 5 Viewfinder indicators ......51 Internal clock ....... . . 51 Power supply .
-
Page 6: Introduction
❏ We strongly recommend you back up files stored on the HDD to another storage device periodically. ❏ Epson is not liable for any problems resulting from the loss or corruption of data on the HDD. Safety Instructions Read all of these instructions before using this product, and keep this guide handy for later reference. -
Page 7: When Using The Strap
If a battery is swallowed, seek medical treatment immediately. ❏ Use only an Epson Li-ion battery for this camera, as specified in this manual. ❏ Do not use the battery that comes with this product for other devices. -
Page 8: Important Safety Instructions
These safety and operating instructions should be kept for future reference. ❏ Use only the Epson battery charger provided to charge the Epson Li-ion battery Model EU-85. Never attempt to charge other types of batteries in this charger as they may explode, leak, overheat, or cause personal injury. - Page 9 ❏ The battery charger included is designed for use with this product. Use of any other battery charger could result in fire, electric shock, or injury. ❏ Use only a power source that meets the power requirements indicated on the label attached to the product. If you are not sure of the power supply specifications in your area, contact your local power company or contact our Customer Support.
- Page 10 Introduction...
-
Page 11: When Using A Memory Card
When using a memory card ❏ Only memory cards designed for the product’s specifications can be used. ❏ The methods for using memory cards vary according to card type. Be sure to refer to the documentation included with your memory card for details. -
Page 12: Fcc Compliance Statement For United States Users
DECLARATION of CONFORMITY According to 47CFR, Part 2 and 15 for Class B Personal Computers and Peripherals; and/or CPU Boards and Power Supplies used with Class B Personal Computers: EPSON AMERICA, INC. Located at: MS 3-13 3840 Kilroy Airport Way... - Page 13 Operation is subject to the following two conditions: (1) this device may not cause harmful interference, and (2) this device must accept any interference received, including interference that may cause undesired operation. Trade Name: EPSON Type of Product: Digital Still Camera Model: G911A...
-
Page 14: Chapter 1 Getting Started
Make sure that your camera box contains all of the items shown below. Battery charger Power cord (for battery charger) Camera body Lens cap User’s guide CD-ROM (EPSON PhotoRAW/EPSON RAW Plug-In, Adobe Photoshop Elements 2.0*) * Adobe Photoshop Elements 2.0 may not be included in some countries. Li-ion battery Strap Getting Started... -
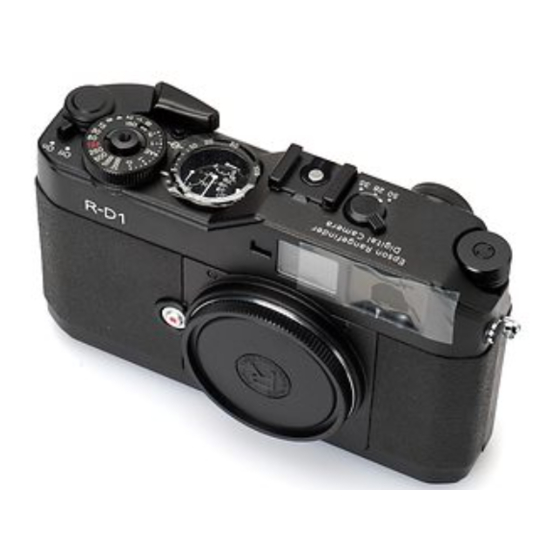
Page 15: Camera Parts
Camera Parts Front view Back view AE-lock button LCD display Top view X contact Lens release button JOG dial Photo quality/WB lever SD card access LED LCD button MENU button ENTER button CANCEL button USER button Shutter button Accessory shoe Status gauge Frame selector Power switch... -
Page 16: Getting Started
X contact Used to mount an optional flash. Lens release button Used to mount or remove lenses. AE-lock button Locks exposure. Photo quality/WB lever Sets photo quality or white balance. SD card access LED Indicates the following statuses of the SD card. On: accessing a memory card Flashing: a memory card error has occurred Off: not accessing a memory card... -
Page 17: Attaching The Strap To Your Camera
Attaching the Strap to Your Camera Follow the steps below to attach the strap to the camera. 1. Attach the protective pad and the metal ring to one side of the camera. 2. Lace the strap end through the holes in the protective pad and the metal ring. -
Page 18: Inserting The Battery
Indicates the battery is charging. Off: Indicates charging is complete or the battery is not fully seated in the battery charger. Inserting the battery Your camera uses the lithium-ion battery (EU-85) provided. Only use an Epson Li-ion EU-85 battery with the camera. -
Page 19: Installing And Removing A Memory Card
1. Make sure that the camera is off, and then open the battery cover as shown below. DUMMY 2. Insert the battery. Insert the battery into the camera until it clicks, making sure the orientation of the battery is correct. DUMMY 3. -
Page 20: The Write Protect Tab
Formatting a memory card Format a memory card when you want to erase all the data on the card or when you see a message on the LCD display instructing you to do so. Caution: ❏ The SD memory card must be formatted by your camera. Using an SD memory card formatted by a different camera may cause read or write errors. -
Page 21: Removing A Memory Card
Removing a memory card 1. Make sure the SD memory access LED is off, and then open the memory card cover. Caution: Never remove a memory card while the access light is on. Doing so may cause data in the card to be lost or damaged. 2. -
Page 22: Removing M (Bayonet) Mount Lenses
2. Insert the lens and turn it clockwise until you hear a click. Removing M (Bayonet) mount lenses 1. Turn the lens counterclockwise as far as it will go while pressing down the lens release button. Getting Started 2. Pull the lens straight out of the mount. Mounting L mount lenses Note: ❏... -
Page 23: Removing L Mount Lenses
2. Turn the M-Bayonet adapter ring clockwise, then remove the cover. DUMMY 3. Align the lens mount screw with that of the M-Bayonet adapter ring, and turn the lens clockwise until it clicks. Caution: Be careful not to tighten the lens too tightly. Removing L mount lenses 1. -
Page 24: Setting Up Your Camera
Setting Up Your Camera Turning the power on 1. Turn the power switch to the on position. When you turn your camera on, information about current settings (number of remaining photos, photo quality, remaining battery power, and white balance settings) is indicated on the status gauge on the top of the camera. -
Page 25: Setting The Date Format
3. Confirm that the year is highlighted, and rotate the JOG dial clockwise or counterclockwise to change the year. T i m e a n d D a t e 2 0 0 4 0 1 / 0 1 1 5 : 0 9 S e t Note: When you turn the JOG dial clockwise, the value will increase. -
Page 26: Power Save Timer Settings
The new setting is saved, and the screen returns to the Basic Setup menu. Power save timer settings If no operations are performed for a certain period when power is on, the LCD display turns off automatically and the camera enters Power Save Timer mode to save battery power. -
Page 27: Resetting The Default Settings
Resetting the default settings If necessary, you can use this function to initialize all current settings to their factory defaults, as shown below. Setting Default Color Color Film Standard Date YYYY/MM/DD Power Save Timer 5 min. Sequential Numbering LCD Brightness Language English USER Button... -
Page 28: Chapter 2 Taking Pictures
Chapter 2 Taking Pictures About the Status Gauge You can use the status gauge on top of the camera to check the following: the number of remaining photos, photo quality, remaining battery power, and white balance. Each needle indicates the status of one of these items. -
Page 29: Setting Photo Quality
Setting Photo Quality Before taking photos using the camera, photo quality (image format, size, and compression ratio) must be specified. Set photo quality according to how you plan to use your image data. Photo quality setting When taking photos using the camera, images are saved in JPEG or RAW format. -
Page 30: Setting Iso Sensitivity
1. Switch the Photo quality/WB lever to WB position. 2. Rotate the JOG dial to select the desired white balance (light source). You can select from Auto, Sunny, Shade, Cloudy, Incandescent, or Fluorescent. Note: You can check the selected white balance setting on the status gauge. For details, see “About the Status Gauge”... -
Page 31: Setting Auto Exposure (Aperture)
Setting Auto Exposure (Aperture) When you set the aperture, the most appropriate shutter speed settings are automatically selected. Follow the steps below to set the aperture for a photo. 1. Rotate the shutter speed dial to AE. 2. Rotate the aperture ring to select the desired value. 3. -
Page 32: Locking The Exposure Setting (Ae Lock)
You can change exposure compensation using the shutter speed dial. Background is much brighter than the main subject Background is much darker than the main subject Note: ❏ When you switch the shutter speed setting from AE (0) to another value, rotate the shutter speed dial while pressing the lock-release button. -
Page 33: B (Bulb) Shooting Mode
2. Rotate the shutter speed dial to the desired shutter speed value (1 to 2000). Note: To switch the shutter speed setting from auto to manual, rotate the shutter speed dial while pressing the lock-release button. 3. Press the shutter button halfway down. Both the optimal shutter speed (optimal exposure) and current shutter speed are displayed in the viewfinder. -
Page 34: Manually Locking The Aperture Setting
Manually Locking the Aperture Setting To lock the aperture manually, follow the steps below. 1. Pull back on and release the shutter charge lever. 2. Rotate the aperture ring to the desired value. 3. Press the shutter button halfway. Both the optimal shutter speed (optimal exposure) and current shutter speed are displayed in the viewfinder. -
Page 35: Selecting Image Settings
2. Select Color or Monochrome. If you want color photos, use the JOG dial to select Color and press the ENTER button. The color setting is saved and the screen returns to the Camera Settings menu. If you want black and white photos, use the JOG dial to select Monochrome and press the MENU button. -
Page 36: Numbering Your Photos Sequentially
7. Focus on the subject again and press the shutter button down. Note: For more information, see the documentation for your flash. Numbering Your Photos Sequentially You can number your photos in sequence across different memory cards. 1. Use the JOG dial to select Sequential Numbering in the Basic Setup menu, and press the ENTER button. - Page 37 2. Use the JOG dial to select the needle you want to adjust and press the ENTER button. The needles indicate the following:. Needle Function E (long needle at the top of the Number of remaining photos gauge R (short needle on the right-side of Photo quality the gauge) E (short needle at the bottom of the...
-
Page 38: Chapter 3 Viewing And Managing Your Photos
Chapter 3 Viewing and Managing Your Photos Viewing Photos on the LCD Display When you turn the power switch on, you’re ready to take pictures. To view the photos on the camera, invert the LCD display toward you and press the LCD button. The camera switches from picture-taking mode to playback mode, and the last recorded photo is displayed. - Page 39 Indicates you can magnify or shrink a photo by rotating the JOG dial clockwise or counterclockwise in the unraised position (displayed in the Magnify mode). Appears when the ENTER button is available. Appears when the CANCEL button is available. Appears when the current photo display style is full screen.
- Page 40 ❏ Print ( ) icon with number of prints (displayed only when DPOF settings have been made) Histogram display ❏ Number of current photo/total number of images (9999 maximum) ❏ Histogram Highlight display ❏ Number of current photo/total number of images (9999 maximum) ❏...
-
Page 41: Viewing Your Photos In A Slide Show
❏ Photo quality ❏ Shutter speed (when the picture is taken with auto exposure, “AE” and the exposure compensation value are displayed. e.g., AE+1.3) ❏ ISO sensitivity ❏ White balance ❏ Film setting ❏ Lock ( ) icon (displayed only when the image is locked) ❏... -
Page 42: Deleting Images
Deleting Images In playback mode, you can delete the currently displayed image or all images. Deleting a single image To delete the currently displayed image, follow the steps below. 1. Use the JOG dial to display the image you want to delete, and press the MENU button. -
Page 43: Locking Images
Locking Images This function is used to protect images from accidental deletion. Note: After locking images, they become read only. Locking an image 1. In playback mode, display the image you want to lock and press the MENU button. The Main menu is displayed. 2. -
Page 44: Setting Number Of Prints (Dpof Setting)
1. Use the JOG dial to select LCD Brightness in the Basic Setup menu, then press the ENTER button. 2. Select the desired brightness and press the ENTER button. The new setting is saved, and the screen returns to the Basic Setup menu. -
Page 45: Chapter 4 Using The Lcd Display
Chapter 4 Using the LCD Display How to Use the LCD Display You can use the LCD display to view photos in playback mode or make camera settings. When using the LCD display, invert it toward you and press the LCD button. To invert the LCD monitor, insert your finger into the indentation at the bottom of the display and open the LCD so that it is at right angles to the camera (1). -
Page 46: Camera Settings Menu
CANCEL button: Used to exit a menu without making changes. The screen returns to the previous menu or function. USER button: Accesses user-assigned functions. JOG dial: Rotate the JOG dial clockwise or counterclockwise to display the previous or next menu or photo. The JOG dial is used in either the raised or unraised position, depending on the menu or function. -
Page 47: Basic Setup Menu
Function Description Calibrate Needles Displays the Needle Calibration menu to adjust the following four needles: E (number of remaining photos), R (photo quality), E (remaining battery power), and A (white balance). These settings are indicated on the status gauge. Initialize Settings Resets the current settings (except date and time settings) to their default values. -
Page 48: Chapter 5 Using The Raw Data Processing Software
Adobe Photoshop Elements 2.0 to display ERF (EPSON RAW File) files on these applications. Note: ❏ To install the EPSON PhotoRAW or EPSON RAW Plug-In software, you need administrator privileges. ❏ For CCD-RAW files, only ERF format is supported. ❏ Copy ERF files to your hard drive before processing them. It may take a long time to process them on a memory card. -
Page 49: Installing The Software
1. Insert the software CD-ROM into the CD-ROM drive. The EPSON Installer Program dialog box appears automatically. Note: ❏ If the EPSON Installation Program dialog box does not appear, click the CD-ROM icon, and then select Open from the File menu. Then double-click EPSETUP. EXE. -
Page 50: Starting The Software
The main window for the EPSON RAW Plug-In is displayed as shown below. Note: ❏ When the EPSON RAW Plug-In does not start automatically even if you select an ERF file, select Open from the File menu, and select EPSON RAW Plug-In from the Format drop-down list. Then select your desired ERF file. -
Page 51: Chapter 6 Maintenance And Troubleshooting
Chapter 6 Maintenance and Troubleshooting Cleaning the Camera To keep your camera operating at its best, you should clean it thoroughly several times a year. Before you perform any maintenance on the camera, be sure to read the “Safety Instructions” on page 1. Then follow these guidelines: ❏... -
Page 52: Contacting Customer Support
Contacting Customer Support If your Epson product is not operating properly and you cannot solve the problem using the troubleshooting information in your product documentation, contact the customer support services for assistance. If customer support for your area is not listed below, contact the dealer where you purchased your product. -
Page 53: For Users In Korea
❏ Proof of purchase (such as a store receipt) and date of purchase ❏ Computer configuration and operating system version ❏ Description of the problem You can purchase manuals and accessories from Epson at (800) 873-7766, or visit www.epsonstore.com (U.S. sales only). In Canada, please call (800) 463-7766 for dealer referral. -
Page 54: Appendix A Appendix
Camera EMC Directive 89/336/EEC Lithium-ion battery EMC Directive 89/336/EEC Battery charger Low Voltage Directive 73/23/EEC EMC Directive 89/336/EEC Appendix Specifications Camera Epson Rangefinder Digital Camera R-D1 EN55022 Class B General EN55024 Dimensions and weight: EN55022 Class B EN55024 Temperature: Humidity:... -
Page 55: Optic System
JPEG compression ratio: Locked at 1/4 PRINT image matching:® Supports PRINT Image Matching Ver.2.6 (JPEG only) Optic system Primary-color CCD (APS size: 23.7 × 15.6 mm) Image sensor: Available pixels:6.1 M Lens mount: EM mount Viewfinder: Real image range finder type see-through viewfinder Viewfinder Real-size magnification:... -
Page 56: Viewfinder Indicators
Viewfinder indicators Exposure meter: Displays optimal shutter speed on LED display based on metered value. Also displays current value through shutter speed dial (optimal shutter speed is the flashing number on the LCD display). Displayed shutter speed: 1/2000 to 1 sec, bulb Internal clock Internal clock: Records the shooting date on the photo... -
Page 57: Performance
Performance File size of photos Photo quality: Compression ratio 2240 × 1488 (JPEG): Locked at 1/4 3008 × 2000 (JPEG): Locked at 1/4 CCD-RAW: Non-compressive About Optional Accessories The following options are available for the camera. ❏ Lithium-ion battery (Model: EU-85) Average file size about 1.5MB about 3MB... - Page 58 35 standard display, 34 DPOF, 39 ENTER button, 10 EPSON PhotoRAW, 43, 44 EPSON RAW Plug-In, 43 ERF (EPSON RAW File), 43 Exposure compensation, 26 Flash, 30 Format SD memory card, 15, 37 Frame selector lever, 10, 11...
- Page 59 aperture locking, 29 shutter speed locking, 27 SD card access LED, 10, 11 Memory card cover, 15 SD memory card Memory card slot, 15 formatting, 15, 37 MENU button, 10 installing, 14 removing, 16 write protect switch, 15 Setting Needle indicator brightness of the LCD display, remaining battery power, 23 white balance, 23...
Need help?
Do you have a question about the R-D and is the answer not in the manual?
Questions and answers