Table of Contents
Advertisement
Quick Links
Operator's Manual
CRRFTSMRN °
U
A E
Model No. 486.242101
DO NOT RETURN TO STORE
For Missing Parts or Assembly
Questions
Call 1-866-576-8388
(For Source
247. Tractors)
CAUTION:
Before using this product,
read
this manual and follow all Safety
Rules and Operating
Instructions.
TOOLS
NEEDED
FOR
ASSEMBLY
7/16" Wrenches
(2)
1/2" Wrench
(2)
5/8" Wrench
(1)
1/2" Socket Wrench
and Extension
(1)
Sears, Roebuck
and Co., Hoffman Estates,
IL 60179 U.S.A.
www.sears.com/craftsman
PRINTED IN U.S.A.
FORM NO. 41990 (3/21/11)
Advertisement
Table of Contents

Summary of Contents for Craftsman 486.242101
- Page 1 Before using this product, read 7/16" Wrenches this manual and follow all Safety 1/2" Wrench Rules and Operating Instructions. 5/8" Wrench 1/2" Socket Wrench and Extension Sears, Roebuck and Co., Hoffman Estates, IL 60179 U.S.A. www.sears.com/craftsman PRINTED IN U.S.A. FORM NO. 41990 (3/21/11)
-
Page 2: Table Of Contents
Craftsman product fails due to a defect in material or workmanship within one year from the date or purchase, return it to any Sears store or other Craftsman outlet in the United States for free replacement. This warranty applies for only 90 days from the date of purchase if this product is ever used for commercial or rental purposes. -
Page 3: Carton Contents
CARTON CONTENTS ............... --_ ..J--_....---_ ____ REF. PART QTY. DESCRIPTION REF. PART QTY. DESCRIPTION 27017 49242 Base Top Tube Mount Bracket 27263 25014 Upright Tube Support Bracket 49325 25013 Top Tube Base Leg Tube 25012 U-Tube 25304... -
Page 4: Hardware Chart
HARDWARE CHART SHOWN FULL SIZE ..NOT SHOWN FULL SIZE REF. PART QTY. DESCRIPTION REF. PART QTY. DESCRIPTION 43720 Plastic Knob 43070 Washer, 3/8" 43081 Flat Washer, 5/16" 23625 Spacer, .38 ID x .62 OD x .27 L 43648 Hex Bolt, 1/4-20 x 1-1/2" 44911 Spacer, .41 ID x 1.25 OD x .5 L 47189... -
Page 5: Assembly Instructions
ASSEMBLY iNSTRUCTiONS FOR (LT) LAWN TRACTORS Skip to page 10 if you have a (YT)Yard Tractor or a (GT) Garden Tractor. FOR TRACTORS WiTH A SEAT ADJUSTMENT KNOB UNDERNEATH THE SEAT: Skip to page 8 if REMOVE BOLTS AND SPRINGS there is an adjustment lever on the side of the seat. - Page 6 ASSEMBLY iNSTRUCTiONS FOR (LT) LAWN TRACTORS STEP 4: (Figure 4) Loosely attach the seat springs and the mount brackets to the rear fender using the original bolts. Do not tighten ORiGiNAL yet. BOLT AND SPRING FIGURE 4_ STEP 5: (Figure 5) Attach an adhesive pad to the bottom of each rear base 5/16"...
- Page 7 ASSEMBLY iNSTRUCTiONS FOR (LT) LAWN TRACTORS FOR TRACTORS WiTH A SEAT ADJUSTMENT LEVER ON THE SIDE OFTHE SEAT: Go back to page 5 if there is a seat adjustment knob underneath the seat. STEP 1" (Figure 7) REMOVE BOLTS AND SPRINGS Raise the tractor seat and remove the seat springs and bolts.
- Page 8 ASSEMBLY iNSTRUCTiONS FOR (LT) LAWN TRACTORS STEP 3: (Figure g) Loosely attach a support bracket to each assembled 5/16" WHIZLOCK mount bracket and base leg tube. Do not tighten yet. RIGHT SIDE .59 ID WASHER 5/16" WASHER 5/16" x 2=1/4" HEX BOLT LEFT SIDE FIGURE 9...
- Page 9 ASSEMBLY iNSTRUCTiONS FOR (LT) LAWN TRACTORS STEP 6: (Figure 12) Attach an adhesive pad to the bottom of each rear base support bracket. Remove the nut from the rear bolt in each base support tube. Use the nut to loosely attach a rear base support bracket to the outside of each base leg tube.
- Page 10 ASSEMBLY iNSTRUCTiONS FOR (YT)YARD TRACTORS "_ AND (GT) GARDEN TRACTORS STEP 1" (Figure 14) Raise the tractor seat and remove the springs from the REMOVE BOLTS AND SPRINGS rear fender. The original bolts can be stored, they will not "\ be used with the sun shade.
- Page 11 ASSEMBLY iNSTRUCTiONS FOR (YT)YARD TRACTORS "_ AND (GT) GARDEN TRACTORS STEP 3: (Figure 16) Remove the original bolt and nut from only one side of the seat bracket. Insert a small spacer into the empty hole in the seat bracket. SPACER ORiGiNAL Attach the end of an assembled support bracket to the...
- Page 12 ASSEMBLY iNSTRUCTiONS FOR (YT)YARD TRACTORS "] AND (GT) GARDEN TRACTORS ,..,) STEP 5: (Figure 18) Attach an adhesive pad to the bottom of each rear base 5/16" support bracket. REAR BASE WHIZLOC SUPPORT Loosely attach a rear base support bracket to the outside BRACKET of each base leg tube.
-
Page 13: Canopy Installation
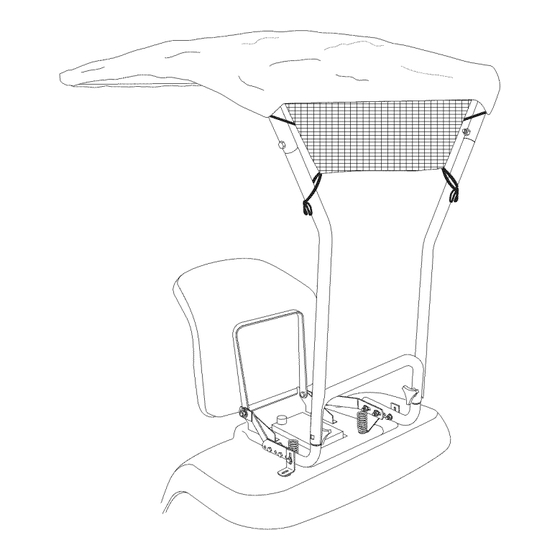
CANOPY iNSTALLATiON FOR ALL TRACTORS STEP 1" (Figure 20) Assemble the upright tubes to the base assembly. UPRIGHT TUBES NOTE: If holes are difficult to align, loosen bolts attaching base leg tubes to mounting bracket(s). If hole alignment is still difficult, loosen bolts attaching mounting bracket to rear fender. -
Page 14: Operation
OPERATION Read this owner's manual and safety rules before operating your tractor with the sun shade. Check the area of operation thoroughly before using the CAUTION: This sun shade does not provide tractor with the sun shade. The added height of the sun protection against exhaust fumes, collision, rollover or other accidents. -
Page 15: Repair Parts List
REPAIR PARTS FOR MODEL 71-242101 SUN SHADE -_-i......18 21_,_ j 22 13 ..c-_ REF. PART QTY. DESCRIPTION REF. PART QTY. DESCRiPTiON 49242 Base Top Tube 25357 Spacer, .31 ID x .44 OD x .14 L. 25014 Upright Tube 44977 Carriage Bolt, 5/16-18 x 2"... - Page 16 Your Home For expert troubleshooting and home solutions advice: g÷ www.managemyhome.com For repair - in your home - of all major brand appliances, lawn and garden equipment, or heating and cooling systems, no matter who made it, no matter who sold it! For the replacement parts, accessories owner's manuals that you need to do-it-yourself.


Need help?
Do you have a question about the 486.242101 and is the answer not in the manual?
Questions and answers