
Related Manuals for Canon NP6512


Summary of Contents for Canon NP6512
- Page 1 REVISION 0 FY8-13GB-000 AUG. 1999 COPYRIGHT © 1999 CANON INC. CANON NP6512/6612/7120/7130/7130F REV.0 AUG. 1999 PRINTED IN JAPAN (IMPRIME AU JAPON)
- Page 2 IMPORTANT THIS DOCUMENTATION IS PUBLISHED BY CANON INC., JAPAN, TO SERVE AS A SOURCE OF REFERENCE FOR WORK IN THE FIELD. SPECIFICATIONS AND OTHER INFORMATION CONTAINED HEREIN MAY VARY SLIGHTLY FROM ACTUAL MACHINE VALUES OR THOSE FOUND IN ADVERTISING AND OTHER PRINTED MATTER.
- Page 3 Chapter 11 Troubleshooting provides tables of maintenance/inspection, standards/ adjustments, and problem identification (image fault/malfunction). Appendix contains a general timing chart and general circuit diagrams. COPYRIGHT © 1999 CANON INC. CANON NP6512/6612/7120/7130/7130F REV.0 AUG. 1999 PRINTED IN JAPAN (IMPRIME AU JAPON)
- Page 4 All service persons are expected to have a good understanding of the contents of this Service Manual and all relevant Service Information bulletins and be able to identify and isolate faults in the machine. COPYRIGHT © 1999 CANON INC. CANON NP6512/6612/7120/7130/7130F REV.0 AUG. 1999 PRINTED IN JAPAN (IMPRIME AU JAPON)
- Page 5 NP7130 3R1E 500 sheets NP7130 2R2E 500 sheets NP7130F 3R1E 500 sheets The notation “ ” indicates that the item in question is available. COPYRIGHT © 1999 CANON INC. CANON NP6512/6612/7120/7130/7130F REV.0 AUG. 1999 PRINTED IN JAPAN (IMPRIME AU JAPON)
-
Page 7: Table Of Contents
C. Lens Drive System ....3-3 A. Scanner Drive Assembly ..3-14 D. Scanner Drive System ..3-4 B. Lens Drive Assembly ..3-32 C. Exposure System ....3-38 COPYRIGHT © 1999 CANON INC. CANON NP6512/6612/7120/7130/7130F REV.0 AUG. 1999 PRINTED IN JAPAN (IMPRIME AU JAPON) - Page 8 E. Delivery Assembly ....5-30 CHAPTER 6 FIXING SYSTEM OPERATIONS ......6-1 DISASSEMBLY/ASSEMBLY ..6-9 A. Outline ........6-1 A. Fixing Assembly ....6-10 B. Controlling the Fixing Temperature ......6-3 COPYRIGHT © 1999 CANON INC. CANON NP6512/6612/7120/7130/7130F REV.0 AUG. 1999 PRINTED IN JAPAN (IMPRIME AU JAPON)
- Page 9 A. Unpacking and Installation ..9-2 CHAPTER 10 MAINTENANCE AND SERVICING PERIODICALLY REPLACED III. SCHEDULED SERVICING ..10-1 PARTS ........10-1 DURABLES AND CONSUMABLES ...... 10-1 COPYRIGHT © 1999 CANON INC. CANON NP6512/6612/7120/7130/7130F REV.0 AUG. 1999 PRINTED IN JAPAN (IMPRIME AU JAPON)
- Page 10 N. PRE-EXPOSURE CIRCUIT DIAGRAM ......... A-29 DIAGRAM ......... A-37 H. AE SENSOR CIRCUIT O. SPECIAL TOOLS ...... A-38 DIAGRAM ......... A-31 SOLVENTS/OILS ...... A-39 viii COPYRIGHT © 1999 CANON INC. CANON NP6512/6612/7120/7130/7130F REV.0 AUG. 1999 PRINTED IN JAPAN (IMPRIME AU JAPON)
- Page 11 III. NAMES OF PARTS .....1-8 USER ........1-16 A. External View ......1-8 VI. IMAGE FORMATION ....1-19 B. Cross Section ..... 1-11 A. Outline ........ 1-19 COPYRIGHT © 1999 CANON INC. CANON NP6512/6612/7120/7130/7130F REV.0 AUG. 1999 PRINTED IN JAPAN (IMPRIME AU JAPON)
-
Page 13: Chapter 1 General Description
• The machine’s top unit may be opened to make jam removal easy. ADF Type • Continuous copying is possible with the use of the ADF. COPYRIGHT © 1999 CANON INC. CANON NP6512/6612/7120/7130/7130F REV.0 AUG. 1999 PRINTED IN JAPAN (IMPRIME AU JAPON) -
Page 14: Specifications
Dry (toner projection) Pickup Cassette (1 pc.) Multifeeder Separation Curvature separation + static eliminator Fixing Flat heater Cleaning Blade Original orientation Center reference (copyboard) Table 1-202 COPYRIGHT © 1999 CANON INC. CANON NP6512/6612/7120/7130/7130F REV.0 AUG. 1999 PRINTED IN JAPAN (IMPRIME AU JAPON) - Page 15 Upon delivery, be sure to remove each from the copy tray. Be sure to remove any curling before feeding for a second time. If stopped because paper ran out during copying operation, 1 hr. COPYRIGHT © 1999 CANON INC. CANON NP6512/6612/7120/7130/7130F REV.0 AUG. 1999 PRINTED IN JAPAN (IMPRIME AU JAPON)
- Page 16 Copy paper: Keep wrapped, and protect against humidity. Toner: Avoid direct sunlight, and store at 40°C/104°F, 85% or less. Table 1-204 250-sheet cassette type 500-sheet cassette type COPYRIGHT © 1999 CANON INC. CANON NP6512/6612/7120/7130/7130F REV.0 AUG. 1999 PRINTED IN JAPAN (IMPRIME AU JAPON)
- Page 17 The number of copies starting with the pickup operation that follows the delivery of the 19th copy in a continuous copying job. (See p.5-5) The specifications are subject to change for product improvement. COPYRIGHT © 1999 CANON INC. CANON NP6512/6612/7120/7130/7130F REV.0 AUG. 1999 PRINTED IN JAPAN (IMPRIME AU JAPON)
-
Page 18: Adf
24 VDC and 5 VDC (from the host) Maximum power consumption 40 W or less Temperature: same as the host Operating environment Humidity: same as the host Table 1-207 COPYRIGHT © 1999 CANON INC. CANON NP6512/6612/7120/7130/7130F REV.0 AUG. 1999 PRINTED IN JAPAN (IMPRIME AU JAPON) - Page 19 • Sheet with a carbon back. • Sheet with a cut-and-paste piece. • Sheet with curling, bending, or wrinkling. The specifications are subject to change for product improvement. COPYRIGHT © 1999 CANON INC. CANON NP6512/6612/7120/7130/7130F REV.0 AUG. 1999 PRINTED IN JAPAN (IMPRIME AU JAPON)
-
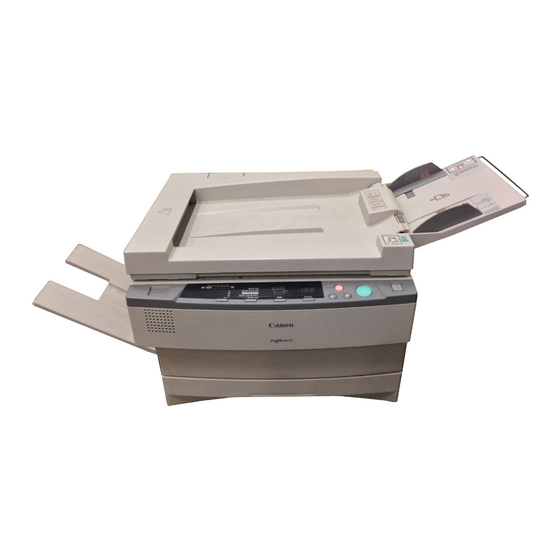
Page 20: Names Of Parts
[1] Copy tray [4] Copy density correction dial [2] Power cord connector [5] Static eliminator [3] Open/close lever [6] Delivery guide plate Figure 1-302 COPYRIGHT © 1999 CANON INC. CANON NP6512/6612/7120/7130/7130F REV.0 AUG. 1999 PRINTED IN JAPAN (IMPRIME AU JAPON) -
Page 21: Adf Type
[5] Open/close lever [2] Delivery guide plate [6] Copy density correction dial [3] Copy tray [7] Static eliminator [4] Power cord connector Figure 1-304 COPYRIGHT © 1999 CANON INC. CANON NP6512/6612/7120/7130/7130F REV.0 AUG. 1999 PRINTED IN JAPAN (IMPRIME AU JAPON) - Page 22 CHAPTER 1 GENERAL DESCRIPTION [1] Original tray [3] Slide guide [2] Original delivery tray [4] Auxiliary tray Figure 1-305 1-10 COPYRIGHT © 1999 CANON INC. CANON NP6512/6612/7120/7130/7130F REV.0 AUG. 1999 PRINTED IN JAPAN (IMPRIME AU JAPON)
-
Page 23: Cross Section
[30] Cleaning roller [10] Lens [20] Registration roller [31] Delivery roller [11] No. 6 mirror [21] Developing cylinder [32] Copy tray Figure 1-306 1-11 COPYRIGHT © 1999 CANON INC. CANON NP6512/6612/7120/7130/7130F REV.0 AUG. 1999 PRINTED IN JAPAN (IMPRIME AU JAPON) - Page 24 [11] Feed belt [5] Copyboard tray [12] Feed belt roller [6] Auxiliary tray [13] Feed belt link slave roller [7] Guide plate Figure 1-307 1-12 COPYRIGHT © 1999 CANON INC. CANON NP6512/6612/7120/7130/7130F REV.0 AUG. 1999 PRINTED IN JAPAN (IMPRIME AU JAPON)
-
Page 25: Using The Machine
Stops copying or returns copy- Standard Mode ing mode to standard mode. Ratio: 100% Count: 1 Paper source: cassette Copy density: auto mode 1-13 COPYRIGHT © 1999 CANON INC. CANON NP6512/6612/7120/7130/7130F REV.0 AUG. 1999 PRINTED IN JAPAN (IMPRIME AU JAPON) - Page 26 Selects the cassette/ manual feed tray. Default ratio key Selects a default reproduction ratio. Selects copying density mode. Copy density mode selection Table 1-401 1-14 COPYRIGHT © 1999 CANON INC. CANON NP6512/6612/7120/7130/7130F REV.0 AUG. 1999 PRINTED IN JAPAN (IMPRIME AU JAPON)
-
Page 27: User Mode
If no input is entered, ‘0’ will be assumed. ‘74’: Measures APVC and stirs toner. Reserved. ------------------------------- *Only if an ADF is installed. Table 1-402 1-15 COPYRIGHT © 1999 CANON INC. CANON NP6512/6612/7120/7130/7130F REV.0 AUG. 1999 PRINTED IN JAPAN (IMPRIME AU JAPON) -
Page 28: Soiled Images
• You cannot start feeder cleaning mode while the machine is making copies or if an error exists. • The auto power-off mechanism does not operate while feeder cleaning mode is being executed. 1-16 COPYRIGHT © 1999 CANON INC. CANON NP6512/6612/7120/7130/7130F REV.0 AUG. 1999 PRINTED IN JAPAN (IMPRIME AU JAPON) -
Page 29: If Jams Occur Frequently
Figure 1-502 If Jams Occur Frequently a. Static Eliminator 1) Remove the static eliminator cleaner from the machine. Figure 1-503 (Copyboard type) 1-17 COPYRIGHT © 1999 CANON INC. CANON NP6512/6612/7120/7130/7130F REV.0 AUG. 1999 PRINTED IN JAPAN (IMPRIME AU JAPON) - Page 30 • Brush out the paper lint or the like from the groove of the static eliminator. Figure 1-505 4) Close the machine as soon as you have finished cleaning. (Work briskly.) 1-18 COPYRIGHT © 1999 CANON INC. CANON NP6512/6612/7120/7130/7130F REV.0 AUG. 1999 PRINTED IN JAPAN (IMPRIME AU JAPON)
-
Page 31: Image Formation
Primary charging roller Pre-exposure Developing lamp blade Developing Photo- cylinder sensitive drum Fixing assembly Cleaning blade Transfer charging roller Static eliminator Figure 1-601 1-19 COPYRIGHT © 1999 CANON INC. CANON NP6512/6612/7120/7130/7130F REV.0 AUG. 1999 PRINTED IN JAPAN (IMPRIME AU JAPON) - Page 32 Manual feed 5. Transfer Registration 7. Fixing 6. Separation Delivery Cassette : Flow of copy paper : Rotation of the photosensitive drum Figure 1-602 1-20 COPYRIGHT © 1999 CANON INC. CANON NP6512/6612/7120/7130/7130F REV.0 AUG. 1999 PRINTED IN JAPAN (IMPRIME AU JAPON)
- Page 33 Motor (M1) ......2-5 B. Outline of Electrical E. Inputs to and Outputs from the Circuitry .........2-2 DC Controller ......2-7 C. Basic Sequence of Operations ......2-3 COPYRIGHT © 1999 CANON INC. CANON NP6512/6612/7120/7130/7130F REV.0 AUG. 1999 PRINTED IN JAPAN (IMPRIME AU JAPON)
-
Page 35: Chapter 2 Basic Operation
Photosensitive Developing drum cleaning block assembly Transfer/ separation Pickup Feeding control block Copy tray Fixing assembly/ Pickup/ Cassette delivery assembly feeding system Figure 2-101 COPYRIGHT © 1999 CANON INC. CANON NP6512/6612/7120/7130/7130F REV.0 AUG. 1999 PRINTED IN JAPAN (IMPRIME AU JAPON) -
Page 36: Outline Of Electrical Circuitry
• Primary charging roller cleaning solenoid Control Side blanking panel lamp Scanner/ lens drive motor Pre-exposure Power lamp switch Scanner cooling fan Counter Sensor/ ADF load switch Figure 2-102 COPYRIGHT © 1999 CANON INC. CANON NP6512/6612/7120/7130/7130F REV.0 AUG. 1999 PRINTED IN JAPAN (IMPRIME AU JAPON) -
Page 37: Basic Sequence Of Operations
Developing AC bias Developing DC bias Transfer bias Static eliminator bias Heater (H1) I: Scanner home position detection II: Lens home position detection Figure 2-103 COPYRIGHT © 1999 CANON INC. CANON NP6512/6612/7120/7130/7130F REV.0 AUG. 1999 PRINTED IN JAPAN (IMPRIME AU JAPON) - Page 38 Direct. LSTR From when SCRV ends to when the Neutralizes the drum surface potential main motor stops. as post-processing. (last rotation) Table 2-101 COPYRIGHT © 1999 CANON INC. CANON NP6512/6612/7120/7130/7130F REV.0 AUG. 1999 PRINTED IN JAPAN (IMPRIME AU JAPON)
-
Page 39: Controlling The Main Motor (M1)
Main motor drive (M1) circuit J203 J103 J104 J204 Hall IC output MLOCK MMCLK Composite power supply Reference signal Main motor drive PCB Figure 2-104 COPYRIGHT © 1999 CANON INC. CANON NP6512/6612/7120/7130/7130F REV.0 AUG. 1999 PRINTED IN JAPAN (IMPRIME AU JAPON) - Page 40 ‘E010’ in the display. COPYRIGHT © 1999 CANON INC. CANON NP6512/6612/7120/7130/7130F REV.0 AUG. 1999 PRINTED IN JAPAN (IMPRIME AU JAPON)
-
Page 41: Inputs To And Outputs From The Dc Controller
(analog signal) J131-1 When the temperature of the scanner increases, Scanner thermistor the voltage decreases. (analog signal) Figure 2-105 COPYRIGHT © 1999 CANON INC. CANON NP6512/6612/7120/7130/7130F REV.0 AUG. 1999 PRINTED IN JAPAN (IMPRIME AU JAPON) - Page 42 Toner level antenna J951-1 J954 J103 J214-1 +24V when toner level drops, ‘0’. TNMONI J952 J215 Composite Toner level power supply detection Figure 2-106 COPYRIGHT © 1999 CANON INC. CANON NP6512/6612/7120/7130/7130F REV.0 AUG. 1999 PRINTED IN JAPAN (IMPRIME AU JAPON)
- Page 43 HVT board +24V J103-7 See p. 2-5. J104-1 MLOCK Main motor Main motor driver PCB See p. 3-7. Scanner/ lens drive motor Figure 2-107 COPYRIGHT © 1999 CANON INC. CANON NP6512/6612/7120/7130/7130F REV.0 AUG. 1999 PRINTED IN JAPAN (IMPRIME AU JAPON)
- Page 44 When ‘0’, the pre-exposure lamp Pre-exposure lamp turns on. PEXP* +24V J119-2 When ‘0’, the total copy counter Total copy counter CNT1 turns on. TCNTD* Figure 2-108 2-10 COPYRIGHT © 1999 CANON INC. CANON NP6512/6612/7120/7130/7130F REV.0 AUG. 1999 PRINTED IN JAPAN (IMPRIME AU JAPON)
- Page 45 DC controller PCB J114-1 To the ADF See Chapter 8. To the ADF J202-1 J105-6 +24V +24V Composite power supply PCB Figure 2-109 2-11 COPYRIGHT © 1999 CANON INC. CANON NP6512/6612/7120/7130/7130F REV.0 AUG. 1999 PRINTED IN JAPAN (IMPRIME AU JAPON)
-
Page 47: I. Operations
C. Exposure System ....3-38 C. Lens Drive System ....3-3 D. Scanner Drive System ..3-4 EXPOSURE SYSTEM ....3-9 A. Controlling the Scanning Lamp ........3-9 COPYRIGHT © 1999 CANON INC. CANON NP6512/6612/7120/7130/7130F REV.0 AUG. 1999 PRINTED IN JAPAN (IMPRIME AU JAPON) -
Page 49: Operations
• Thermal fuse (FU1; blows at 128°C) Table 3-101 Copyboard glass Moves for enlargement/ Enlarge Reduce reduction Fixed focal point lens No. 4/5 mirror unit Photosensitive drum Figure 3-101 COPYRIGHT © 1999 CANON INC. CANON NP6512/6612/7120/7130/7130F REV.0 AUG. 1999 PRINTED IN JAPAN (IMPRIME AU JAPON) -
Page 50: Varying The Reproduction Ratio
(for enlargement) than the drum peripheral speed. Direct Optical length Reduction Optical length Enlargement Optical length Optical length: L1 < L2, L1 < L3 Figure 3-102 COPYRIGHT © 1999 CANON INC. CANON NP6512/6612/7120/7130/7130F REV.0 AUG. 1999 PRINTED IN JAPAN (IMPRIME AU JAPON) -
Page 51: Lens Drive System
Lens cable Reduction Enlargement Lens unit Lens home position sensor (PS2) Lens shift detecting shaft for side blanking lamp DC controller PCB Figure 3-103 COPYRIGHT © 1999 CANON INC. CANON NP6512/6612/7120/7130/7130F REV.0 AUG. 1999 PRINTED IN JAPAN (IMPRIME AU JAPON) -
Page 52: Scanner Drive System
The scanner/lens drive motor dives the lens drive system as well as the scanner. PS1 Light-blocking plate Scanner home position signal (SCHP) Scanner home position sensor(PS1) Q109 Motor driver circuit DC controller PCB Figure 3-104 COPYRIGHT © 1999 CANON INC. CANON NP6512/6612/7120/7130/7130F REV.0 AUG. 1999 PRINTED IN JAPAN (IMPRIME AU JAPON) - Page 53 130%, the scanner is moved forward as if for A4 (297 mm); if it is 130% or more, the scanner is moved forward as if for LTR (279 mm). *For descriptions on how length is detected, see p. 5-7. COPYRIGHT © 1999 CANON INC. CANON NP6512/6612/7120/7130/7130F REV.0 AUG. 1999 PRINTED IN JAPAN (IMPRIME AU JAPON)
- Page 54 II: By the time the Copy Start key is pressed or the power switch is turned off and then on again next time, the scanner is moved to and stopped at 105 mm forward from the home position. Figure 3-106 COPYRIGHT © 1999 CANON INC. CANON NP6512/6612/7120/7130/7130F REV.0 AUG. 1999 PRINTED IN JAPAN (IMPRIME AU JAPON)
- Page 55 (Q101) SC-COM (Q109) SC-A SC-A* Motor SC-B driver circuit SC-B* Current switching signal 1 Current switching signal 2 Current switching signal 3 Figure 3-107 COPYRIGHT © 1999 CANON INC. CANON NP6512/6612/7120/7130/7130F REV.0 AUG. 1999 PRINTED IN JAPAN (IMPRIME AU JAPON)
- Page 56 If overcurrent flows to the scanner/lens drive motor for some reason, the fuse (R339) on the DC controller PCB will blow to cut the power to the motor. Caution: The fuse (R339) will not recover once it has blown. COPYRIGHT © 1999 CANON INC. CANON NP6512/6612/7120/7130/7130F REV.0 AUG. 1999 PRINTED IN JAPAN (IMPRIME AU JAPON)
-
Page 57: Controlling The Scanning Lamp
(LA1) LAMP_ON (HIC001) Arcing circuit Activation detection signal Rectifying LAMP_DETECT circuit Activation detection circuit DC controller PCB Composite power supply PCB Figure 3-201 COPYRIGHT © 1999 CANON INC. CANON NP6512/6612/7120/7130/7130F REV.0 AUG. 1999 PRINTED IN JAPAN (IMPRIME AU JAPON) - Page 58 The scanning lamp turns on. When LAMP_ON is ‘1’, The phase control circuit turns off. The arcing circuit turns off. The scanning lamp turns off. 3-10 COPYRIGHT © 1999 CANON INC. CANON NP6512/6612/7120/7130/7130F REV.0 AUG. 1999 PRINTED IN JAPAN (IMPRIME AU JAPON)
- Page 59 1kHz Pulse duty= t/ 100 [%] Figure 3-202 Related Service Mode 38 (LAMP_ADJ) Use it to adjust the intensity of the scanning lamp. 3-11 COPYRIGHT © 1999 CANON INC. CANON NP6512/6612/7120/7130/7130F REV.0 AUG. 1999 PRINTED IN JAPAN (IMPRIME AU JAPON)
- Page 60 The machine automatically corrects the activation voltage of the scanning lamp to make up for the change in copy image quality caused by deterioration/wear of the photosensitive drum. 3-12 COPYRIGHT © 1999 CANON INC. CANON NP6512/6612/7120/7130/7130F REV.0 AUG. 1999 PRINTED IN JAPAN (IMPRIME AU JAPON)
-
Page 61: Disassembly/Assembly
6. As a rule, do not operate the machine with any of its part removed. 7. A few of the screws used are special screws (with wider thread intervals). Do not use any screws indiscriminately. 3-13 COPYRIGHT © 1999 CANON INC. CANON NP6512/6612/7120/7130/7130F REV.0 AUG. 1999 PRINTED IN JAPAN (IMPRIME AU JAPON) -
Page 62: Scanner Drive Assembly
4) Remove the four screws [1], and detach the lens cover [2]. Figure 3-301 5) Disconnect the connector (J110) [3] from the DC controller PCB. Figure 3-302 3-14 COPYRIGHT © 1999 CANON INC. CANON NP6512/6612/7120/7130/7130F REV.0 AUG. 1999 PRINTED IN JAPAN (IMPRIME AU JAPON) - Page 63 30 mm in diameter) of a screwdriver. Figure 3-303 7) Remove the two fixing screws [4] from the scanner/lens drive motor [5]. Figure 3-304 3-15 COPYRIGHT © 1999 CANON INC. CANON NP6512/6612/7120/7130/7130F REV.0 AUG. 1999 PRINTED IN JAPAN (IMPRIME AU JAPON)
- Page 64 9) Remove the E-ring [6]; then, lift the cable drive pulley [7] slightly, and detach the Lift. scanner/lens drive motor [5]. Figure 3-305 3-16 COPYRIGHT © 1999 CANON INC. CANON NP6512/6612/7120/7130/7130F REV.0 AUG. 1999 PRINTED IN JAPAN (IMPRIME AU JAPON)
-
Page 65: Outline Of The Scanner Drive Cable
CHAPTER 3 EXPOSURE SYSTEM Outline of the Scanner Drive Cable Wind 1.5 times. (black cable) Wind 7.5 times. (silver-colored cable) Figure 3-306 3-17 COPYRIGHT © 1999 CANON INC. CANON NP6512/6612/7120/7130/7130F REV.0 AUG. 1999 PRINTED IN JAPAN (IMPRIME AU JAPON) - Page 66 3) Remove the copyboard glass. (See Chapter 7.III.C.1. “Removing the Copyboard Glass.”) 4) Disconnect the connectors (J101, J131) [1] from the DC controller PCB. Figure 3-308 3-18 COPYRIGHT © 1999 CANON INC. CANON NP6512/6612/7120/7130/7130F REV.0 AUG. 1999 PRINTED IN JAPAN (IMPRIME AU JAPON)
- Page 67 [3] from the left upper stay [4]. Figure 3-309 6) Remove the three screws [5], and detach the left upper stay [4]. Figure 3-310 3-19 COPYRIGHT © 1999 CANON INC. CANON NP6512/6612/7120/7130/7130F REV.0 AUG. 1999 PRINTED IN JAPAN (IMPRIME AU JAPON)
- Page 68 CHAPTER 3 EXPOSURE SYSTEM 7) Remove the four screws [6], and detach the lens cover [7]. Figure 3-311 3-20 COPYRIGHT © 1999 CANON INC. CANON NP6512/6612/7120/7130/7130F REV.0 AUG. 1999 PRINTED IN JAPAN (IMPRIME AU JAPON)
- Page 69 [3]. Longer end Shorter end Face with a marking Figure 3-312 Top View Figure 3-313 3-21 COPYRIGHT © 1999 CANON INC. CANON NP6512/6612/7120/7130/7130F REV.0 AUG. 1999 PRINTED IN JAPAN (IMPRIME AU JAPON)
- Page 70 (front) Figure 3-314 3) Hook the shorter end [6] on the pulley [7]. Figure 3-315 3-22 COPYRIGHT © 1999 CANON INC. CANON NP6512/6612/7120/7130/7130F REV.0 AUG. 1999 PRINTED IN JAPAN (IMPRIME AU JAPON)
- Page 71 6) Lead the longer end [14] along the cable [14] drive pulley, and hook it on the pulley [15] on the right front side. [15] Figure 3-318 3-23 COPYRIGHT © 1999 CANON INC. CANON NP6512/6612/7120/7130/7130F REV.0 AUG. 1999 PRINTED IN JAPAN (IMPRIME AU JAPON)
- Page 72 Be sure that the secured end of the cable is [14] found where the hole in the left side plate and the tip of the cable matches. Figure 3-320 3-24 COPYRIGHT © 1999 CANON INC. CANON NP6512/6612/7120/7130/7130F REV.0 AUG. 1999 PRINTED IN JAPAN (IMPRIME AU JAPON)
- Page 73 [8] of the No. 2/3 mirror mount, and lead it between the No. 1 mirror mount [7] and the scanning lamp [9]. Figure 3-323 3-25 COPYRIGHT © 1999 CANON INC. CANON NP6512/6612/7120/7130/7130F REV.0 AUG. 1999 PRINTED IN JAPAN (IMPRIME AU JAPON)
- Page 74 [12] of the No. 2/3 mirror mount as shown; then, lead it between the No. 1 mirror mount [7] and the scanning lamp [9]. Figure 3-326 3-26 COPYRIGHT © 1999 CANON INC. CANON NP6512/6612/7120/7130/7130F REV.0 AUG. 1999 PRINTED IN JAPAN (IMPRIME AU JAPON)
- Page 75 8) Free the shorter end [3] and the longer end [5] (reversing cable), and connect both [14] with a spring [14]; then, fit the stopper [15]. [15] Figure 3-328 3-27 COPYRIGHT © 1999 CANON INC. CANON NP6512/6612/7120/7130/7130F REV.0 AUG. 1999 PRINTED IN JAPAN (IMPRIME AU JAPON)
- Page 76 CHAPTER 3 EXPOSURE SYSTEM 9) Detach the pulley clip [16] from the cable drive pulley [1]. [16] Figure 3-329 3-28 COPYRIGHT © 1999 CANON INC. CANON NP6512/6612/7120/7130/7130F REV.0 AUG. 1999 PRINTED IN JAPAN (IMPRIME AU JAPON)
- Page 77 1) Fix the rear and the front of the No. 1 mir- ror mount [1] temporarily to the metal fix- ing [2] of the forwarding cable. Figure 3-330 (front) Figure 3-331 (rear) 3-29 COPYRIGHT © 1999 CANON INC. CANON NP6512/6612/7120/7130/7130F REV.0 AUG. 1999 PRINTED IN JAPAN (IMPRIME AU JAPON)
- Page 78 2) Turn the cable drive pulley [4] so that the three shafts [3] of the mirror positioning tool for rear and front is as shown. Figure 3-332 (rear) Figure 3-333 (front) 3-30 COPYRIGHT © 1999 CANON INC. CANON NP6512/6612/7120/7130/7130F REV.0 AUG. 1999 PRINTED IN JAPAN (IMPRIME AU JAPON)
- Page 79 3) While keeping the condition of step 2), tighten the positioning screw on the rear and front of the No. 1 mirror mount [1]. Figure 3-334 (rear) Figure 3-335 (front) 3-31 COPYRIGHT © 1999 CANON INC. CANON NP6512/6612/7120/7130/7130F REV.0 AUG. 1999 PRINTED IN JAPAN (IMPRIME AU JAPON)
-
Page 80: Lens Drive Assembly
3) Remove the main drive assembly. (See Chapter 7.III.D.2. “Removing the Main Drive Assembly.”) 4) Remove the four screws [1], and detach the lens cover [2]. Figure 3-336 3-32 COPYRIGHT © 1999 CANON INC. CANON NP6512/6612/7120/7130/7130F REV.0 AUG. 1999 PRINTED IN JAPAN (IMPRIME AU JAPON) - Page 81 Figure 3-337 6) Disengage the lever [5] of the No. 4/5 mir- ror mount and the gear [6]. Figure 3-338 3-33 COPYRIGHT © 1999 CANON INC. CANON NP6512/6612/7120/7130/7130F REV.0 AUG. 1999 PRINTED IN JAPAN (IMPRIME AU JAPON)
- Page 82 [9], move it to the center of the machine. Caution: Do not hold the reflecting plate. Figure 3-340 9) Remove the spring [10]. [10] Figure 3-341 3-34 COPYRIGHT © 1999 CANON INC. CANON NP6512/6612/7120/7130/7130F REV.0 AUG. 1999 PRINTED IN JAPAN (IMPRIME AU JAPON)
- Page 83 11) Free the lens cable [13] from the lens [13] cable fixing plate [12]; then, detach the lens cable from the machine. [12] Figure 3-343 3-35 COPYRIGHT © 1999 CANON INC. CANON NP6512/6612/7120/7130/7130F REV.0 AUG. 1999 PRINTED IN JAPAN (IMPRIME AU JAPON)
- Page 84 [3] on the top face of the cam gear [2] match; then, engage the lever [1] and the cam gear [2]. Figure 3-345 3-36 COPYRIGHT © 1999 CANON INC. CANON NP6512/6612/7120/7130/7130F REV.0 AUG. 1999 PRINTED IN JAPAN (IMPRIME AU JAPON)
- Page 85 Figure 3-346 3-37 COPYRIGHT © 1999 CANON INC. CANON NP6512/6612/7120/7130/7130F REV.0 AUG. 1999 PRINTED IN JAPAN (IMPRIME AU JAPON)
-
Page 86: Exposure System
Figure 3-347 4) Free the harness [3] from the guide [2]; then, remove the screw [4], and detach the reflecting plate [5]. Figure 3-348 3-38 COPYRIGHT © 1999 CANON INC. CANON NP6512/6612/7120/7130/7130F REV.0 AUG. 1999 PRINTED IN JAPAN (IMPRIME AU JAPON) - Page 87 2. Do not leave fingerprints on the sur- face of the scanning lamp. 3. If the surface of the scanning lamp is soiled, dry wipe it. Figure 3-349 3-39 COPYRIGHT © 1999 CANON INC. CANON NP6512/6612/7120/7130/7130F REV.0 AUG. 1999 PRINTED IN JAPAN (IMPRIME AU JAPON)
- Page 88 (p. 11-42) and AE adjust- ment (p. 11-44). Scanning lamp (mirror mount moving in reverse) 45˚ (approx.) Figure 3-350 3-40 COPYRIGHT © 1999 CANON INC. CANON NP6512/6612/7120/7130/7130F REV.0 AUG. 1999 PRINTED IN JAPAN (IMPRIME AU JAPON)
-
Page 89: Removing The Thermal Fuse
Make sure that the fuse is in contact with the reflecting plate. (front) Thermal fuse Figure 3-352 3-41 COPYRIGHT © 1999 CANON INC. CANON NP6512/6612/7120/7130/7130F REV.0 AUG. 1999 PRINTED IN JAPAN (IMPRIME AU JAPON) - Page 90 2) Disconnect the connector (J131) [1] from the DC controller PCB; remove the screw [2], and detach the thermistor unit [3]. Figure 3-353 3-42 COPYRIGHT © 1999 CANON INC. CANON NP6512/6612/7120/7130/7130F REV.0 AUG. 1999 PRINTED IN JAPAN (IMPRIME AU JAPON)
-
Page 91: Chapter 4 Image Formation System
C. Blank Exposure ....4-39 G. Controlling the Pre-Exposure D. Developing Assembly ..4-43 Lamp ........4-24 H. Controlling the Side Blanking Mechanism ......4-26 COPYRIGHT © 1999 CANON INC. CANON NP6512/6612/7120/7130/7130F REV.0 AUG. 1999 PRINTED IN JAPAN (IMPRIME AU JAPON) -
Page 93: I. Image Formation System
Level detection by a waste toner sensor Waste toner case full detection Detection by a waste toner sensor Primary charging roller cleaning Auto cleaning by the cleaning pad Table 4-101 COPYRIGHT © 1999 CANON INC. CANON NP6512/6612/7120/7130/7130F REV.0 AUG. 1999 PRINTED IN JAPAN (IMPRIME AU JAPON) - Page 94 Photosensitive drum Static Transfer eliminator roller Lamp regulator High-voltage Q101 block circuit block Microprocessor Microprocessor DC controller PCB Composite power supply PCB Figure 4-101 COPYRIGHT © 1999 CANON INC. CANON NP6512/6612/7120/7130/7130F REV.0 AUG. 1999 PRINTED IN JAPAN (IMPRIME AU JAPON)
-
Page 95: Timing Chart For The Image Formation System
Developing DC bias Transfer bias Transfer cleaning bias Transfer reference 0.6sec.(approx.) bias (ATVC) 3200V Static eliminator bias Pre-registration roller paper sensor (Q751) Figure 4-102 COPYRIGHT © 1999 CANON INC. CANON NP6512/6612/7120/7130/7130F REV.0 AUG. 1999 PRINTED IN JAPAN (IMPRIME AU JAPON) -
Page 96: Primary Charging Roller Bias Control
-1000 V ± (correction value by APVC); cleaning area by transfer -600 V ± (correction value by APVC); trailing edge area *See p. 4-16. COPYRIGHT © 1999 CANON INC. CANON NP6512/6612/7120/7130/7130F REV.0 AUG. 1999 PRINTED IN JAPAN (IMPRIME AU JAPON) - Page 97 Primary T101 Voltage charging separation roller circuit Photosensitive drum Microprocessor (Q900) Composite power supply PCB Serial communication Microprocessor (Q101) DC controller PCB Figure 4-103 COPYRIGHT © 1999 CANON INC. CANON NP6512/6612/7120/7130/7130F REV.0 AUG. 1999 PRINTED IN JAPAN (IMPRIME AU JAPON)
- Page 98 DC bias control signal (PDC_PWM) according to the difference so as to ensure that it remains specific level. Reference: The DC bias control signal varies its pulse duty ratio to change the level of the DC bias. COPYRIGHT © 1999 CANON INC. CANON NP6512/6612/7120/7130/7130F REV.0 AUG. 1999 PRINTED IN JAPAN (IMPRIME AU JAPON)
- Page 99 Scanning lamp (LA1) I II Primary bias I: Area between sheets II: Cleaning area by transfer III: Image area IV: Trailing edge area Figure 4-104 COPYRIGHT © 1999 CANON INC. CANON NP6512/6612/7120/7130/7130F REV.0 AUG. 1999 PRINTED IN JAPAN (IMPRIME AU JAPON)
- Page 100 PCB using service mode (Nos. 34, 35). Then, be sure to execute ‘U7’ in user mode (installation/drum replacement mode). COPYRIGHT © 1999 CANON INC. CANON NP6512/6612/7120/7130/7130F REV.0 AUG. 1999 PRINTED IN JAPAN (IMPRIME AU JAPON)
-
Page 101: Controlling The Transfer Roller Bias
Transfer high-voltage transformer Transfer DC bias ON signal T_FW_ON High-voltage transformer control signal CLK32K DC controller PCB Composite power supply PCB Figure 4-105 COPYRIGHT © 1999 CANON INC. CANON NP6512/6612/7120/7130/7130F REV.0 AUG. 1999 PRINTED IN JAPAN (IMPRIME AU JAPON) - Page 102 Reference: The level of transfer bias applied to the transfer roller during a copying run is between -7.5 and -3.0 kV. 4-10 COPYRIGHT © 1999 CANON INC. CANON NP6512/6612/7120/7130/7130F REV.0 AUG. 1999 PRINTED IN JAPAN (IMPRIME AU JAPON)
- Page 103 SCFW SCRV LSTR STBY Main motor (M1) 1.6sec(approx.) 1.2sec (approx.) 0.7sec (approx.) Cleaning bias 0.8sec (approx.) Reference bias (ATVC) Transfer bias Figure 4-106 4-11 COPYRIGHT © 1999 CANON INC. CANON NP6512/6612/7120/7130/7130F REV.0 AUG. 1999 PRINTED IN JAPAN (IMPRIME AU JAPON)
-
Page 104: Controlling The Developing/Separation Static Eliminator Bias
Reference: Developing DC bias: -40 ~ -550V Developing AC bias: 1350Vpp±100Vpp 4-12 COPYRIGHT © 1999 CANON INC. CANON NP6512/6612/7120/7130/7130F REV.0 AUG. 1999 PRINTED IN JAPAN (IMPRIME AU JAPON) - Page 105 Microprocessor (Q900) Composite power supply PCB Serial communication Microprocessor (Q101) Density correction dial (VR107) DC controller PCB AE sensor Control panel Figure 4-107 4-13 COPYRIGHT © 1999 CANON INC. CANON NP6512/6612/7120/7130/7130F REV.0 AUG. 1999 PRINTED IN JAPAN (IMPRIME AU JAPON)
- Page 106 (ACBIAS) so that an AC bias is applied to the developing cylinder. The AC bias is modified/rectified and then supplied to the static eliminator (static eliminator bias, about 3.2 kV). 4-14 COPYRIGHT © 1999 CANON INC. CANON NP6512/6612/7120/7130/7130F REV.0 AUG. 1999 PRINTED IN JAPAN (IMPRIME AU JAPON)
- Page 107 DC bias. Change the bias if copies tend to be foggy or light images because of shifts in the sensitivity of the photosensitive drum. The dial is used when manual density adjustment or auto density adjustment (AE) is executed. Figure 4-108 4-15 COPYRIGHT © 1999 CANON INC. CANON NP6512/6612/7120/7130/7130F REV.0 AUG. 1999 PRINTED IN JAPAN (IMPRIME AU JAPON)
- Page 108 Figures 4-109 and 4-110 show the changes in the DC bias caused by changes in the output of the AE sensor during auto density adjustment and the density adjusting lever settings during manual adjustment. 4-16 COPYRIGHT © 1999 CANON INC. CANON NP6512/6612/7120/7130/7130F REV.0 AUG. 1999 PRINTED IN JAPAN (IMPRIME AU JAPON)
- Page 109 -550 1 -550 AE9 (lighter) Developing Developing bias DC bias DC component (V) component (V) AE mode Manual Density Mode Figure 4-109 Figure 4-110 4-17 COPYRIGHT © 1999 CANON INC. CANON NP6512/6612/7120/7130/7130F REV.0 AUG. 1999 PRINTED IN JAPAN (IMPRIME AU JAPON)
-
Page 110: Measuring The Density Of Originals
+24V AEREF +24V (Q900) AE sensor Developing +24V DCON signal Serial communi- cation VR102 Composite power DC controller PCB supply PCB Figure 4-111 4-18 COPYRIGHT © 1999 CANON INC. CANON NP6512/6612/7120/7130/7130F REV.0 AUG. 1999 PRINTED IN JAPAN (IMPRIME AU JAPON) - Page 111 SCFW SCRV SCFW SCRV LSTR STBY Main motor (M1) Scanner / lens drive motor (M2) Scanning lamp (LA1) AE signal (AE) Figure 4-113 4-19 COPYRIGHT © 1999 CANON INC. CANON NP6512/6612/7120/7130/7130F REV.0 AUG. 1999 PRINTED IN JAPAN (IMPRIME AU JAPON)
- Page 112 Caution: The flexible cable for the control panel is connected to the upper front cover; disconnect the cable from the DC controller PCB. 4-20 COPYRIGHT © 1999 CANON INC. CANON NP6512/6612/7120/7130/7130F REV.0 AUG. 1999 PRINTED IN JAPAN (IMPRIME AU JAPON)
- Page 113 • The scanner will move forward, and the scanning lamp will turn on. 7) Turn VR103 on the DC controller PCB fully clockwise. VR103 AE GAIN J130 VR102 J103 J104 Figure 4-116 4-21 COPYRIGHT © 1999 CANON INC. CANON NP6512/6612/7120/7130/7130F REV.0 AUG. 1999 PRINTED IN JAPAN (IMPRIME AU JAPON)
- Page 114 11) Turn VR103 on the DC controller PCB so that the display on the control panel indicates ‘52’ through ‘5c’. VR103 AE GAIN J130 VR102 J103 J104 Figure 4-118 4-22 COPYRIGHT © 1999 CANON INC. CANON NP6512/6612/7120/7130/7130F REV.0 AUG. 1999 PRINTED IN JAPAN (IMPRIME AU JAPON)
- Page 115 • If the copy is foggy or its characters are not dark enough, go back to step 1) and start over. • If the results are still not good after adjustment for a second time, use the density correction dial (VR107). Figure 4-119 4-23 COPYRIGHT © 1999 CANON INC. CANON NP6512/6612/7120/7130/7130F REV.0 AUG. 1999 PRINTED IN JAPAN (IMPRIME AU JAPON)
-
Page 116: Controlling The Pre-Exposure Lamp
The levels of PREX_LP and IP_OFST are adjusted and stored at the factory. If you have replaced the pre-exposure lamp or the drum unit, be sure to enter the values recorded on the label attached to each part. 4-24 COPYRIGHT © 1999 CANON INC. CANON NP6512/6612/7120/7130/7130F REV.0 AUG. 1999 PRINTED IN JAPAN (IMPRIME AU JAPON) - Page 117 SCFW SCRV SCFW SCRV LSTR STBY Main motor (M1) APVC Primary bias Pre-exposure lamp (LA2) I: Image area II: Non-image area Figure 4-121 4-25 COPYRIGHT © 1999 CANON INC. CANON NP6512/6612/7120/7130/7130F REV.0 AUG. 1999 PRINTED IN JAPAN (IMPRIME AU JAPON)
-
Page 118: Controlling The Side Blanking Mechanism
A: Position of the side blanking lamp in Direct and Reduce mode B: Position of the side blanking lamp in Reduce mode Figure 4-123 4-26 COPYRIGHT © 1999 CANON INC. CANON NP6512/6612/7120/7130/7130F REV.0 AUG. 1999 PRINTED IN JAPAN (IMPRIME AU JAPON) -
Page 119: Ii. Developing Assembly Cleaning Assembly
PCB Cleaning Coupling solenoid gear Waste toner sensor Cleaning Developing Drum unit assembly Toner antenna Cleaning blade Waste toner feeding blade Figure 4-201 4-27 COPYRIGHT © 1999 CANON INC. CANON NP6512/6612/7120/7130/7130F REV.0 AUG. 1999 PRINTED IN JAPAN (IMPRIME AU JAPON) -
Page 120: Roller
If the cumulative number of copies reaches 100 during a continuous copying job, copying will be stopped thereafter. 4-28 COPYRIGHT © 1999 CANON INC. CANON NP6512/6612/7120/7130/7130F REV.0 AUG. 1999 PRINTED IN JAPAN (IMPRIME AU JAPON) - Page 121 DC controller PCB (TNMONI) circuit Replace toner Toner level detection PCB cartridge indicator Toner level antenna Developing cylinder Developing assembly Figure 4-202 4-29 COPYRIGHT © 1999 CANON INC. CANON NP6512/6612/7120/7130/7130F REV.0 AUG. 1999 PRINTED IN JAPAN (IMPRIME AU JAPON)
-
Page 122: Detecting Waste Toner
DC controller PCB Replace drum unit indicator Waste toner sensor (PS5) Waste toner Photosensitive drum Toner feeding blade Coupling gear Figure 4-203 4-30 COPYRIGHT © 1999 CANON INC. CANON NP6512/6612/7120/7130/7130F REV.0 AUG. 1999 PRINTED IN JAPAN (IMPRIME AU JAPON) -
Page 123: Primary Charging Roller Cleaning Control
• Condition 3 When user mode ‘U1’ has been executed. 4-31 COPYRIGHT © 1999 CANON INC. CANON NP6512/6612/7120/7130/7130F REV.0 AUG. 1999 PRINTED IN JAPAN (IMPRIME AU JAPON) -
Page 124: Primary Charging Roller
Primary charging roller cleaning solenoid(SL6) Figure 4-205 • Condition 2 Power-off Power-on Power-on Power-on Copying Delivery sensor (PS3) Primary charging roller cleaning solenoid(SL6) Figure 4-206 4-32 COPYRIGHT © 1999 CANON INC. CANON NP6512/6612/7120/7130/7130F REV.0 AUG. 1999 PRINTED IN JAPAN (IMPRIME AU JAPON) -
Page 125: Disassembly/Assembly
6. As a rule, do not operate the machine with any of its part removed. 7. A few of the screws used are special screws (with wider thread intervals). Do not use any screws indiscriminately. 4-33 COPYRIGHT © 1999 CANON INC. CANON NP6512/6612/7120/7130/7130F REV.0 AUG. 1999 PRINTED IN JAPAN (IMPRIME AU JAPON) -
Page 126: Drum Unit
CHAPTER 4 IMAGE FORMATION SYSTEM Drum Unit Outline Figure 4-301 [1] Primary charging roller cleaning pad [2] Primary charging roller [3] Photosensitive drum [4] Drum cleaner assembly 4-34 COPYRIGHT © 1999 CANON INC. CANON NP6512/6612/7120/7130/7130F REV.0 AUG. 1999 PRINTED IN JAPAN (IMPRIME AU JAPON) -
Page 127: Removing The Drum Unit
2) Turn the developing locking lever [1] counterclockwise. Figure 4-302 3) Turn the fixing lever [2] of the drum unit counterclockwise. Figure 4-303 4-35 COPYRIGHT © 1999 CANON INC. CANON NP6512/6612/7120/7130/7130F REV.0 AUG. 1999 PRINTED IN JAPAN (IMPRIME AU JAPON) - Page 128 (Do not use paper, lint-free or oth- erwise.) Caution: Do not dry wipe the drum or do not use a solvent. Do not use drum cleaning powder. 4-36 COPYRIGHT © 1999 CANON INC. CANON NP6512/6612/7120/7130/7130F REV.0 AUG. 1999 PRINTED IN JAPAN (IMPRIME AU JAPON)
-
Page 129: After Replacing The Drum Unit
2) Execute ‘U7’, ‘installation/drum unit re- placement mode’, and enter the setting re- PRIMARY corded on the service label attached to the IP_OFST drum unit. FS5-8725 Figure 4-306 4-37 COPYRIGHT © 1999 CANON INC. CANON NP6512/6612/7120/7130/7130F REV.0 AUG. 1999 PRINTED IN JAPAN (IMPRIME AU JAPON) -
Page 130: Transfer Charging Assembly
[3]. Caution: Do not touch the surface of the roller. Be sure the surface is free of dirt. Figure 4-307 4-38 COPYRIGHT © 1999 CANON INC. CANON NP6512/6612/7120/7130/7130F REV.0 AUG. 1999 PRINTED IN JAPAN (IMPRIME AU JAPON) -
Page 131: Blank Exposure
Composite Power Supply PCB.”) 6) Remove the two screws [1]. Figure 4-308 7) Remove the developing assembly. (See D.2. “Removing the Developing As- sembly.”) 4-39 COPYRIGHT © 1999 CANON INC. CANON NP6512/6612/7120/7130/7130F REV.0 AUG. 1999 PRINTED IN JAPAN (IMPRIME AU JAPON) - Page 132 PCBs are at the ex- treme ends and that the lens is positioned at the farthest left (141% position). Lamp PCBs Figure 4-311 4-40 COPYRIGHT © 1999 CANON INC. CANON NP6512/6612/7120/7130/7130F REV.0 AUG. 1999 PRINTED IN JAPAN (IMPRIME AU JAPON)
- Page 133 2) Disengage the two claws [1], and remove the pre-exposure lamp unit [2]. Figure 4-312 3) Remove the screw [3], and remove the pre-exposure lamp unit cover [4]. Figure 4-313 4-41 COPYRIGHT © 1999 CANON INC. CANON NP6512/6612/7120/7130/7130F REV.0 AUG. 1999 PRINTED IN JAPAN (IMPRIME AU JAPON)
- Page 134 PCB using ‘37’ of service mode. PREX LP FBS-0756 Figure 4-315 2) After entering the setting, execute ‘U7’ in user mode. 4-42 COPYRIGHT © 1999 CANON INC. CANON NP6512/6612/7120/7130/7130F REV.0 AUG. 1999 PRINTED IN JAPAN (IMPRIME AU JAPON)
-
Page 135: Developing Assembly
The flexible cable for the control panel is connected to the front upper cover; dis- connect the flexible cable from the DC controller. Figure 4-317 4-43 COPYRIGHT © 1999 CANON INC. CANON NP6512/6612/7120/7130/7130F REV.0 AUG. 1999 PRINTED IN JAPAN (IMPRIME AU JAPON) - Page 136 [4], and turn the locking lever [5] counter- clockwise. • Turning the locking lever disengages the developing assembly. Caution: Take care not to touch the developing cylinder. Figure 4-319 4-44 COPYRIGHT © 1999 CANON INC. CANON NP6512/6612/7120/7130/7130F REV.0 AUG. 1999 PRINTED IN JAPAN (IMPRIME AU JAPON)
- Page 137 [4] of the developing assembly against the hooks [3] at the rear and the front. Figure 4-321 4-45 COPYRIGHT © 1999 CANON INC. CANON NP6512/6612/7120/7130/7130F REV.0 AUG. 1999 PRINTED IN JAPAN (IMPRIME AU JAPON)
- Page 138 (See D.2. “Removing the Developing As- sembly.”) 2) Turn the toner cartridge [1] clockwise, and pull it out slowly toward the front. Figure 4-323 4-46 COPYRIGHT © 1999 CANON INC. CANON NP6512/6612/7120/7130/7130F REV.0 AUG. 1999 PRINTED IN JAPAN (IMPRIME AU JAPON)
- Page 139 4) Remove the five screws [2], and remove the cover [3]. Caution: Take care not to damage the developing cylinder and the blade when removing the cover. Figure 4-325 4-47 COPYRIGHT © 1999 CANON INC. CANON NP6512/6612/7120/7130/7130F REV.0 AUG. 1999 PRINTED IN JAPAN (IMPRIME AU JAPON)
- Page 140 8) Remove the gear [8], gear [9], bearing [10], and spacer [11]; then, remove the developing cylinder [12]. [8] [9][10] [11] [12] Figure 4-328 4-48 COPYRIGHT © 1999 CANON INC. CANON NP6512/6612/7120/7130/7130F REV.0 AUG. 1999 PRINTED IN JAPAN (IMPRIME AU JAPON)
- Page 141 2) Install the developing assembly cover, Developing assembly cover and tighten the five screws lightly; then, tighten the screws in the order shown in the figure. Figure 4-330 4-49 COPYRIGHT © 1999 CANON INC. CANON NP6512/6612/7120/7130/7130F REV.0 AUG. 1999 PRINTED IN JAPAN (IMPRIME AU JAPON)
- Page 142 If any of the stirring rods does not face the same direction, the interference among the rods can prevent stirring op- eration. Figure 4-332 4-50 COPYRIGHT © 1999 CANON INC. CANON NP6512/6612/7120/7130/7130F REV.0 AUG. 1999 PRINTED IN JAPAN (IMPRIME AU JAPON)
- Page 143 C. Feeding Assembly ....5-24 C. Controlling the Movement of D. Registration Roller Paper ........5-6 Assembly ......5-25 D. Detecting Jams .....5-8 E. Delivery Assembly ....5-30 COPYRIGHT © 1999 CANON INC. CANON NP6512/6612/7120/7130/7130F REV.0 AUG. 1999 PRINTED IN JAPAN (IMPRIME AU JAPON)
-
Page 145: Pickup/Feeding System
Photosensitive drum Registration roller Delivery roller Q751 Static Vertical Cassette Fixing assembly eliminator path roller Copy tray pickup roller Cassette Holding plate Figure 5-101 COPYRIGHT © 1999 CANON INC. CANON NP6512/6612/7120/7130/7130F REV.0 AUG. 1999 PRINTED IN JAPAN (IMPRIME AU JAPON) -
Page 146: Controlling The Pickup Roller
Cassette pickup rollers Pickup clutch Copy paper Figure 5-102 COPYRIGHT © 1999 CANON INC. CANON NP6512/6612/7120/7130/7130F REV.0 AUG. 1999 PRINTED IN JAPAN (IMPRIME AU JAPON) - Page 147 0.5 sec after the pickup clutch solenoid (SL1) has turned don. II: The cassette pickup solenoid (SL5) turns on once again about 1.3 sec after the pickup clutch solenoid (SL1) turns on. Figure 5-103 COPYRIGHT © 1999 CANON INC. CANON NP6512/6612/7120/7130/7130F REV.0 AUG. 1999 PRINTED IN JAPAN (IMPRIME AU JAPON)
- Page 148 Paper guide plate Toothless section The cam gear makes a 180˚ turn (approximate), causing the paper guide plate to move up and down. Figure 5-104 COPYRIGHT © 1999 CANON INC. CANON NP6512/6612/7120/7130/7130F REV.0 AUG. 1999 PRINTED IN JAPAN (IMPRIME AU JAPON)
- Page 149 (Q751) I: A switch to 9-cpm copying speed is made after delivering the 19th copy in a continuous copy- ing job. Figure 5-105 COPYRIGHT © 1999 CANON INC. CANON NP6512/6612/7120/7130/7130F REV.0 AUG. 1999 PRINTED IN JAPAN (IMPRIME AU JAPON)
-
Page 150: Controlling The Movement Of Paper
Control ring Paper detecting lever Copy paper Claw Pre- registration roller paper sensor (Q751) Pre-registration roller paper detection signal (RPD) DC controller PCB Figure 5-106 COPYRIGHT © 1999 CANON INC. CANON NP6512/6612/7120/7130/7130F REV.0 AUG. 1999 PRINTED IN JAPAN (IMPRIME AU JAPON) - Page 151 11 (mm): distance between pre-registration roller paper sensor and registration roller. 10 (mm): length of actuator of the pre-registration roller paper sensor. Figure 5-108 COPYRIGHT © 1999 CANON INC. CANON NP6512/6612/7120/7130/7130F REV.0 AUG. 1999 PRINTED IN JAPAN (IMPRIME AU JAPON)
-
Page 152: Detecting Jams
If the pre-registration roller paper sensor detects copy paper during this 1.5 sec period (ap- proximate), the machine will identify the condition as a pickup delay jam, and flash the Jam indica- tor. COPYRIGHT © 1999 CANON INC. CANON NP6512/6612/7120/7130/7130F REV.0 AUG. 1999 PRINTED IN JAPAN (IMPRIME AU JAPON) - Page 153 STBY INTR SCFW Pickup clutch solenoid (SL1) 2.6sec Jam check Pre-registration roller paper No paper sensor (Q751) 1.5sec Main motor (M1) Figure 5-112 (jam) COPYRIGHT © 1999 CANON INC. CANON NP6512/6612/7120/7130/7130F REV.0 AUG. 1999 PRINTED IN JAPAN (IMPRIME AU JAPON)
- Page 154 SCFW SCRV Cassette pickup solenoid (SL5) 0.5sec 0.5sec Jam check Vertical path roller Normal paper sensor (PS4) 1.5sec Main motor (M1) Figure 5-114 5-10 COPYRIGHT © 1999 CANON INC. CANON NP6512/6612/7120/7130/7130F REV.0 AUG. 1999 PRINTED IN JAPAN (IMPRIME AU JAPON)
- Page 155 SCFW SCRV SCFW Registration clutch solenoid (SL2) 4.6sec 4.6sec Jam check Pre-registration roller Normal paper sensor (Q751) 1.5sec Main motor (M1) Figure 5-116 5-11 COPYRIGHT © 1999 CANON INC. CANON NP6512/6612/7120/7130/7130F REV.0 AUG. 1999 PRINTED IN JAPAN (IMPRIME AU JAPON)
-
Page 156: Delivery Delay Jam
Jam indicator. indication SCFW SCRV SCFW SCRV SCFW 4.1sec 4.1sec Jam check normal Delivery sensor (PS3) 1.5sec Main motor (M1) Figure 5-118 5-12 COPYRIGHT © 1999 CANON INC. CANON NP6512/6612/7120/7130/7130F REV.0 AUG. 1999 PRINTED IN JAPAN (IMPRIME AU JAPON) -
Page 157: Disassembly/Assembly
6. As a rule, do not operate the machine with any of its part removed. 7. A few of the screws used are special screws (with wider thread intervals). Do not use any screws indiscriminately. 5-13 COPYRIGHT © 1999 CANON INC. CANON NP6512/6612/7120/7130/7130F REV.0 AUG. 1999 PRINTED IN JAPAN (IMPRIME AU JAPON) -
Page 158: Pickup Assembly
Figure 5-201 4) Remove the screw [1], and free the two claws [2]; then, detach the feeding assem- bly cover [3]. Figure 5-202 5-14 COPYRIGHT © 1999 CANON INC. CANON NP6512/6612/7120/7130/7130F REV.0 AUG. 1999 PRINTED IN JAPAN (IMPRIME AU JAPON) - Page 159 [8] in the direction of the arrow so that the pickup roller [9] is oriented as shown. Figure 5-204 5-15 COPYRIGHT © 1999 CANON INC. CANON NP6512/6612/7120/7130/7130F REV.0 AUG. 1999 PRINTED IN JAPAN (IMPRIME AU JAPON)
- Page 160 3) Mount the multifeeder; then, make a Figure 5-206 copy using the multifeeder. 5-16 COPYRIGHT © 1999 CANON INC. CANON NP6512/6612/7120/7130/7130F REV.0 AUG. 1999 PRINTED IN JAPAN (IMPRIME AU JAPON)
- Page 161 (about 30 mm in diameter). Figure 5-207 4) Disconnect the two connectors [1], and remove the two screws [2] then, detach the solenoid unit [3]. Figure 5-208 5-17 COPYRIGHT © 1999 CANON INC. CANON NP6512/6612/7120/7130/7130F REV.0 AUG. 1999 PRINTED IN JAPAN (IMPRIME AU JAPON)
- Page 162 5) While freeing the two claws [4], remove the pickup clutch unit [5]. Figure 5-209 6) Remove the E-ring [6], and detach the pickup clutch [7]. Figure 5-210 5-18 COPYRIGHT © 1999 CANON INC. CANON NP6512/6612/7120/7130/7130F REV.0 AUG. 1999 PRINTED IN JAPAN (IMPRIME AU JAPON)
- Page 163 Figure 5-211 3) Remove the screw [1], and free the two claws [2]; then, detach the feeding assem- bly cover [3]. Figure 5-212 5-19 COPYRIGHT © 1999 CANON INC. CANON NP6512/6612/7120/7130/7130F REV.0 AUG. 1999 PRINTED IN JAPAN (IMPRIME AU JAPON)
- Page 164 CHAPTER 5 PICK-UP/FEEDING SYSTEM 4) While lifting the sensor lever [4], remove the vertical path roller [5]. Figure 5-213 5-20 COPYRIGHT © 1999 CANON INC. CANON NP6512/6612/7120/7130/7130F REV.0 AUG. 1999 PRINTED IN JAPAN (IMPRIME AU JAPON)
-
Page 165: Multifeeder Assembly
3) Mount the multifeeder unit; then, Figure 5-215 make a copy using the multifeeder. 5-21 COPYRIGHT © 1999 CANON INC. CANON NP6512/6612/7120/7130/7130F REV.0 AUG. 1999 PRINTED IN JAPAN (IMPRIME AU JAPON) - Page 166 3) Remove the multifeeder pickup roller unit [4]. Figure 5-217 4) While freeing the claw [5], detach the multifeeder pickup roller [6]. Figure 5-218 5-22 COPYRIGHT © 1999 CANON INC. CANON NP6512/6612/7120/7130/7130F REV.0 AUG. 1999 PRINTED IN JAPAN (IMPRIME AU JAPON)
-
Page 167: Removing The Separation Pad
Figure 5-219 4) Push up the separation pad [4], and pull it out by pushing the shaft [5] toward the in- side. Figure 5-220 5-23 COPYRIGHT © 1999 CANON INC. CANON NP6512/6612/7120/7130/7130F REV.0 AUG. 1999 PRINTED IN JAPAN (IMPRIME AU JAPON) -
Page 168: Feeding Assembly
[2]. Figure 5-221 3) While freeing the claw [3], detach the four shafts [4]; then, detach the feed belt [5]. Figure 5-222 5-24 COPYRIGHT © 1999 CANON INC. CANON NP6512/6612/7120/7130/7130F REV.0 AUG. 1999 PRINTED IN JAPAN (IMPRIME AU JAPON) -
Page 169: Registration Roller Assembly
(about 30 mm in diameter). Figure 5-223 3) Remove the shaft [1] and the spring [2]. Figure 5-224 5-25 COPYRIGHT © 1999 CANON INC. CANON NP6512/6612/7120/7130/7130F REV.0 AUG. 1999 PRINTED IN JAPAN (IMPRIME AU JAPON) - Page 170 4) Free the seven claws [3] and remove the transfer mount [4] and the high-voltage terminal unit [5]. Figure 5-225 5) Remove the two springs [6]. Figure 5-226 5-26 COPYRIGHT © 1999 CANON INC. CANON NP6512/6612/7120/7130/7130F REV.0 AUG. 1999 PRINTED IN JAPAN (IMPRIME AU JAPON)
- Page 171 CHAPTER 5 PICK-UP/FEEDING SYSTEM 6) Remove the two springs [7]; then, while freeing the two claws [8], remove the reg- istration roller unit [9]. Figure 5-227 5-27 COPYRIGHT © 1999 CANON INC. CANON NP6512/6612/7120/7130/7130F REV.0 AUG. 1999 PRINTED IN JAPAN (IMPRIME AU JAPON)
-
Page 172: Removing The Registration Roller
Caution: Take care not to drop the pin from the rear of the gear. Figure 5-228 3) Remove the E-ring [4]. Figure 5-229 5-28 COPYRIGHT © 1999 CANON INC. CANON NP6512/6612/7120/7130/7130F REV.0 AUG. 1999 PRINTED IN JAPAN (IMPRIME AU JAPON) - Page 173 6) Remove the E-ring [8], and pull out the clutch [9]. Caution: Take care not to lose the pin from the rear of the clutch. Figure 5-232 5-29 COPYRIGHT © 1999 CANON INC. CANON NP6512/6612/7120/7130/7130F REV.0 AUG. 1999 PRINTED IN JAPAN (IMPRIME AU JAPON)
-
Page 174: Delivery Assembly
[2] and the four gears [3]. Figure 5-233 3) Remove the screw [4], and free the two hooks [5]; then, detach the sensor holder [6]. Figure 5-234 5-30 COPYRIGHT © 1999 CANON INC. CANON NP6512/6612/7120/7130/7130F REV.0 AUG. 1999 PRINTED IN JAPAN (IMPRIME AU JAPON) - Page 175 4) Remove the two bushings [7]. Figure 5-235 5) While shifting the delivery lower guide [8] toward the rear, detach the delivery roller [9]. Figure 5-236 5-31 COPYRIGHT © 1999 CANON INC. CANON NP6512/6612/7120/7130/7130F REV.0 AUG. 1999 PRINTED IN JAPAN (IMPRIME AU JAPON)
-
Page 177: B. Controlling The Fixing Temperature
It also shows how these units may be disassembled/assembled and adjusted. OPERATIONS ......6-1 DISASSEMBLY/ASSEMBLY ..6-9 A. Outline ........6-1 A. Fixing Assembly ....6-10 B. Controlling the Fixing Temperature ......6-3 COPYRIGHT © 1999 CANON INC. CANON NP6512/6612/7120/7130/7130F REV.0 AUG. 1999 PRINTED IN JAPAN (IMPRIME AU JAPON) - Page 179 The fixing temperature fails to increase. E001 The thermistor has detected overheating. E002 Fault in fixing power control. E003 The fixing temperature has dropped abnormally. Table 6-101 COPYRIGHT © 1999 CANON INC. CANON NP6512/6612/7120/7130/7130F REV.0 AUG. 1999 PRINTED IN JAPAN (IMPRIME AU JAPON)
- Page 180 Fixing film Fixing thermistor (TH1) Thermal fuse 2 (FU2) Fixing heater (H1) Main motor Fixing lower roller Cleaning roller Composite power supply PCB Figure 6-102 COPYRIGHT © 1999 CANON INC. CANON NP6512/6612/7120/7130/7130F REV.0 AUG. 1999 PRINTED IN JAPAN (IMPRIME AU JAPON)
- Page 181 OFF signal HEAT_PWM Fixing heater duty signal Fixing heater HEAT_TRG Fixing heater drive signal Composite power DC controller PCB supply PCB Figure 6-103 COPYRIGHT © 1999 CANON INC. CANON NP6512/6612/7120/7130/7130F REV.0 AUG. 1999 PRINTED IN JAPAN (IMPRIME AU JAPON)
- Page 182 TH1) and the temperatures to which the fixing heater is controlled ac- cording to the number of copies made in continuous mode. COPYRIGHT © 1999 CANON INC. CANON NP6512/6612/7120/7130/7130F REV.0 AUG. 1999 PRINTED IN JAPAN (IMPRIME AU JAPON)
- Page 183 Controlling the Temperature of the Fixing Heater (˚C) Number of Copies in Continuous Copying Mode after a Press on the Copy Start Key Figure 6-104 COPYRIGHT © 1999 CANON INC. CANON NP6512/6612/7120/7130/7130F REV.0 AUG. 1999 PRINTED IN JAPAN (IMPRIME AU JAPON)
- Page 184 The best level is selected at the factory when the fixing assembly is assembled. Do not change the combination of jumper wires. Figure 6-106 COPYRIGHT © 1999 CANON INC. CANON NP6512/6612/7120/7130/7130F REV.0 AUG. 1999 PRINTED IN JAPAN (IMPRIME AU JAPON)
- Page 185 LSTR STBY Main motor (M1) Registration clutch solenoid (SL2) Heater OFF Delivery sensor (PS3) Heater ON Fixing heater (H1) Forward Reverse Scanner Figure 6-107 COPYRIGHT © 1999 CANON INC. CANON NP6512/6612/7120/7130/7130F REV.0 AUG. 1999 PRINTED IN JAPAN (IMPRIME AU JAPON)
- Page 186 If the temperature around the thermal fuse exceeds 228°C and remains so for a specific period of time, the thermal fuse will blow to cut the power to the fixing heater. COPYRIGHT © 1999 CANON INC. CANON NP6512/6612/7120/7130/7130F REV.0 AUG. 1999 PRINTED IN JAPAN (IMPRIME AU JAPON)
-
Page 187: Disassembly/Assembly
6. As a rule, do not operate the machine with any of its part removed. 7. A few of the screws used are special screws (with wider thread intervals). Do not use any screws indiscriminately. COPYRIGHT © 1999 CANON INC. CANON NP6512/6612/7120/7130/7130F REV.0 AUG. 1999 PRINTED IN JAPAN (IMPRIME AU JAPON) -
Page 188: Fixing Assembly
Front Lower Cover.”) 2) Remove the screw [1], and free the two hooks [2]; then, detach the power supply cover [3]. Figure 6-202 6-10 COPYRIGHT © 1999 CANON INC. CANON NP6512/6612/7120/7130/7130F REV.0 AUG. 1999 PRINTED IN JAPAN (IMPRIME AU JAPON) - Page 189 4) Remove the two screws [6], and discon- nect the connector [7]; then, detach the fixing assembly [8] by turning it in the di- rection of the arrow. Figure 6-204 6-11 COPYRIGHT © 1999 CANON INC. CANON NP6512/6612/7120/7130/7130F REV.0 AUG. 1999 PRINTED IN JAPAN (IMPRIME AU JAPON)
- Page 190 [5]. Caution: Do not disassemble the fixing film and the fixing heater. They cannot be re- placed on their own. Figure 6-206 6-12 COPYRIGHT © 1999 CANON INC. CANON NP6512/6612/7120/7130/7130F REV.0 AUG. 1999 PRINTED IN JAPAN (IMPRIME AU JAPON)
- Page 191 1) Remove the fixing lower roller. (See 3. “Removing the Fixing Lower Roller.”) 2) Remove the cleaning roller [1] together with the bushing. Figure 6-208 6-13 COPYRIGHT © 1999 CANON INC. CANON NP6512/6612/7120/7130/7130F REV.0 AUG. 1999 PRINTED IN JAPAN (IMPRIME AU JAPON)
- Page 193 C. Detecting an Error on the Com- bly ........7-17 posite Power Supply PCB ..7-6 E. Electrical System ....7-21 D. Protecting the Power Supply Circuit ........7-6 COPYRIGHT © 1999 CANON INC. CANON NP6512/6612/7120/7130/7130F REV.0 AUG. 1999 PRINTED IN JAPAN (IMPRIME AU JAPON)
-
Page 195: Chapter 7 Externals/Auxiliary Mechanisms
The heat exhaust fan is driven directly by the main motor (M1; through a belt and a gear), and is designed to rotate at all times while the main motor is rotating. Heat exhausting fan Figure 7-101 COPYRIGHT © 1999 CANON INC. CANON NP6512/6612/7120/7130/7130F REV.0 AUG. 1999 PRINTED IN JAPAN (IMPRIME AU JAPON) - Page 196 Heat exhausting fan Forward Reverse Scanner I: If 6-cpm copying speed control is executed starting with the first copy, the fan will rotate. Figure 7-102 COPYRIGHT © 1999 CANON INC. CANON NP6512/6612/7120/7130/7130F REV.0 AUG. 1999 PRINTED IN JAPAN (IMPRIME AU JAPON)
-
Page 197: Power Supply System
T101 circuit Scanning lamp Scanning lamp control circuit Primary charging High- roller voltage power supply Developing roller circuit Transfer roller Static eliminator Figure 7-201 COPYRIGHT © 1999 CANON INC. CANON NP6512/6612/7120/7130/7130F REV.0 AUG. 1999 PRINTED IN JAPAN (IMPRIME AU JAPON) -
Page 198: Power Supply Circuit
• During copying, +24 V ±5% • During standby, +18 V ±10% However, the above assume that the deviations in AC input are -15%, +10%. COPYRIGHT © 1999 CANON INC. CANON NP6512/6612/7120/7130/7130F REV.0 AUG. 1999 PRINTED IN JAPAN (IMPRIME AU JAPON) - Page 199 FU102 Main supply +24VU transfor- Auxiliary power T101 supply Microprocessor Power (Q900) switch SW309 BAT1 Control panel DC controller PCB Power supply Figure 7-202 COPYRIGHT © 1999 CANON INC. CANON NP6512/6612/7120/7130/7130F REV.0 AUG. 1999 PRINTED IN JAPAN (IMPRIME AU JAPON)
-
Page 200: Detecting An Error On The Composite Power Supply Pcb
If the output has stopped, it may be reset by opening the machine's top unit, correcting the load, and then turning the power switch back on. Keep in mind, however, that repeated short-circuiting and resetting can blow the fuse (FU102). COPYRIGHT © 1999 CANON INC. CANON NP6512/6612/7120/7130/7130F REV.0 AUG. 1999 PRINTED IN JAPAN (IMPRIME AU JAPON) -
Page 201: Disassembly/Assembly
6. As a rule, do not operate the machine with any of its part removed. 7. A few of the screws used are special screws (with wider thread intervals). Do not use any screws indiscriminately. COPYRIGHT © 1999 CANON INC. CANON NP6512/6612/7120/7130/7130F REV.0 AUG. 1999 PRINTED IN JAPAN (IMPRIME AU JAPON) -
Page 202: External Covers
[1] Copyboard cover [5] Cassette [2] Top cover [6] Front upper cover [7] Left cover [3] Control panel [4] Front lower cover Figure 7-301 (Copyboard type) COPYRIGHT © 1999 CANON INC. CANON NP6512/6612/7120/7130/7130F REV.0 AUG. 1999 PRINTED IN JAPAN (IMPRIME AU JAPON) - Page 203 [1] Rear cover [2] Right door [3] Multifeeder unit Figure 7-303 COPYRIGHT © 1999 CANON INC. CANON NP6512/6612/7120/7130/7130F REV.0 AUG. 1999 PRINTED IN JAPAN (IMPRIME AU JAPON)
- Page 204 DC control- ler. Figure 7-304 4) Free the two claws [3], and slide the left cover [4] to detach. Figure 7-305 7-10 COPYRIGHT © 1999 CANON INC. CANON NP6512/6612/7120/7130/7130F REV.0 AUG. 1999 PRINTED IN JAPAN (IMPRIME AU JAPON)
- Page 205 [6]; then, detach the rear cover [7]. Figure 7-306 6) Remove the screw [8], and detach the copyboard cover foot retainer [9]. Figure 7-307 7-11 COPYRIGHT © 1999 CANON INC. CANON NP6512/6612/7120/7130/7130F REV.0 AUG. 1999 PRINTED IN JAPAN (IMPRIME AU JAPON)
- Page 206 CHAPTER 7 EXTERNALS/AUXILIARY MECHANISMS 7) Free the two claw [10]; then, lift the top cover [11] to detach. [10] [10] [11] Figure 7-308 7-12 COPYRIGHT © 1999 CANON INC. CANON NP6512/6612/7120/7130/7130F REV.0 AUG. 1999 PRINTED IN JAPAN (IMPRIME AU JAPON)
- Page 207 A flexible cable for the control panel is connected to the front upper cover. Dis- connect the cable from the DC control- ler. Figure 7-310 7-13 COPYRIGHT © 1999 CANON INC. CANON NP6512/6612/7120/7130/7130F REV.0 AUG. 1999 PRINTED IN JAPAN (IMPRIME AU JAPON)
- Page 208 3) Mount the multifeeder, and make one copy using it as the source of paper. Figure 7-313 7-14 COPYRIGHT © 1999 CANON INC. CANON NP6512/6612/7120/7130/7130F REV.0 AUG. 1999 PRINTED IN JAPAN (IMPRIME AU JAPON)
-
Page 209: Control Panel
Figure 7-314 3) Remove the two screws [3], and free the eight claws [4]; then, detach the control panel [5]. Figure 7-315 7-15 COPYRIGHT © 1999 CANON INC. CANON NP6512/6612/7120/7130/7130F REV.0 AUG. 1999 PRINTED IN JAPAN (IMPRIME AU JAPON) -
Page 210: Copyboard Glass
When mounting the copyboard glass, be sure that the grounding plate is on the Copyboard glass side of its top edge. (ADF type only) Grounding plate Figure 7-317 7-16 COPYRIGHT © 1999 CANON INC. CANON NP6512/6612/7120/7130/7130F REV.0 AUG. 1999 PRINTED IN JAPAN (IMPRIME AU JAPON) -
Page 211: D. Main Motor/Main Drive Assem Bly
Power Supply PCB.”) 3) Remove the screw [1], and detach the high-voltage PCB [2]. Figure 7-318 4) Remove the insulating sheet [3]. Figure 7-319 7-17 COPYRIGHT © 1999 CANON INC. CANON NP6512/6612/7120/7130/7130F REV.0 AUG. 1999 PRINTED IN JAPAN (IMPRIME AU JAPON) - Page 212 When installing the main motor unit, be sure to attach the fan belt. After attaching the fan belt, make sure that the belt is free of twists. Figure 7-321 7-18 COPYRIGHT © 1999 CANON INC. CANON NP6512/6612/7120/7130/7130F REV.0 AUG. 1999 PRINTED IN JAPAN (IMPRIME AU JAPON)
-
Page 213: Bly
Power Supply PCB.”) 3) Remove the screw [1], and detach the high-voltage PCB [2]. Figure 7-322 4) Remove the insulating sheet [3]. Figure 7-323 7-19 COPYRIGHT © 1999 CANON INC. CANON NP6512/6612/7120/7130/7130F REV.0 AUG. 1999 PRINTED IN JAPAN (IMPRIME AU JAPON) - Page 214 After attaching the fan belt, make sure that the belt is free of twists. Figure 7-325 7-20 COPYRIGHT © 1999 CANON INC. CANON NP6512/6612/7120/7130/7130F REV.0 AUG. 1999 PRINTED IN JAPAN (IMPRIME AU JAPON)
-
Page 215: Electrical System
3) Disconnect all connectors from the DC controller PCB, remove the screw [3], and free the five claws [4]; then, detach the DC controller PCB [5]. Figure 7-327 7-21 COPYRIGHT © 1999 CANON INC. CANON NP6512/6612/7120/7130/7130F REV.0 AUG. 1999 PRINTED IN JAPAN (IMPRIME AU JAPON) -
Page 216: Supply Pcb
4) Disconnect the eleven connectors [3] from the composite power supply PCB, and disconnect the connector [4] from the main motor assembly. Figure 7-329 7-22 COPYRIGHT © 1999 CANON INC. CANON NP6512/6612/7120/7130/7130F REV.0 AUG. 1999 PRINTED IN JAPAN (IMPRIME AU JAPON) - Page 217 CHAPTER 7 EXTERNALS/AUXILIARY MECHANISMS 5) Remove the seven screws [5], and free the five claws [6]; then, detach the composite power supply PCB [7]. Figure 7-330 7-23 COPYRIGHT © 1999 CANON INC. CANON NP6512/6612/7120/7130/7130F REV.0 AUG. 1999 PRINTED IN JAPAN (IMPRIME AU JAPON)
- Page 218 In particular, keep in mind that holding the area indicated by “ ” can cause deformation or cracking of the board. Figure 7-331 7-24 COPYRIGHT © 1999 CANON INC. CANON NP6512/6612/7120/7130/7130F REV.0 AUG. 1999 PRINTED IN JAPAN (IMPRIME AU JAPON)
-
Page 219: Power Supply Pcb
PCB, be sure to enter the values indicated on the PCB to ‘34’ and ‘35’ in 120V 230V service mode. OFST Composite power supply PCB Figure 7-332 7-25 COPYRIGHT © 1999 CANON INC. CANON NP6512/6612/7120/7130/7130F REV.0 AUG. 1999 PRINTED IN JAPAN (IMPRIME AU JAPON) -
Page 221: Adf
Delivery ......8-12 C. Drive System ...... 8-23 G. Controlling the Pickup D. Feeding System ....8-26 Motor ........8-14 E. Electrical System ....8-33 COPYRIGHT © 1999 CANON INC. CANON NP6512/6612/7120/7130/7130F REV.0 AUG. 1999 PRINTED IN JAPAN (IMPRIME AU JAPON) -
Page 223: Outline
The ADF picks up the originals stacked on the original tray starting with the topmost original, moves them through the copyboard, and delivers them. See Figure 8-101 for an outline of the feeding route. Original tray Copier Figure 8-101 COPYRIGHT © 1999 CANON INC. CANON NP6512/6612/7120/7130/7130F REV.0 AUG. 1999 PRINTED IN JAPAN (IMPRIME AU JAPON) -
Page 224: B Basic Construction
IC for communications.) [Input block] [Control block] [Output block] ADFcontroller PCB Sensor Motor (Q1) Switch (Q2) 24V 5V Serial communication Composite power supply Copier Figure 8-102 COPYRIGHT © 1999 CANON INC. CANON NP6512/6612/7120/7130/7130F REV.0 AUG. 1999 PRINTED IN JAPAN (IMPRIME AU JAPON) - Page 225 (when light-blocking plate is at sensor) Belt motor J3-1 See p. 8-15. Pickup motor J3-6 See p. 8-14. J114 J202 Serial communication Copier *Negative logic. Figure 8-103 COPYRIGHT © 1999 CANON INC. CANON NP6512/6612/7120/7130/7130F REV.0 AUG. 1999 PRINTED IN JAPAN (IMPRIME AU JAPON)
-
Page 226: Basic Operations
Further, the ADF is equipped with three sensors for monitoring the movement of originals. The ADF is designed to accommodate one-sided original copying mode only. ADF controller PCB One-way clutch Figure 8-104 COPYRIGHT © 1999 CANON INC. CANON NP6512/6612/7120/7130/7130F REV.0 AUG. 1999 PRINTED IN JAPAN (IMPRIME AU JAPON) - Page 227 Delivery tray Originals Original tray Placing originals Picking up an original Feeding 1 Feeding 2 Copying Delivering Figure 8-105 COPYRIGHT © 1999 CANON INC. CANON NP6512/6612/7120/7130/7130F REV.0 AUG. 1999 PRINTED IN JAPAN (IMPRIME AU JAPON)
-
Page 228: Detecting An Original
(PDP3) to the ADF controller PCB in response to the movement of the detecting lever away from the sensor. Original Original tray Detecting lever ADF controller PCB Figure 8-106 COPYRIGHT © 1999 CANON INC. CANON NP6512/6612/7120/7130/7130F REV.0 AUG. 1999 PRINTED IN JAPAN (IMPRIME AU JAPON) - Page 229 Original tray ADF controller PCB Figure 8-107 Original Lengths and Operation Sequences Length Sequence ~313cm For A4/LTR originals 314cm~ For LGL originals Table 8-101 COPYRIGHT © 1999 CANON INC. CANON NP6512/6612/7120/7130/7130F REV.0 AUG. 1999 PRINTED IN JAPAN (IMPRIME AU JAPON)
-
Page 230: Pickup Operation
(topmost) and forward it as far as the registration roller. (The separation pad ensures that only one original is picked up.) Pickup roller 1 Pickup roller 2 1st original Separation pad Registration roller Figure 8-109 COPYRIGHT © 1999 CANON INC. CANON NP6512/6612/7120/7130/7130F REV.0 AUG. 1999 PRINTED IN JAPAN (IMPRIME AU JAPON) - Page 231 At the same time, the pickup motor (M2) is rotated counterclockwise to prepare for picking up the second original. Delivery sensor Feeding belt 1st original Figure 8-111 2nd original Original tray Paper guide Figure 8-112 COPYRIGHT © 1999 CANON INC. CANON NP6512/6612/7120/7130/7130F REV.0 AUG. 1999 PRINTED IN JAPAN (IMPRIME AU JAPON)
- Page 232 If the original is LGL, the second original is picked up after the scanner has been moved for- ward. 1st original 2nd original Scanner Figure 8-114 8-10 COPYRIGHT © 1999 CANON INC. CANON NP6512/6612/7120/7130/7130F REV.0 AUG. 1999 PRINTED IN JAPAN (IMPRIME AU JAPON)
- Page 233 Pickup motor (M2) Belt motor (M1) Original detection sensor (PI3) Registration sensor (PI2) Feeding 15mm farther Delivery sensor (PI1) : motor CCW rotation Figure 8-116 8-11 COPYRIGHT © 1999 CANON INC. CANON NP6512/6612/7120/7130/7130F REV.0 AUG. 1999 PRINTED IN JAPAN (IMPRIME AU JAPON)
-
Page 234: Delivery
The ADF switches the belt motor to low speed as soon as the trailing edge of the original moves past the delivery sensor (PI1), thereby delivering the original slowly. 1st original Delivery tray Delivery sensor 2nd original Figure 8-118 8-12 COPYRIGHT © 1999 CANON INC. CANON NP6512/6612/7120/7130/7130F REV.0 AUG. 1999 PRINTED IN JAPAN (IMPRIME AU JAPON) - Page 235 Registration sensor (PI2) Feeding farther 15mm Feeding farther 15mm Feeding farther 15mm Delivery sensor (PI1) : motor CCW rotation : motor low-speed rotation Figure 8-120 8-13 COPYRIGHT © 1999 CANON INC. CANON NP6512/6612/7120/7130/7130F REV.0 AUG. 1999 PRINTED IN JAPAN (IMPRIME AU JAPON)
-
Page 236: Controlling The Pickup Motor
Pickup roller signal (PM0) signal (PM1) rotation ‘1’ ‘1’ Braked ‘1’ ‘0’ Picking up ‘0’ ‘1’ Delivering ‘0’ ‘0’ At reset (free) Table 8-102 8-14 COPYRIGHT © 1999 CANON INC. CANON NP6512/6612/7120/7130/7130F REV.0 AUG. 1999 PRINTED IN JAPAN (IMPRIME AU JAPON) -
Page 237: Controlling The Belt Motor
Jam indicator on the controller and stop the belt motor at the same time. ADF controller PCB +24V Belt motor Motor driver Figure 8-122 8-15 COPYRIGHT © 1999 CANON INC. CANON NP6512/6612/7120/7130/7130F REV.0 AUG. 1999 PRINTED IN JAPAN (IMPRIME AU JAPON) -
Page 238: I. Detecting Original Jams
During pickup, the delivery sensor (PI1) re- mains on even when the original is fed for ‘length + about 60 mm’. Table 8-103 8-16 COPYRIGHT © 1999 CANON INC. CANON NP6512/6612/7120/7130/7130F REV.0 AUG. 1999 PRINTED IN JAPAN (IMPRIME AU JAPON) -
Page 239: Power Supply
Delivery sensor (PI1) supply Fuse resistor (R1) Registration sensor (PI2) J1-3 J101-3 Logic Original placement sensor (PI3) ADF controller PCB Copier Figure 8-124 8-17 COPYRIGHT © 1999 CANON INC. CANON NP6512/6612/7120/7130/7130F REV.0 AUG. 1999 PRINTED IN JAPAN (IMPRIME AU JAPON) -
Page 240: Disassembly/Assembly
6. As a rule, do not operate the machine with any of its part removed. 7. A few of the screws used are special screws (with wider thread intervals). Do not use any screws indiscriminately. 8-18 COPYRIGHT © 1999 CANON INC. CANON PC800S/900S REV.0 AUG. 1999 PRINTED IN JAPAN (IMPRIME AU JAPON) -
Page 241: Removing The Adf
[5]. Figure 8-202 4) Close the machine’s top unit. 5) Remove the two screws [6], and remove the fixing plate [7]. Figure 8-203 8-19 COPYRIGHT © 1999 CANON INC. CANON NP6512/6612/7120/7130/7130F REV.0 AUG. 1999 PRINTED IN JAPAN (IMPRIME AU JAPON) - Page 242 [9]; then, remove the cable bush [10]. Figure 8-204 7) Remove the two lockpin [11], and remove the ADF from the copier. [11] [11] Figure 8-205 8-20 COPYRIGHT © 1999 CANON INC. CANON NP6512/6612/7120/7130/7130F REV.0 AUG. 1999 PRINTED IN JAPAN (IMPRIME AU JAPON)
-
Page 243: External Covers
1) Remove the ADF from the copier. (See “A. Removing the ADF.”) 2) Remove the feeding roller [1] from the bushing [2]. Figure 8-207 8-21 COPYRIGHT © 1999 CANON INC. CANON NP6512/6612/7120/7130/7130F REV.0 AUG. 1999 PRINTED IN JAPAN (IMPRIME AU JAPON) - Page 244 [4] from the upper cover [5]. Figure 8-208 4) Disconnect the connector [6], and remove the lower cover [4]. Figure 8-209 8-22 COPYRIGHT © 1999 CANON INC. CANON NP6512/6612/7120/7130/7130F REV.0 AUG. 1999 PRINTED IN JAPAN (IMPRIME AU JAPON)
-
Page 245: Drive System
2) Remove the screw [1] and the bushing [2]; then, remove the pickup roller cover [3]. Figure 8-210 3) Remove the E-ring [4], and remove the bearing [5]. Figure 8-211 8-23 COPYRIGHT © 1999 CANON INC. CANON NP6512/6612/7120/7130/7130F REV.0 AUG. 1999 PRINTED IN JAPAN (IMPRIME AU JAPON) - Page 246 5) Remove the five screws [9], and remove the right hinge unit [8]. Figure 8-213 6) Remove the stop ring [10] (resin) and the [11] bushing [11]. [10] Figure 8-214 8-24 COPYRIGHT © 1999 CANON INC. CANON NP6512/6612/7120/7130/7130F REV.0 AUG. 1999 PRINTED IN JAPAN (IMPRIME AU JAPON)
- Page 247 7) Disconnect the two connectors [12], and remove the five screws [13]; then, remove the drive unit [14]. [13] [14] [13] [12] Figure 8-215 8-25 COPYRIGHT © 1999 CANON INC. CANON NP6512/6612/7120/7130/7130F REV.0 AUG. 1999 PRINTED IN JAPAN (IMPRIME AU JAPON)
-
Page 248: D. Feeding System
2) Remove the E-ring [2], and remove the shaft [3]; then, detach the pickup roller 1 [4]. Figure 8-217 3) Remove the stop ring [5]. Figure 8-218 8-26 COPYRIGHT © 1999 CANON INC. CANON NP6512/6612/7120/7130/7130F REV.0 AUG. 1999 PRINTED IN JAPAN (IMPRIME AU JAPON) - Page 249 4) Remove the two straight pins [6], and re- move the pickup roller 2 [8] while moving the cover [7] in the direction of the arrow. Figure 8-219 8-27 COPYRIGHT © 1999 CANON INC. CANON NP6512/6612/7120/7130/7130F REV.0 AUG. 1999 PRINTED IN JAPAN (IMPRIME AU JAPON)
-
Page 250: Registration Roller
3) While pushing the bushing [3] in the di- rection of the arrow, pull out the registra- tion roller shaft [2] slowly. Figure 8-221 8-28 COPYRIGHT © 1999 CANON INC. CANON NP6512/6612/7120/7130/7130F REV.0 AUG. 1999 PRINTED IN JAPAN (IMPRIME AU JAPON) - Page 251 4) Remove the timing belt [4], and remove the feeding belt drive roller [5] by moving it in the direction of the arrow. Figure 8-224 8-29 COPYRIGHT © 1999 CANON INC. CANON NP6512/6612/7120/7130/7130F REV.0 AUG. 1999 PRINTED IN JAPAN (IMPRIME AU JAPON)
- Page 252 [8]. Figure 8-226 7) Remove the stop ring [10] (made of resin); then, remove the bushing [11]. [10] [11] Figure 8-227 8-30 COPYRIGHT © 1999 CANON INC. CANON NP6512/6612/7120/7130/7130F REV.0 AUG. 1999 PRINTED IN JAPAN (IMPRIME AU JAPON)
- Page 253 10) Remove the two E-rings [17]; then, re- [20] [17] move the timing belt [18], gear [19], and two bushings [20]. [20] [19] [17] [18] Figure 8-230 8-31 COPYRIGHT © 1999 CANON INC. CANON NP6512/6612/7120/7130/7130F REV.0 AUG. 1999 PRINTED IN JAPAN (IMPRIME AU JAPON)
- Page 254 11) Pull out the actuator [21] in the direction of the arrow; then, remove the feeding belt link roller [22], and remove the feeding belt [23]. [23] [21] [22] Figure 8-231 8-32 COPYRIGHT © 1999 CANON INC. CANON NP6512/6612/7120/7130/7130F REV.0 AUG. 1999 PRINTED IN JAPAN (IMPRIME AU JAPON)
-
Page 255: Electrical System
Sensor Cable color Original placement sensor Purple Registration paper sensor Yellow Table 8-201 Registration paper sensor Figure 8-233 8-33 COPYRIGHT © 1999 CANON INC. CANON NP6512/6612/7120/7130/7130F REV.0 AUG. 1999 PRINTED IN JAPAN (IMPRIME AU JAPON) - Page 257 SELECTING THE SITE ....9-1 B. Placing Copy Paper.... 9-18 UNPACKING AND III. MOVING THE MACHINE ..9-21 INSTALLATION ......9-2 A. Unpacking and Installation ..9-2 COPYRIGHT © 1999 CANON INC. CANON NP6512/6612/7120/7130/7130F REV.0 AUG. 1999 PRINTED IN JAPAN (IMPRIME AU JAPON)
-
Page 259: Chapter 9 Installation
• The machine must be at least 10 cm/3.9 in. away from any wall, and there must be adequate space for work involving the machine. 10cm min. 10cm min. Figure 9-101 COPYRIGHT © 1999 CANON INC. CANON NP6512/6612/7120/7130/7130F REV.0 AUG. 1999 PRINTED IN JAPAN (IMPRIME AU JAPON) -
Page 260: Unpacking And Installation
Shipping attachment [1] You will be storing the shipping attachment [1] inside the machine in step 10. COPYRIGHT © 1999 CANON INC. CANON NP6512/6612/7120/7130/7130F REV.0 AUG. 1999 PRINTED IN JAPAN (IMPRIME AU JAPON) - Page 261 Attach the manual feed tray that comes with the machine. Caution: This applies only if the manual feed tray comes packaged with the machine. Manual feed tray COPYRIGHT © 1999 CANON INC. CANON NP6512/6612/7120/7130/7130F REV.0 AUG. 1999 PRINTED IN JAPAN (IMPRIME AU JAPON)
- Page 262 Caution: If the protective member is not found on the machine, go to the next step. Protective members COPYRIGHT © 1999 CANON INC. CANON NP6512/6612/7120/7130/7130F REV.0 AUG. 1999 PRINTED IN JAPAN (IMPRIME AU JAPON)
- Page 263 Sheet Store the shipping attachments [1] and [2] re- Shipping attachments moved in steps 3 and 4 in the machine's bot- tom unit. COPYRIGHT © 1999 CANON INC. CANON NP6512/6612/7120/7130/7130F REV.0 AUG. 1999 PRINTED IN JAPAN (IMPRIME AU JAPON)
-
Page 264: Installing The Drum Unit
Protective members move the two protective members. Note: Do not touch the surface of the drum when handling the drum unit. Surface of the drum COPYRIGHT © 1999 CANON INC. CANON NP6512/6612/7120/7130/7130F REV.0 AUG. 1999 PRINTED IN JAPAN (IMPRIME AU JAPON) - Page 265 Enter the date of installation of the drum unit Label and the counter reading on the label attached to the drum unit. Drum unit COPYRIGHT © 1999 CANON INC. CANON NP6512/6612/7120/7130/7130F REV.0 AUG. 1999 PRINTED IN JAPAN (IMPRIME AU JAPON)
- Page 266 Further, you would not be able to close the machine's top unit unless you turned the locking lever clockwise. COPYRIGHT © 1999 CANON INC. CANON NP6512/6612/7120/7130/7130F REV.0 AUG. 1999 PRINTED IN JAPAN (IMPRIME AU JAPON)
- Page 267 • Be sure to pull the sealing tape straight out. • Take care so that toner possibly adhering to the sealing tape will not stain your clothes. COPYRIGHT © 1999 CANON INC. CANON NP6512/6612/7120/7130/7130F REV.0 AUG. 1999 PRINTED IN JAPAN (IMPRIME AU JAPON)
- Page 268 Machine's top unit 9-10 COPYRIGHT © 1999 CANON INC. CANON NP6512/6612/7120/7130/7130F REV.0 AUG. 1999 PRINTED IN JAPAN (IMPRIME AU JAPON)
- Page 269 Slide in and out the auxiliary tray several Auxiliary tray times to make sure that it moves smoothly. Close the original tray. Original tray 9-11 COPYRIGHT © 1999 CANON INC. CANON NP6512/6612/7120/7130/7130F REV.0 AUG. 1999 PRINTED IN JAPAN (IMPRIME AU JAPON)
- Page 270 English. If a non-English language is needed, select the appropriate label from among those that come with the machine and stick it. Label 9-12 COPYRIGHT © 1999 CANON INC. CANON NP6512/6612/7120/7130/7130F REV.0 AUG. 1999 PRINTED IN JAPAN (IMPRIME AU JAPON)
-
Page 271: Connecting The Power Cord
If you are unsure of the power source, check with your local power com- pany. Turn on the power switch. • The display will indicate '1'. Power switch 9-13 COPYRIGHT © 1999 CANON INC. CANON NP6512/6612/7120/7130/7130F REV.0 AUG. 1999 PRINTED IN JAPAN (IMPRIME AU JAPON) -
Page 272: Adjusting The Machine
"PRIMARY" you recorded in step 5 of "2. In- stalling the Drum Unit". • During adjustment, the display will indi- cate " ". 9-14 COPYRIGHT © 1999 CANON INC. CANON NP6512/6612/7120/7130/7130F REV.0 AUG. 1999 PRINTED IN JAPAN (IMPRIME AU JAPON) - Page 273 Press the Copy Start ( ) key. • The display will indicate '73'. Press the Copy Start ( ) key. • The display will indicate '74'. 9-15 COPYRIGHT © 1999 CANON INC. CANON NP6512/6612/7120/7130/7130F REV.0 AUG. 1999 PRINTED IN JAPAN (IMPRIME AU JAPON)
- Page 274 Attach the copy tray into the machine. Fit the copy tray by matching its grooves over the three protrusions on the machine’s left side. Copy tray 9-16 COPYRIGHT © 1999 CANON INC. CANON NP6512/6612/7120/7130/7130F REV.0 AUG. 1999 PRINTED IN JAPAN (IMPRIME AU JAPON)
- Page 275 • Make sure that as many copies as specified are made normally. Clean the machine’s exterior and the area around it. 9-17 COPYRIGHT © 1999 CANON INC. CANON NP6512/6612/7120/7130/7130F REV.0 AUG. 1999 PRINTED IN JAPAN (IMPRIME AU JAPON)
-
Page 276: B. Placing Copy Paper
Side paper guide plate (front) 9-18 COPYRIGHT © 1999 CANON INC. CANON NP6512/6612/7120/7130/7130F REV.0 AUG. 1999 PRINTED IN JAPAN (IMPRIME AU JAPON) - Page 277 English. If you need to replace it with a non- English label, select the appropriate one from among those packaged with the machine, and attach it. Language label for cassette 9-19 COPYRIGHT © 1999 CANON INC. CANON NP6512/6612/7120/7130/7130F REV.0 AUG. 1999 PRINTED IN JAPAN (IMPRIME AU JAPON)
- Page 278 (LTR/LGL) only. Rear end guide plate Place copy paper in the cassette; then, set the cassette in the machine. 500-sheet cassette 250-sheet cassette 9-20 COPYRIGHT © 1999 CANON INC. CANON NP6512/6612/7120/7130/7130F REV.0 AUG. 1999 PRINTED IN JAPAN (IMPRIME AU JAPON)
-
Page 279: Iii. Moving The Machine
Detach the copy tray. Press down on the marking on the machine's top unit to fully close the machine. 9-21 COPYRIGHT © 1999 CANON INC. CANON NP6512/6612/7120/7130/7130F REV.0 AUG. 1999 PRINTED IN JAPAN (IMPRIME AU JAPON) - Page 280 Pack the machine, using the original packing material and box. Or tape the machine’s top in place so that it will not open while in transit. 9-22 COPYRIGHT © 1999 CANON INC. CANON NP6512/6612/7120/7130/7130F REV.0 AUG. 1999 PRINTED IN JAPAN (IMPRIME AU JAPON)
-
Page 281: Chapter 10 Maintenance And Servicing
CHAPTER 10 MAINTENANCE AND SERVICING PERIODICALLY REPLACED DURABLES AND PARTS ........10-1 CONSUMABLES ...... 10-1 III. SCHEDULED SERVICING ..10-1 COPYRIGHT © 1999 CANON INC. CANON NP6512/6612/7120/7130/7130F REV.0 AUG. 1999 PRINTED IN JAPAN (IMPRIME AU JAPON) -
Page 283: Periodically Replaced Parts
The machine does not have items designated as durables or consumables. III. SCHEDULED SERVICING The machine does not have any parts which require scheduled servicing. 10-1 COPYRIGHT © 1999 CANON INC. CANON NP6512/6612/7120/7130/7130F REV.0 AUG. 1999 PRINTED IN JAPAN (IMPRIME AU JAPON) - Page 285 Counter Mode (60) ... 11-93 A. Troubleshooting VIII. SELF DIAGNOSIS ....11-94 Malfunctions ..... 11-65 TROUBLESHOOTING FEEDING PROBLEMS ......11-77 A. Copy Paper Jam ....11-77 COPYRIGHT © 1999 CANON INC. CANON NP6512/6612/7120/7130/7130F REV.0 AUG. 1999 PRINTED IN JAPAN (IMPRIME AU JAPON)
-
Page 287: Chapter 11 Troubleshooting
• If you want to find out the checks to make or action to take, go through the steps: answer the questions under "Checks"; if yes, take the action shown. Otherwise, go to the next step and make the indicated checks. 11-1 COPYRIGHT © 1999 CANON INC. CANON NP6512/6612/7120/7130/7130F REV.0 AUG. 1999 PRINTED IN JAPAN (IMPRIME AU JAPON) - Page 288 "+" indicates the terminal to which you are expected to connect the positive probe of the meter and "-," the negative probe. example: J109-1 (+) ..Connect the positive probe. J109-2 (-) ..Connect the negative probe. 11-2 COPYRIGHT © 1999 CANON INC. CANON NP6512/6612/7120/7130/7130F REV.0 AUG. 1999 PRINTED IN JAPAN (IMPRIME AU JAPON)
-
Page 289: Maintenance And Inspection
3. Density of gray scale No. 1 (good or bad; Note 1) procedure.) 4. Fogging of background (Note 1) troubleshooting procedure. 2. See p. 11-42. 11-3 COPYRIGHT © 1999 CANON INC. CANON NP6512/6612/7120/7130/7130F REV.0 AUG. 1999 PRINTED IN JAPAN (IMPRIME AU JAPON) -
Page 290: Points To Note For Servicing
Tools/sovents Work/remarks to soil with solvent and oil. Static eliminator Special brush Cleaning. Feeding assembly Part Tools/sovents Work/remarks Feed belt Moist cloth Cleaning. 11-4 COPYRIGHT © 1999 CANON INC. CANON NP6512/6612/7120/7130/7130F REV.0 AUG. 1999 PRINTED IN JAPAN (IMPRIME AU JAPON) -
Page 291: Standards And Adjustments
Relationship between Setting and Leading Edge Non-Image Width Setting Leading edge non-image width Higher Increases Lower Decreases Table 11-201 11-5 COPYRIGHT © 1999 CANON INC. CANON NP6512/6612/7120/7130/7130F REV.0 AUG. 1999 PRINTED IN JAPAN (IMPRIME AU JAPON) - Page 292 Relationship between Settings and Image Leading Edge Margin Setting Image leading edge margin Higher Decreases Lower Increases Table 11-202 11-6 COPYRIGHT © 1999 CANON INC. CANON NP6512/6612/7120/7130/7130F REV.0 AUG. 1999 PRINTED IN JAPAN (IMPRIME AU JAPON)
- Page 293 3) Loosen the screws used to secure the cable retainer at the rear and the front of the No. 1 mirror mount [1]. Figure 11-204 11-7 COPYRIGHT © 1999 CANON INC. CANON NP6512/6612/7120/7130/7130F REV.0 AUG. 1999 PRINTED IN JAPAN (IMPRIME AU JAPON)
- Page 294 4) Turn the cable drive pulley [3] so that the three shafts [2] of the mirror positioning tool for the front and the rear may be arranged as shown. Figure 11-205 (rear) Figure 11-206 (front) 11-8 COPYRIGHT © 1999 CANON INC. CANON NP6512/6612/7120/7130/7130F REV.0 AUG. 1999 PRINTED IN JAPAN (IMPRIME AU JAPON)
- Page 295 5) While keeping the condition of 4), tighten the positioning screw at the rear and the front of the No. 1 mirror mount [1]. Figure 11-207 (rear) Figure 11-208 (front) 11-9 COPYRIGHT © 1999 CANON INC. CANON NP6512/6612/7120/7130/7130F REV.0 AUG. 1999 PRINTED IN JAPAN (IMPRIME AU JAPON)
- Page 296 970 ±150 g when the holding plate is 18 mm away from the bottom of the cassette. Spring gauge (CK-0054) Holding plate Cassette Cassette spring Figure 11-209 11-10 COPYRIGHT © 1999 CANON INC. CANON NP6512/6612/7120/7130/7130F REV.0 AUG. 1999 PRINTED IN JAPAN (IMPRIME AU JAPON)
- Page 297 CHAPTER 11 TROUBLESHOOTING e-1. Routing the Scanner Drive Cable Wind 1.5 times. (black cable) Wind 7.5 times. (silver- colored cable) Figure 11-210 11-11 COPYRIGHT © 1999 CANON INC. CANON NP6512/6612/7120/7130/7130F REV.0 AUG. 1999 PRINTED IN JAPAN (IMPRIME AU JAPON)
- Page 298 3) Remove the copyboard glass. (See Chapter 7.III.C.1. “Removing the Copyboard Glass.”) 4) Disconnect the connectors (J101, J131) [1] from the DC controller PCB. Figure 11-212 11-12 COPYRIGHT © 1999 CANON INC. CANON NP6512/6612/7120/7130/7130F REV.0 AUG. 1999 PRINTED IN JAPAN (IMPRIME AU JAPON)
- Page 299 [3] from the left upper stay [4]. Figure 11-213 6) Remove the three screws [5], and detach the left upper stay [4]. Figure 11-214 11-13 COPYRIGHT © 1999 CANON INC. CANON NP6512/6612/7120/7130/7130F REV.0 AUG. 1999 PRINTED IN JAPAN (IMPRIME AU JAPON)
- Page 300 CHAPTER 11 TROUBLESHOOTING 7) Remove the four screws [7], and detach the lens cover [8]. Figure 11-215 11-14 COPYRIGHT © 1999 CANON INC. CANON NP6512/6612/7120/7130/7130F REV.0 AUG. 1999 PRINTED IN JAPAN (IMPRIME AU JAPON)
- Page 301 [3]. Longer end Shorter end Face with a marking Figure 11-216 Top view Figure 11-217 11-15 COPYRIGHT © 1999 CANON INC. CANON NP6512/6612/7120/7130/7130F REV.0 AUG. 1999 PRINTED IN JAPAN (IMPRIME AU JAPON)
- Page 302 When putting the cable drive pulley into the shaft, be sure that the hook is at the front. Hook (front) Figure 11-218 3) Hook the shorter end [6] on the pulley [7]. Figure 11-219 11-16 COPYRIGHT © 1999 CANON INC. CANON NP6512/6612/7120/7130/7130F REV.0 AUG. 1999 PRINTED IN JAPAN (IMPRIME AU JAPON)
- Page 303 Be sure that the secured end of the cable is found where the hole in the left side plate and the tip of the cable matches. [13] [12] Figure 11-221 11-17 COPYRIGHT © 1999 CANON INC. CANON NP6512/6612/7120/7130/7130F REV.0 AUG. 1999 PRINTED IN JAPAN (IMPRIME AU JAPON)
- Page 304 [16] on the left front side and the pulley [17] of the No. 2/3 mirror mount. [17] [16] [14] Figure 11-223 11-18 COPYRIGHT © 1999 CANON INC. CANON NP6512/6612/7120/7130/7130F REV.0 AUG. 1999 PRINTED IN JAPAN (IMPRIME AU JAPON)
- Page 305 Be sure that the secured end of the cable is found where the hole in the left side plate and the tip of the cable matches. [18] [19] [14] Figure 11-224 11-19 COPYRIGHT © 1999 CANON INC. CANON NP6512/6612/7120/7130/7130F REV.0 AUG. 1999 PRINTED IN JAPAN (IMPRIME AU JAPON)
- Page 306 2) Lead the longer end [5] along the cable drive pulley [1] as shown, and hook it on the pulley [6] on the right front side. Figure 11-226 11-20 COPYRIGHT © 1999 CANON INC. CANON NP6512/6612/7120/7130/7130F REV.0 AUG. 1999 PRINTED IN JAPAN (IMPRIME AU JAPON)
- Page 307 [9]. Figure 11-227 4) Hook the end of the longer end [5] on the hole [10] on the right side. [10] Figure 11-228 11-21 COPYRIGHT © 1999 CANON INC. CANON NP6512/6612/7120/7130/7130F REV.0 AUG. 1999 PRINTED IN JAPAN (IMPRIME AU JAPON)
- Page 308 No. 2/3 mirror mount as shown; then, lead it between the No. 1 mirror mount [7] and the scanning lamp [9]. [12] Figure 11-230 11-22 COPYRIGHT © 1999 CANON INC. CANON NP6512/6612/7120/7130/7130F REV.0 AUG. 1999 PRINTED IN JAPAN (IMPRIME AU JAPON)
- Page 309 8) Free the shorter end [3] and the longer end [5] (reversing cable), and connect both with a spring [14]; then, fit the stopper [15]. [14] [15] Figure 11-232 11-23 COPYRIGHT © 1999 CANON INC. CANON NP6512/6612/7120/7130/7130F REV.0 AUG. 1999 PRINTED IN JAPAN (IMPRIME AU JAPON)
- Page 310 CHAPTER 11 TROUBLESHOOTING 9) Detach the pulley clip [16] from the cable drive pulley [1]. [16] Figure 11-233 11-24 COPYRIGHT © 1999 CANON INC. CANON NP6512/6612/7120/7130/7130F REV.0 AUG. 1999 PRINTED IN JAPAN (IMPRIME AU JAPON)
- Page 311 1) Fix the rear and the front of the No. 1 mirror mount [1] temporarily to the metal fixing [2] of the forwarding cable. Figure 11-234 (rear) Figure 11-235 (front) 11-25 COPYRIGHT © 1999 CANON INC. CANON NP6512/6612/7120/7130/7130F REV.0 AUG. 1999 PRINTED IN JAPAN (IMPRIME AU JAPON)
- Page 312 2) Turn the cable drive pulley [4] so that the three shafts [3] of the mirror positioning tool for rear and front is as shown. Figure 11-236 (rear) Figure 11-237(front) 11-26 COPYRIGHT © 1999 CANON INC. CANON NP6512/6612/7120/7130/7130F REV.0 AUG. 1999 PRINTED IN JAPAN (IMPRIME AU JAPON)
- Page 313 3) While keeping the condition of step 2), tighten the positioning screw on the rear and front of the No. 1 mirror mount [1]. Figure 11-238 (rear) Figure 11-239 (front) 11-27 COPYRIGHT © 1999 CANON INC. CANON NP6512/6612/7120/7130/7130F REV.0 AUG. 1999 PRINTED IN JAPAN (IMPRIME AU JAPON)
- Page 314 • If you have replaced the scanning lamp, you must adjust the intensity of the lamp (p. 11- 44) and perform AE adjustment. • Do not touch the lamp when handling it. 11-28 COPYRIGHT © 1999 CANON INC. CANON NP6512/6612/7120/7130/7130F REV.0 AUG. 1999 PRINTED IN JAPAN (IMPRIME AU JAPON)
- Page 315 When mounting the thermal fuse of the No. 1 mirror mount, be sure that the fuse is oriented as shown. Make sure that the fuse is in contact with the reflecting plate. Reflecting plate (front) Thermal fuse Figure 11-241 11-29 COPYRIGHT © 1999 CANON INC. CANON NP6512/6612/7120/7130/7130F REV.0 AUG. 1999 PRINTED IN JAPAN (IMPRIME AU JAPON)
-
Page 316: Adf
A4/LTR copy papper Figure 11-242 2) Turn on the machine, and place the test sheet prepared in step 1) on the original tray. Figure 11-243 11-30 COPYRIGHT © 1999 CANON INC. CANON NP6512/6612/7120/7130/7130F REV.0 AUG. 1999 PRINTED IN JAPAN (IMPRIME AU JAPON) - Page 317 Relationship between Adjusting Screw and L1/L2 Direction of turn Relationship between L1 and L2 Clockwise L1 > L2 Counterclockwise L1 < L2 Table 11-203 11-31 COPYRIGHT © 1999 CANON INC. CANON NP6512/6612/7120/7130/7130F REV.0 AUG. 1999 PRINTED IN JAPAN (IMPRIME AU JAPON)
- Page 318 • The sheet will be used as a test sheet. 10mm A4/LTR copy papper Figure 11-246 2) Remove the original tray cover from below the original tray. Original tray cover Figure 11-247 11-32 COPYRIGHT © 1999 CANON INC. CANON NP6512/6612/7120/7130/7130F REV.0 AUG. 1999 PRINTED IN JAPAN (IMPRIME AU JAPON)
- Page 319 5) Check to make sure that the distance L3 on the copy image indicated is 10 ±2.5 mm (standard) or less. Copy image L3 =10 2.5mm Figure 11-249 11-33 COPYRIGHT © 1999 CANON INC. CANON NP6512/6612/7120/7130/7130F REV.0 AUG. 1999 PRINTED IN JAPAN (IMPRIME AU JAPON)
- Page 320 Pinion gear Pinion gear positioning screw Figure 11-250 Relationship between Pinion Gear Position and L3 Direction of pinion gear Increases Decreases Table 11-204 11-34 COPYRIGHT © 1999 CANON INC. CANON NP6512/6612/7120/7130/7130F REV.0 AUG. 1999 PRINTED IN JAPAN (IMPRIME AU JAPON)
- Page 321 • The sheet will be used as a test sheet. 10mm A4/LTR copy papper Figure 11-251 2) Remove the screw, and remove the ADF controller cover. Screw ADF controller cover Figure 11-252 11-35 COPYRIGHT © 1999 CANON INC. CANON NP6512/6612/7120/7130/7130F REV.0 AUG. 1999 PRINTED IN JAPAN (IMPRIME AU JAPON)
- Page 322 5) Check to make sure that the distance L4 on the copy image indicated is 10 +2.0, -2.5 mm (standard) or less. Copy image L4 =10 2.0mm Figure 11-254 11-36 COPYRIGHT © 1999 CANON INC. CANON NP6512/6612/7120/7130/7130F REV.0 AUG. 1999 PRINTED IN JAPAN (IMPRIME AU JAPON)
- Page 323 7) Press the push switch (PSW) on the ADF controller PCB. • The copy paper will be picked up from the original tray and stopped on the copyboard glass. Figure 11-256 11-37 COPYRIGHT © 1999 CANON INC. CANON NP6512/6612/7120/7130/7130F REV.0 AUG. 1999 PRINTED IN JAPAN (IMPRIME AU JAPON)
- Page 324 Relationship between Rotary Switch Direction and Original Position Direction of rotary switch Position (shift) of original Clockwise Toward leading edge Counterclockwise Toward trailing edge Table 11-205 11-38 COPYRIGHT © 1999 CANON INC. CANON NP6512/6612/7120/7130/7130F REV.0 AUG. 1999 PRINTED IN JAPAN (IMPRIME AU JAPON)
- Page 325 (PSW) to pick up the copy paper. Figure 11-258 3) Turn the rotary switch (SW2) on the ADF controller PCB clockwise by 10 notches. Figure 11-259 11-39 COPYRIGHT © 1999 CANON INC. CANON NP6512/6612/7120/7130/7130F REV.0 AUG. 1999 PRINTED IN JAPAN (IMPRIME AU JAPON)
- Page 326 4) Press the push switch (PSW) on the ADF controller PCB. • The copy paper on the copyboard will be discharged, and the optimum value will be stored. Figure 11-260 11-40 COPYRIGHT © 1999 CANON INC. CANON NP6512/6612/7120/7130/7130F REV.0 AUG. 1999 PRINTED IN JAPAN (IMPRIME AU JAPON)
-
Page 327: Electrical
Sheet; if (and only if) an image fault is found, adjust the intensity of the scanning lamp and execute AE adjustment. Table 11-206 11-41 COPYRIGHT © 1999 CANON INC. CANON NP6512/6612/7120/7130/7130F REV.0 AUG. 1999 PRINTED IN JAPAN (IMPRIME AU JAPON) - Page 328 4) Select '38' in service mode. • The display will indicate '38'. 5) Press the Copy Start key. • The existing setting will flash. 11-42 COPYRIGHT © 1999 CANON INC. CANON NP6512/6612/7120/7130/7130F REV.0 AUG. 1999 PRINTED IN JAPAN (IMPRIME AU JAPON)
- Page 329 • A higher setting will decrease the intensity of the lamp, thereby making copies darker. • A lower setting will increase the intensity of the lamp, thereby making copies lighter. 11-43 COPYRIGHT © 1999 CANON INC. CANON NP6512/6612/7120/7130/7130F REV.0 AUG. 1999 PRINTED IN JAPAN (IMPRIME AU JAPON)
- Page 330 • The scanner will move forward, and the scanning lamp will turn on. 3) Turn VR103 on the DC controller PCB fully clockwise. VR103 AE GAIN J130 VR102 J103 J104 Figure 11-262 11-44 COPYRIGHT © 1999 CANON INC. CANON NP6512/6612/7120/7130/7130F REV.0 AUG. 1999 PRINTED IN JAPAN (IMPRIME AU JAPON)
- Page 331 If you cannot set VR102 and VR103 to the target values at the same time, turn VR103 fully counterclockwise, and go back to step 4) and make adjustments once again. 11-45 COPYRIGHT © 1999 CANON INC. CANON NP6512/6612/7120/7130/7130F REV.0 AUG. 1999 PRINTED IN JAPAN (IMPRIME AU JAPON)
- Page 332 • If the copy is foggy or its characters are too light, go back to step 1) and start over. • If there is no change after adjustment for a second time, use the density correction dial (VR107). Figure 11-265 11-46 COPYRIGHT © 1999 CANON INC. CANON NP6512/6612/7120/7130/7130F REV.0 AUG. 1999 PRINTED IN JAPAN (IMPRIME AU JAPON)
-
Page 333: Apvc Measurement Current Correction (Ip_Ofst)
• If you have replaced the drum unit, execute ‘Installation/drum unit replacement mode’ (U7) in the user mode. (See Chapter 9.II.A.6. “Adjusting the Machine.”) 11-47 COPYRIGHT © 1999 CANON INC. CANON NP6512/6612/7120/7130/7130F REV.0 AUG. 1999 PRINTED IN JAPAN (IMPRIME AU JAPON) -
Page 334: Voltage Correction For Measurement Of Apvc (Pw_Ofst)
4) Press the AE key to store the value. 5) Record the new value on the service label. 6) Execute 'U7' in user mode (installation/drum replacement mode). 11-48 COPYRIGHT © 1999 CANON INC. CANON NP6512/6612/7120/7130/7130F REV.0 AUG. 1999 PRINTED IN JAPAN (IMPRIME AU JAPON) -
Page 335: Current Correction For Measurement Of Apvc (Ip_Adj)
Composite power supply PCB Figure 11-267 4) Enter the AE key to store the new setting. 5) Record the new value on the service label. 11-49 COPYRIGHT © 1999 CANON INC. CANON NP6512/6612/7120/7130/7130F REV.0 AUG. 1999 PRINTED IN JAPAN (IMPRIME AU JAPON) -
Page 336: Ratio Fine Adjustment (Lens_Adj)
+/- key. 4) Press the AE key to store the new value. 5) Execute 'U7' in user mode (installation/drum replacement mode). 11-50 COPYRIGHT © 1999 CANON INC. CANON NP6512/6612/7120/7130/7130F REV.0 AUG. 1999 PRINTED IN JAPAN (IMPRIME AU JAPON) -
Page 337: Checking The Photointerrupters
Q751, paper sensor (RPD) hand. When the light- blocking plate is not at Q751, Table 11-209 11-51 COPYRIGHT © 1999 CANON INC. CANON NP6512/6612/7120/7130/7130F REV.0 AUG. 1999 PRINTED IN JAPAN (IMPRIME AU JAPON) -
Page 338: Troubleshooting Image Faults
Copy Paper a. Is copy paper of a type recommended by Canon? b. Is copy paper moist? Try paper fresh out of package. 11-52 COPYRIGHT © 1999 CANON INC. CANON NP6512/6612/7120/7130/7130F REV.0 AUG. 1999 PRINTED IN JAPAN (IMPRIME AU JAPON) - Page 339 Instruct the user so that the cartridge is not opened before it has become used to the room temperature (one to two hours). 11-53 COPYRIGHT © 1999 CANON INC. CANON NP6512/6612/7120/7130/7130F REV.0 AUG. 1999 PRINTED IN JAPAN (IMPRIME AU JAPON)
- Page 340 CHAPTER 11 TROUBLESHOOTING 11-54 COPYRIGHT © 1999 CANON INC. CANON NP6512/6612/7120/7130/7130F REV.0 AUG. 1999 PRINTED IN JAPAN (IMPRIME AU JAPON)
- Page 341 CHAPTER 11 TROUBLESHOOTING 11-55 COPYRIGHT © 1999 CANON INC. CANON NP6512/6612/7120/7130/7130F REV.0 AUG. 1999 PRINTED IN JAPAN (IMPRIME AU JAPON)
-
Page 342: Sample Image Faults
A3 and printed with a reduction of about 19%; actual images may be somewhat different. * Copies made with the copyboard lifted; faults may also appear on normally made copies. † Strips may vary in width. † 11-56 COPYRIGHT © 1999 CANON INC. CANON NP6512/6612/7120/7130/7130F REV.0 AUG. 1999 PRINTED IN JAPAN (IMPRIME AU JAPON) -
Page 343: Troubleshooting Image Faults
Replace the drum unit. Is the problem End. Developing corrected? Replace the electric unit bias, Develop- (composite power supply ing bias PCB, DC controller terminal PCB). 11-57 COPYRIGHT © 1999 CANON INC. CANON NP6512/6612/7120/7130/7130F REV.0 AUG. 1999 PRINTED IN JAPAN (IMPRIME AU JAPON) - Page 344 Scanning 1. Check the activation lamp, Devel- of the scanning oping bias lamp. 2. Check the develop- ing assembly. 11-58 COPYRIGHT © 1999 CANON INC. CANON NP6512/6612/7120/7130/7130F REV.0 AUG. 1999 PRINTED IN JAPAN (IMPRIME AU JAPON)
- Page 345 Remove the foreign charging the transfer charging roller assembly? matter, or replace the roller transfer charging roller. Drum unit Replace the drum unit. 11-59 COPYRIGHT © 1999 CANON INC. CANON NP6512/6612/7120/7130/7130F REV.0 AUG. 1999 PRINTED IN JAPAN (IMPRIME AU JAPON)
-
Page 346: The Back Of The Copy Is Soiled
Is the feeding assembly soiled? Clean the feeding assembly assembly. Pickup guide Clean the pickup guide assembly, assembly and the Delivery delivery roller. roller 11-60 COPYRIGHT © 1999 CANON INC. CANON NP6512/6612/7120/7130/7130F REV.0 AUG. 1999 PRINTED IN JAPAN (IMPRIME AU JAPON) -
Page 347: The Copy Has A Fixing Fault
Check the supply PCB fixing assembly top unit, DC controller PCB, and composite power supply PCB. 11-61 COPYRIGHT © 1999 CANON INC. CANON NP6512/6612/7120/7130/7130F REV.0 AUG. 1999 PRINTED IN JAPAN (IMPRIME AU JAPON) -
Page 348: The Copy Has A Blurred Image
Does the copy paper spring up or stop Check the feeding system around the transfer assembly? assembly for burrs. Drum unit Replace the drum unit. 11-62 COPYRIGHT © 1999 CANON INC. CANON NP6512/6612/7120/7130/7130F REV.0 AUG. 1999 PRINTED IN JAPAN (IMPRIME AU JAPON) -
Page 349: The Copy Has Horizontal Fogging
No. 2 mirror. Scanner Clean the scanning lamp, reflecting End. Drum unit plate, mirror, and lens. Is the problem Replace the drum unit. corrected? 11-63 COPYRIGHT © 1999 CANON INC. CANON NP6512/6612/7120/7130/7130F REV.0 AUG. 1999 PRINTED IN JAPAN (IMPRIME AU JAPON) -
Page 350: The Copy Is Blank
------------ Does the scanning lamp remain on See "The scanning during copying? lamp fails to turn on." Is the drum unit set correctly? 11-64 COPYRIGHT © 1999 CANON INC. CANON NP6512/6612/7120/7130/7130F REV.0 AUG. 1999 PRINTED IN JAPAN (IMPRIME AU JAPON) -
Page 351: Troubleshooting Malfunctions
Replace the composite power supply End. power PCB. Is the problem corrected? supply PCB DC control- Replace the DC ler PCB controller PCB. 11-65 COPYRIGHT © 1999 CANON INC. CANON NP6512/6612/7120/7130/7130F REV.0 AUG. 1999 PRINTED IN JAPAN (IMPRIME AU JAPON) - Page 352 Main motor Replace the main motor (M1). Is the End. (M1) problem corrected? DC control- Replace the DC ler PCB controller PCB. 11-66 COPYRIGHT © 1999 CANON INC. CANON NP6512/6612/7120/7130/7130F REV.0 AUG. 1999 PRINTED IN JAPAN (IMPRIME AU JAPON)
- Page 353 Replace the composite power supply End. power PCB. Is the problem corrected? supply PCB DC control- Replace the DC ler PCB controller PCB. 11-67 COPYRIGHT © 1999 CANON INC. CANON NP6512/6612/7120/7130/7130F REV.0 AUG. 1999 PRINTED IN JAPAN (IMPRIME AU JAPON)
- Page 354 Replace the composite power supply End. power PCB. Is the problem corrected? supply PCB DC control- Replace the DC ler PCB controller PCB. 11-68 COPYRIGHT © 1999 CANON INC. CANON NP6512/6612/7120/7130/7130F REV.0 AUG. 1999 PRINTED IN JAPAN (IMPRIME AU JAPON)
-
Page 355: Malfunctions
DC control- Replace the DC controller PCB. Is the End. ler PCB. problem corrected? Composite Replace the composite power power supply PCB. supply PCB 11-69 COPYRIGHT © 1999 CANON INC. CANON NP6512/6612/7120/7130/7130F REV.0 AUG. 1999 PRINTED IN JAPAN (IMPRIME AU JAPON) - Page 356 Control Replace the control panel PCB. Is the End. panel PCB problem corrected? Composite Replace the composite power power supply PCB. supply PCB 11-70 COPYRIGHT © 1999 CANON INC. CANON NP6512/6612/7120/7130/7130F REV.0 AUG. 1999 PRINTED IN JAPAN (IMPRIME AU JAPON)
- Page 357 125 V, 5 V replace the fuse. Composite 220/240V model: 250 V, 2.5 A Replace the composite power power supply PCB. supply PCB 11-71 COPYRIGHT © 1999 CANON INC. CANON NP6512/6612/7120/7130/7130F REV.0 AUG. 1999 PRINTED IN JAPAN (IMPRIME AU JAPON)
- Page 358 J109-8 J109-7 (SL1) (SL4) DC control- Replace the DC Pickup clutch ler PCB controller PCB. J109-4 J109-3 solenoid (SL1) Table 11-403 11-72 COPYRIGHT © 1999 CANON INC. CANON NP6512/6612/7120/7130/7130F REV.0 AUG. 1999 PRINTED IN JAPAN (IMPRIME AU JAPON)
-
Page 359: The Scanner Fails To Move Forward
24 V for a moment after the if normal, replace SL2. DC control- Copy Start key is pressed? Replace the DC ler PCB controller PCB. 11-73 COPYRIGHT © 1999 CANON INC. CANON NP6512/6612/7120/7130/7130F REV.0 AUG. 1999 PRINTED IN JAPAN (IMPRIME AU JAPON) -
Page 360: The Scanning Lamp Fails To Turn On
DC supply PCB controller PCB and the composite power supply PCB; if nor- mal, replace the composite power supply PCB. 11-74 COPYRIGHT © 1999 CANON INC. CANON NP6512/6612/7120/7130/7130F REV.0 AUG. 1999 PRINTED IN JAPAN (IMPRIME AU JAPON) -
Page 361: The Fixing Heater Fails To Turn On
DC control- Replace the DC controller PCB. Is the End. ler PCB problem corrected? Composite Replace the composite power power supply PCB. supply PCB 11-75 COPYRIGHT © 1999 CANON INC. CANON NP6512/6612/7120/7130/7130F REV.0 AUG. 1999 PRINTED IN JAPAN (IMPRIME AU JAPON) - Page 362 11-51.) to each sensor; if normal, replace the sensor in question. DC control- Replace the DC ler PCB controller PCB. 11-76 COPYRIGHT © 1999 CANON INC. CANON NP6512/6612/7120/7130/7130F REV.0 AUG. 1999 PRINTED IN JAPAN (IMPRIME AU JAPON)
-
Page 363: Troubleshooting Feeding Problems
[1] Pickup block [2] Separation/feeding block [3] Fixing/delivery block The troubleshooting procedures that follow are organized according to the location of a jam. Figure 11-501 11-77 COPYRIGHT © 1999 CANON INC. CANON NP6512/6612/7120/7130/7130F REV.0 AUG. 1999 PRINTED IN JAPAN (IMPRIME AU JAPON) -
Page 364: Pickup Assembly
(PS4) Pickup roller, Check the roller for Vertical path wear and deformation, roller,Roll and the roll for attach- ment. 11-78 COPYRIGHT © 1999 CANON INC. CANON NP6512/6612/7120/7130/7130F REV.0 AUG. 1999 PRINTED IN JAPAN (IMPRIME AU JAPON) - Page 365 Does the delivery roller operate Check the delivery roller drive smoothly? roller drive assembly assembly Leading Check the leading edge margin edge of copy paper for margin. 11-79 COPYRIGHT © 1999 CANON INC. CANON NP6512/6612/7120/7130/7130F REV.0 AUG. 1999 PRINTED IN JAPAN (IMPRIME AU JAPON)
-
Page 366: B. Faulty Feeding
Fixing Is the inlet guide soiled with toner? Check the fixing assembly assembly. Inlet guide Clean the inlet guide with solvent. 11-80 COPYRIGHT © 1999 CANON INC. CANON NP6512/6612/7120/7130/7130F REV.0 AUG. 1999 PRINTED IN JAPAN (IMPRIME AU JAPON) -
Page 367: Vi. Arrangement And Functions Of Electrical Parts
Total copy counter Solenoid Pickup clutch solenoid Registration clutch solenoid Lens solenoid Multifeeder pickup solenoid Cassette pickup solenoid Primary charging roller cleaning solenoid 11-81 COPYRIGHT © 1999 CANON INC. CANON NP6512/6612/7120/7130/7130F REV.0 AUG. 1999 PRINTED IN JAPAN (IMPRIME AU JAPON) -
Page 368: B. Switches
CHAPTER 11 TROUBLESHOOTING Switches SW309 Figure 11-602 Symbol Name Notation Description Remarks Switch Door switch SW309 Power switch 11-82 COPYRIGHT © 1999 CANON INC. CANON NP6512/6612/7120/7130/7130F REV.0 AUG. 1999 PRINTED IN JAPAN (IMPRIME AU JAPON) -
Page 369: C. Lamp, Heater, Motor, Etc
Fixing heater temperature detection Scanner temperature detection Thermal fuse Lamp overheating detection Fixing heater overheating detection Varistor Fixing film varistor Transfer guide varistor 11-83 COPYRIGHT © 1999 CANON INC. CANON NP6512/6612/7120/7130/7130F REV.0 AUG. 1999 PRINTED IN JAPAN (IMPRIME AU JAPON) -
Page 370: D. Pcbs
Detects the density of originals. Blanking PCB (front) Used for blanking exposure. Blanking PCB (rear) Used for blanking exposure. [10] Pre-exposure PCB Used for pre-exposure. 11-84 COPYRIGHT © 1999 CANON INC. CANON NP6512/6612/7120/7130/7130F REV.0 AUG. 1999 PRINTED IN JAPAN (IMPRIME AU JAPON) -
Page 371: E. Adf
Delivery paper detection Resistration roller paper detection Original placement detection Microswitch ADF open/close switch Motor Belt motor Pickup motor Controls sequence of operations ADF controller 11-85 COPYRIGHT © 1999 CANON INC. CANON NP6512/6612/7120/7130/7130F REV.0 AUG. 1999 PRINTED IN JAPAN (IMPRIME AU JAPON) -
Page 372: Check Pins By Pcb
Composite Power Supply PCB J203 J204 J951 J202 J207 VR951 J954 J201 VR801 VR952 J953 VR001 VR301 J910 J302 J209 FU102 J205 J213 J212 Figure 11-607 11-86 COPYRIGHT © 1999 CANON INC. CANON NP6512/6612/7120/7130/7130F REV.0 AUG. 1999 PRINTED IN JAPAN (IMPRIME AU JAPON) - Page 373 CHAPTER 11 TROUBLESHOOTING ADF Controller PCB FACE Soldered side PSW SW1 Figure 11-608 11-87 COPYRIGHT © 1999 CANON INC. CANON NP6512/6612/7120/7130/7130F REV.0 AUG. 1999 PRINTED IN JAPAN (IMPRIME AU JAPON)
-
Page 374: Vii. Service Mode
Figure 11-701 Caution: A flexible cable for the control panel is connected to the front upper cover. Disconnect the cable from the DC controller. 11-88 COPYRIGHT © 1999 CANON INC. CANON NP6512/6612/7120/7130/7130F REV.0 AUG. 1999 PRINTED IN JAPAN (IMPRIME AU JAPON) -
Page 375: Ending Service Mode
1) While the display is indicating 'F', press the +/- key to select the item to check or adjust. • The 10s digit will flash. 2) Press the Copy Start key to start the item. 11-89 COPYRIGHT © 1999 CANON INC. CANON NP6512/6612/7120/7130/7130F REV.0 AUG. 1999 PRINTED IN JAPAN (IMPRIME AU JAPON) - Page 376 Then, record these values on the service label. REGIST LE_BLANK PRIMARY IP_OFST PW_OFST IP_ADJ LENS_ADJ PREX_LP LAMP_ADJ FB5-2777 Figure 11-704 11-90 COPYRIGHT © 1999 CANON INC. CANON NP6512/6612/7120/7130/7130F REV.0 AUG. 1999 PRINTED IN JAPAN (IMPRIME AU JAPON)
-
Page 377: Adjustment Mode (30)
Use it to adjust the intensity of the scanning lamp. adjustment Unit: 0.15 V (approx.; 120 V) (LAMP_ADJ) 0.30 V (approx.; 220/240 V) Table 11-702 11-91 COPYRIGHT © 1999 CANON INC. CANON NP6512/6612/7120/7130/7130F REV.0 AUG. 1999 PRINTED IN JAPAN (IMPRIME AU JAPON) -
Page 378: Operation/Inspection Mode (40)
If you have to stop the RAM clear mechanism, press the Clear/Stop key before starting step (4). The RAM will be cleared when step (4) is executed. Table 11-703 11-92 COPYRIGHT © 1999 CANON INC. CANON NP6512/6612/7120/7130/7130F REV.0 AUG. 1999 PRINTED IN JAPAN (IMPRIME AU JAPON) -
Page 379: Machine Settings Mode (50)
60 will be for item 61; count reading for item 61 will be for item 62; count reading for item 62 will be deleted.) 11-93 COPYRIGHT © 1999 CANON INC. CANON NP6512/6612/7120/7130/7130F REV.0 AUG. 1999 PRINTED IN JAPAN (IMPRIME AU JAPON) -
Page 380: Self Diagnosis
• The counter drive signal is not generated when the counter is driven. • The counter drive signal is not '0' when the counter is not driven. 11-94 COPYRIGHT © 1999 CANON INC. CANON NP6512/6612/7120/7130/7130F REV.0 AUG. 1999 PRINTED IN JAPAN (IMPRIME AU JAPON) - Page 381 • During a copying run, the +24 V power • The composite power supply PCB is deviates from the control value by faulty. ±20%. 11-95 COPYRIGHT © 1999 CANON INC. CANON NP6512/6612/7120/7130/7130F REV.0 AUG. 1999 PRINTED IN JAPAN (IMPRIME AU JAPON)
- Page 382 JP103 Figure 11-801 2) When 'F' has turned on, stop shorting circuit JP103 and JP104. 3) Turn off and then on the machine. 11-96 COPYRIGHT © 1999 CANON INC. CANON NP6512/6612/7120/7130/7130F REV.0 AUG. 1999 PRINTED IN JAPAN (IMPRIME AU JAPON)
-
Page 383: Appendix
N. PRE-EXPOSURE CIRCUIT DIAGRAM ......... A-29 DIAGRAM ......... A-37 H. AE SENSOR CIRCUIT O. SPECIAL TOOLS ...... A-38 DIAGRAM ......... A-31 SOLVENTS/OILS ...... A-39 COPYRIGHT © 1999 CANON INC. CANON NP6512/6612/7120/7130/7130F REV.0 AUG. 1999 PRINTED IN JAPAN (IMPRIME AU JAPON) -
Page 385: General Timing Chart
Developing AC bias Developing DC bias Transfer bias Static eliminator bias Fixing heater (H1) Scanner cooling fan (FM1) Delivery sensor (PS3) : Scanner/lens drive motor (reverse) COPYRIGHT © 1999 CANON INC. CANON NP6512/6612/7120/7130/7130F REV.0 AUG. 1999 PRINTED IN JAPAN (IMPRIME AU JAPON) - Page 386 Transfer bias Static eliminator bias Fixing heater (H1) Scanner cooling fan (FM1) Delivery sensor (PS3) : Scanner/lens drive motor (reverse)/Pickup motor (reverse)/Belt motor (reverse) COPYRIGHT © 1999 CANON INC. CANON NP6512/6612/7120/7130/7130F REV.0 AUG. 1999 PRINTED IN JAPAN (IMPRIME AU JAPON)
-
Page 387: Signals And Abbreviations
SCANNER MOTOR DRIVE signal SCHP SCANNER HOME POSITION signal TCNTD TOTAL COPY COUNTER DRIVE signal T_FEEDBACK TRANSFER BIAS VOLTAGE DETECTION signal T_FW_DRV TRANSFER DC BIAS CONTROL signal COPYRIGHT © 1999 CANON INC. CANON NP6512/6612/7120/7130/7130F REV.0 AUG. 1999 PRINTED IN JAPAN (IMPRIME AU JAPON) -
Page 389: General Circuit Diagram
Primary charging Waste toner PRE-EXPOSURE Fixing film solenoid clutch solenoid pickup solenoid position sensor solenoid roller paper sensor counter roller cleaning solenoid sensor Varistor 1 COPYRIGHT © 1999 CANON INC. CANON NP6512/6612/7120/7130/7130F REV.0 AUG. 1999 PRINTED IN JAPAN (IMPRIME AU JAPON) - Page 390 BR BROWN GY GRAY GN GREEN To composite power supply OR ORANGE +24V PK PINK SB SKY-BLUE VIOLET Y/GN WHITE YELLOW (M3) (M4) Switch COPYRIGHT © 1999 CANON INC. CANON NP6512/6612/7120/7130/7130F REV.0 AUG. 1999 PRINTED IN JAPAN (IMPRIME AU JAPON)
-
Page 391: Dc Controller Circuit Diagram
C202 DIGIT<4..0> DV_AC_ON* C162 D201 DV_DC_ON* PR_DC_ON* CPS_REQ* R301 Q149 SEG<7..0> KEY<7..0> KEY<7..0> C193 R300 R211 D203 Q183 R210 C157 D200 ADF type only COPYRIGHT © 1999 CANON INC. CANON NP6512/6612/7120/7130/7130F REV.0 AUG. 1999 PRINTED IN JAPAN (IMPRIME AU JAPON) - Page 392 C107 C106 C166 C165 C164 C163 R227 R226 R225 R224 SC_INB* SC_INB SC_INA* SC_INA C263 C264 C265 C266 R111 R109 R107 R108 C109 C108 COPYRIGHT © 1999 CANON INC. CANON NP6512/6612/7120/7130/7130F REV.0 AUG. 1999 PRINTED IN JAPAN (IMPRIME AU JAPON)
- Page 393 Q106 ZD101 C185 VR102 C184 R264 R118 C186 R263 R309 +24VU +24VR +24VR R306 R310 24V_SENSE R307 Q106 Q106 C207 C203 C205 ZD102 R305 COPYRIGHT © 1999 CANON INC. CANON NP6512/6612/7120/7130/7130F REV.0 AUG. 1999 PRINTED IN JAPAN (IMPRIME AU JAPON)
- Page 394 R240 R243 R242 R241 R358 DIG4 [VOL1] D214 D214 SEG1* Q114 SEG2* Q115 SEG3* Q116 SEG4* Q117 SEG5* Q118 SEG6* Q119 SEG7* Q120 A-10 COPYRIGHT © 1999 CANON INC. CANON NP6512/6612/7120/7130/7130F REV.0 AUG. 1999 PRINTED IN JAPAN (IMPRIME AU JAPON)
- Page 395 OUT X Q131 C126 R275 C183 R148 +24VU D204 D189 R272 T_CNT* VR107 Q181 ZD103 T_CNT_ERR AEDS_VR R314 R296 T_CNT Q162 R273 C178 R311 A-11 COPYRIGHT © 1999 CANON INC. CANON NP6512/6612/7120/7130/7130F REV.0 AUG. 1999 PRINTED IN JAPAN (IMPRIME AU JAPON)
- Page 396 C129 PR_DC_ON* Q136 DV_DC_ON DV_DC_ON* Q135 RG_PD_CPU R170 DV_AC_ON DV_AC_ON* C128 Q138 R249 STBY/CPY* STBY/CPY Q140 C204 PREX_LP_ON* PEXP* Q184 R303 Q185 R308 A-12 COPYRIGHT © 1999 CANON INC. CANON NP6512/6612/7120/7130/7130F REV.0 AUG. 1999 PRINTED IN JAPAN (IMPRIME AU JAPON)
- Page 397 R191 D128 R192 D185 C176 HEAT_TRG Q148 Q147 Q108 R190 R186 Q151 R212 R214 C160 HEAT_OFF Q160 R187 C161 D132 HEAT_PWM D133 Q108 A-13 COPYRIGHT © 1999 CANON INC. CANON NP6512/6612/7120/7130/7130F REV.0 AUG. 1999 PRINTED IN JAPAN (IMPRIME AU JAPON)
- Page 398 DIG4 TNFULL J111 J121 DIG2 J201 DIG1 R351 R386 J121 J201 J132 DIG3 R286 R390 J201 R365 J121 J132 J201 J121 J132 J201 A-14 COPYRIGHT © 1999 CANON INC. CANON NP6512/6612/7120/7130/7130F REV.0 AUG. 1999 PRINTED IN JAPAN (IMPRIME AU JAPON)
-
Page 399: Adf Controller Circuit Diagram
P15/A5 STBY* P16/A6 P17/A7 P40/TMCI0 P41/TMO0 P20/A8 P42/TMRI0 P21/A9 P43/TMCI1 P22/A10 P44/TMO1 P23/A11 P45/TMRI1 P24/A12 P46/PHI P25/A13 P47/E P26/A14 HC14 +24V ZD1 ADFC A-15 COPYRIGHT © 1999 CANON INC. CANON NP6512/6612/7120/7130/7130F REV.0 AUG. 1999 PRINTED IN JAPAN (IMPRIME AU JAPON) - Page 400 ADF Controller Circuit Diagram (2/3) +24V +24V OUTA OUT1 OUTA* OUT2 OUTA* VrefA INA* +24V OUTA OUTB* +24V VrefB INB* OUTB A-16 COPYRIGHT © 1999 CANON INC. CANON NP6512/6612/7120/7130/7130F REV.0 AUG. 1999 PRINTED IN JAPAN (IMPRIME AU JAPON)
- Page 401 ADF Controller Circuit Diagram (3/3) PDP3 HC14 PDP2 HC14 PDP1 DIPSW1 HC14 DIPSW0 HC14 DIGIT0 HC14 DIGIT1 DIGIT2 HC14 DIGIT3 A-17 COPYRIGHT © 1999 CANON INC. CANON NP6512/6612/7120/7130/7130F REV.0 AUG. 1999 PRINTED IN JAPAN (IMPRIME AU JAPON)
- Page 402 A-18 COPYRIGHT © 1999 CANON INC. CANON NP6512/6612/7120/7130/7130F REV.0 AUG. 1999 PRINTED IN JAPAN (IMPRIME AU JAPON)
- Page 403 <A508> Q617 D810 C605 R801 <A508> AC_MONITOR C818 <A509> Q611 R603 Q608 C620 R609 Q621 HEAT_TRG R611 <A508> Q620 R614 R615 R602 C604 A-19 COPYRIGHT © 1999 CANON INC. CANON NP6512/6612/7120/7130/7130F REV.0 AUG. 1999 PRINTED IN JAPAN (IMPRIME AU JAPON)
-
Page 404: Composite Power Supply Circuit Diagram
D106 MV_H <A505> <A504> <A509> MV_L <A505> AC_LA NC=8 R109 R103 D121 D122 D124 R110 R108 D125 D123 Q118 T103 T104 PROTECT <A508> A-20 COPYRIGHT © 1999 CANON INC. CANON NP6512/6612/7120/7130/7130F REV.0 AUG. 1999 PRINTED IN JAPAN (IMPRIME AU JAPON) - Page 405 C103 C127 R125 R186 D119 C143 R136 MPWM_INV R185 <A508> R148 +24VR R156 D120 R147 Q115 C145 Q107 R160 C146 R155 R146 C144 A-21 COPYRIGHT © 1999 CANON INC. CANON NP6512/6612/7120/7130/7130F REV.0 AUG. 1999 PRINTED IN JAPAN (IMPRIME AU JAPON)
- Page 406 C203 R201 MV_L <A503> C514 C513 T101 C202 PRIMARY R211 J209 JP887 R521 PDC_PWM Q201 <A508> R215 P_C_S C207 <A508> R216 C222 R212 A-22 COPYRIGHT © 1999 CANON INC. CANON NP6512/6612/7120/7130/7130F REV.0 AUG. 1999 PRINTED IN JAPAN (IMPRIME AU JAPON)
- Page 407 C221 R237 R238 ACBIAS <A508> HV_L <A503> R236 R207 D214 BIAS_PWM R208 <A508> Q206 R239 C218 C219 C208 R243 BIAS_S <A508> D215 C215 A-23 COPYRIGHT © 1999 CANON INC. CANON NP6512/6612/7120/7130/7130F REV.0 AUG. 1999 PRINTED IN JAPAN (IMPRIME AU JAPON)
- Page 408 HV_H R351 R352 R353 R354 R355 R356 T_REV T101 C343 C321 C380 C382 D326 HV_L C344 D325 <A503> T_REV_R R388 T_REV_ON* Q321 A508 A-24 COPYRIGHT © 1999 CANON INC. CANON NP6512/6612/7120/7130/7130F REV.0 AUG. 1999 PRINTED IN JAPAN (IMPRIME AU JAPON)
- Page 409 <A507> T_REV_ON* T_REV_ON* S_IN S_IN HEAT_TRG <A502> <A507> T_FW_DRV S_OUT MLOCK T_FW_DRV S_OUT <A507> T_FW_S S_CLK T_FW_S S_CLK Q900 JP999: 220/240V model only A-25 COPYRIGHT © 1999 CANON INC. CANON NP6512/6612/7120/7130/7130F REV.0 AUG. 1999 PRINTED IN JAPAN (IMPRIME AU JAPON)
- Page 410 <A503> Q002 Q0001 R016 R025 D010 L001 R001 D009 Q001 LAMP_DETECT D011 <A508> Q011 D008 C005 R012, R013, R018, R021: 220/240V model only A-26 COPYRIGHT © 1999 CANON INC. CANON NP6512/6612/7120/7130/7130F REV.0 AUG. 1999 PRINTED IN JAPAN (IMPRIME AU JAPON)
- Page 411 +24V ADJ- J953 DEV_BIAS D952 C951 ADJ+ R951 J953 D953 J953 Q951 D951 Q952 R952 R954 C964 C952 R957 R956 VR952 C953 R955 A-27 COPYRIGHT © 1999 CANON INC. CANON NP6512/6612/7120/7130/7130F REV.0 AUG. 1999 PRINTED IN JAPAN (IMPRIME AU JAPON)
- Page 412 A-28 COPYRIGHT © 1999 CANON INC. CANON NP6512/6612/7120/7130/7130F REV.0 AUG. 1999 PRINTED IN JAPAN (IMPRIME AU JAPON)
-
Page 413: Control Panel Circuit Diagram
ADF type only DSVR R305 SEG4 C301 J301 VR301 J301 R306 10 SEG5 C302 J301 J301 R307 11 SEG6 J301 R308 12 SEG7 J301 A-29 COPYRIGHT © 1999 CANON INC. CANON NP6512/6612/7120/7130/7130F REV.0 AUG. 1999 PRINTED IN JAPAN (IMPRIME AU JAPON) -
Page 415: Ae Sensor Circuit Diagram
H. AE SENSOR CIRCUIT DIAGRAM +24VR R601 R603 J601-1 C603 R606 C601 +24VR J601-2 R605 PD601 Q601 R602 +24VR Q601 J601-3 R604 C602 J601-4 A-31 COPYRIGHT © 1999 CANON INC. CANON NP6512/6612/7120/7130/7130F REV.0 AUG. 1999 PRINTED IN JAPAN (IMPRIME AU JAPON) -
Page 416: Sensor Circuit Diagram
APPENDIX I. SENSOR CIRCUIT DIAGRAM J751-2 Q751 J751-3 R751 J751-1 A-32 COPYRIGHT © 1999 CANON INC. CANON NP6512/6612/7120/7130/7130F REV.0 AUG. 1999 PRINTED IN JAPAN (IMPRIME AU JAPON) -
Page 417: Noise Filter Circuit Diagram
APPENDIX J. NOISE FILTER CIRCUIT DIAGRAM FU501 L501 AC_H JP502 J501-1 C503 R501 C501 C502 C504 AC_N JP501 J501-2 A-33 COPYRIGHT © 1999 CANON INC. CANON NP6512/6612/7120/7130/7130F REV.0 AUG. 1999 PRINTED IN JAPAN (IMPRIME AU JAPON) -
Page 418: High Voltage Contact Circuit Diagram
BP702 JP704 JP705 BP703 JP706 JP707 R701 BP704 JP708 JP709 R702 [PR_IN] BP705 JP710 JP711 [GND_IN] BP706 JP712 JP713 R703 [DV_IN] BP707 JP714 A-34 COPYRIGHT © 1999 CANON INC. CANON NP6512/6612/7120/7130/7130F REV.0 AUG. 1999 PRINTED IN JAPAN (IMPRIME AU JAPON) -
Page 419: Blank Exposure (Front) Circuit Diagram
APPENDIX L. BLANK EXPOSURE (front) CIRCUIT DIAGRAM LA601 J601 J601 A-35 COPYRIGHT © 1999 CANON INC. CANON NP6512/6612/7120/7130/7130F REV.0 AUG. 1999 PRINTED IN JAPAN (IMPRIME AU JAPON) -
Page 420: Blank Exposure (Rear) Circuit Diagram
APPENDIX M. BLANK EXPOSURE (rear) CIRCUIT DIAGRAM LA602 J602 J602 A-36 COPYRIGHT © 1999 CANON INC. CANON NP6512/6612/7120/7130/7130F REV.0 AUG. 1999 PRINTED IN JAPAN (IMPRIME AU JAPON) -
Page 421: Pre-Exposure Circuit Diagram
APPENDIX N. PRE-EXPOSURE CIRCUIT DIAGRAM LA801 LA802 LA803 LA804 LA805 J801 LA806 LA807 J801 A-37 COPYRIGHT © 1999 CANON INC. CANON NP6512/6612/7120/7130/7130F REV.0 AUG. 1999 PRINTED IN JAPAN (IMPRIME AU JAPON) -
Page 422: Special Tools
A: Each service person is expected to carry one. B: Each five or so service persons is expected to carry one. C: Each workshop is expected to carry one. A-38 COPYRIGHT © 1999 CANON INC. CANON NP6512/6612/7120/7130/7130F REV.0 AUG. 1999 PRINTED IN JAPAN (IMPRIME AU JAPON) -
Page 423: Solvents/Oils
Mineral oil • CK-0451 (100cc) spring clutch (paraffin family) Lubricating oil Lubricating Silicone oil • CK-0551 (20g) drive and friction parts, scanner rail A-39 COPYRIGHT © 1999 CANON INC. CANON NP6512/6612/7120/7130/7130F REV.0 AUG. 1999 PRINTED IN JAPAN (IMPRIME AU JAPON) - Page 425 Prepared by Office Imaging Products Technical Support Division CANON INC. Printed in Japan REVISION 0 (AUG. 1999) (30359/10317) 5-1, Hakusan 7-chome, Toride-shi, Ibaraki 302-8501 Japan COPYRIGHT © 1999 CANON INC. CANON NP6512/6612/7120/7130/7130F REV.0 AUG. 1999 PRINTED IN JAPAN (IMPRIME AU JAPON)
- Page 426 This pubication is printed on 70% reprocessed paper. PRINTED IN JAPAN (IMPRIME AU JAPON) 0899AB1.51-1...
Need help?
Do you have a question about the NP6512 and is the answer not in the manual?
Questions and answers