Table of Contents
Advertisement
INSTALLATION, USE & CARE MANUAL
36" FREESTANDING DUAL FUEL RANGES
Models X365PIRX
Models X365PIRBI
Models X365PIRCR
Models X365PIRGI
Models X365PIRRO
Models X365PIRVI
Models X365PIRVE
Models X365PIRBL
Models X365PIRNE
Models X366PIRX
Models X366PIRBI
Models X366PIRCR
Models X366PIRGI
Models X366PIRRO
Models X366PIRVI
Models X366PIRVE
Models X366PIRBL
Models X366PIRNE
[M3W0PTU(4,6)X(2,5)D]
[M3W0PTU(4,6)W(2,5)D]
[M3W0PTU(4,6)D(2,5)D]
[M3W0PTU(4,6)I(2,5)D]
[M3W0PTU(4,6)R(2,5)D]
[M3W0PTU(4,6)L(2,5)D]
[M3W0PTU(4,6)V(2,5)D]
[M3W0PTU(4,6)U(2,5)D]
[M3W0PTU(4,6)N(2,5)D]
[M3Y0PTU(4,6)X(2,5)D]
[M3Y0PTU(4,6)W(2,5)D]
[M3Y0PTU(4,6)D(2,5)D]
[M3Y0PTU(4,6)I(2,5)D]
[M3Y0PTU(4,6)R(2,5)D]
[M3Y0PTU(4,6)L(2,5)D]
[M3Y0PTU(4,6)V(2,5)D]
[M3Y0PTU(4,6)U(2,5)D]
[M3Y0PTU(4,6)N(2,5)D]
1
310358
Advertisement
Table of Contents

Related Manuals for Bertazzoni X365PIRX


Summary of Contents for Bertazzoni X365PIRX
- Page 1 INSTALLATION, USE & CARE MANUAL 36” FREESTANDING DUAL FUEL RANGES Models X365PIRX [M3W0PTU(4,6)X(2,5)D] Models X365PIRBI [M3W0PTU(4,6)W(2,5)D] Models X365PIRCR [M3W0PTU(4,6)D(2,5)D] Models X365PIRGI [M3W0PTU(4,6)I(2,5)D] Models X365PIRRO [M3W0PTU(4,6)R(2,5)D] Models X365PIRVI [M3W0PTU(4,6)L(2,5)D] Models X365PIRVE [M3W0PTU(4,6)V(2,5)D] Models X365PIRBL [M3W0PTU(4,6)U(2,5)D] Models X365PIRNE [M3W0PTU(4,6)N(2,5)D] Models X366PIRX [M3Y0PTU(4,6)X(2,5)D] Models X366PIRBI [M3Y0PTU(4,6)W(2,5)D] Models X366PIRCR...
- Page 2 Bertazzoni product. This manual will help you learn to use the product in the safest and most effective manner and care for it so that it may give you the highest satisfaction for years to come.
-
Page 3: Table Of Contents
TABLE OF CONTENTS WARRANTY AND SERVICE............................4 CUSTOMER SERVICE............................... 5 REPLACEMENT PARTS ..............................5 IMPORTANT SAFETY INFORMATION ........................6 PRODUCT SPECIFICATIONS............................7 BEFORE INSTALLATION ............................8 INSTALLING THE LEGS .............................. 9 INSTALLING THE WORKTOP FRONTGUARD ......................9 INSTALLING THE BACKGUARD..........................10 INSTALLATION REQUIREMENTS .......................... - Page 4 SOUND BUZZER................................27 OVEN CONVECTION FAN.............................. 27 BAKE ..................................27 PREHEATING THE OVEN ............................. 27 GETTING THE BEST RESULTS ..........................27 BAKEWARE TYPE ..............................28 BAKE RACK POSITIONS ............................28 CONVECTION................................. 28 CONVECTION ............................... 28 CONVECTION BAKE ............................. 28 TURBO .................................
-
Page 5: Warranty And Service
WARRANTY AND SERVICE All Bertazzoni products carry a 2 year parts and labour warranty. Service on all Bertazzoni products shall be carried out by factory‐trained professionals only. For warranty service please contact Customer Service at the numbers indicated below. CUSTOMER SERVICE English/Spanish hotline (866) 905‐0010... -
Page 6: Important Safety Information
WARNING! IMPORTANT SAFETY INFORMATION Read this instruction booklet before installing PLEASE READ AND FOLLOW THESE IMPORTANT and using the appliance. INSTRUCTIONS FOR THE SAFETY OF YOUR HOME The manufacturer will not be responsible for AND OF THE PEOPLE LIVING IN IT. any damage to property or to persons caused by Save this Manual for local electrical inspector’s incorrect installation or improper use of the... -
Page 7: Product Specifications
PRODUCT SPECIFICATIONS Dimensions (insert drawings front, side and back Weight Burner power Auxiliary 3400 BTU/h Semi‐rapid 6100 BTU/h Rapid 10400 BTU/h Dual burner (inner) 2800 BTU/h Dual burner ( outer) 12000 BTU/h... -
Page 8: Before Installation
WARNING! BEFORE INSTALLATION Do not use aerosol sprays in the vicinity of this This appliance shall only be installed by an appliance while it is in operation authorized professional. ROOM VENTILATION: An exhaust fan may be This appliance shall be installed in accordance used with the appliance;... -
Page 9: Installing The Legs
INSTALLING THE LEGS INSTALLING THE WORKTOP FRONTGUARD Bertazzoni ranges must be used only with the legs properly installed. To increase the clearance between the front edge of the worktop and the burners it is possible to Four height‐adjustable legs are shipped with the... -
Page 10: Installing The Backguard
2 lateral screws from the bottom. INSTALLING THE BACKGUARD The back guard must be installed prior to operation of the appliance for appropriate ventilation of the oven compartment. The supplied back guard is a 2‐part assembly. The box also contains a set of metal screws for securing the back guard to the worktop. -
Page 11: Installation Requirements
INSTALLING THE ANTI‐TIP Stability DEVICE INSTALLATION REQUIREMENTS The anti‐tip bracket shipped with the range must be properly secured to the rear wall as shown in the picture below. ELECTRICAL The height of the bracket from the floor must be determined after the range legs have been A properly grounded and horizontally‐mounted adjusted to the desired height and after the electrical receptacle Type NEMA 14‐50R should... -
Page 12: Installation Adjacent To Kitchen Cabinets
This range may be installed directly adjacent to been designed to work in conjunction with the existing countertop high cabinets (36" or 91.5 cm Bertazzoni range and have the same finish for a from the floor). perfect look. For the best look, the worktop should be level For maximum performance, the height of the with the cabinet countertop. -
Page 13: Electrical Connection
‐ Connect the NEUTRAL receptacle terminal to ELECTRICAL CONNECTION the incoming NEUTRAL (WHITE) electrical The appliance shall be connected to a single supply wire phase electric line rated at 120/208Vac or ‐ Connect the GROUND receptacle terminal to 120/240Vac and 60Hz frequency. the incoming GROUND (GREEN) electrical supply wire Electric power rating:... - Page 14 4) Loose strain relief by unscrewing the two strain relief's screws as in diagram. 5) Remove damaged supply cord set by taking off the 4 electrical connection screws (block L1, N, L2 and Ground screw, see diagram) 6) Insert the new supply cord set in the strain relief and lock it with two strain relief's screws in suitable position.
- Page 15 WARNING! ELECTRICAL SHOCK HAZARD Disconnect electrical power at the circuit breaker box or fuse box before installing the appliance. Provide appropriate ground for the appliance. Use copper conductors only. Failure to follow these instructions could result in serious injury or death CAUTION Label all wires prior to disconnecting when servicing controls.
-
Page 16: Wiring Diagram
WIRING DIAGRAM... -
Page 17: Gas Connection
MANUAL SHUT‐OFF VALVE GAS CONNECTION THIS VALVE IS NOT SHIPPED WITH THE All gas connections must comply with national APPLIANCE AND MUST BE SUPPLIED BY THE and local codes. The gas supply line (service) INSTALLER. must be the same size or greater than the inlet The manual shut‐off valve must be installed in line of the appliance. -
Page 18: Pressure Regulator
GAS CONVERSION PRESSURE REGULATOR WARNING! Since service pressure may fluctuate with local Before carrying out this operation, disconnect demand, every gas cooking appliance must be the appliance from gas and electricity. equipped with a pressure regulator on the Gas conversion shall be conducted by a factory‐ incoming service line for safe and efficient trained professional. -
Page 19: Step 2: Surface Burners
7 mm {socket wrench). Replace nozzles using the conversion set supplied with the range or by a Bertazzoni authorized parts warehouse. Each nozzle has a number indicating its flow diameter printed on the body. -
Page 20: Gas Burners Data Tables
GAS BURNERS DATA TABLES Models X365PIRX [M3W0PTU(4,6)X(2,5)D] Models X365PIRBI [M3W0PTU(4,6)W(2,5)D] Models X365PIRCR [M3W0PTU(4,6)D(2,5)D] Models X365PIRGI [M3W0PTU(4,6)I(2,5)D] Models X365PIRRO [M3W0PTU(4,6)R(2,5)D] Models X365PIRVI [M3W0PTU(4,6)L(2,5)D] Models X365PIRVE [M3W0PTU(4,6)V(2,5)D] Models X365PIRBL [M3W0PTU(4,6)U(2,5)D] Models X365PIRNE [M3W0PTU(4,6)N(2,5)D] Burner Position Injector Pressure Max Rate Min Rate By‐pass diam. -
Page 21: Installation Checklist
INSTALLATION Checklist FINAL PREPARATION 1. Is the range mounted on its legs? All stainless steel body parts should be wiped with hot, soapy water and with a liquid stainless 2. Is the back guard securely connected? steel cleanser. If build‐up occurs, do not use steel wool, abrasive 3. -
Page 22: User Manual
USER MANUAL Do not clean oven door gasket. The door gasket WARNING! is essential for a good seal. Care should be taken Proper Installation. Be sure your appliance is not to rub, damage, or move the gasket. properly installed and grounded by a qualified Do not use oven cleaning products. -
Page 23: Surface Burner Layout
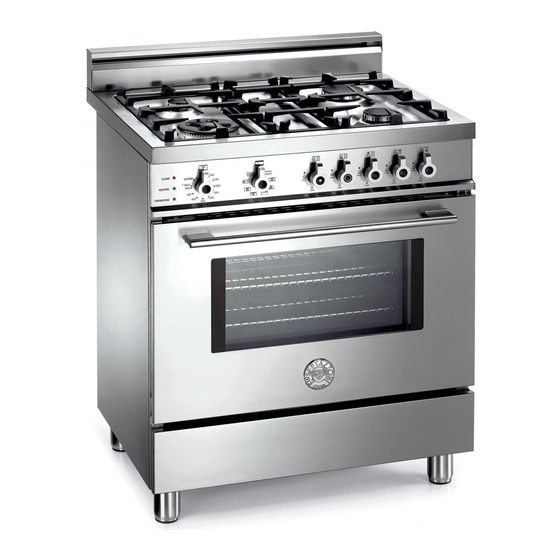
SURFACE BURNER LAYOUT SURFACE COOKING 1. Small Burner SYMBOLS 2. Medium burner 3. Rapid burner 4. Dual burner (Power burner) Model X365PIR(X,BI,CR,GI,RO,VI,VE,BL,NE) [M3W0PTU(4,6) (X,W,D,I,R,L,V,U,N)(2,5)D] Burner position (in this case front right burner). Model X366PIR (X,BI,CR,GI,RO,VI,VE,BL,NE) [M3Y0PTU(4,6) (X,W,D,I,R,L,V,U,N)(2,5)D] Maximum temperature setting /Recommended control knob... -
Page 24: Surface Burner Operation
SURFACE BURNER OPERATION TIPS FOR USING BURNERS CORRECTLY THERMOCOUPLE SAFETY VALVE WARNING! Each surface burner of a Bertazzoni range is KEEP CHILDREN AT A SAFE DISTANCE FROM THE equipped with a thermocouple safety device. APPLIANCE DURING OPERATION. The thermocouple opens the flow of gas to the DO NOT ALLOW CHILDREN TO OPERATE THE burner only when hot. -
Page 25: Tips For Using Pans Correctly
TIPS FOR USING PANS CORRECTLY OVEN COOKING WARNING! Use Care When Opening Door. Let hot air or ATTENTION! steam escape before removing or replacing Always ensure that bottom and handles of pans food. do not protrude from the worktop. Do Not Heat Unopened Food Containers. Build‐ When cooking with flammable fat such as oil, do up of pressure may cause container to burst and not leave the range unattended. -
Page 26: Symbols
BROILER (Broiler heating element) to OVEN RACKS be used with temperature selector at 500°F for broiling Bertazzoni ranges are equipped with commercial grade shelves and an enamel cooking tray. CONVECTION BROILER (Broiler Shelves are mounted on the appropriate guides heating element + fan) to be used with situated on the sides of the oven compartment. -
Page 27: Using The Oven
PROOFING (Bottom heating element) FRONT INDICATOR LIGHTS to be used with temperature selector set at 150°F (corresponding to an internal oven This appliance is equipped with 3 indicator lights setup fixed temperature of 100°F/38°C) on the front panel: ‐ CLEAN/RED colour: on with door locked during WARMING‐Level 1 (Bottom heating cleaning cycle element) to be used with temperature... -
Page 28: Bakeware Type
and form a nice crust. Foods in covered dishes Store the broiler pans outside the oven: extra (casseroles, pot roast) or delicate custards are pans without food affect the browning and not suitable for convection cooking. cooking. Browning can depend from the type of pan used: For tender, golden brown crusts, use light CONVECTION non‐stick anodized or shiny metal pans. -
Page 29: Rack Positions
When baking on more than one rack, cookie TIPS FOR CONVECTION and sheets and rectangular (9 x 13) cake pans should BAKE/CONVECTION/TURBO not be staggered; round cake pans should be staggered. Preheating the Oven Preheat the oven before baking. The oven does not need to be preheated for large pieces of Settings for BAKE/CONVECTION and meat or poultry. -
Page 30: Warming
WARMING PROOFING SLOW COOKING AND LOW TEMPERATURE USES In this oven function the pre‐heating light/sound OF THE OVEN indicators are deactivated; only the heating indicator light is active. In this oven function the pre‐heating light/sound indicators are deactivated; only the heating indicator light is active. -
Page 31: Dehydrate
To activate DEHYDRATE mode: set function DEHYDRATE selector on and set temperature selector at 100°F (corresponding to an internal oven setup fixed In this oven function the pre‐heating light/sound temperature of 100°F=38°C). indicators are deactivated; only the heating indicator light is active. Cooling fans does... -
Page 32: Broil / Convection Broil
100°F. Turn and cook the second side to desired BROIL / CONVECTION BROIL internal temperature. Tips for Broiling SETTING BROILER OR CONVECTION BROILER Select BROILER to brown food on the top side Broiling requires constant exposure to high, only. This mode requires turning food if browning intense heat. -
Page 33: Broiling And Roasting Recommendations
BROILING AND ROASTING RECOMMENDATIONS FOOD ITEM RACK OVEN MODE CONTROL APPROXIMATE SPECIAL NUMBER FUNCTION TEMPERATURE COOKING TIME INSTRUCTIONS SELECTOR SETTING AND TIPS SELECTOR BEEF Broiler or 500°F fixed 15 to 20 minutes Broil until no pink in convection Broiler temperature center Ground Beef setting... -
Page 34: Care And Maintenance
by turning the function selector to the OFF posi‐ tion. The CLEANING light will turn off only after CARE AND MAINTENANCE the oven has cooled below 500°260°C and the automatic door lock has completed its cycle to SELF‐CLEANING THE OVEN the open position. -
Page 35: Maintaining Your Range
food residue prevent the smooth operation of the control knobs, call the customer service MAINTAINING YOUR RANGE hotline to schedule service by a factory‐trained professional. Cleaning stainless steel: for best results use a REPLACING THE OVEN LIGHT BULBS stainless steel cleaner product with a soft sponge or wipe. -
Page 36: Troubleshooting Guide
TROUBLESHOOTING GUIDE OVEN PROBLEM POSSIBLE CAUSES AND/OR REMEDY Range does not function Range is not connected to electrical power. Ask a professional to check power circuit breaker, wiring and fuses. Self‐clean cycle does not activate Door is not shut tight enough for automatic door latch to lock Broil does not work Temperature control knob is rotated too far past broil position (500°F);... -
Page 37: Location Of Appliance Tags
CLEAN indicator light turned on Interruption/Stop of an incomplete cleaning cycle due to a intentional or intermittently, sound alarm off accidental displacement of one of the two oven selectors from CLEAN position during cleaning cycle operation; put both selectors in OFF position, wait that door latch unlocks the door when oven temperature is dropped below 500°F(260°C) and then re‐select a desired oven function. -
Page 38: Important Appliance Information
IMPORTANT APPLIANCE INFORMATION MODEL ______________________________________________________________ DATE INSTALLED _______________________________________________________________ DEALER _______________________________________________________________ _______________________________________________________________ INSTALLER _______________________________________________________________ ________________________________________________________________ SERVICER _______________________________________________________________ ________________________________________________________________... - Page 39 BERTAZZONI SpA Via Palazzina 8 42016 Guastalla RE ITALY WWW.BERTAZZONI‐ITALIA.COM...
-
Page 40: Spare Parts List
SPARE PARTS LIST X365PIRX X366PIRX NUMBER COMPONENT DESCRIPTION QUANTITY 601661 CABL.PRINCIPALE M3 PIRO 601662 CABL.LUNBERG 8 POLI M3 PIRO 601663 CABL.LUMBERG 6 POLI M3 PIRO 601665 CABLAGGINO MICRO-TANG M3 PIRO 910588 PAN SUPPORT BUMPER KIT 310358 USER MANUAL 202387 BURNERS FLASK 202432 PART FOR DUAL WOK AND SEMI RAPID BURNERS 306003... - Page 41 603023 LOOK DOOR MOTOR 603020 OVEN CONVECTION FAN 603019 COOLING FAN 606078 OVEN RESISTANCE 2400W 230V 606077 RESISTENCE 4000W 240V 606076 CIRCULAR HEATER 3300W 608048 OVEN BULB WITH HOLDER 309150 CORD FASTENER 602046 COMMUTATOR 8+0 602047 TEMPERATURE SELECTOR 607027 TERMINAL SEPARATOR 608050 RED LED 608051...
- Page 42 1615 202565 CONTROL SUPPORT 1622 608049 SMALL BUD 1624 200316 WORK TABLE 1624 200317 WORK TABLE 1627 501752 GAS COLLECTOR 1627 501753 GAS COLLECTOR 1628 501634 TUBE FOR RIGHT FRONT BURNER 1631 501635 TUBE FOR RIGHT BACK BURNER 1639 202587 LEFT VERTICAL VENT 1643 309148...
Need help?
Do you have a question about the X365PIRX and is the answer not in the manual?
Questions and answers