Table of Contents
Advertisement
Quick Links
Advertisement
Table of Contents
Troubleshooting

Related Manuals for Eiki EIP-200


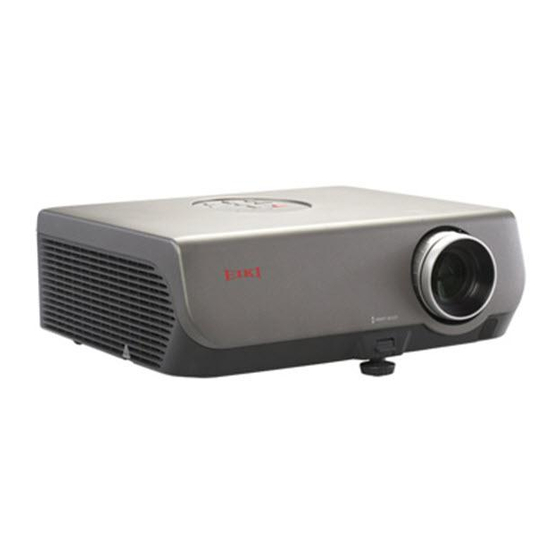
Summary of Contents for Eiki EIP-200
- Page 1 EIP-2500 EIP-200 OWNER’S MANUAL EIKI INDUSTRIAL CO., LTD.
- Page 2 • For your assistance in reporting the loss or theft of your Projector, please record the Model and Serial Number located on the bottom of the projector and retain this information. • Before recycling the packaging, please ensure that you have checked the con- tents of the carton thoroughly against the list of “Supplied accessories”...
- Page 4 The supplied CD-ROM contains operation instructions in English, German, French, Spanish, Italian and Portuguese. Carefully read through the operation instructions before operating the projector. Die mitgelieferte CD-ROM enthält Bedienungsanleitungen in Englisch, Deutsch, Französisch, Spanisch, Italienisch und Portugiesisch. Bitte lesen Sie die Bedienungsanleitung vor der Verwendung des Projektors sorgfältig durch.
-
Page 5: Warranty
2. CONSUMER PRODUCT SAFETY ACT To ensure that you will promptly receive any safety notification of inspection, modification, or recall that EIKI may be required to give under the 1972 Consumer Product Safety Act, PLEASE READ CAREFULLY THE IMPORTANT “LIMITED WARRANTY”... -
Page 6: Declaration Of Conformity
Caution Concerning Lamp Replacement See “Replacing the Lamp” on page 50. This EIKI projector uses a DMD panel. This very sophisticated panel contains 786,432 (EIP- 2500) / 480,000 (EIP-200) pixels (micromirrors). As with any high technology electronic equipment such as large screen TVs, video systems and video cameras, there are certain acceptable tolerances that the equipment must conform to. -
Page 7: How To Read This Owner's Manual
Adjustment buttons (P/R/O/Q) MENU/HELP button Menu Selections (Adjustments) Example: Adjusting “Bright”. • This operation can also be performed by using the buttons on the projector. Press BMENU. • The “Picture” menu screen for the se- lected input mode is displayed. -
Page 8: Table Of Contents
Usable Range ... 15 Quick Start Quick Start ... 16 Using Basic Operation Turning the Projector On/Off ... 27 Turning the Projector on ... 27 Turning the Power off (Putting the Projector into Standby Mode) ... 27 Image Projection ... 28 About the Setup Guide ... - Page 9 Reference Appendix Maintenance ... 47 Maintenance Indicators ... 48 Regarding the Lamp ... 50 Lamp ... 50 Caution Concerning the Lamp ... 50 Replacing the Lamp ... 50 Removing and Installing the Lamp Unit ... 51 Resetting the Lamp Timer ... 52 Connecting Pin Assignments ...
-
Page 10: Important Safeguards
IMPORTANT SAFEGUARDS CAUTION: Please read all of these instructions before you operate this product and save these instructions for later use. Electrical energy can perform many useful functions. This product has been engineered and manufactured to assure your personal safety. BUT IMPROPER USE CAN RESULT IN POTENTIAL ELECTRICAL SHOCK OR FIRE HAZARDS. -
Page 11: Replacement Parts
15. Overloading Do not overload wall outlets, extension cords, or integral convenience receptacles as this can result in a risk of fire or electric shock. 16. Object and Liquid Entry Never push objects of any kind into this product through openings as they may touch dangerous voltage points or short-out parts that could result in a fire or electric shock. - Page 12 Internal cleaning should only be performed by an EIKI Authorized Dealer or Service Cen- ter. Do not set up the projector in places ex- posed to direct sunlight or bright light.
-
Page 13: How To Access The Pdf Owner's Manuals
How to Access the PDF Owner’s Manuals PDF owner’s manuals in several languages are included in the CD-ROM, so that you can work with the projector, even if you do not have this manual. To utilize these manuals, you need to install Adobe or Macintosh ®... -
Page 14: Accessories
(9'10" (3.0 m)) HP-7 or similar) QCNWGA045WJPZ For Europe, 3 RCA to 15-pin except U.K. D-sub cable (6' (1.8 m)) (9'10" (3.0 m)) QACCVA011WJPZ QCNWGA043WJPZ Lens cap (attached) DIN-D-sub RS-232C adaptor " (15 cm)) QCNWGA015WJPZ AH-66271 (for EIP-2500) AH-15001 (for EIP-200) -
Page 15: Part Names And Functions
Projector Top View Power 27, 48 indicator STANDBY-ON button For turning the power on and putting the projector into standby mode. ENTER button For setting items selected or adjusted on the menu. KEYSTONE button For entering the Keystone Correction mode. -
Page 16: Rear View
Using the Kensington Lock • This projector has a Kensington Security Standard connector for use with a Kensington MicroSaver Security System. Refer to the information that came with the system for instructions on how to use it to secure the projector. - Page 17 Numbers in refer to the main pages in this owner’s manual where the topic is explained. STANDBY button For putting the projector into the standby mode. KEYSTONE button For entering the Keystone Correction mode. RETURN button For returning to the previous menu screen during menu operations.
-
Page 18: Inserting The Batteries
Battery fluid from leaked batteries is harmful to skin, therefore ensure that you first wipe them and then remove them using a cloth. • The batteries included with this projector may run down in a short period, depending on how they are kept. Be sure to replace them as soon as possible with new batteries. •... -
Page 19: Usable Range
Usable Range The remote control can be used to control the projector within the ranges shown in the illustra- tion. Note • The signal from the remote control can be re- flected off a screen for easy operation. How- ever, the effective distance of the signal may differ depending on the screen material. -
Page 20: Quick Start
Setup and Projection In this section, connection of the projector and the computer is explained using one example. 1. Place the projector facing a wall or a screen 2. Connect the projector to the computer and plug the power cord... - Page 21 After adjusting the focus, height (angle) and screen size, press pENTER to finish the Setup Guide. 5. Turn the computer on 6. Select the INPUT mode Select the “INPUT 1” using the INPUT button on the projector or C INPUT 1 on the remote control. On the projector •...
-
Page 22: Setting Up The Projector
Setting up the Projector Setting up the Projector For optimal image quality, position the projector perpendicular to the screen with the projector’s feet flat and level. Doing so will eliminate the need for Keystone correction and provide the best image quality. -
Page 23: Projection (Prj) Mode
Projection (PRJ) Mode The projector can use any of the 4 projection modes, shown in the diagram below. Select the mode most appropriate for the projection setting in use. (You can set the PRJ mode in “SCR-ADJ” menu. See page 42.) I Table mounted, front projection Menu item ©... -
Page 24: Screen Size And Projection Distance
Setting up the Projector (Continued) Screen Size and Projection Distance NORMAL Mode (4:3) Picture (Screen) size Diag. [ χ ] Width 300 (762 cm) 610 cm (240 ) 457 cm (180 ) 270 (686 cm) 549 cm (216 ) 411 cm (162 ) -
Page 25: Input Terminals And Connectable Main Equipment
Connecting an audio cable (Shared audio input terminal for INPUT 3 and 4). (See pages and 25.) RS-232C terminal Connecting the computer to control the projector. (See page 26.) INPUT 4 terminal Connecting video equipment without S- video output terminal. (See page 25.) -
Page 26: Samples Of Cables For Connection
Cables for a camera or a video game/ø3.5 mm minijack to RCA audio cable (commer- cially available) RCA adaptor plug (commercially available) or connect directly to AUDIO (INPUT 3, 4). Terminal on the projector INPUT1, 2 AUDIO INPUT INPUT1, 2 INPUT3 INPUT4 AUDIO INPUT INPUT1, 2... -
Page 27: Connecting To A Computer
After making all connections, turn on the projector and then the other devices. When connecting a computer, ensure that it is the last device to be turned on after all the connections are made. -
Page 28: Connecting To Video Equipment
Connecting to Video Equipment The projector is equipped with input terminals that support component, S-video, and video signals. See the illustration below to connect with the audio-visual equipment. The image quality is highest in the order of the component signal, the S-video signal and the video signal. -
Page 29: Connecting To A Monitor With Rgb Input Terminal
To video output terminal RCA audio cable (com- mercially available) Connecting to a Monitor with RGB Input Terminal You can display computer images on both the projector and a separate monitor using two sets of RGB cables. Computer INPUT 1... -
Page 30: Controlling The Projector By A Computer
When the RS-232C terminal on the projector is connected to a computer with a DIN-D-sub RS- 232C adaptor and an RS-232C serial control cable (cross type, commercially available), the com- puter can be used to control the projector and check the status of the projector. See page detail. -
Page 31: Turning The Projector On/Off
Green: The lamp is shut down abnormally or the lamp should be replaced. • When switching on the projector, a slight flickering of the image may be experienced within the first minute after the lamp has been illuminated. This is normal operation as the lamp’s control circuitry is stabilising the lamp output char-... -
Page 32: Image Projection
Image Projection About the Setup Guide After turning on the projector, the Setup Guide screen appears to assist you with projector setup. Guidance items 1 FOCUS 2 HEIGHT ADJUST 3 ZOOM Press pENTER to exit the Setup Guide screen. Note •... -
Page 33: Adjusting The Height
• Do not apply too much pressure on the pro- jector when the front adjustment foot comes out. • When lowering the projector, be careful not to get your fingers caught in the area between the adjustment foot and the projector. -
Page 34: Switching The Input Mode
INPUT1 INPUT2 INPUT3 • When “Auto Search” is set to “On”, INPUT (P/ R) on the projector functions as the Auto Search buttons. (See page 43.) Adjusting the Volume Press K/L on the remote control or –O/Q+ on the projector to adjust the vol-... -
Page 35: Correcting Trapezoidal Distortion
• The on-screen display of the Keystone Correction mode will disappear. • You can also use q KEYSTONE on the projector. When using EIP-2500 • The projector automatically detects tilt and the AUTO KEYSTONE feature automatically cor- rects trapezoidal distortion. Adjustment buttons (P/R/O/Q) -
Page 36: Resize Mode
XGA (1024 K 768) 4:3 aspect ratio SXGA (1280 K 960) SXGA L (1400 K 1050) SXGA (1280 K 1024) Other aspect ratios 1280 K 720 Input Signal Computer EIP-2500 EIP-200 Resolution Resolution lower than lower than SVGA SVGA Resolution Resolution higher than... - Page 37 VIDEO • “STRETCH” is fixed when 540P, 720P or 1080I signals are entered. Input Signal DVD / Video Image type 4:3 aspect ratio Letter box 480I, 480P, 576I, 576P, NTSC, PAL, SECAM Squeezed 16:9 image Squeezed 4:3 image 16:9 aspect ratio 540P, 720P, 1080I 16:9 aspect ratio (4:3 aspect ratio in...
-
Page 38: Operating With The Remote Control
Auto Sync (Auto Sync Adjustment) BREAK TIMER button Auto Sync function works when detect- FREEZE button ing input signal after the projector turns Press FAUTO SYNC to manually ad- PICTURE MODE just with Auto Sync function. button Note • When the optimum image cannot be achieved... -
Page 39: Menu Items
Menu Items The following shows the items that can be set in the projector. “Picture” menu INPUT 1 (RGB)/INPUT2 (RGB) Picture SCR - ADJ PRJ - ADJ Picture Mode Standard Contrast Bright Blue CLR Temp 7 5 0 0 Bright Boost... - Page 40 Menu Items (Continued) “Projection adjustment (PRJ-ADJ)” menu Picture SCR - ADJ PRJ - ADJ Auto Search Auto Sync Auto Power Off System Sound Speaker RS-232C 9600 bps Fan Mode Normal System Lock Lamp Timer(Life) SEL./ADJ. ENTER “Help” menu Picture SCR - ADJ PRJ - ADJ There is no picture or audio Vertical stripes or flickering image appear...
-
Page 41: Using The Menu Screen
Adjustment buttons (P/R/O/Q) MENU/HELP button Menu Selections (Adjustments) Example: Adjusting “Bright”. • This operation can also be performed by using the buttons on the projector. Press BMENU. • The “Picture” menu screen for the se- lected input mode is displayed. - Page 42 • The adjustment is stored. Press BMENU/HELP. • The menu screen will disappear. Note • Menu buttons do not function while the projector is operating the “Auto Sync”, “Break Time”, “FREEZE”, or “AV MUTE” functions. Picture SCR - ADJ PRJ - ADJ...
-
Page 43: Picture Adjustment ("Picture" Menu)
Picture Adjustment (“Picture” menu) Q Example: “Picture” screen menu for INPUT 1 (RGB) mode Picture SCR - ADJ PRJ - ADJ Picture Mode Contrast Bright Blue CLR Temp 7 5 0 0 Bright Boost Lamp Setting Reset SEL./ADJ. ENTER 1 Selecting the Picture Mode Selectable items Description Standard... -
Page 44: Adjusting The Image
* The film source is a digital video recording with the For more original encoded as is at 24 frames/second. The sharpness. projector can convert this film source to progres- sive video at 60 frames/second with NTSC and For more PAL60Hz or at 50 frames/second with PAL50Hz vividness. -
Page 45: Adjusting The Projected Image ("Scr - Adj" Menu)
“Off”, select “Keystone”, and then adjust with the slide bar. Manual Correction Q or P button Q button a When using EIP-200 Select “Keystone” on the “SCR-ADJ” menu and adjust with the slide bar. See page Note • The Keystone Correction can be adjusted up to an angle of approximately ±13 degrees with... -
Page 46: Setting On-Screen Display
INPUT/VOLUME/AV MUTE/FREEZE/ AUTO SYNC/RESIZE/PICTURE MODE/ “An invalid button has been pressed.” are not displayed. 5 Selecting the Background Image Selectable items Logo EIKI logo screen Blue Blue screen None — 6 Selecting the Setup Guide Selectable items Displaying the Setup Guide when turning the projector on. -
Page 47: Adjusting The Projector Function ("Prj - Adj" Menu)
Adjusting the Projector Function (“PRJ - ADJ” menu) 1 Auto Search Function This function automatically searches for and switches to the input mode in which signals are being received, when the projector is turned on, or when the INPUT button is pressed. -
Page 48: Selecting The Transmission Speed (Rs-232C)
Info • If you lose or forget your keycode, contact your nearest EIKI Authorized Dealer or Service Center. Even if the product warranty is valid, the keycode reset will incur a charge. a Setting/Changing the keycode... -
Page 49: Locking The Operation Buttons On The Projector (Keylock Function)
Note To cancel the keycode that you have already • Press R on the projector for four times in steps 2 and 3 above. When the System Lock is set • When System Lock is set, the keycode input screen appears after the power is turned on. -
Page 50: Troubleshooting With "Help" Menu
Troubleshooting with “Help” menu This function advises you to solve the problems during usage. Utilizing “Help” menu functions Example: When image flickering appears Operation to solve image flickering when pro- jecting the computer RGB signal. Press BMENU/HELP. Press O or Q to select “Help”, then press hENTER. -
Page 51: Maintenance
Strong cleaning detergents may discolor, warp or damage the coating on the projector. Make sure to test on a small, inconspicuous area on the projector before use. -
Page 52: Maintenance Indicators
At this time, the lamp indicator will illuminate in red. I If you try to turn on the projector a fourth time without replacing the lamp, the projector will not turn on. - Page 53 The sound of the cooling fan may change during operation because the fan speed may change and this is not a malfunction. • Do not unplug the power cord after the projector has entered standby mode and while the cooling fan is running. The cooling fan runs for about 90 seconds.
-
Page 54: Regarding The Lamp
I Carefully change the lamp by following the instructions described in this section. * If you wish, you may have the lamp replaced at your nearest EIKI Authorized Dealer or Service Center. * If the new lamp does not light after replacement, take your projector to the nearest EIKI Authorized Dealer or Service Center for repair. -
Page 55: Removing And Installing The Lamp Unit
• Make sure that you remove the lamp unit by the handle. Do not touch the glass surface of the lamp unit or the inside of the projector. • To avoid injury to yourself and damage to the lamp, be sure to carefully follow the steps below. -
Page 56: Resetting The Lamp Timer
• Plug the power cord into the AC socket of the projector. Reset the lamp timer. • While simultaneously holding down rMENU/HELP, pENTER and R on the projector, press oSTANDBY-ON on the projector. • “LAMP 0000H” is displayed, indicating that the lamp timer is reset. Handle... -
Page 57: Connecting Pin Assignments
Signal Name Receive Data Input Send Data Output Signal Ground Request to Send Clear to Send Signal Pin No. Projector Computer Pin No. Pin No. Component Input/Output PR (CR) PB (CB) Not connected Not connected Earth (PR) Earth (Y) Earth (PB) Not connected 10. -
Page 58: Rs-232C Specifications And Command Settings
• If an asterisk (*) appears in the parameter column, enter a value in the range indicated in brackets under Control Contents. *1 For setting the projector name, send the commands in the order of PJN1, PJN2 and PJN3. *2 Parameters of CLR Temp settings are as follows. - Page 59 INPUT 4 Adjustment Reset All Reset Volume (0 – 60) Volume up / down ( 10 – Keystone ( 127 – 127 (EIP-2500) / 100 – 100 (EIP-200)) AV Mute Off AV Mute On Freeze Off Freeze On Auto Sync Start...
- Page 60 RS-232C Specifications and Command Settings (Continued) CONTROL CONTENTS INPUT 1 Picture Mode : Presentation INPUT 1 Picture Mode : Movie INPUT 1 Picture Mode : Game INPUT 1 Picture Mode : sRGB INPUT 1 Contrast ( 30 – INPUT 1 Bright ( 30 – INPUT 1 Color ( 30 –...
- Page 61 Internal Speaker : Off Internal Speaker : On Image Shift ( 96 – 96 (EIP-2500) / 75 – 75 (EIP-200)) OSD Display : Off OSD Display : On Video System Selection : AUTO Video System Selection : PAL Video System Selection : SECAM Video System Selection : NTSC4.43...
-
Page 62: Computer Compatibility Chart
• When this projector receives 640K350 VESA format VGA signals, “640K400” appears on the screen. • Optimum image quality will be achieved by matching your computer’s output resolution to the projector’s native resolution. (1024 x 768 for the EIP-2500 model OR 800 x 600 for the EIP-200 model). -
Page 63: Troubleshooting
• Cables incorrectly connected to the projector. • Volume is set to minimum. • When the projector is connected to an external device and the volume is set to minimum, the sound is not output even if you turn up the volume of the external device. - Page 64 Picture is too bright and • Image adjustments are incorrectly set. whitish. The cooling fan becomes • When temperature inside the projector increases, the cooling fan noisy. The lamp does not light • The lamp indicator is illuminating in red.
-
Page 65: Specifications
U.K., RGB cable, 3 RCA to 15-pin D-sub cable, DIN-D-sub RS-232C adaptor, Quick Guide, Owner’s manual (Printed and CD-ROM) As a part of policy of continuous improvement, EIKI reserves the right to make design and specification changes for product improvement without prior notice. The performance specifica- tion figures indicated are nominal values of production units. -
Page 66: Dimensions
Dimensions Units: inches (mm) (80) (77.5) (315) (33.8) (46.2) (65.5) (75) -
Page 67: Index
Index 3 RCA to 15-pin D-sub cable ... 24 AC socket ... 26 Accessories ... 10 Adjustment buttons ... 37 Adjust horizontal noise ... 36, 46 Adjust vertical noise ... 36, 46 Aspect ratio ... 32 AUDIO INPUT terminal ... 23, 24, 25 AUDIO OUTPUT terminal ... - Page 68 530-0028 Japan Tel : +81-6-6311-9479 Fax : +81-6-6311-8486 WorldWide Website http://www.eiki.com Canada EIKI CANADA - Eiki International, Inc. P.O. Box 156, 310 First St. - Unit 2, Midland, ON, L4R 4K8, Canada Tel : 800-563-3454 (705)-527-4084 Fax : 800-567-4069 (705)-527-4087 E-Mail : canada@eiki.com...
Need help?
Do you have a question about the EIP-200 and is the answer not in the manual?
Questions and answers