Eiki EIP-WSS3100 Service Manual
Hide thumbs
Also See for EIP-WSS3100:
- Owner's manual (63 pages) ,
- Specifications (2 pages) ,
- Quick start manual (45 pages)
Table of Contents
Advertisement
Quick Links
Download this manual
See also:
Owner's Manual
Advertisement
Table of Contents

Related Manuals for Eiki EIP-WSS3100


Summary of Contents for Eiki EIP-WSS3100
- Page 1 D�� ����� ��� ����� � ������ ��� ����������� Date Revise Version Description 2013.04.22 V1.0 Initial Issue Copyright Apr. 2013 All Rights Reserved...
- Page 2 Preface This manual is applied to EIP-WSS3100 projection system. The manual gives you a brief description of basic technical information to help in service and maintain the product. Your customers will appreciate the quick response time when you immediately identify problems that occur with our products.
-
Page 3: Table Of Contents
Table of Content Chapter 1 Introduction Highlight Compatible Mode Chapter 2 Disassembly Process & Assembly Process Equipment Needed &Product Overview Disassemble Lamp Module and Mesh Inlet Disassemble Lamp Module and Mesh Inlet Mesh Inlet Disassemble Top Cover Module Disassemble Top Cover Module Disassemble Transform Board&Keypad Board Disassemble Transform Board&Keypad Board Disassemble Main Board... - Page 4 Chapter 3 Troubleshooting LED Lighting Message Main Procedure Main Procedure Pin Assignment Block Diagram Chapter 4 Function Test & Alignment Procedure Test Equipment Needed Test Condition I/O Port Test Run In Test 4-10 Test Inspection Procedure 4-11 ADC Calibration 4-12 Waveform Download 4-13 Fan Calibration...
- Page 5 Equipment Needed Equipment Needed 5-11 5-11 5-11 PC Hardware Link PC Hardware Link 5-12 5-12 5-12 Chapter 6 EDID Upgrade EDID Introduction Equipment Needed Setup Procedure EDID Key-In Procedure Universal password Universal password Appendix A Explode Image Appendix B RSPL Instruction Confidential...
-
Page 6: Chapter 1 Introduction
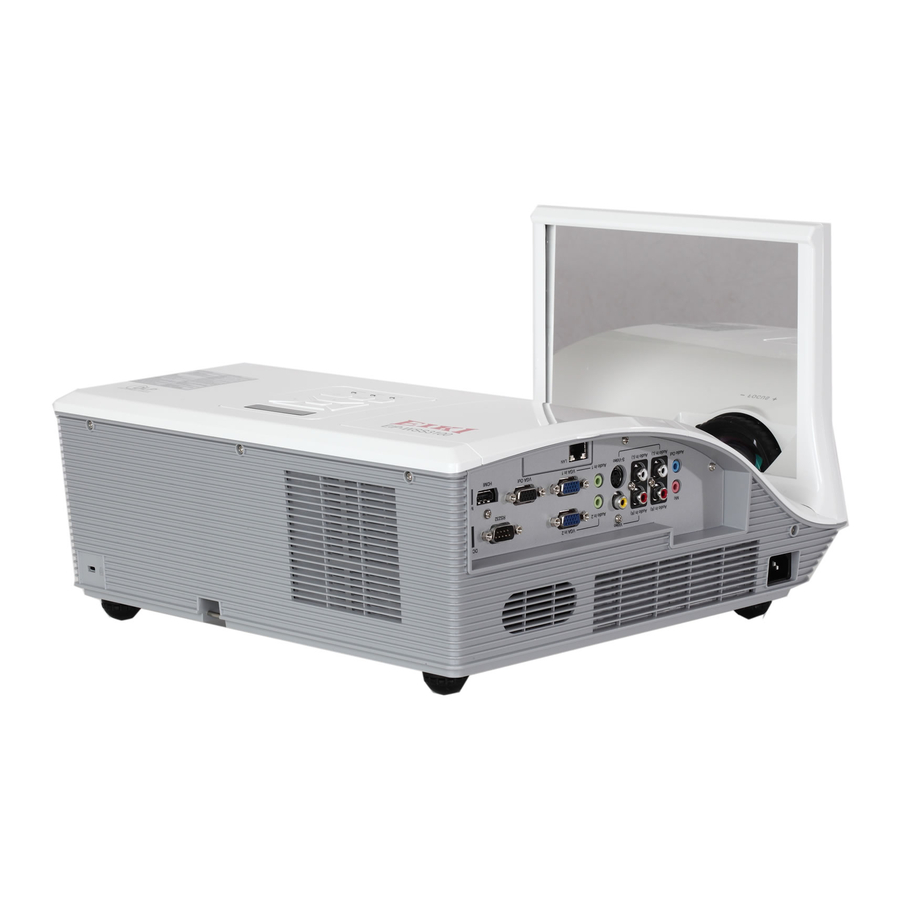
Chapter 1 Introduction 1-1 Highlight Item Description Technology One panel 0.65” WXGA DMD chip ● 357 (W) x 367 (D) x 135(H) mm (excluding foot) Dimension (W x D ● 357 (W) x 367 (D) x �31(H) mm (including re��ection mirror) 357 (W) x 367 (D) x �31(H) mm (including re��ection mirror) x H) Weight... - Page 7 Item Description LAN Module With LAN IR Camera Option,need an external IR Camera module. Interactive solution Temperature ● 5 ~ 40°C ● 0 -- �500 ft, 5 -- 40 °C Altitude ● �500 -- 5000 ft, 5 -- 35 °C �500 -- 5000 ft, 5 -- 35 °C ●...
-
Page 8: Compatible Mode
1-2 Compatible Mode VGA Analog (1) PC Signal Compatibility Resolution V-Sync [Hz] H-Sync [KHz] 640x480 31.5 640x480 35.0 640x480 7� 37.� 640x480 37.5 640x480 43.3 640x480 1�0 61.� 7�0x400 31.5 800x600 35.1 800x600 37.� 800x600 7� 48.1 SVGA 800x600 46.� 800x600 53.7 800x600... - Page 9 (�) Extended Wide timing Compatibility Resolution V-Sync [Hz] H-Sync [KHz] 1�80x7�0 44.8 1�80x800 4�.6 WXGA 1366x768 47.7 1440x�00 5�.� WSXGA+ 1680x1050 65.3 (3) Component Signal 480i 7�0x480(1440x480) 5�.�4(��.�7) 15.7 576i 7�0x576(1440x576) 50(�5) 15.6 480p 7�0x480 5�.�4 31.5 576p 7�0x576 31.3 1�80x7�0 45.0 7�0p...
- Page 10 HDMI Digital (1) PC Signal Compatibility Resolution V-Sync [Hz] H-Sync [KHz] 640x480 31.5 640x480 35.0 640x480 7� 37.� 640x480 37.5 640x480 43.3 640x480 1�0 61.� 7�0x400 31.5 800x600 35.1 800x600 37.� 800x600 7� 48.1 SVGA 800x600 46.� 800x600 53.7 800x600 1�0 77.4 Apple,Mac II...
- Page 11 (�) Extended Wide timing Compatibility Resolution V-Sync [Hz] H-Sync [KHz] 1�80x7�0 44.8 1�80x800 4�.6 WXGA 1366x768 47.7 1440x�00 5�.� WSXGA+ 1680x1050 65.3 (3) HDMI-Video Signal 640x480p 640x480 5�.�4/60 31.5 480i 7�0x480(1440x480) 5�.�4(��.�7) 15.7 480p 7�0x480 5�.�4 31.5 576i 7�0x576(1440x576) 50(�5) 15.6 480p 7�0x480...
-
Page 12: Equipment Needed &Product Overview
Chapter 2 Disassembly Process 2-1 Equipment Needed & Product Overview 1. Projector 2. Hex Sleeves 7mm 3. Long Nose Nipper 4. Screw Bit (+) :105 5. Screw Bit (+) :107 6. Screw Bit (-) :107 7. Hex Sleeves 5 mm 8. - Page 13 2-2 Disassemble Lamp Module and Mesh Inlet 1. Loosen 2 screws (as red circle) on the Lamp Cover. 2. Separate the Lamp cover and Lamp cover strap(as green square). LAMP COVER 3. Loosen 2 screws (as yellow circle) on the Lamp Module. 4.Take off the Lamp Module.
-
Page 14: Disassemble Top Cover Module
5. Remove the two mesh inlets. BACK MESH INLET SIDE MESH INLET 2-3 Disassemble Top Cover Module 1. Push (A) part and pull the (B) part of the corner cover at the same time to remove it. Confidential... - Page 15 2. Unscrew 2 screws(as red circle). 3. Disassemble the Bottom Cap(as green square). 4. Unscrew 2 screws(as yellow circle). 5. Remove the front mirror cover module. FRONT MIRROR COVER MODULE Confidential...
- Page 16 6. Remove the rear mirror cover. REAR MIRROR COVER 7. Unscrew 2 screws(as green circle) to remove wireless top cover. WIRELESS TOP COVER Confidential...
- Page 17 8. Unscrew 2 screws(as yellow circles) to disassemble Lan Board. LAN BOARD 9. Uscrew 2 screws (as red circle). 10.Unscrew 2 screws (as green circle). Confidential...
- Page 18 10. Unscrew 3 screws (as blue circle). 11.Unscrew 3 screws (as yellow circle). 12.Unscrew 2 screws (as red circle). 14.- Pull upward the Top Cover Module - Unplug 1 connector (as blue square) - Unplug 1 connector (as green square) - Remove the Top Cover Module.
- Page 19 15.Unscrew 2 screws (as red circles) to disassemble IR Camera Transform Board. IR Camera Transform Board 16.Tear off the Keypad mylar and Sponge (as yellow square). Confidential...
- Page 20 17.Unscrew 4 screws (as red circles) to disassemble keypad board . 18.Separate the keypad button and keypad board and FPC cable. Keypad Board Keypad Button TOP COVER Confidential...
-
Page 21: Disassemble Main Board
2-4 Disassemble Main Board 1.Unscrew 11 screws (as red circles) to disassemble the main board shielding . 2.Unscrew 6 screws (as green circles) . 3. Unscrew 8 hex screws (as blue circles) and 4 screws (as yellow circles). 4. Tear off the tape (as red squares). Confidential 2-10... - Page 22 5. Unplug 10 connectors (as yellow square). 6.Unplug 1 connector (as green square) of Color Wheel. Male Connector Item The key feature Figure on Main Board IR Camera Transform Compose of Red/White/Black/ Board Green wire (4 pin) Compose of Red/Yellow/ Blower FAN Blackwire (3 pin) Compose of Red/White/Black-...
- Page 23 Compose of Red/Black/White Photo Sensor Wire(3 pin) Lamp Driver Black wire tube (5 pin) LVPS to Main Board Black wire tube (16 pin) cable Compose of Red/Black/White/ Thermal sensor Blue(4pin) Compose of Red/Black/White Front IR Wire(3 pin) Compose of Black/Red wire Speaker and Black wire tube (2 pin) Confidential...
- Page 24 8.- Disassemble MB Module. - Unscrew 2 screws to separate the daughter board and main board (as green circles) 9.Unscrew 2 screws(as red circles). Main board Daughter board Confidential 2-13...
- Page 25 2-5 Disassemble Shielding and IO Cover Module 1. - Plug the IO cover Module from bottom cover. - Separate the lan cover from the IO cover. IO Cover Lan Board Cover 2. Unscrew 5 screws (as green circles) to disassemble the Shielding. Confidential 2-14...
- Page 26 2-6 Disassemble Lamp Driver Module and LVPS 1. Unscrew 4 screws (as red circles) to disassemble the Lamp Driver Module. Note:1. When assemble ,please arrange the Interlock switch and lamp cable to the notch (as blue square). 2. When assemble ,please arrange 16Pin cable and 5Pin cable to the Shileding notch(as yellow square).
- Page 27 3. Unscrew 1 screw (as green circle) to disassemble the thermal sensor board. Thermal sensor board 4. Unplug 1 connector (as blue square). blue square). square). 5.Separate Lamp Driver from Lamp Driver Shielding. Lamp Driver Confidential 2-16...
- Page 28 6. Unplug 5 connectors (as green squares). 7. Unscrew 4 screws (as yellow circles) disassemble LVPS. LVPS 8. Take off Mylar(as yellow square). Confidential 2-17...
- Page 29 2-7 Disassemble Speaker and AC Inlet Bracket 1. Tear off the mylar (as blue square) and unscrew 3 screws(as red circles) to remove the right speaker module. 2. Unscrew 4 screws(as yellow circles) to remove the speaker and tear off the sponge(as yellow square).
-
Page 30: Disassemble Engine Module
2-8 Disassemble Engine Module 1. Unscrew 5 screws(as red circles) to remove the Engine Module. 2.- Tear off the EMI tape and EMI gasket (as green square) . - Unscrew 3 screws(as blue circles) to disassemble the focus ring from the engine module. - Page 31 3. Unscrew 2 screws(as red circle) to remove C/W module. 4. Unscrew 1 screw (as blue circle) to separate C/W module and photo sensor board. Confidential 2-20...
- Page 32 5.Unscrew 3 screws(as blue circle) to disassemble focus ring. 6.Tear off the tape (as blue square) and disassemble front IR sensor board. The engine module disassembly process is completed. IR sensor board Confidential 2-21...
- Page 33 2-9 Disassemble DMD FAN ,SYS FAN and Blower FAN 1. Unscrew 2 screws(as red circles) and remove the DMD FAN Module. 2.Separate the Bracket and FAN. DMD FAN Confidential 2-22...
- Page 34 3. Unscrew 4 screws(as yellow circles) to disassemble SYS FAN. Note: SYS Fan Rubber card completely into the wind guide tube (as blue square). 4. Turn over the fan module and unscrew 1 screw(as red circle) to disassemble the thermal switch. Thermal switch Confidential 2-23...
- Page 35 5. Unscrew 1 screw(as red circle) to disassemble the Interlock switch. Interlock switch 6. Unscrew 4 screws(as green circles) to disassemble the SYS FAN. Confidential 2-24...
- Page 36 SYS FAN 7. Unscrew 3 screws(as yellow circles) to disassemble the Blower FAN. 8. Separate the Blower and Blower Rubber. Confidential 2-25...
-
Page 37: Disassemble Bottom Module
2-10 Disassemble Bottom Module 1. Unscrew 4 screws(as red circles) to remove the Lamp holder rail. 2.Unscrew 6 screws(as green circles) to remove the Bottom Shielding. 3.Unscrew 4 screws(as blue circles) to disassemble the side mesh frame and back mesh frame. Confidential 2-26... - Page 38 5. Tear off the Speaker Mylar (as green square). 6.Pull out the Security Bar. Confidential 2-27...
-
Page 39: Re-Write Lamp Usage Hour
2-11 Re-write Lamp Usage Hour 1. Get into Service Mode Press “Power”, “Left”, “Right” and “Menu” buttons sequentially . 2.Select "Lamp Fail" to get into the hidden menu. 3. Re-write Lamp Hour-Full - Select "Lamp Hour-Full" and use "left" and "right" key to re-write "Full Hours". 4. -
Page 40: Repair Action
2-12 Repair Action Change parts Software Repair action Description page Main Engine Lamp F-type Color Firmware Board Module Driver Wheel Firmware Update Chapter 5 Color Wheel Index Chapter 4-3-1.7 OSD Reset Chapter 4-5.2 EDID Chapter 6 Re-write Lamp Chapter 2-11 Hours Usage Chapter 4-8 Fan Calibration... -
Page 41: Chapter 3 Troubleshooting
Chapter 3 Troubleshooting 3-1 LED Lighting Message Power LED Message LAMP(Red) TEMP(Red) (Red) (Green) Flash ON to OFF Flash ON to OFF Flash ON to OFF Power Plug 100ms 100ms 100ms Standby Power button ON 0.5 second(ON) Cooling state 0.5 second(OFF) flashing Power button OFF:Cooling completed;Standby Mode... -
Page 42: Main Procedure
3-2 Main Procedure Symptom Procedure - Ensure the Power Cord and AC Power Outlet are securely connected - Check Lamp Cover ,Interlock Switch No Power - Ensure all connectors are securely connected and aren’t broken - Check LVPS - Check Main BD - Check LED status a. - Page 43 Symptom Procedure - Ensure all connectors are securely connected and aren’t broken - Check Lamp Module - Check Lamp Driver No Light On - Check LVPS - Check Main Board - Check Color Wheel Module - Check Photo Sensor Board - Ensure the Signal Cable and Source work (If you connect multiple sources at the same time, use the "Source"...
- Page 44 Symptom Procedure - Do “Reset (All data)” of the OSD Menu - Ensure that the signal cables and source are work as well - Check Lamp Driver and execute waveform download - Check Lamp Module Image Flicker - Check Color Wheel - Check Photo Sensor and clean Photo Sensor - Check Engine module - Check Main Board...
- Page 45 Symptom Procedure - Ensure that the signal cables and source work as well Garbage Image - Check Main Board - Check Engine module - Remote Control a. Check Battery b. Check Remote Controller c. Check IR Sensor Board Remote Controller/Control d.
-
Page 46: Pin Assignment
3-3 Pin Assignment J1: 16 Pin_POWER Description Voltage(V) Pin8 Pin9 PS_ON_LVPS 5V±5% +5VSBY_LVPS 5V±5% +12V_LVPS 12V±5% +12V_LVPS 12V±5% +12V_LVPS 12V±5% +12V_LVPS 12V±5% +12V_LVPS 12V±5% Pin16 Pin1 +12V_LVPS 12V±5% J8: Blower Fan Description Voltage(V) FAN3_1 Pre-cooling mode :8V±5% °C Full power mode :6.5V ±5% °C Eco mode : 5V ±5% °C... - Page 47 J6: System Fan Description Voltage(V) FAN1_1 Pre-cooling mode : 12V ±5% 25°C Full power mode : 6.5V ±5% 25°C Eco mode : 5.5V ±5% 40°C Full power mode : 12V ±5% 40°C Eco mode : 11V ±5% ED Mode (30% lamp power):5V±5% FAN1_2 Normal Mode:Low Pin3...
-
Page 48: Block Diagram
Product Engineering Specification 3-4 Block Diagram Appendix B: EE block diagram HDMI Main Board HDMI HDMI Port Input Receiver Audio In S-Video 64M bits XTAL RCA Red & Audio 20MHz Flash White Input (for S-Video) Audio In MUX & CVBS RCA Red &... -
Page 49: Function Test & Alignment Procedure
Chapter 4 Function Test & Alignment Procedure 4-1 Test Equipment Needed - PC with HDTV resolution - DVD player with Multi-system, equipped “Composite”, “S-Video” - HDTV Source (720P,1080P,1080i) - CL100 - Quantum Data 802BT or CHROMA2327 (Color Video Signal & Pattern Generator) 4-2 Test Condition - Circumstance brightness: Dark room less than 2 lux. -
Page 50: I/O Port Test
4-3 I/O Port Test 4-3-1 VGA Port Test Note: Native resolution of test signal is 1280x800@60HZ, 1. Frequency and tracking boundary Procedure - Test equipment: video generator. - Test signal: analog 1280 x 800@60Hz - Test Pattern: General-1 - Check and see if the image sharpness is well performed. - Page 51 functional will be workable. 2. Bright Pixel Procedure - Test equipment: video generator. - Test signal: analog 1280 x 800@60Hz - Test Pattern: gray 10 Inspection item - Bright pixel check. Criteria - Please refer to Pixel specification table. Gray 10 3.
- Page 52 Pixel specification SEQ # TEST SCREEN ACCEPTANCE CRITERIA Dark Blemish Blue 60 1. ≤4 visible dark blemishes are allowed in the active area 2. The size: ≤ 55.4 mm @87.2 Bright Blemish Gray 10 1.≤ 4 visible light blemishes are allowed in the active area 2.
- Page 53 7. Color Performance Procedure - Test equipment: video generator. - Test signal: 1024 x 768@60Hz, 1080i - Test Pattern: 64 gray RGBW * Please Use 1024 x 768@60Hz signal & 64 gray x 768@60Hz signal & 64 gray @60Hz signal & 64 gray RGBW pattern to do color performance test.
- Page 54 8. Optical Performance Inspection Condition - Environment luminance: 2 Lux - Product must be warmed up for 5 minutes - Distances from the screen: 200mm~250 mm - Screen Size: 87.2 inches diagonal 1). Test equipment Procedure - Connect VGA IN port of Projector with VGA port of Chroma by VGA cable, press “Menu”...
- Page 55 3). Full On/Full Off Contrast Procedure - Full white pattern & Full black pattern - Use C100 to measure brightness values of full white pattern P5 & full black pattern B5 ( see image: full white) - Follow Contrast formula to calculate contrast values.
- Page 56 4-3-2 Video Port Test Procedure - Test equipment: DVD Player - Test signal: video Inspection item - Video performance test Inspection Distance - 200mm~250 mm Criteria - Check any abnormal color, line distortion or any noise on the screen. - Check the sound from speaker. 4-3-3 S-Video Port Test Procedure - Test equipment: DVD player...
- Page 57 4-3-5 3D Test Procedure - Test equipment: Blue-Ray DVD player & 3D format CD - Test signal: 1080i @60Hz Inspection item - 3D test Inspection Distance - 3~5 M Criteria - The image should not appear noise, flicker, shadow, shocking, abnormal color. 4-3-6 Audio Test Procedure - Test equipment: DVD Player.
-
Page 58: Run In Test
4-4 Run In Test - Temperature: 15°C~35°C - Circumstance brightness: Normal environment - Screen size: No concern - Display mode: ECO mode After repairing each unit, a Ru n-in test is necessary (refer to the below table). Symptom Run-in Time Normal repair 2 hours 4 hours... -
Page 59: Test Inspection Procedure
4-5 Test Inspection Procedure 1. Check Points Check item Check point Firmware version All firmware version must be the latest version TB implementation Related TB must be implement Cosmetic Cosmetic can not be broken Missing logo, missing prints and blurry prints are Logo unacceptable Lamp cover... -
Page 60: Adc Calibration
4-6 ADC Calibration Note: After replacing main board or upgrading firmware, the ADC calibration should be done. Procedure - Test equipment: video generator (1) Test signal: 1280 x 800@60Hz (2) Test Pattern: White (up) Black (down) - Note: (1) Calibration pattern should be in full screen mode. (240/255) white/ (2) Please get into service mode,and choose (15/255) Black... -
Page 61: Waveform Download
4-7 Waveform download After replacing Lamp driver, the “waveform download” is needed . 1. Hold on “Power” and “Menu“ button and plug in the power cord. 2. The “Power LED” will flash red about 2s, then release the “Power” and “Menu“ button. 3. -
Page 62: Fan Calibration
4-8 Fan Calibration After replacing main board or the F-type Fan and upgrading the firmware, please follow steps as below: 1. Hold on “Menu“ button and plug in the power cord. 2. The “Power LED” will flash blue about 2s and release the “Menu”... -
Page 63: Network Function Test
4-9 Network Function Test 1. Projector Setting (1) Power on projector. (2) Press “Menu” to get into OSD Mode. (3) Select “LAN” (4) Record projector IP which you set in last step. (5) Connect projector with PC by LAN cable. 2. - Page 64 (3). Modify the IP address to 192.168.10.101 (as red square). Note: The HOST ID (192.168.10.XXX) of PC , IP address must be different from the projector IP address recorded down - Click "OK". (4). Click "Close" to exit the setting screen. 3.
-
Page 65: Firmware Upgrade
Chapter 5 Firmware Upgrade Section 1: Scalar Firmware Upgrade 5-1-1 Equipment Needed Software: (DDP 442X-USB) - DDP 442X Firmware Downloader.exe - Firmware (*.img) - NET Framework 4.0 Hardware: - Projector - Power Cord - Mini USB Cable: (USB Cable mini USB to USB (A)) - PC or Laptop Confidential... -
Page 66: Net Framework 4.0 Setup Procedure
5-1-2 NET Framework 4.0 Setup Procedure 1. Choose "dotNetFX40_Full_X86_X64 Microsoft.NET Framework 4.0 Microsoft Corporation" Program. 2. Click "Run". 3.Preparing 4. Read "License terms". - Choose "I have read and accept the license terms". - Click "Install". Confidential... - Page 67 5.Installing 6. Click "Finish". Confidential...
-
Page 68: Firmware Upgrade Procedure
5-1-3 Firmware Upgrade Procedure 1. Download the firmware from website, unzip the firmare file , then unzip the "DDP442X Firmware Downloader_1_0_0_1.zip" file. 2. Execute “DDP442X Firmware Downloader.exe” 3. Click "Browse" to choose the firmware ,then click "Open". 4. Connect projector and computer by USB cable (USB A to mini USB B). - Page 69 6. The “Projector found” will appear, then click “Down Load Image”. 7. The firmware will be upgraded automatically . 8. Finish. "Download Complete" will appear, click "OK". 9. Check the Scalar firmware version. - Unplug the power cord and USB cable, then re-plug the power cord to power on the projector .
-
Page 70: Mcu Firmware Upgrade Procedure
Section 2: PIC Firmware Upgrade Procedure 5-2-1 Equipment Needed Software: - RS232.EXE - xxx_xxx_xxx.hex Hardware: - Projector - Power Cord - RS232 Cable : (RS-232 9 Pin Cable (pin to pin, F-F)) - PC or Laptop Confidential... -
Page 71: Mcu Firmware Upgrade Procedure
5-2-2 MCU Firmware Upgrade Procedure 1. Set up - Connect projector with RS232 cable to PC. - Hold on "MENU" button and plug in the power cord. - Release the "MENU" button until all LEDs solid on. 2. Download the firmware file from website , then unzip the firmware file, and unzip the “RS232.zip”. - Page 72 4. Program settings - Make sure the settings are as below: 1) PORT: Check the COM port is “COM 3” (Select the COM port which you are using). 2) Baudrate : Please set to 19200 3) Program : Please set to “NON-ECHO”. 5.
- Page 73 7. Click the “OK” to start firmware upgrading. 8. The firmware will be upgraded automatically. 9. Finish. - Click "OK". Confidential...
- Page 74 10. Check the MCU firmware version. - Unplug the power cord and USB cable, then re-plug the power cord to power on the projector . - Press "power->left->right->menu" sequentially to get into service mode to check MCU firmware version. Confidential 5-10...
-
Page 75: Network Firmware Upgrade Procedure
Section 3: Network Firmware Upgrade Procedure 5-3-1 Equipment Needed Software: - xxx_xxx_xxx.bin (*.bin) Hardware: - Projector - Power Cord Power Cord - LAN Cable - PC or Laptop or Laptop Confidential 5-11... -
Page 76: Pc Hardware Link
5-3-2 PC Hardware Link 1. Execute Network Settings, please refer to 4-7 details of Chapter 4. 2. Enter into OSD menu.,then select "Setting"-->LAN/Wireless(Standby),choose "Off" to "On",then turn off the projector. 3. Double click "Internet Explorer". 4. - Visit "http://192.168.10.100/ firmwareUpdate.htm" to get into web to to upgrade network firmware. - Page 77 5. Please wait for 3 seconds. 6. - Click “Browse” button to select the Network FW file (*.bin) which you saved. - Click “Open”. 7. Click the “Update” button. Confidential 5-13...
- Page 78 8. Click the “Re login” button. 9. Firmware upgrade procedure complete. Visit "http://192.168.10.100/ firmwareUpdate.htm" to check the version. Confidential 5-14...
-
Page 79: Edid Upgrade
Chapter 6 EDID Upgrade 6-1 EDID Introduction Extended Display Identification Data is a VESA standard data format that contains basic information about a display device and its capabilities, including vendor information, maximum image size, color characteristics, factory pre-set timings, frequency range limits, and character strings for the monitor name and serial number. -
Page 80: Equipment Needed
6-2 Equipment Needed Software - EDID Program (Generic V0.91) - EDID File (*.ini) Hardware - Projector - Generic Fixture for EDID Key-in - Power Cord - RS-232 9 Pin Cable (pin to pin, F-M) - Monitor - PC - VGA cable - Power adapter and power cord for fixture - HDMI to DVI Cable Confidential... -
Page 81: Setup Procedure
6-3 Setup Procedure 1. Connect all ports (1) Connect P1 of Fixture with COM Port of PC/Laptop by RS232 Cable. (2) Connect P2 of Fixture with VGA port of Projector by VGA Cable. (3) Connect P3 of Fixture with DVI port ,and connect HDMI 1 port of Projector. -
Page 82: Edid Key-In Procedure
6-4 EDID Key-In Procedure 1. Execute EDID Program (1) Click on "EDID" to execute EDID program. 2. Process (1) Check the COM port is COM3" (Select the COM port which you are using). (2) Click the Model button. (3) Choose the source file "*.ini" and then open it. - Page 83 - "Please change the cable to VGA 2" will be shown on the screen. - Change the VGA Cable to VGA 2 port. - Please press "OK" button. - "Please change the cable to HDMI " will be shown on the screen. - Please press "OK"...
-
Page 84: Universal Password
6-5 Universal password Note:This unique password is a back door of Administrator Password which will be accepted by projector anytime no matter what the Administrator Password is. 1.The process of get universal password (1) Click the" EDI Password Translation". (2) Input SNID number.(The SNID number must the serial number of EDID upgrade or enter into service mode, read the SNID number after upgrade FW.) (3) Then the Universal Password will appear. - Page 85 Appendix A (Exploded Image) The chapter is only designed to show exploded image of the projector. For updated part numbers, please refer to RSPL report. Dummy Casing: Confidential...
- Page 86 Dummy Casing Item EDI PN Description Parts Supply 13220657 LAN Module Cover(GP) / 51.8PE05H021,EIKI WSS3100 CAP WIRELESS IO BLANK MN3600 G3.5 WIRELESS LABEL BLANK PC-835 G3.5 COVER MIRROR REAR MN3600 WHITE G3.5 COVER COSMETIC MODULE ASSY I/O COVER MODULE 8PE (SERVICE)
- Page 87 ASSY TOP COVER MODULE EDI PN Item Description Parts Supply SCREW PAN TAP M3*6 Ni COVER COSMETIC MODULE KEYPAD MN3600 G3.5 KEYPAD MENU MN3600 G3.5 PCBA (GP) / 80.8PE03G001,KEYPAD FOR 63730009 G035 PCBA IR CAMERA TRANSFORM BOARD 8PE FR4 FOR G035 PROJECTOR GASKET FOR MAIN BOARD EMI Confidential...
- Page 88 ASSY LAMP DRIVER MODULE Item EDI PN Description Parts Supply SPACER FOR LAMP DRIVER 240W G3.5 GROUNDING CABLE CLAMP FN-008 “PINGOOD BRACKET LAMP DRIVER MIPRO LAMP DRIVER MYLAR FORMEX GK-17 0.43t G3.5 63670007 Ballast (GP) / 75.8SZ01G001,Lamp Driver,EU30 THERMAL SENSOR MYLAR G3.5 63730010 PCBA (GP) / 80.8PE09G001,THERMAL SENSOR SCREW PAN MECH W/SF M3*6 BLACK...
- Page 89 ASSY SYS FAN MODULE Item EDI PN Description Parts Supply 63630003 Thermal Switch (GP) / 43.8EM17G001,W/I bracket 63260008 FAN(GP) / 49.8PE01G011,SUNON,105*32mm FAN SYSTEM BRACKET MIPRO BLOWER DUCT ASS’Y G3.5 BUY ASSY INTERLOCK SWITCH 2P #26 320mm G3.5 LIMIT SWITCH HOLDER PC MN3600H BLACK TDP-SP1 Confidential...
- Page 90 ASSY LEFT SPEAKER MODULE Item EDI PN Description Parts Supply 63680002 Speaker(GP) / 49.8PE04G001,10W 6-OHM SPEAKER BRKT LEFT SECC 0.8t G3.5 PORON SPEAKER G3.5 SCREW PAN MECH W/SF M3*8 NI GREEN Confidential...
- Page 91 ASSY MAIN BOARD MODULE Item EDI PN Description Parts Supply HEXAGON COPPER STICK M3 L18 SCREW L4.5 EzPro 735 63730008 PCBA (GP) / 80.8UR01G001,MB PCBA DAUGHTER BD FOR G035 PROJECTOR SCREW PAN MECH W/SF M3*6 Ni GREEN Confidential...
- Page 92 ASSY LAMP BLOWER MODULE Item EDI PN Description Parts Supply 63260006 SUNON 70mm*25mm /LAMP BLOWER/ RoHS2.0/WIRE LENGTH 230mm 7025 BLOWER RUBBER HD33 7025 BLOWER DUCT AIR TIGHT Confidential VIII...
- Page 93 ASSY ENGINE MODULE Item EDI PN Description Parts Supply 63010004 OE Main (GP) / 75.8PE06G001,G0.35,WXGA G0.35 OSRAM 280W XGA ENGINE MODULE SCREW FLAT HEAD TAP M2*4MM SWRCH18A H BLACK FOCUS RING MIPRO 63120003 Color Wheel (GP) / 75.8SP06GR01,FOR 8SP Confidential...
- Page 94 Dummy Packing Item EDI PN Description Parts Supply D.C. G3.5 EPE BAG S500WI EPE CUSHION LEFT G3.5 EPE CUSHION RIGHT G3.5 63340014 Carton (GP) / 55.8UR01G001 A.K. G3.5 Confidential...
- Page 95 Accessories Kit Item EDI PN Description Parts Supply AK BOX MIPRO AK PARTITION PAPER W/O IR CAMERA MIPRO CABLE POWER CORD 1.8M SP30+IS14 US CABLE VGA 15P 1.8M BLK EP739 13910056 Remote Control (GP) / 45.8UR01G001,WI Battery,Blank Confidential...
- Page 96 COVER TOP WIRELESS 51.8PE05H001 13220659 51.8PE05H001,Blank MN3600 G3.5 LAN Module Cover(GP) COVER TOP WIRELESS 51.8PE05H021 13220657 / 51.8PE05H021,EIKI MN3600 WITH EIKI LOGO WSS3100 COVER MIRROR REAR 51.8PE07H002 MN3600 WHITE G3.5 CORNER COVER MN3600 51.8PE42H001 G3.5 Carton (GP) / CARTON BOX 55.8UR01G001...
- Page 97 Item Core PN EDI PN EDI Description Description Power Supply (GP) / POWER SUPPLY,AD- 75.8PEP2G001 63670006 75.8PEP2G001,AD-435W,EU- 435W,CONN,150*100,DL,T- 30W_X BUY ASSY INTERLOCK 75.8PE10G001 SWITCH 2P #26 320mm G3.5 BUY COVER BTM ASS’Y 75.8PE20G001 MIPRO LAMP COVER ASSY MIPRO 75.8PE16G002 COVER MIRROR FRONT 75.8UR04G001 MODULE CX7720 WH9G129 Color Wheel (GP) /...
Need help?
Do you have a question about the EIP-WSS3100 and is the answer not in the manual?
Questions and answers