Table of Contents
Advertisement
Quick Links
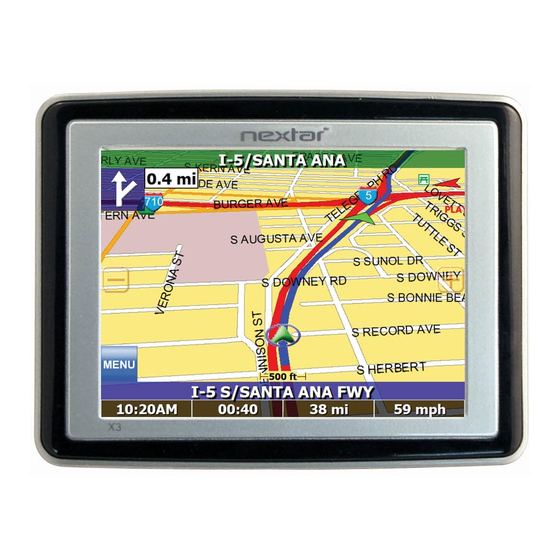
Thank you for choosing Nextar Navigation System as your door-to-door in-car navigator.
Read the Quick Start Guide first and start using Nextar Navigation System right away. This
document is the detailed description of the software. You can easily discover Nextar
Navigation System while you are using it; however, we still recommend that you read this
manual to understand the screens and the features of Nextar Navigation System.
1
Advertisement
Table of Contents

Related Manuals for Nextar X3-09


Summary of Contents for Nextar X3-09
- Page 1 Thank you for choosing Nextar Navigation System as your door-to-door in-car navigator. Read the Quick Start Guide first and start using Nextar Navigation System right away. This document is the detailed description of the software. You can easily discover Nextar Navigation System while you are using it;...
-
Page 2: Table Of Contents
Table of contents 1 Warnings and Safety information ..........5 2 Getting started with Nextar Navigation System......6 2.1 Simple and Advanced modes............. 7 2.2 Buttons and other controls on the screen........... 8 2.2.1 Using keyboards..................9 2.3 Using the map .................. 10 2.3.1 Checking the details of a map location .......... - Page 3 3.1.6 Selecting the destination from the History ..........33 3.1.7 Selecting the destination by entering its coordinates......33 3.2 Creating a multi-point route (inserting a via point)......34 3.3 Creating a multi-point route (appending a new destination) ..... 35 3.4 Editing the route ................35 3.5 Viewing the entire route on the map (Fit-to-Screen)......
- Page 4 4.4.7 User Data Management ................ 60 4.5 Settings menu................... 60 4.5.1 Map Screen settings................61 4.5.2 Sound settings..................62 4.5.3 Route Planning options ................. 63 4.5.4 Regional settings................... 64 4.5.5 Navigation settings ................65 4.5.6 Warning settings..................66 4.5.7 GPS settings ..................67 4.5.8 Menu settings ..................
-
Page 5: Warnings And Safety Information
Nextar Navigation System has a Safety Mode: if you turn on Safety Mode, you cannot change anything in Nextar Navigation System while the vehicle is moving at a speed of 10 km/h (6 mph) or higher. Unless only passengers operate Nextar Navigation System, we strongly encourage you to turn on Safety Mode. -
Page 6: Getting Started With Nextar Navigation System
2 Getting started with Nextar Navigation System Nextar Navigation System is optimized for in-car use. You can use it easily by tapping the screen buttons and the map with your fingertips. Nextar Navigation System can plan routes throughout the whole installed map set; you do not need to change maps or switch to a poorly detailed general map to navigate between map segments or countries. -
Page 7: Simple And Advanced Modes
Start using Nextar Navigation System When Nextar Navigation System is started the first time, you need to do the following: Select the written language of the application interface. Later you can change it in Settings (page 64). Select the language and speaker used for voice guidance messages. Later you can change it in Settings (page 64). -
Page 8: Buttons And Other Controls On The Screen
See page 66 2.2 Buttons and other controls on the screen When you are using Nextar Navigation System, you usually tap buttons on the touch screen. You only need to confirm selections or changes in Nextar Navigation System if the application... -
Page 9: Using Keyboards
2.2.1 Using keyboards You only need to enter letters or numbers in Nextar Navigation System when you cannot avoid it. You can type with your fingertips on the full-screen keyboards and you can switch between various keyboard layouts, for example ABC, QWERTY, or numerical. -
Page 10: Using The Map
Finalising the keyboard entry 2.3 Using the map The map screen is the most frequently used screen of Nextar Navigation System. It can be accessed from the Navigation menu by tapping For further information about the map screen, see page 40. -
Page 11: Manipulating The Map
Changes how much of the map is displayed on the screen. and out Nextar Navigation System uses high-quality vector maps that let you see the map at various zoom levels, always with optimized content. It always displays street names and other text with the... - Page 12 System zooms in and raises the view angle to let you easily recognize your maneuver at the next junction. • If the next turn is at a distance, Nextar Navigation System zooms out and lowers the view angle to show you the road in front of you.
-
Page 13: Status Information And Hidden Controls On The Map
Map scale Nextar Navigation System shows the scale of the map in 2D mode. Fit-to-screen This button does not appear on the Map screen. It is available on the following screens: •... -
Page 14: Icon Description
The sound output of Nextar Navigation System is muted. The sound output of Nextar Navigation System is enabled. Nextar Navigation System records a Track log when GPS position is available. Track log recording is disabled. The following information can be seen in the three data fields shown on the map screen. Tap this area to open the Trip Information screen where you can select which values to be shown in these three fields. -
Page 15: Using The Cursor (The Selected Map Location)
When there is no active route, these fields show the following information: current speed, compass and the current time of day. Icon Type More information Compass Shows the direction of your heading both when the map is automatically rotated (3D) and when the map is always facing North (2D). -
Page 16: Nextar Navigation System Concepts
• While driving without an active route in Nextar Navigation System: Smart Zoom will zoom in if you drive slowly and zoom out when you drive at high speed. -
Page 17: Position Markers
GPS position. 2.4.2.3 Selected location (Cursor) If you select a location in the Find menu, or you tap the map when the map control buttons are visible, the Cursor appears at the selected point on the map. Nextar Navigation System... -
Page 18: Original Position In The Cursor Menu
Cursor menu was opened, and the icon appears again. 2.4.3 Daytime and night color schemes Nextar Navigation System uses different color schemes during the day and during the night. • Daytime colors are similar to paper road maps. -
Page 19: Route Calculation And Recalculation
• Cross-border Planning • Carpool Lanes (appears only when used in the USA) Nextar Navigation System automatically recalculates the route if you deviate from the proposed itinerary. For further information about Route Planning options, see page 63. 2.4.6 Itinerary The Itinerary is the list of the route events, that is, the driving instructions. -
Page 20: Track Logs
2.4.7 Track Logs Nextar Navigation System can log the track that you drive (page 37). A Track Log is a recording of how your GPS position changed and it is independent of the route Nextar Navigation System calculated. -
Page 21: Route Demonstration
GPS data received from the GPS device. These logs are saved as separate text files on the memory card, and they cannot be shown or replayed in Nextar Navigation System. To turn on NMEA/SIRF log saving, tap the following buttons: 2.4.8 Route demonstration... -
Page 22: Speed Limit Warning
(ask your local dealer) or may not be fully correct for all roads on the map. You can configure Nextar Navigation System to warn you if you exceed the current limit. Tap the following buttons: When you exceed the speed limit, the following happens: •... -
Page 23: Navigating With Nextar Navigation System
GPS position or even without GPS reception (available in Advanced mode only) 3.1 Selecting the destination of a route Nextar Navigation System offers you several ways of choosing your destination and via points (intermediate destinations): •... -
Page 24: Entering An Address Or Part Of An Address
(Advanced mode). By default, Nextar Navigation System proposes the country, state and city where you are. If needed, tap the button with the name of the country, and select a different one from the list. If you select a new country, you also need to select the state, or tap to search for a city regardless of the state it is in. -
Page 25: Entering An Address If House Numbering Is Restarted
(Simple mode), or (Advanced mode). By default, Nextar Navigation System proposes the country/state and city where you are. If needed, tap the button with the name of the country/state, and select a different one from the list. If needed, change the city:... -
Page 26: Entering An Address Without Knowing The District/Suburb
• To select the city from the list of recently used ones, tap the button. • To enter a new city: Tap the button with the name of the city, or if you have changed the country/state, tap Start entering the city name on the keyboard. Get to the list of search results: •... - Page 27 (Simple mode), or (Advanced mode). By default, Nextar Navigation System proposes the country/state and city where you are. If needed, tap the button with the name of the country/state, and select a different one from the list. If needed, change the city: •...
-
Page 28: Selecting An Intersection As The Destination
(Simple mode), or (Advanced mode). By default, Nextar Navigation System proposes the country/state and city where you are. If needed, tap the button with the name of the country/state, and select a different one from the list. If needed, change the city: •... -
Page 29: Selecting A City Center As The Destination
(Simple mode), or (Advanced mode). By default, Nextar Navigation System proposes the country/state and city where you are. If needed, tap the button with the name of the country/state, and select a different one from the list. If needed, change the city: •... -
Page 30: Entering An Address With A Zip Code
(Simple mode), or (Advanced mode). By default, Nextar Navigation System proposes the country/state and city where you are. If needed, tap the button with the name of the country/state, and select a different one from the list. Tap the button with the name of the city, and enter the ZIP code: Start entering the ZIP code on the keyboard. -
Page 31: Tips On Entering Addresses Quickly
3.1.2.7 Tips on entering addresses quickly • When you are entering the name of a city or a street, Nextar Navigation System only displays those characters that appear in possible search results. The other characters are greyed out. • When entering the city name or the street name, tap the button after a couple of letters;... - Page 32 • : The POI will be searched for around a given address. • : The map appears with the Cursor in the middle. Modify the location of the Cursor if necessary, then tap . The POI will be searched for around the given location.
-
Page 33: Selecting The Destination With Saved Poi Search Criteria
3.1.5 Selecting the destination with saved POI search criteria POI search criteria can be saved in the POI section of the Manage menu, but Nextar Navigation System is already shipped with some saved criteria you can use instantly when searching for a POI. -
Page 34: Creating A Multi-Point Route (Inserting A Via Point)
Tap the latitude or longitude value to change the coordinates. Enter the coordinate values in WGS84 format on the keyboard: the latitude (N or S) and the longitude (E or W). The map appears with the selected point in the middle. Tap (Simple mode) or (Advanced mode) from the Cursor menu. -
Page 35: Creating A Multi-Point Route (Appending A New Destination)
3.3 Creating a multi-point route (appending a new destination) destination Multi-point routes are created from simple routes, so a route must be active first. One of the ways of expanding the route is to add a new destination. The previous destination becomes the last via point of the route. -
Page 36: Viewing The Entire Route On The Map (Fit-To-Screen)
3.5 Viewing the entire route on the map (Fit-to-Screen) The map can be moved and scaled to show the whole line of the route. You do not need to manipulate the map manually. The Plan on Map feature does it for you. In Advanced mode you have the following options to enter Plan on Map: •... -
Page 37: Pausing The Active Route
3.8 Pausing the active route You do not need to pause the active route: when you start driving again, Nextar Navigation System restarts the voice instructions from your position. 3.9 Deleting the next via point from the route The easiest way to delete the upcoming route point (the next via point) in both Simple mode... -
Page 38: Saving A Route
You return to the map and you can continue driving. Repeat the above steps, then tap later to stop the recording. Nextar Navigation System labels the Track Log with a time stamp. (As an alternative, you can tap the button in the Quick menu to start, and later to stop the Track Log recording.) -
Page 39: Loading A Saved Route
Enter a name for the saved route, and then tap When you save a route, Nextar Navigation System not only saves the route points but the whole itinerary: • If you updated your map since you first saved the route, Nextar Navigation System recognizes the change, and recalculates the driving instructions according to the latest available map information. -
Page 40: Reference Guide (Advanced Mode)
4 Reference Guide (Advanced mode) On the following pages you will find the description of the different menu screens of Nextar Navigation System in Advanced mode. In Simple mode, these functions work the same way, but only a few of them are available. - Page 41 Symbol Name Action Turn Preview, that is, the next Opens the Route Information screen route event Second upcoming route event Opens the Itinerary Trip data Opens the Trip Information screen Battery status Opens the Quick menu Opens the Quick menu GPS position quality Opens the Quick menu Vehicle used in route...
- Page 42 Symbol Name Action map only) • Return to GPS position button • Smart Zoom button Rotate left, rotate right Rotates the 3D map left or right Tilt up, tilt down Tilts the 3D map Zoom in, zoom out Scales the map Return to GPS position Tap this button to move the map back to (appears when GPS position is...
-
Page 43: Icons On The Map
GPS reception quality shows the current accuracy of the position information. Icon Description Nextar Navigation System has no connection to the GPS receiver: GPS navigation is not possible. Devices with a built-in GPS receiver are permanently connected. On such devices, the icon does not appear in normal circumstances. -
Page 44: Status Indicator Strip
The sound output of Nextar Navigation System is muted. The sound output of Nextar Navigation System is enabled. Nextar Navigation System records a Track log when GPS position is available. Track log recording is disabled. 4.1.1.3 Next two route events (Turn Preview fields) There are two fields reserved on the Map screen to display the next two maneuvers (route events that are listed in the Itinerary). -
Page 45: Objects On The Map
4.1.2 Objects on the map 4.1.2.1 Streets and roads Nextar Navigation System shows the streets in a way that is similar to how the paper road maps show them. Their width and colors correspond to their importance: you can easily tell a highway from a small street. -
Page 46: Elements Of The Active Route
To fine-tune 3D visualization on the map, tap the following buttons: 4.1.2.3 Elements of the active route Nextar Navigation System shows the route in the following way: Symbol Name Description Current GPS position Your current position displayed on the map. -
Page 47: Detour Menu
You can choose whether you want to use or avoid excluded from the navigation certain road types (page 63). However, when Nextar Navigation System cannot avoid such roads, the route will include them and it will show them in a color that is different from the route color. -
Page 48: Button Description
Button Description Zooms out the map. Zooms in the map. With the Cursor menu open, you can still move or scale the map, and tap the map anywhere to place the Cursor to a new location, but when you use this button, the Cursor jumps back to the place where it was at the time when you opened the Cursor menu. -
Page 49: Position Menu
Button Description If the Cursor is at or near a Pin, this button replaces the previous one, and deletes the Pin the Cursor is near to. The location of the Cursor is added to the list of frequently visited destinations, the so called Favorites. You can give a name for the Favorite. -
Page 50: Trip Information Screen
Name Description Function Estimated Shows the estimated arrival time at the final Tap this field to change the Arrival destination of the route based on information content of all data fields to available for the remaining segments of the via point information. route. - Page 51 When you open the screen, all route data fields contain information about reaching your final destination. Tap and the fields concerning your route display data for the next via point. Tap the button repeatedly to toggle between the two options. You have the following data and functions on this screen: Name Description...
-
Page 52: Trip Computer Screen
This button replaces the previous one if it has been activated. Tap it to resume collecting trip data. Resets all counters of the currently shown trip. Collecting trip data is restarted only when Nextar Navigation System receives a position from the GPS. Cycles through all trips. -
Page 53: Gps Data Screen
If you only adjust the volume, you need to use Opens the Navigation menu. this button to return to the Map screen. Mutes all sounds of Nextar Navigation System. Opens Sound settings. Switches between the daytime and night color Opens Color Profiles schemes manually. - Page 54 Icon Color Name Description Green Nextar Navigation System has a position connection to the GPS receiver and quality GPS position information is available indicator in 3D: Nextar Navigation System can calculate both your horizontal and vertical GPS position. Yellow Nextar Navigation System has a...
-
Page 55: Find Menu
You can select your destination from the thousands of POIs page 31 included with Nextar Navigation System or from the ones you have previously created. The destinations that you have already entered in Nextar page 33 Navigation System are available in the History list. -
Page 56: Manage Menu
21 You can run a demonstration of the route at normal speed. page 21 4.4 Manage menu You can manage the content that Nextar Navigation System stores. Tap the following buttons: Button Description Reference Renaming or deleting saved routes... -
Page 57: Manage History
4.4.2 Manage History You can manage the list of locations you used lately. Tap the following buttons: Button Description Deletes the selected item in the History. Deletes the entire History. Moves between pages for additional list items. 4.4.3 Manage Track Logs You can record Track Logs, then play them back, display them on the map, and view their details. -
Page 58: Manage Favorites
4.4.4 Manage Favorites You can manage the list of your Favorites. Tap the following buttons: Button Description Button with the name of the Opens the selected Favorite for editing. Favorite Deletes the selected item in the list of Favorites. Clears the list of Favorites. Moves between pages for additional list items. -
Page 59: Manage Saved Search Criteria
When a POI group is open for editing: Button Description Items in the POI group will not be shown on the map. The distance buttons set the zoom level from which the items in the POI group will be shown on the map. , ... -
Page 60: User Data Management
All settings will return to their factory defaults, but no user data will be deleted. 4.5 Settings menu You can configure the program settings, and modify the behaviour of Nextar Navigation System. Tap the following buttons: The Settings menu has two pages of submenus. Tap to access the other options. -
Page 61: Map Screen Settings
3D when you navigate. Color Profiles Nextar Navigation System is able to show the map and the menus in different colors during the day and during the night. Select the color profiles to be used in each mode, and select the... -
Page 62: Sound Settings
This setting tells Nextar Navigation System whether to display this information at the top or at the bottom of the map. 4.5.2 Sound settings You can adjust the sounds of Nextar Navigation System. Tap the following buttons: Button Description Master Volume Use the switch to mute all sounds of the device and then to re- enable them again. -
Page 63: Route Planning Options
Toll roads By default Nextar Navigation System includes toll roads (pay roads where there is a per-use charge) in the routes. If you disable toll roads, Nextar Navigation System plans the best toll-free route. -
Page 64: Regional Settings
Fast route, but it takes other roads as well to save fuel. Easy Results in a route with fewer turns. With this option, you can make Nextar Navigation System to take, for example, the highway instead of series of smaller roads or streets. -
Page 65: Navigation Settings
Please note that the GPS clock is only available with GPS reception. This allows you to check whether any correction is needed. 4.5.5 Navigation settings You can control how Nextar Navigation System behaves during navigation. Tap the following buttons:... -
Page 66: Warning Settings
Maps may contain information about the speed limits of the road Speeding segments. Nextar Navigation System is able to warn you if you exceed the current limit. This information may not be available for your region (ask your local dealer), or may not be fully correct for all roads in the map. -
Page 67: Gps Settings
Menu and keyboard screens appear in an animated way. Background You can choose the image to be used as the menu background image. Skin You can choose from a list of available skins to change the look of Nextar Navigation System. -
Page 68: Device Settings
4.5.9 Device settings You can change some device settings to control the screen backlight when Nextar Navigation System is running. Tap the following buttons: Button Description Power Management You can set how the backlight will behave when the screen has not been touched for a while. -
Page 69: Glossary
Active route The currently navigated route. You can save and load routes in Nextar Navigation System, but only one route can be active at any given time, and it is always active until you delete it, reach your destination or you quit Nextar Navigation System. See also: Route. - Page 70 Overview mode You can instruct Nextar Navigation System to automatically switch to Overview mode if the next route event is in a distance. In Overview mode the map is shown in 2D but scaled down to a predefined zoom level. When you approach the next route event, the previous 2D or 3D map view returns automatically.
-
Page 71: End User Licence Agreement
6 End User Licence Agreement 1 The contracting parties 1.1 Contracting parties to this Agreement are, on the one hand: Nav N Go Kft. (23 Bérc utca, H-1016 Budapest, Hungary; Hungarian reg.no.: 01-09-891838) as Licensor the legal user (as defined in Section 2) of the object of this Agreement according to Section 4, hereinafter referred to as User on the other hand (hereinafter jointly referred to as Parties). - Page 72 5.4 In the conclusion and execution of this Agreement the Database Owner is represented by Licensor in relations to the User. 5.5 By concluding this Agreement, Licensor shall withhold all rights vested in the Software Product, except for those that the User is entitled to according to explicit legal regulations or that of this Agreement.
- Page 73 8.6 By concluding this Agreement, the User shall especially acknowledge the information stated in Section 8 above. 9 Sanctions 9.1 The Licensor hereby informs the User that according to regulations of the CA, should the Licensor find its rights to be breached, the Licensor may 9.1.1 claim the acknowledgement of such breach by court;...
-
Page 74: Copyright
Made in China © 2008 Nextar (Hong Kong) Limited. Nextar is a trademark and service mark of Nextar (Hong Kong) Limited. All other brand names, trademarks and service marks are property of their owners. Nextar™, a trademark of Nextar (Hong Kong) Limited.
Need help?
Do you have a question about the X3-09 and is the answer not in the manual?
Questions and answers