Table of Contents
Advertisement
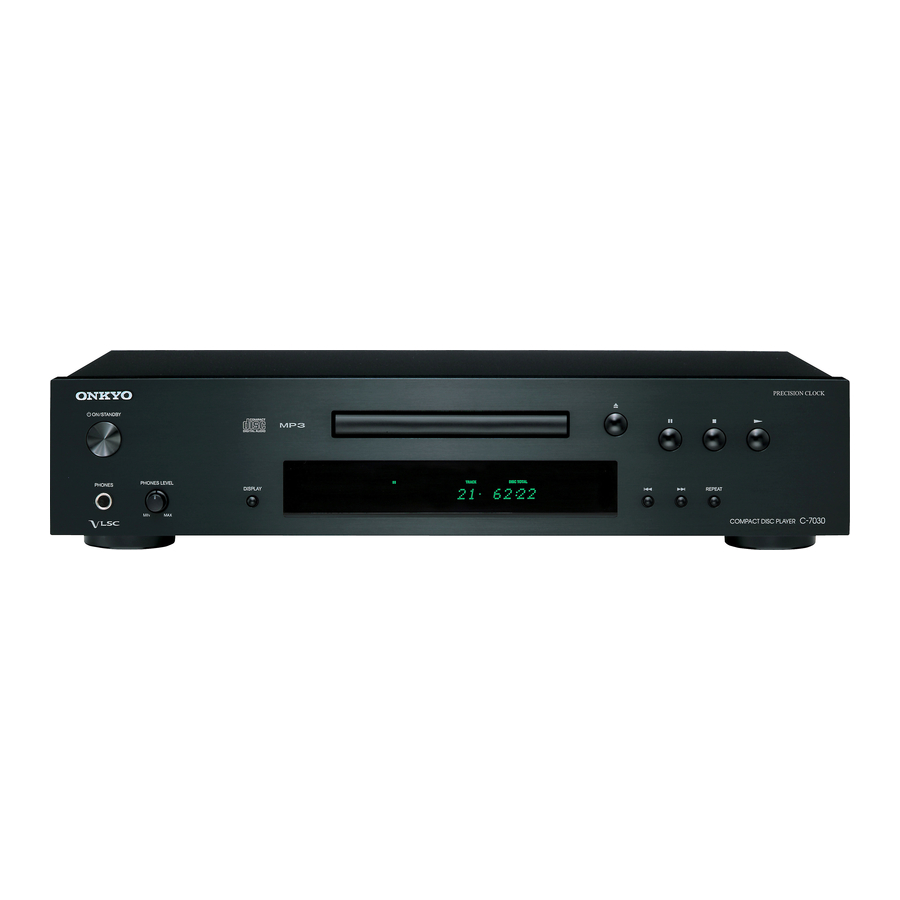
COMPACT DISC PLAYER
C-7030
Instruction Manual
Thank you for purchasing an Onkyo product. Please read this
manual carefully before making any connections or using this
product. By following these instructions, you'll get the best audio
performance and the most listening pleasure from your Onkyo
product. Keep this manual for future reference.
Getting Started
............................En-
2
13
15
16
21
24
26
27
E
n
Advertisement
Table of Contents

Related Manuals for Onkyo C-7030


Summary of Contents for Onkyo C-7030
-
Page 1: Table Of Contents
.... En- Troubleshooting ...... En- Thank you for purchasing an Onkyo product. Please read this manual carefully before making any connections or using this product. By following these instructions, you’ll get the best audio performance and the most listening pleasure from your Onkyo product. -
Page 2: Important Safety Instructions
WARNING: WARNING AVIS RISK OF ELECTRIC SHOCK RISQUE DE CHOC ELECTRIQUE TO REDUCE THE RISK OF FIRE OR ELECTRIC DO NOT OPEN NE PAS OUVRIR SHOCK, DO NOT EXPOSE THIS APPARATUS The lightning flash with arrowhead symbol, within an TO RAIN OR MOISTURE. equilateral triangle, is intended to alert the user to the presence of uninsulated “dangerous voltage”... -
Page 3: Precautions
This unit contains a semiconductor laser system and is are wet or damp. If water or any other liquid gets classified as a “CLASS 1 LASER PRODUCT”. So, to inside this unit, have it checked by your Onkyo use this model properly, read this Instruction Manual dealer. -
Page 4: Declaration Of Conformity
ELECTRONICS GmbH LIEGNITZERSTRASSE 6, 82194 GROEBENZELL, For Canadian Models GERMANY declare in own responsibility, that the ONKYO product NOTE: THIS CLASS B DIGITAL APPARATUS described in this instruction manual is in compliance with the COMPLIES WITH CANADIAN ICES-003. corresponding technical standards such as EN60065, EN55013, EN55020 and EN61000-3-2, -3-3. -
Page 5: Supplied Accessories
• Hi-Rigidity, Anti-Resonant Chassis • Aluminium Front Panel • RI-Compatible Remote Control • 3-Mode Dimmer Audio cable (80 cm) *1 VLSC and the VLSC logo are registered trademarks of Onkyo Corporation. cable (80 cm) • To use , the CD Player must be connected with a ... - Page 6 Contents Important Safety Instructions ......2 Precautions............3 Supplied Accessories........5 Features .............. 5 Getting to Know the CD Player ......7 Front Panel..............7 Display...............8 Rear Panel..............8 Remote Controller .............9 Installing the Batteries ..........10 Aiming the Remote Controller ........10 Disc Notes............11 Connecting the CD Player .......
-
Page 7: Getting To Know The Cd Player
Getting to Know the CD Player Front Panel ON/STANDBY button (15) PHONES LEVEL knob (15) Press to turn on or standby the C-7030. Use to control the phones level. Turn the knob clockwise to increase the phones Disc tray (16) level and counterclockwise to decrease it. -
Page 8: Display
Rear Panel Onkyo components for interactive control. To use ANALOG AUDIO OUTPUT jacks (13, 14) , the C-7030 must be connected with an These analog audio outputs can be connected to an cable and an audio cable. amplifier’s analog inputs by using the supplied audio cable. -
Page 9: Remote Controller
When making a memory RC - 822C setting, the selected track is erased. [] button (15) Press to turn on or standby the C-7030. DIMMER button (15) Press to adjust the display brightness. Pause [] button (16, 17) -
Page 10: Installing The Batteries
Getting to Know the CD Player—Continued Installing the Batteries Aiming the Remote Controller When you operate the remote controller, point it at the To open the battery compartment, press the CD Player’s remote control sensor, as shown below. small hollow and slide open the cover. Remote control sensor Insert two batteries (R03/AAA) into the Notes:... -
Page 11: Disc Notes
Disc Notes Precautions for Playback Playback of MP3 Discs Compact discs (CDs) with the following logo on the • Only MP3 files with the extension “.MP3” or “. mp3” label surface can be used. are supported. Do not use discs designed for purposes other than audio, •... - Page 12 Caring for Discs If the disc is dirty, the C-7030 will have a hard time read- ing signals, and the audio quality may drop. If the disc is dirty, gently wipe off fingerprints and dust with a soft cloth.
-
Page 13: Connecting The Cd Player
(typically labeled “R”). Use white plugs to connect left-channel audio inputs and out- puts (typically labeled “L”). Note: Do not put anything on top of the C-7030, as it may inter- Analog audio fere with proper ventilation. cable... -
Page 14: Connections
AV receiver, when you start playback on the • The C-7030 has two connectors. You can connect C-7030, the AV receiver will select the C-7030 as the either one to your Onkyo hi-fi amp or AV receiver. The input source. -
Page 15: Basic Operation
Connecting the Power Cord Before connecting the power cord, connect all of the other components. Plug the power cord into a suitable electrical outlet Basic Operation Turning On CD Player Use the [] or [] button to display “ASb”; then press the [ ENTER ] button. -
Page 16: Disc Playback
Disc Playback Disc tray DIMMER DISPLAY RANDOM REPEAT / ENTER Selecting Tracks Press the Open/Close [] button to open To return to the beginning of the track that’s currently the disc tray. playing or paused, press the Previous [] button. Place the CD on the tray with the label-side Press the Previous [] button repeatedly to select ear- facing up. -
Page 17: Using The Remote Controller
Disc Playback—Continued Using the Remote Controller [DISPLAY] DIMMER DISPLAY Press repeatedly to display [] CD information Press to pause playback See below for details. [] Press to start playback []/[] RANDOM REPEAT Press to fast-forward or fast- []/[] reverse Press to select tracks During playback or while playback is •... -
Page 18: Selecting Files (Mp3/Wma Cds)
Disc Playback—Continued Selecting Files (MP3/WMA CDs) Selecting Files in Navigation Mode For MP3/WMA CDs, files (MP3/WMA files) may be In Navigation mode, you can select files by navigating organized in a hierarchy, with folders containing files through the folder hierarchy. This mode can only be used and subfolders, as shown below. -
Page 19: Selecting Files In All Folder Mode
Disc Playback—Continued Use the []/[] or []/[] buttons to select Press the [ENTER] or [] button. the files within the folder. Playback will start with the specified file or folder To select another folder, press the [] button again and continue until all of the files on the disc have (front panel: []), and then use the [/] been played. -
Page 20: Displaying Mp3/Wma Information
Disc Playback—Continued Title: Title of the current file (if ID3 tag is present). To select the previous folder, press the When there is no ID3 tag, “TITLE-NO DATA” appears. Previous [] button. To select the next folder, press the Next [] button. -
Page 21: Various Playback Modes
Various Playback Modes You can select the following playback modes: Memory Playback (For Audio CDs) • Random playback In memory playback, you can create a playlist of up to • Memory playback 25 files. • Repeat playback Random Playback DIMMER DISPLAY With random playback, all of the files on the disc are DISPLAY... -
Page 22: Memory Playback (For Mp3/Wma Cds)
Various Playback Modes—Continued ■ To Cancel Memory Playback Use the Previous and Next []/[] buttons • Stop playback, then press the [MEMORY] button to to select the first file you want to add to the change the playback mode. The MEMORY indicator playlist, and then press [ENTER] button. -
Page 23: Repeat Playback
Various Playback Modes—Continued Repeat Playback Use the []/[]/[] buttons to continue selecting other items for memory playback. In repeat playback, you can play an entire CD repeat- To move up a level, press the [] button. edly, play one track repeatedly, or combine it with mem- To continue selecting items for memory playback, ory playback to play the playlist repeatedly, or random repeat steps 4 and 5. -
Page 24: Setting For Mp3/Wma
Setting for MP3/WMA ❏ FOLDER NAME (Scroll/Not) Setting MP3/WMA Preferences This preference determines whether the folder name The MP3/WMA preferences let you change the way scrolls across the display when an MP3/WMA folder is MP3/WMA file information is displayed and the way selected. - Page 25 Setting for MP3/WMA—Continued File/folder name Disable Enable 01 Pops 01 Pops Pops 10-Rock 10-Rock Rock 16_Jazz 16_Jazz Jazz 21st Century 21st Century 21st Century 05-07-20 Album 05-07-20 Album Album ❏ STOP KEY (All Folder/Navigation/Disable) This preference determines how the Stop [ ] button on the CD Player works.
-
Page 26: Troubleshooting
Can’t access the SETUP menu. • If any track has been selected even when the C-7030 is stopped, you must place it into the full stop state by pressing the [] button before you can view all the SETUP menus. -
Page 27: Specifications
Relocate if necessary. • If the C-7030 is installed in a cabinet with colored glass doors, the remote controller may not work reliably when the doors are closed. Open the doors, or use a cabinet without colored glass. - Page 28 1301, 555 Tower, No.555 West NanJin Road, Jin an, Shanghai, China 200041, Tel: 86-21-52131366 Fax: 86-21-52130396 I1102-1 SN 29400669 (C) Copyright 2011 ONKYO SOUND & VISION CORPORATION Japan. All rights reserved. * 2 9 4 0 0 6 6 9 *...
Need help?
Do you have a question about the C-7030 and is the answer not in the manual?
Questions and answers
HOW DO YOU CONTROL THE VOLUME
The Onkyo C-7030 is a CD player and does not have a built-in volume control. To adjust the volume, you need to use the amplifier or receiver that the C-7030 is connected to. Ensure the correct input source is selected on your amplifier.
This answer is automatically generated