Table of Contents
Advertisement
Quick Links
Compact Disc Player
C-733
Instruction Manual
Thank you for purchasing an Onkyo Compact Disc
Player. Please read this manual thoroughly before
making connections and plugging in the unit.
Following the instructions in this manual will enable
you to obtain optimum performance and listening
enjoyment from your new Compact Disc Player.
Please retain this manual for future reference.
Contents
Introduction .................................... 2
Connections ................................... 8
Operation...................................... 10
Troubleshooting........................... 14
Specifications .............................. 15
E
n
Advertisement
Table of Contents

Related Manuals for Onkyo C-733


Summary of Contents for Onkyo C-733
- Page 1 C-733 Instruction Manual Connections ........8 Operation........10 Thank you for purchasing an Onkyo Compact Disc Troubleshooting......14 Player. Please read this manual thoroughly before making connections and plugging in the unit. Following the instructions in this manual will enable you to obtain optimum performance and listening enjoyment from your new Compact Disc Player.
-
Page 2: Introduction Important Safety Instructions
WARNING: WARNING AVIS TO REDUCE THE RISK OF FIRE OR ELECTRIC RISK OF ELECTRIC SHOCK RISQUE DE CHOC ELECTRIQUE DO NOT OPEN NE PAS OUVRIR SHOCK, DO NOT EXPOSE THIS APPARATUS TO RAIN OR MOISTURE. The lightning flash with arrowhead symbol, within an equilateral triangle, is intended to alert the user to the CAUTION: presence of uninsulated “dangerous voltage”... -
Page 3: Precautions
If water or any other liquid gets leave this unit turned on for two to three hours. By inside this unit, have it checked by your Onkyo this time, the unit will have warmed up and any con- dealer. - Page 4 We, ONKYO EUROPE ELECTRONICS GmbH LIEGNITZERSTRASSE 6, 82194 GROEBENZELL, GERMANY declare in own responsibility, that the ONKYO product described in this instruction manual is in compliance with the corresponding technical standards such as EN60065, EN55013, EN55020 and EN61000-3-2, -3-3. GROEBENZELL, GERMANY I.
-
Page 5: Table Of Contents
, the C-733 must be connected with an cable and an audio cable. In catalogs and on packaging, the letter added to the end of the product name indicates the color of the C-733. Specifications and operation are the same regardless of color. -
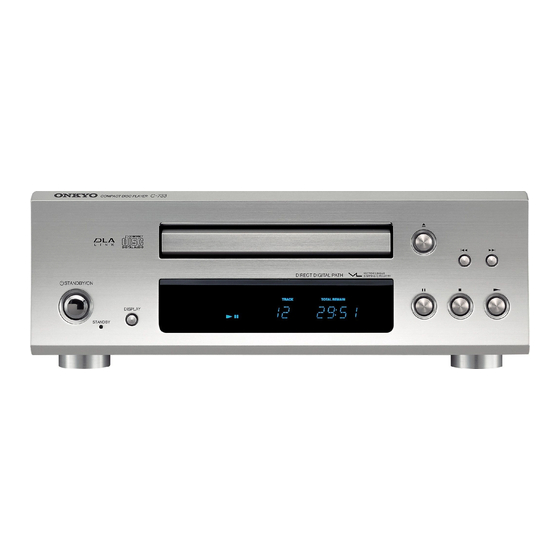
Page 6: Front & Rear Panels
Press to change the displayed information. TRACK indicator (11) STANDBY/ON button (10) Illuminates when a disc is loaded. Press to set the C-733 to On or Standby. RANDOM indicator (12) STANDBY indicator (10) Illuminates during random playback. Lights up when the C-733 is in Standby mode. -
Page 7: Remote Controller
CALL Press to change the displayed information. Using the Remote Controller The C-733 doesn’t have its own remote controller, but it Notes: can be controlled by using the remote controller • The remote controller may not work reliably if the (RC-613S) that’s supplied with the Onkyo A-933... -
Page 8: Connections
See the amplifier’s instruction manual. Auto Power On When you turn on the power or start playback on the C-733, the amplifier will turn on automatically. (The ampli- fier’s POWER switch must be set to ON for this to work.) Direct Change When playback is started on the C-733, the amplifier will automatically select the CD input. -
Page 9: Connecting An Amplifier With An Analog Input
C-733 and the other component. • Use only dedicated cables for connections. • If you use the C-733 with other components from the Onkyo Separate Collection, refer to the instruction manuals supplied with the A-933 as well. -
Page 10: Turning On The C-733
PRESET MUTING PRESET Note: If you’re using the C-733 together with the A-933 ampli- With CDs that contain many tracks, fier from the Onkyo Separate Collection, press the playback may take a while to start. remote controller’s [ON] button once to turn on the... -
Page 11: Displaying The Remaining Time
] button to fast forward or the [ ] button to fast reverse. Remaining track time: Using the C-733: During playback or while playback is paused, press and hold the [ ] button to fast forward or the [ ] button to fast reverse. -
Page 12: Memory Playback
Playing CDs —Continued ■ To Stop Memory Playback Press the Stop [ ] button. STANDBY ■ To Remove the Last Track from the Program Number While memory playback is stopped, press the [CLEAR] buttons 10/0 >10 GROUP button. Each time you press it the last track from the CLEAR CLEAR program will be removed. -
Page 13: Repeat Playback
Some copy-controlled CDs may not conform to the offi- cial CD standard. These special discs may not play properly on the C-733. Don’t load discs that are not audio discs (e.g., CD- ROMs designed for use with computers), as these may... -
Page 14: Troubleshooting
Troubleshooting If you have any trouble using the C-733, look for a solution here. If you can’t resolve the issue yourself, contact your Onkyo dealer. Power Can’t turn on the C-733. • Make sure that the power cord is properly plugged into the wall outlet (page 9). -
Page 15: Specifications
Specifications Power supply: AC 230–240 V, 50 Hz Power consumption: 14.5 W Standby power consumption: 1.0 W Dimensions (W × H × D): 275 × 103 × 304 mm Weight: 4.5 kg Operation condition Temperature, humidity: 5–35 °C, 5–85% (no condensation) Frequency response: 5 Hz–20 kHz SN ratio:... - Page 16 Units 2102-2107, Metroplaza Tower I, 223 Hing Fong Road, Kwai Chung, N.T., HONG KONG Tel: 852-2429-3118 Fax: 852-2428-9039 Printed in Japan http://www.ch.onkyo.com/ I0502-2 SN 29343928A (C) Copyright 2005 ONKYO CORPORATION Japan. All rights reserved. * 2 9 3 4 3 9 2 8 A *...
Need help?
Do you have a question about the C-733 and is the answer not in the manual?
Questions and answers