Table of Contents
Advertisement
Quick Links
Manual CT100 / CT125
INSTALLATION OPERATION MAINTENANCE
FROM SERIAL NO. 83338 TO CURRENT
Serial No.: ------------------------------------------------------
Installation date: -------------------------------------------------
THIS MANUAL MUST BE KEPT ONBOARD AT ALL TIMES
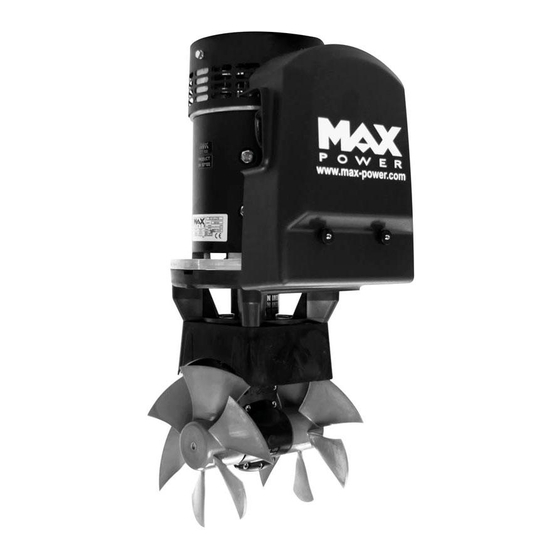
CT100 12V
CT125 24V
With electronic thruster control
Via Philips 5, 20900 Monza (MI), Italy
Tel. +39 039 200 1973-936 - Fax +39 039 2004299
www.max-power.com
www.max-power.com
Last Update: February 2020
E-mail:contact@max-power.com
Advertisement
Table of Contents

Related Manuals for MAX power CT125


Summarization of Contents
1. General Installation Guidelines
Tunnel Position and Waterline
Guidance on acceptable tunnel positions relative to the waterline for optimal performance.
Motor Support and Ventilation
Recommendations for supporting the electric motor and ensuring adequate ventilation for heat dissipation.
Battery Placement and Voltage Loss
Advice on battery placement for minimizing voltage loss and connecting to the thruster.
Flammable Product Storage Warning
Cautionary note against storing flammable products near electrical components.
Drive Leg and Propeller Alignment
Instructions for centering the drive leg in the tunnel and preventing propeller protrusion.
2. Tunnel Installation
Tunnel Marking and Hull Cutting
Steps for determining tunnel position and marking hull for cutting elliptical openings.
Hull Surface Preparation
Instructions for preparing the hull surface around the cut openings for proper lamination.
Tunnel Securing and Lamination
Method for securing the tunnel using fiberglass filler and resin, including layer requirements.
Finishing and Watertight Barrier
Guidance on applying undercoats, sanding, finish coats, and creating a watertight barrier.
3. Motor Support and Drive Leg
Centering and Hole Marking
Instructions for centering the motor support and drive leg and marking holes for fixing screws.
Hole Preparation and Verification
Procedures for cleaning and verifying drilled holes before inserting screws.
Assembly and Alignment Check
Steps for assembling the leg, gasket, and motor support, and checking general alignment.
Sealing and Tightening Procedure
Guidance on applying sealing compound and tightening screws with specified torque.
Composite Drive Leg Specifics
Information on the composite drive leg's pre-filled oil, lack of anodes, and non-disassembly warranty.
4. Electric Motor Installation
Motor and Drive Leg Coupling
Instructions for coupling the electric motor to the drive leg shaft and checking play.
Motor Support Screw Tightening
Procedure for tightening motor support screws with specified torque.
Propeller Rotation and Ventilation
Ensuring propellers turn freely and adequate motor ventilation.
5. Propeller Installation
Propeller Fixing and Safety
Steps for installing propellers, tightening screws, and protecting hands.
Shaft Seal Protection Recommendation
Recommendation to coat shaft seals with silicon grease to prevent calcium deposits.
6. Protection Grids
Performance Considerations
Note that installing protection grids may affect thruster performance.
7. Electrical Installation
Installation Cautions and Quality
Warning about incorrect installation and emphasis on battery/cable quality.
Water Contact and Connection Tightness
Installer's responsibility for water protection and ensuring tight connections.
Battery Isolator Requirement
Essential to install manual and electric battery isolators for the thruster motor power line.
8. Main Power Fuse
Fuse Sizing and Type
Guidance on determining main power fuse sizes based on cable sections and recommended fuse types.
9. Battery Recommendations
Recommended Battery Type
Recommendation for maintenance-free "starting" type batteries with high CCA outputs.
10. Electronic Control Box Installation
Control Box Circuit Protection
Requirement to install a fused circuit breaker/switch for the thruster control box supply.
Control Box Power Cable Fuse
The positive supply cable of the thruster control box must be protected by an 8A fuse.
11. Control Panel and Thruster Functions
Powering On/Off and Delay
Instructions for switching the thruster ON/OFF and explanation of directional thrust time delays.
Overheating and Auto Shutdown
Description of overheating alarms, flashing LED, automatic shutdown, and cooldown period.
Automatic Inactivity Shutdown
Automatic switch-off after thirty minutes of inactivity, with preceding audible alerts.
Power Isolation for Safety
Necessity of installing an electric battery isolator for isolating the thruster motor power circuit.
12. Control Panel Installation
Panel Placement and Protection
Guidance on protecting control panels from elements and placing them in accessible locations.
Sealing and Waterproofing
Importance of correct gasket installation and ensuring panel waterproofing and cable protection.
13. Tests and Measurements
Test Conditions and Prohibitions
Advice on test conditions (boat in water) and prohibition of testing out of water.
Electrical Measurement Points
Recommended points for making electrical measurements to detect voltage drop.
Voltage Drop Analysis
Expected voltage readings and parameters to check if voltage is too low.
14. Operation and Safety
System Activation and Maneuvering
Steps to activate the system and operate the thruster for boat maneuvering.
Momentum and Area Safety
Reminder about boat momentum and caution against using thruster near swimmers or debris.
15. Alarms, Safety, and Maintenance
Overheating Alarm and Shutdown
Description of the thermal switch, buzzer, flashing LED, and automatic shutdown during overheating.
Power Isolation and General Safety
Defines power isolation and prohibits storing flammable products near electrical components.
Regular Maintenance Tasks
Ongoing maintenance includes checking batteries, connections, motor brushes, and drive leg components.
25. Warranty Coverage
Warranty Definitions
Defines key terms related to warranty, such as Authorized Repair Number, Dealer, End User, etc.
Warranty Period
Specifies the warranty period for the equipment, typically two years from the date of purchase.
Warranty Registration Process
Instructions on how to register the purchase to receive extended warranty coverage.
25. Warranty Terms and Procedures
Warranty Terms and Conditions
Outlines the warranty terms for Year 1 and Year 2, including coverage for repairs and replacements.
Warranty Exclusions
Lists specific conditions and damages that are excluded from the warranty coverage.
Procedural Guidelines for Claims
Steps to follow for reporting a problem and contacting dealers or distributors.
Need help?
Do you have a question about the CT125 and is the answer not in the manual?
Questions and answers