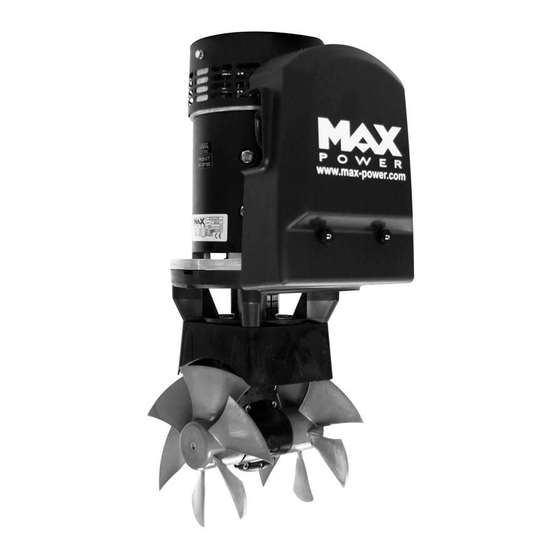
MAX power CT100 Installation Operation & Maintenance

MAX power CT100 Installation Operation & Maintenance

12v/24v with electronic thruster control

Advertisement

Quick Links

Manual CT100 / CT125
INSTALLATION OPERATION MAINTENANCE
FROM SERIAL NO. 83338 TO CURRENT
Serial No.: ------------------------------------------------------
Installation date: -------------------------------------------------
THIS MANUAL MUST BE KEPT ONBOARD AT ALL TIMES
CT100 12V
CT125 24V
With electronic thruster control
Via Philips 5, 20900 Monza (MI), Italy
Tel. +39 039 200 1973-936 - Fax +39 039 2004299
www.max-power.com
www.max-power.com
Last Update: February 2020
E-mail:contact@max-power.com

Advertisement

Table of Contents
loading
Need help?

Need help?

Do you have a question about the CT100 and is the answer not in the manual?

Questions and answers

Subscribe to Our Youtube Channel

Summary of Contents for MAX power CT100

  • Page 1 Manual CT100 / CT125 Last Update: February 2020 CT100 12V CT125 24V With electronic thruster control INSTALLATION OPERATION MAINTENANCE FROM SERIAL NO. 83338 TO CURRENT Serial No.: ------------------------------------------------------ Installation date: ------------------------------------------------- THIS MANUAL MUST BE KEPT ONBOARD AT ALL TIMES Via Philips 5, 20900 Monza (MI), Italy Tel.
  • Page 2: Table Of Contents

    Contents Section Title Page General installation guidelines Tunnel Composite motor support and drive leg Electric Motor Propellers Protection grids Electrical installation Main power fuse Batteries Electronic control box Control panel and thruster control box functions Control panel installation Tests Electrical measurements Operation Alarms or thermal switch-off Safety...
  • Page 3: General Installation Guidelines

    1. GENERAL INSTALLATION GUIDELINES In order to install the thruster in the most efficient position, follow the instructions below:  The minimum acceptable tunnel position is 139 mm below the waterline  The tunnel is ideally positioned when the distance between the waterline and the top of the installed tunnel is 185 mm ...
  • Page 4: Tunnel

    2. TUNNEL Once the final tunnel position has been determined and all dimensions have been checked, mark the centre-point of the tunnel on both sides of the hull and drill holes of 8 –10mm ∅ on either side. Using a metal rod, construct a compass with a 100mm radius. Insert through the holes and trace the ellipses, as shown below.
  • Page 5: Composite Motor Support And Drive Leg

    DO NOT LAMINATE THE AREA OF THE TUNNEL TO WHICH THE ELECTRICAL MOTOR SUPPORT WILL BE FIXED. 3. COMPOSITE MOTOR SUPPORT AND DRIVE LEG The motor support and the drive leg must be centered in the tunnel. Locate and mark the intended position of the holes for the fixing screws and the leg hub. You can use the motor support and the leg’s gasket to mark these holes.
  • Page 6: Electric Motor

    (lightly grease the shaft beforehand). Place the flexible red coupler on the drive leg side coupling, (part n° 8 on the CT100 CT125 – Spare Parts diagram, page 13) Now fit the electric motor onto the motor support and tighten the four 10mm Ø...
  • Page 7: Main Power Fuse

    The performance data of the is measured with an approx. consumption of 680A and 11V for the CT100, or 430A and 22V for the CT125, at the motor’s connections. Please refer to the characteristics given by the manufacturer of the batteries that will be used (see section 9 “Batteries”).
  • Page 8: Control Panel And Thruster Control Box Functions

    Max Power advises the use of an electric battery isolator ref. OPTI3160/3 (12V) OPTI3170/3 (24V). If an electric battery isolator is not used then simply seal-off the two grey wires coming out of the control box.
  • Page 9: Control Panel Installation

    12. CONTROL PANEL INSTALLATION Control panels should be protected from the natural elements while the thruster is not in use. Install the control panel(s) in easily accessible positions, without obstructing the main engine and/or steering controls. When fixing the panel with the stainless steel screws, make sure to install the pre-cut rubber seal, as supplied with the panel, ensuring that it is in the correct place.
  • Page 10: Tests

    13. TESTS Activating the thruster when the boat is out of the water, is not advised under any circumstances. Tests must be carried out with the boat in the water, the battery(ies) charged at 100% and in charge, and the engines running. The maximum continuous operating runtime corresponds to S2-3mn norm.
  • Page 11: Alarms Or Thermal Switch-Off

    16. ALARMS OR THERMAL SWITCH-OFF The thruster's electric motor is fitted with a thermal switch as standard. If the thruster motor overheats the buzzer in the control panel will start beeping and the green LED in the red-push button will flash until the thruster motor has cooled down again. As soon as the overheating alarm sounds (5 intermediate beeps), there are 10 seconds of actual thruster use before the unit automatically shuts down.
  • Page 12: Electrical Installation Diagram

    19. ELECTRICAL INSTALLATION DIAGRAM www.max-power.com...
  • Page 13: Relay And Control Box Connections Diagram

    20. RELAY AND CONTROL BOX CONNECTIONS www.max-power.com...
  • Page 14: Spare Parts Diagram

    21. SPARE PARTS DIAGRAM www.max-power.com...
  • Page 15: Spare Parts List

    313715 enhanced MP085030 313714 Screws MPOP4130 630509 Leg gasket MPOP2060 310254 MPOP5135 312015 Composite leg CT100/125 (includes n° 11, 12, 15) MP088100 35035 Propeller Pin MPOP5221 312053 Propeller Φ185 MPOP8080 35031 Electronic Controller MPOP5701 315308 Fuse holder T2 for CT100...
  • Page 16: Troubleshooting Guide

    23. TROUBLESHOOTING GUIDE Before contacting your nearest Max Power service station, please check the below troubleshooting guide and our online trouble shooting videos: https://www.max-power.com/troubleshooting Problem Check  The control panel does not light Check the 6 wire connector behind the joystick ...
  • Page 17: Warranty Coverage

    The purpose of this document is to set out the terms of warranty cover offered in relation to products purchased by the End User from Max Power or its approved network of resellers. This document will adhere to the following format:-...
  • Page 18 PROBLEM PRIOR TO CONTACTING THE DEALER/INSTALLER Contact your dealer/installer to report the problem. a. If you do not know who this is contact the nearest Max Power distributor b. If you are in foreign waters please contact the nearest Max Power distributor...
  • Page 19: Warranty Form

    Serial No.: 26. WARANTY FORM VERY IMPORTANT: Please complete this form and fax a COPY to Max Power with a copy of the installation invoice or the invoice of the yacht/boat in order for the warranty to come into effect.

This manual is also suitable for:

Ct125

Table of Contents