
Related Manuals for COMAC Vega 65 BT


Summary of Contents for COMAC Vega 65 BT
- Page 1 SCRUBBING MACHINES USE AND MAINTENANCE MANUAL ORIGINAL INSTRUCTION DOC. 10088825 - Ver. AB - 04-2020...
-
Page 3: Table Of Contents
CONTENTS CONTENTS ........................... 3 LOCATING THE MAIN MACHINE COMPONENTS ..............5 GENERAL DESCRIPTION ......................6 GENERAL SAFETY REGULATIONS ........................6 SYMBOLS USED IN THE MANUAL ......................... 6 PURPOSE AND CONTENT OF THE MANUAL ......................7 TARGET GROUP ..............................7 PRESERVATION OF THE USER ..........................7 ON CONSIGNMENT OF THE MACHINE ......................... - Page 4 TAG INSERTION (CFC VERSIONS) ........................26 OVERFLOW DEVICE ............................. 26 AT THE END OF THE WORK ..................... 26 RECOMMENDED MAINTENANCE OPERATIONS ..............27 CLEANING THE SQUEEGEE BODY ........................29 CLEANING THE DEBRIS HOPPER (SWEEPING VERSION) ................29 CLEANING THE BRUSH HEAD BRUSHES (SCRUBBING VERSION) ..............29 CLEANING THE BRUSH HEAD BRUSHES (SWEEPING VERSION) ..............
-
Page 5: Locating The Main Machine Components
LOCATING THE MAIN MACHINE COMPONENTS 12. Liquid vacuum wand kit vacuum tube, SST version (Fig.5). 13. Solution tank quick filling tube (Fig.6). 14. Solution tank filler cap/measuring device inlet (Fig.6). 15. Solution tank level indicator tube (Fig.6). 16. Solution tank level indicator ball (Fig.6). 17. -
Page 6: General Description
GENERAL DESCRIPTION The descriptions contained in this document are not binding. The company therefore reserves the right to make any modifications at any time to elements, details, or accessory supply, as considered necessary for reasons of improvement or manufacturing/commercial requirements. The reproduction, even partial, of the text and drawings contained in this document is prohibited by law. -
Page 7: Purpose And Content Of The Manual
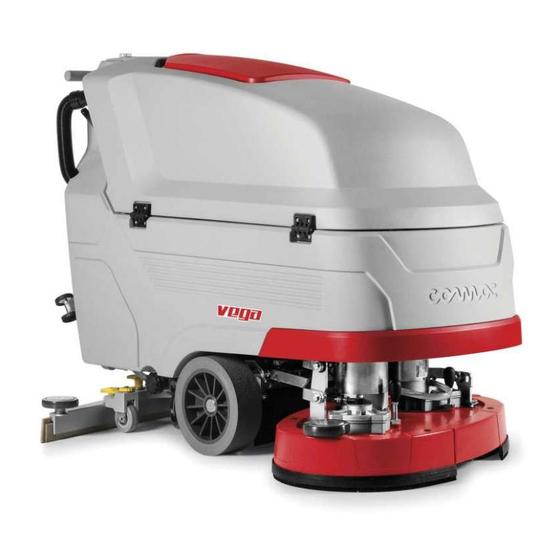
TECHNICAL DESCRIPTION The Vega 2019 is a floor scrubbing machine that is capable of handling a wide variety of floors and types of dirt thanks to the mechanical action of one or two brushes and the chemical action of a water-detergent solution. As it advances, it collects the dirt removed, as well as the detergent solution not absorbed by the flooring itself. -
Page 8: Serial Number Plate
SERIAL NUMBER PLATE The serial number plate is positioned above the electrical system cover carter inside the machine. It indicates the general machine characteristics, in particular the serial number. The serial number is a very important piece of information and should always be provided together with any request for assistance or when purchasing spare parts. -
Page 9: Symbols And Labels Used In The Machine
VEGA VEGA VEGA VEGA VEGA TECHNICAL DATA [KMS] 65 BT 75 BT 85 BT 70 BTo 70 BTo Uncertainty K Hand-arm vibrations [IEC 60335-2-72; IEC 62885-9; ISO 5349-1] <2,5 <2,5 <2,5 <2,5 <2,5 Vibration measurement uncertainty SYMBOLS AND LABELS USED IN THE MACHINE SYMBOLS USED ON THE MACHINE Filter body position symbol: Located on the right-hand side of the machine to indicate the position of the detergent solution tank. -
Page 10: Labels Used On The Machine
LABELS USED ON THE MACHINE Main switch symbol: Used by the control handlebars to indicate the main switch on the machine. Label for detergent solution tap command: Used on the rear right-hand side of the machine to identify the detergent solution tap control lever. - Chiudere il rubinetto a fine lavoro - Turn off the cock when operations are finished - Cierrese el grifo al finalizar el trabajo... -
Page 11: Symbols Used On The Control Panel
SYMBOLS USED ON THE CONTROL PANEL The control screen is divided as follows: 1. Symbol of the reverse movement selector: indicates the switch that enables reverse gear to be activated. 2. Command display: this is a digital display that enables the parameters set on the machine to be viewed during use. -
Page 12: Preparation Of Machine
PREPARATION OF MACHINE... -
Page 13: Handling The Packaged Machine
HANDLING THE PACKAGED MACHINE Gross weight of machine with packaging is: Vega 2019 65 Bt= 000kg; Vega 2019 75 Bt= 000kg; Vega 2019 85 Bt= 000kg; Vega 2019 70 Bto= 000kg; Vega 2019 70 Bts= 000kg. The overall dimensions of the package are: A=000cm B=000cm C=000cm ATTENTION: It is recommended that all the packaging components be kept for any future machine transportation. -
Page 14: How To Move The Machine
INSERTING THE BATTERIES IN THE MACHINE To fit the batteries inside the machine, contact an COMAC assistance centre technician. WARNING: COMAC declines all responsibility for any damage to property or injury persons in the event that the batteries are replaced by an unauthorized technician. -
Page 15: Battery Maintenance And Disposal
For battery maintenance and recharging, respect the instructions provided by the battery manufacturer. When the batteries reach the end of their service life, they must be disconnected by a COMAC assistance centre technician or by a specialised and properly trained worker, and must be subsequently removed from the battery compartment using suitable lifting devices. -
Page 16: Inserting Water System Filter
CAUTION: keep the recovery tank open for the duration of the battery recharging cycle to allow gas fumes to escape. • Once the recharge cycle has been completed, rotate the recovery tank to the maintenance position and disconnect the battery charger's cable from the battery connector. •... -
Page 17: Assembling The Squeegee Body
ASSEMBLING THE SQUEEGEE BODY For packaging reasons, the squeegee body comes disassembled from the machine. In order to mount it on the squeegee support, do the following: 1. Make sure the machine is in a safe condition (read “MACHINE SAFETY”). 2. -
Page 18: Preparing To Work
N.B.: always use low-foam detergent. To avoid the production of foam, put a minimum quantity of antifoam liquid in the recovery tank before starting to clean. Do not use pure acids. ATTENTION: always use detergents whose manufacturer's label indicates their suitability for scrubbing machines. Do not use acid or alkaline products or solvents without this indication. -
Page 19: Starting Work
8. Grip the handle (3) on the right-hand side of the recovery tank and turn the tank until it reaches the work position. 9. Make sure the electronic brake is engaged. If it isn't, turn the lever (4) in the direction of the arrow. The traction gearmotor is located on the rear right-hand side of the machine (Fig.4). -
Page 20: Battery Charge Level Indicator
To start working, do as follows: 1. Carry out all the checks in the paragraph “STARTING WORK”. 2. Turn on the machine and move the main switch to position "I" by turning the key (1) a quarter turn clockwise (Fig.1). 3. -
Page 21: Hour Meter
HOUR METER The machine control panel contains the control display; the upper right-hand area of this shows the total machine usage time (11) (Fig. 4). The figures to the left of the “.” symbol identify the hours, while the figures to the right of the “.” symbol identify the minutes. The flashing hourglass symbol indicates that the hour meter is counting the time the machine is operating. -
Page 22: Drying
N.B.: Remember to fully open the detergent solution flow, turning the lever as far as it will go (7). N.B.: To adjust the flow of detergent solution, see “ADJUSTING THE DETERGENT SOLUTION (versions without CDS system)” or “ADJUSTING THE DETERGENT SOLUTION (versions with CDS system)”. -
Page 23: Eco Mode
ECO MODE This machine has an Eco-Mode function for reducing the noise generated by the vacuum motor, and for reducing the energy used by the machine. To activate or deactivate the Eco-Mode function, proceed as follows. 1. With the machine working, press the button (12) located on the control panel (Fig.4). N.B.: When the Eco-Mode function is active, the word “ECO”... -
Page 24: Reverse Activation - Deactivation
N.B.: Forward speed can be increased by turning the potentiometer's knob (9) clockwise. N.B.: The appliance has two forward speeds. By pushing the dead man's levers (8) (Fig. 7) beyond the first CLICK, the “SLOW” speed is activated; by continuing to push the levers beyond the second CLICK, the “FAST” speed is activated. N.B.: Adjusting a speed, slow or fast, will imply the automatic modification of the other. -
Page 25: Spray Gun Kit
SPRAY GUN KIT On request, the machine can be equipped with the spray gun kit. To use this, proceed as follows: 1. Insert the key (1) into the main switch on the control panel. Set the main switch to "I" (Fig.1). 2. -
Page 26: Tag Insertion (Cfc Versions)
TAG INSERTION (CFC VERSIONS) To activate automatic fleet management data logging (valid for machine versions with CFC), after the screen that enables the machine programming features to be viewed, insert the TAG in the slot (27) on the rear part of the control handlebar (Fig.27). N.B.: if the owner of the TAG just inserted is enabled to use the machine, the screen Fig. -
Page 27: Recommended Maintenance Operations
RECOMMENDED MAINTENANCE OPERATIONS... - Page 28 INTERVAL MACHINE COMPONENTS PROCEDURE Clean the vacuum chamber; the squeegee rubber blades; the vacuum nozzle (see Squeegee “CLEANING THE SQUEEGEE BODY”). Empty the debris hopper and clean inside (see “CLEANING THE DEBRIS HOPPER Debris hopper (SWEEPING VERSION)”). Clean the brushes on the brush head body (see “CLEANING THE BRUSH HEAD BODY BRUSHES (SCRUBBING VERSION)”).
-
Page 29: Cleaning The Squeegee Body
Before carrying out any routine maintenance operations, proceed as follows: 1. Take the machine to the maintenance area. N.B.: the place given over to this operation must comply with current environmental protection regulations. 2. Make sure the machine is in a safe condition (see chapter “MACHINE SAFETY MEASURES”). -
Page 30: Draining The Recovery Tank
DRAINING THE RECOVERY TANK Proceed as follows to empty the recovery tank: 1. Release the recovery tank drainage tube (11) (on the left-hand side of the machine) from the retainers (Fig.11). 2. Bend the end of the drainage tube, so as to create a choke and prevent the contents from coming out, put the tube on the discharge surface, unscrew the cap and gradually release the tube. -
Page 31: Cleaning The Detergent Tank (Cds Versions)
CLEANING THE DETERGENT TANK (CDS VERSIONS) To clean the canister, proceed as follows: 1. Grip the handle (21) on the left-hand side of the recovery tank (Fig.22) and turn the tank as far as it will go. 2. Disconnect the male insert (22) from the female insert (23) on the cap of the detergent canister (Fig.23). N.B.: Before pulling on the male insert, push the lever in the female insert. -
Page 32: Replacing The Brush (Scrubbing Version)
N.B.: The rubber blade can be rotated symmetrically to be used more than once. • Repeat the operations in reverse order to reassemble all the parts. N.B.: Before using the machine, remember to adjust the squeegee body: see the section titled “ADJUSTING THE SQUEEGEE BODY'S RUBBER BLADES”. -
Page 33: Choosing And Using Brushes
MACHINE CODE BRISTLE NOTES 422189 PPL 0.3 LIGHT BLUE DISC BRUSH 422971 PPL 0.6 WHITE DISC BRUSH Vega 2019 422972 PPL 0.9 BLACK DISC BRUSH 65Bt 422981 ABRASIVE GREY DISC BRUSH 422973 PAD HOLDER 414272 PPL 0.3... -
Page 34: Troubleshooting
MACHINE CODE BRISTLE NOTES 442638 RED ABRASIVE PAD 442663 GREEN ABRASIVE PAD Vega 2019 70Bto 442664 BLACK ABRASIVE PAD 443713 WHITE ABRASIVE PAD 449785 PPL 0.3 BLUE CYLINDRICAL BRUSH 448012 PPL 0.6 WHITE CYLINDRICAL BRUSH Vega 2019 70Bts 448013 PPL 0.9... - Page 35 PROBLEM POSSIBLE CAUSE SOLUTION Make sure the squeegee is free of obstructions (read “CLEANING THE SQUEEGEE BODY”). Make sure the vacuum tube is free of obstructions (see “CLEANING THE VACUUM TUBE”). The vacuum unit is obstructed. Make sure the vacuum cap filter is free of obstructions (see “CLEANING THE RECOVERY TANK FILTERS”).
-
Page 36: Ec Declaration Of Conformity
37059 Santa Maria di Zevio (VR) declares under its sole responsibility that the products FLOOR SCRUBBING MACHINES mod. Vega 2019 65Bt; Vega 2019 75Bt; Vega 2019 85Bt; Vega 2019 70Bto; Vega 2019 70Bts comply with the provisions of Directives: • 2006/42/EC: Machinery Directive. - Page 37 37059 Santa Maria di Zevio (VR) declares under its sole responsibility that the products FLOOR SCRUBBING MACHINES mod. Vega 2019 65Bt CB; Vega 2019 75Bt CB; Vega 2019 85Bt CB; Vega 2019 70Bto CB; Vega 2019 70Bts CB comply with the provisions of Directives: •...
- Page 40 COMAC S.p.A. Via Maestri del Lavoro, 13 - 37059 Santa Maria di Zevio - Verona - ITALY Tel. 045 8774222 - Fax 045 8750303 - www.comac.it - com@comac.it...
Need help?
Do you have a question about the Vega 65 BT and is the answer not in the manual?
Questions and answers