Advertisement
Advertisement

Related Manuals for Lilliput BM280-4KS


Summary of Contents for Lilliput BM280-4KS
- Page 1 User Guide...
- Page 2 IMPORTANT SAFETY INSTRUCTIONS The device has been tested for conformance to safety regulations and requirements, and has been certified for international use. However, like all electronic equipment, the device should be used with care. Please read and follow the safety instructions to protect yourself from possible injury and to minimize the risk of damage to the unit.
-
Page 3: Table Of Contents
Contents 1. PRODUCT DESCRIPTION ................3 2. SUN SHADE INSTALLATION ..............6 3. MENU SETTING ..................7 4. ACCESSORIES ..................20 5. PARAMETERS ..................21 6. TROUBLE SHOOTING ................22... -
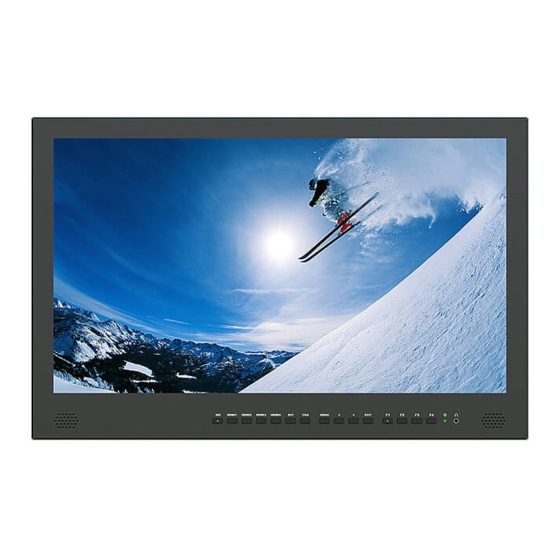
Page 4: Product Description
1. PRODUCT DESCRIPTION Front 1. Speaker 2. SDI Signal switch to SDI mode when light on. 3. HDMI 1 ~ 4 Signal switch to HDMI mode when light on. 4. DVI Signal switch to DVI mode when light on. 5. VGA Signal switch to VGA mode when light on. - Page 5 8. ► Select option in the menu. Increase the option value. Before enter the menu, single press to activate volume, press again to increase the volume. 9. EXIT Back or exit. 10. F1~F4 User definable buttons Default function options: F1:Color Space F2:Display Mode F3:Safety Marker F4:Aspect...
- Page 6 Back 1. Handle (Only available for BM230/BM280) 2. VESA 75×75 & VESA 100×100 mounting port 3. USB port 4. TALLY port 5. VGA input port 6. DVI input port 7. HDMI input port×4。 HDMI 1 & HDMI 2 : HDMI2.0, support 4K 60Hz HDMI 3 &...
-
Page 7: Sun Shade Installation
2. SUN SHADE INSTALLATION 1. Put the sun shade on the suitcase, and match the magnets on both sides. 2. As shown below after finished. -
Page 8: Menu Setting
3. MENU SETTING Please check whether the device is connected well or not. 3-1. F1~F4 user definable shortcut buttons Long keep pressing any one of the 4 buttons for 3-5 seconds to activate shortcut menu setting. Option selected will be highlighted as white. option will be highlighted as yellow, unavailable option will be highlighted as gray. - Page 9 Default options: F1:Color Space F2:Display Mode F3:Safety Marker F4:Aspect 3-2. ◄ / ► Buttons Operation Under non menu screen, press "◄/►" buttons to activate volume bar, Use "◄ / ►" buttons to select the desired option. Press the "MENU" button to select Volume, Brightness, Contrast, Saturation, Hue, Sharpness.
- Page 10 Brightness 0~100 Contrast 0~100 Saturation 0~100 0~100 Sharpness Color Space Native/Rec.709/User1~User3 Off/Auto/HDR10 Picture Backlight Mode Standard/Outdoor/User Backlight 0~100 Temperature 9300/7500/6500/5800/User Red Gain 0~256 Note: Available only under Green Gain 0~256 “User” mode. Blue Gain 0~256 Brightness Adjust the general brightness of the LCD. For example, if it uses outside in bright conditions, increase the LCD brightness to make it easier to view.
- Page 11 User2.cube or User3.cube. Copy the User-defined Lut table to flash disk and insert it to the device, the screen displays a prompt message to show whether to upgrade. Select upgrade, the device will be loading automatically in a black screen and then restart after finishing loading. ...
- Page 12 color temperature is 6500K. Note: Only available under "User" mode to adjust Color Gain. 3-3-2.Function Center Marker ON, OFF Safety Marker OFF, 95%, 93%, 90%, 88%, 85%, 80% Aspect Marker OFF, Full, 17:9, 16:9, 4:3, 1.85:1, 2.35:1 Aspect Full ,17:9, 16:9, 4:3, 1.85:1, 2.35:1 Underscan ON, OFF Pixel To Pixel...
- Page 13 Switch aspect ratio setting among from [Full][17:9][16:9][4:3][1.85:1][2.35:1]. For example: In [Full] mode, images are scaled to fill the entire screen. In [4:3] mode, images are scaled up or down to fill the maximum 4:3 portion of the screen. In [16:9] mode, images are scaled to fill the entire screen if the device aspect is 16:9.
- Page 14 We have included a chart in this section that shows how the colors correspond to specific tonal values. Exposure & Exposure Level The exposure feature helps the user achieve optimum exposure by displaying diagonal lines over areas of the image that exceed the setting exposure level. The exposure level can be set to 0~100.
- Page 15 Histogram The histogram makes users view visually the exposure of whole and each RGM channels. It has the full contrast rang of video for easy color correction during post production. NOTE: Only available when under SDI mode. Time Code The Time Code supports Longitudinal time code (LTC) and Vertical interval time code (VITC).
- Page 16 Display Mode 1P,2P LR,2P TB,2P PIP,4P Display Mode The monitor presets 1P, 2P LR, 2P TB, 2P PIP, 4P five display modes. This function can be work with Select Region function to meet user’s requirement. For example: In 1P mode, images are scaled to fill the entire screen. In 2P LR, display two different signals on the left and right sides.
- Page 17 3-3-5. Select Region Unavailable Display mode 1P Left Side/Right Side/Full Display mode 2P LR Select Region Top Side/Bottom Side/Full Display mode 2P TB Main/Sub/Full Display mode 2P PIP 1P In/1P Out/2P In/2P Out/3P Display mode 4P In/3P Out/4P In/4P Out/4P full Note: This Menu is enabled for audio source selection.
- Page 18 3-3-7. Audio Volume 0~100 NOTE: Only available Level Meter OFF/ON Audio when under SDI mode Audio Analog/Digital region 1~4 Source Digital region 2~4 is only available under multi-displays mode and must activate the corresponding Region under Select Region function at the same time.
- Page 19 3-3-9. System Reset Press to confirm after selected. Menu Time 10~60s OSD H Position 0~100 (To set menu display area) OSD V Position 0~100 (To set menu display area) Language English, Chinese System Transparency 0~255 (To set menu transparency) Color Calibration Off/On Rotate 0°, 90°, 270°...
- Page 20 3-3-10. Information To display current information. Information...
-
Page 21: Accessories
4. ACCESSORIES 1. Folding sun shade cover 1 piece 2. TALLY connector (in bulk) 1 piece 3. V-mount or Anton Bauer mounts Power cable 1 piece 4. V-mount or Anton Bauer mount 1piece 5. Manual 1 copy 6. Carry-on suitcase 1 piece 7. -
Page 22: Parameters
5. PARAMETERS 15.6” 8bit IPS 23.8” IPS 28” IPS Display Screen Physical 3840×2160 3840×2160 3840×2160 Resolution Aspect Ratio 16:9 16:9 16:9 Brightness 330cd/㎡ 300cd/㎡ 300cd/㎡ Contrast 1000: 1 1000: 1 1000: 1 Viewing Angle 176° / 176° (H/V) 178° / 178° (H/V) 170°... -
Page 23: Trouble Shooting
6. TROUBLE SHOOTING 1. Only black-and-white display. Check whether the color saturation is properly setup or not. 2. Power on but no pictures. Check whether the cables of HDMI, VGA,DVI and 3G-SDI are correctly connected or not. Please use the standard power adapter coming with the product package. - Page 24 It can be transformed by using Lut Converter (V1.3.30). 2-1. Activate Lut Converter One individual Product ID for one computer. Please send the ID number to Lilliput to get an Enter Key. Then the computer gets the permission of Lilliput Lut Converter after inputting the Enter Key.
- Page 25 2-3. Click Input File, then select *LUT 2-4. Click Output File, and then select the file name as required format. Such as: Rec709.cube, 3D Size: 17 Data Order:RGB, Table Order:RGB.
- Page 26 Please note: The format which shown in Red Box above should be selected to RGB. 2-5. Click Generate Lut button to finish the transform. 3. USB Loading The USB flash disk must be formatted before using to make sure that there are no other files in the root directory.
- Page 27 Before loading After loading...
Need help?
Do you have a question about the BM280-4KS and is the answer not in the manual?
Questions and answers