Advertisement
Quick Links
Advertisement

Related Manuals for Geeek T812


Summarization of Contents
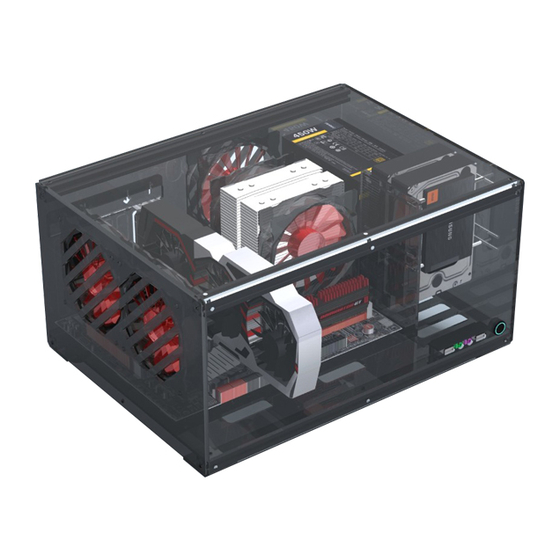
GEEEK T801/T810/T812 Installation Guide
Install the 10mm Standoffs on the Middle Plate
Installs 10mm standoffs onto the middle plate of the PC case.
Install the Front I/O Module
Attaches the front I/O module to the PC case assembly.
Install the Middle Plate
Secures the middle plate to the case structure.
Install the Rear Panel
Attaches the rear panel to the main chassis.
Install the Fan on the Rear Panel
Mounts a fan onto the rear panel of the case.
Install the Power Supply
Mounts the power supply unit (PSU) into the case.
Install the Motherboard
Installs the motherboard onto the standoffs within the case.
Install the GPU Card
Installs the graphics processing unit (GPU) into the motherboard slot.
Secure the GPU Card
Secures the GPU card using appropriate screws.
Install the Aluminum Frame on the Rear Panel
Attaches an aluminum frame component to the rear panel.
Install the Fan on the Left Panel
Mounts fans onto the left side panel of the case.
Install the Side Panels
Attaches the left and right side panels to the case.
Install the HDD
Installs Hard Disk Drives (HDDs) into the designated bays.
Install the Power Switch
Installs the front panel power switch.
Install the Front Panel
Attaches the main front panel to the case.
Install the Bottom Cover
Secures the bottom cover and foot pads to the case.
Install the Top Panel
Attaches the top panel to complete the case assembly.
Overview of GEEEK PC Case Components
Component Identification
Identifies key components of the GEEEK PC case, including panels, frames, and brackets.
SCREWS LIST and Hardware Identification
Hardware Types and Usage
Lists and describes various screws, standoffs, and nuts used in the installation process.
Need help?
Do you have a question about the T812 and is the answer not in the manual?
Questions and answers