Table of Contents
Advertisement
Quick Links
VT-H Series
4, 8, and 16 Channel Digital Video
Recorder with H.264 Compression
• 4, 8 or 16 Video Inputs with 1 BNC & 1 VGA Outputs
• H.264 Compression
• Supports both Dynamic and Static IP Addresses
• Up to 120 IPS Recording / Live Display
• Remote Viewing over the Internet or LAN
• Supports one internal SATA Hard Drive
• 250GB to 1TB Internal Storage Options
• Quadplex operation enabling simultaneous recording, playback,
networking, and backup
• 4 Alarm Inputs / 1 Relay Out
• Control locally via Included IR Remote
• Backup via Ethernet or USB
Advertisement
Table of Contents

Related Manuals for Vitek VT-H


Summary of Contents for Vitek VT-H
- Page 1 VT-H Series 4, 8, and 16 Channel Digital Video Recorder with H.264 Compression • 4, 8 or 16 Video Inputs with 1 BNC & 1 VGA Outputs • H.264 Compression • Supports both Dynamic and Static IP Addresses • Up to 120 IPS Recording / Live Display •...
-
Page 2: Safety Precautions
VT-H Series SAFETY PRECAUTIONS EXPLANATION OF SYMBOLS This symbol is intended to alert the user to the presence important operation maintenance (servicing) instructions in the literature accompanying This symbol is intended to alert the user to the presence of unprotected “dangerous voltage” within the product’s enclosure that may be strong enough to... - Page 3 VT-H Series Do not place any foreign objects inside the unit. Do not place a container holding water or other liquids above the unit when it is connected to power. Do not allow the unit to get wet. Do not use during thunder/thunder storms unless used with an uninterruptable power supply (UPS).
-
Page 4: Main Features
VT-H Series CAUTION Make sure the cable is connected properly to prevent damage to the cable. Main features H.264 Video compression QUADPLEX operation enabling simultaneous recording, playback, networking, and backup. Instant and convenient data backup & firmware upgrade using USB flash drive... - Page 5 VT-H Series Motion detection record Free Dynamic DNS System components and Installation Requirements for installation and safety This chapter is for the requirements for safe installation and use. This kit should be installed on a flat table or in a rack.
- Page 6 CAUTION The HDD that is installed in DVR can be replaced or upgraded by and authorized VITEK Repair Center. Warranty will be void if unit is opened by unauthorized personnel. Components The package contains the main unit and its components as specified below.
-
Page 7: Specifications
VT-H Series Manual SPECIFICATIONS ITEM VT-H40 (4CH) VT-H80 (8CH) VT-H160 (16CH) Input Channel, Input Level 4CH, Composite 8CH, Composite 16CH, Composite Signal Format NTSC/PAL Video Video Loss Check Output Main Monitor Output 1 CH BNC, 1CH VGA: Selectable Signal Format NTSC/PAL &... - Page 8 VT-H Series Multi-channels 2, 4 Search Mode Timeline, Event, Archive, Log Interface Type Serial ATA I Capacity of 1 HDD Internal HDD Storage Number File system NaFS USB Flash drive Video & Still Image Backup Network Video & Still Image...
-
Page 9: Table Of Contents
VT-H Series INDEX 1. NAME & FUNCTION ....................10 1-1. Front panel .....................10 1-2. Remote controller ..................11 1-3. Rear panel and connection ................12 1-3-1. Basic connections ..................12 2. SETTING UP THE DVR....................15 2-1. Setup - Main Screen ..................15 2-2. Setup – Live Mode..................17 2-3. - Page 10 VT-H Series 2-6. Storage ......................27 3. LIVE & SEARCH ......................29 3-1. Live Window ....................29 3-2. SEARCH window .....................30 3-2-1. EVENT Search......................31 3-2-2. TIME LINE Search...................... 32 3-2-3. GO TO .......................... 33 3-2-4. GO FIRST........................34 3-2-5. GO LAST........................34 3-2-6.
-
Page 11: Name & Function
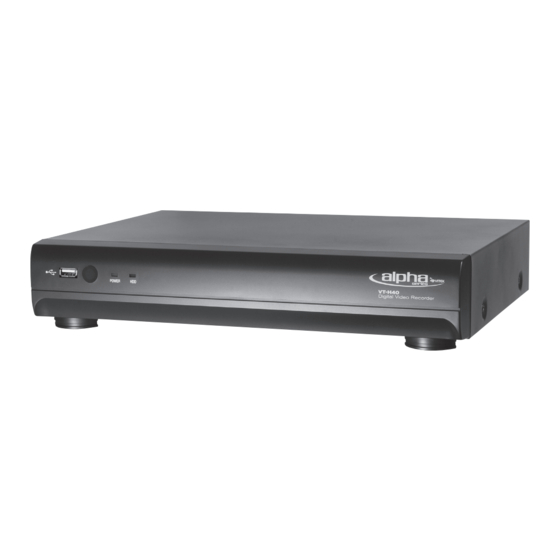
VT-H Series 1. NAME & FUNCTION 1-1. Front panel Table 1.1. Front LED and USB Port Name Description LED light is on when power is applied to the system. POWER LED light is on when the system is recording video data. -
Page 12: Remote Controller
VT-H Series 1-2. Remote controller ID: When a remote control ID number is set in DVR, press it before number. REC: To start and stop manual recording. Number: To select channel (1, 2, 3, & 4) or to enter DVR ID number. -
Page 13: Rear Panel And Connection
VT-H Series CAUTION Do not power this system on before all the connections are completed. Leave power disconnected. Make sure all the connections are properly. Faulty connection may result in the system being damaged. After all connections are made, insert DC power plug. - Page 14 VT-H Series 1-3-2. Network Connections • LAN Connection – Using cross cable, without switching hub Connect to the system directly, using a cross type network cable Cross cable • LAN Connection – Using a switching hub Connect to the system, using a hub (Switching hub) and an Ethernet...
- Page 15 VT-H Series 1-3-3. Sensor and alarm connections SENSOR INPUT: Connect two signal lines of sensor (infrared ray sensor, heat perception sensor, magnetic sensor) to the desired sensor number. NOTICE SENSOR inputs need dry contact only. Do not input any electric signal.
-
Page 16: Setting Up The Dvr
VT-H Series 2. Setting up the DVR The following sections detail the initial setup of the DVR 2-1. Setup - Main Screen When you press the SETUP button, the DVR will ask for a password. The default password is 1111, which can be entered by pressing the up button ) 4 times and then pressing the SEL button. - Page 17 VT-H Series SETUP LIVE SEQUENCE SEQ-DWEL TIME EVENT BEEP OSD CONTRAST CHANNEL DISPLAY, SEQ LIST, BRIGHTNESS, CONTRAST, HUE, SATURATION VGA SCREEN MODE ERROR ALARM RECORD RESOLUTION CHANNEL Frame rate, Quality, Recording, Motion zone, Motion sensitivity, Sensor type, Pre-Record, Post-Event Record, Alarm, Alarm Duration,...
-
Page 18: Setup - Live Mode
VT-H Series 2-2. Setup – Live Mode Table 2.2.1. Menu items in LIVE mode setup Item Description Enable/disable on-screen-display. Enable/disable sequential display of video channels in SEQUENCE full screen mode Dwell time for each cannel display in sequential display SEQ-DWELL... -
Page 19: Setup - Recording Mode
VT-H Series 2-3. Setup – Recording Mode Table 2.3.1. Menu items in Recording mode setup Menu item Description Set resolution to either RESOLUTION 704x480(NTSC)/704X576(PAL) 352x240(NTSC)/352X288(PAL). Select the channel for applying the following settings. CHANNEL Set the frame rate for the specified channel. The sum... -
Page 20: Motion Zones
VT-H Series Figure 2.3.1. Recording mode setup screen 2-3-1. Motion Zones By selecting Partial Zone in the Motion Zone menu, users can set-up the motion sensing zones in the screen shown in figure 3.3.2. Move around each rectangular zone using 4 direction key buttons and press SEL button to include the rectangular region as part of the motion sensing zone. -
Page 21: Recording Schedules
VT-H Series 2-3-2. Recording Schedules To set up a recording schedule, select SCHEDULE in the RECORD menu. Use the arrow buttons to navigate through the items and set the recording. [ALL]: Selected recording mode using the SEL button is applied to the entire time zone and all channels. -
Page 22: System
VT-H Series 2-4. System Table 2.4.1. Menu items in System Setup screen Item Description The name of the system. Press the SEL button and move DVR ID through the position for each alphanumeric character by pressing the LEFT and RIGHT buttons. UP/DOWN buttons are used to change character for each location. - Page 23 VT-H Series (MM/DD/HH) field to set the stop time of DLS by using UP or DOWN button. CAUTION: -DLS can’t start from 23:00 -DLS can’t be applied, if the date of BEGIN and END is same. Figure 2.4.1. System setup screen Figure 2.4.2.
-
Page 24: Network
VT-H Series Figure 2.4.4. Date & Time setup screen. 2-5. Network Set up your network parameters on the Network Setup screen. Table 2.5.1. Menu items in Network Setup screen Item Description Port number (Default: 5445) PORT Enable/Disable remote access through client software. -
Page 25: Ports
VT-H Series changed, the DDNS service cannot be used. Figure 2.5.1. Network setup screen 2-5-1. Ports When you connect one or more DVRs to a local network through a Router, each DVR must have a unique TCP port number to access it from outside the LAN. -
Page 26: Network Types
VT-H Series 2-5-2. Network types 2-5-2-1. LAN 1. Fixed IP assigned by a Network Administrator. (Contact your network administrator) 2. Router/Modem: In a local network environment, an IP address is assigned to the DVR by either a Router or Modem. If an IP address is provided by a router, either the DMZ function or Port Forwarding must be enabled (on the router) to access the DVR from outside of the LAN. -
Page 27: Adsl (Pppoe)
VT-H Series network settings (Server/Router) are not accessible, when the DVR is directly connected to the internet without the use of a Router or Server, or when the connection uses a dynamic IP method (not Fixed or Static). Figure 2.5.3. Network setup screen - DHCP 2-5-2-3. -
Page 28: Storage
VT-H Series Table 2.5.3. ADSL Item Description The user ID for ADSL connection The password for ADSL connection PASSWORD 2-6. Storage User can set recording mode on the hard disk drive (HDD) or initiate formatting of the hard disk drive. - Page 29 VT-H Series Figure 2.6.1. Storage setup screen Figure 2.6.2. Storage setup –USB UPGRADE...
-
Page 30: Live & Search
VT-H Series Figure 2.6.3. Storage setup – save & load setup from a usb device 3. LIVE & SEARCH 3-1. Live Window In the Live window, video inputs from the cameras are displayed on the configuration of the live setup. Figure 4.1.1 shows the layout of the live screen. -
Page 31: Search Window
VT-H Series Indicates that there is no video signal input present (Loss of Video) Table 3.1.2. Button functions of remote controller in Live window Button Description Select channel to be displayed in full screen mode. Switch between full screen and quad display mode. -
Page 32: Event Search
VT-H Series Figure 3.2.1. Search window 3-2-1. EVENT Search The Event Search window is used to find stored video. Three categories of search filters can be applied: DATE, CHANNEL and TYPE. Press SEL to select a value and move down to the next category. Use the UP arrow button to move up to the categories you have previously entered. -
Page 33: Time Line Search
VT-H Series Figure 3.2.2. Event search screen 3-2-2. TIME LINE Search The TIME-LINE search window is used to find the stored video by using the time line bar. 1. Select the date of the video to begin searching by using the LEFT, RIGHT, UP and DOWN buttons to navigate through the days. -
Page 34: Go To
VT-H Series arrow buttons. 3. Once you select the channel, use the LEFT / F/ADV or RIGHT/ F/REW arrow buttons to move the time line select bar (blue) to the point where you wish to start playing the video clip. -
Page 35: Go First
VT-H Series 3-2-4. GO FIRST You can access the first or earliest data which has been recorded into the HDD disk by pressing this menu. 3-2-5. GO LAST You can access the last or most recent data which has been recorded into the HDD disk by pressing this menu. -
Page 36: Playback Mode
VT-H Series Figure 3.2.7. Archive search screen 3-3. Playback mode During the playback of a recorded event, the mode changes from SEARCH to PLAY. While in PLAY mode, you may return to the SEARCH LIST by pressing the ESC button. Playback will start in quad mode with channel 1 highlighted by default. -
Page 37: Archiving And Backup
VT-H Series Jump/Step forward –Playback position moves 60 seconds forward. Press to fast forward the footage at 1x, 2x, and 4x speeds. Playback speed is indicated as +1X, +2X, and +4X for normal, twice, and 4 times of the regular speed at the bottom right of the screen. -
Page 38: Backup Still Images Or Videos On Usb Memory Stick
VT-H Series Figure 4.1.2. Archive screen in Playback mode 4-2. Backup still images or videos on USB memory stick 1. To begin transferring stored image or video into a USB memory stick, connect a USB memory stick to the front panel drive. -
Page 39: Playing Backup File
VT-H Series Figure 4.2.1.Archive search screen 3. Press the SEL button to retrieve lists of archived images or video. 4. Select and display one of the files on the screen in the archived list by using the UP or DOWN button. -
Page 40: Network Access Using The Network Viewer
VT-H Series 5. Network access using the Network Viewer The DVR provides a live remote monitoring feature. Remote monitoring requires installation of the network viewer on your PC. NOTICE In a high bandwidth network, a maximum of four users can access one DVR simultaneously. - Page 41 VT-H Series 4. Select the program folder and click 5. The setup status screen. “Next”. 1. Once installation is complete, a “UMS Client” icon will be on the desktop.
-
Page 42: Live Monitoring Mode And Functions
VT-H Series 5-3. Live monitoring mode and functions. Button Function Description Displays the current date DATE & TIME and time. CONNECT/DISCONNECT Connect/disconnect network connection.. Switches the live mode to SEARCH search mode. Select channel DISPLAY MODE screen display mode. - Page 43 VT-H Series Control PAN/TILT/ZOOM/ PAN/TILT/ZOOM/FOCUS FOCUS features on the remote camera. Capture a still image from CAPTURE live screen. Play/pause live video. PLAY/PAUSE ON/OFF button ALARM the alarm output of the DVR. When an alarm of the DVR is output, this button becomes Red.
-
Page 44: Bi Directional Audio
VT-H Series multiple cameras simultaneously. • Full screen display - Click the maximize button to display only screen and hidden the operation panel. Image capture of live screen Still-image of live screen can be captured and saved as BMP or JPEG file. -
Page 45: Remote Search Mode And Functions
VT-H Series 5-5. Remote search mode and functions Button Function Description Displays the recording time of the DATE & TIME data selected on the time bar at bottom main user interface. Disconnect network connection. DISCONNECT Switches the search mode to live LIVE mode. - Page 46 VT-H Series calendar shows dates with SEARCH recorded video in a light blue and CALENDAR the selected date in dark blue. The timeline shows recorded data in TIMELINE BAR dark blue on the bar. The playback buttons. PLAYBACK BUTTON Select a channel and screen display DISPLAY mode.
- Page 47 VT-H Series Backup of video on the remote DVR Video recorded on the remote DVR can be backed up on the PC HDD as AVI format. 1. Connect the network to the remote DVR and play the video recorded in the remote DVR.
-
Page 48: Pc System Configuration
VT-H Series Channel: Shows backup channel.. 5-6. PC System configuration Click the SETUP button. Then the Setup dialog is displayed. Setting General Set security options, save path, and Automatic reconnection. Security Option: Set a password for security options. When you access... - Page 49 VT-H Series Save Path: Specify the location to record for backup and still image capture. Automatic reconnection: If a user selects this function, the client S/W will automatically try to connect to the previously connected IP address if the network connection is lost.
- Page 50 VT-H Series Setting Record Set the recording conditions and select channels to record. Select the local disk to use and the amount of disk space you want to allow the program to use for recording. Setting Video...
-
Page 51: Network - By A Web-Browser Viewer
VT-H Series Set the video screen. Setting Language Select the language of the network client viewer. 6. Network – By a web-browser viewer The DVR provides a live remote monitoring feature by web-browser viewer. 1. Check the IP address of the DVR from SETUP>SYSTEM>DESCRIPTION>IP ADDRESS. - Page 52 VT-H Series 3. Click the bar at the top of the web browser to install the WebViewer. 4. Click “Install” to download ActiveX control. 5. Web Browser Viewer is displayed as below. 6. Click the CONNECT button on the Left upper corner of the web- viewer.
- Page 53 VT-H Series Port: Input Port number (The number sets on SETUP>NETWORK>PORT) Password: Input Password (The number sets on SETUP>SYSTEM>NETWORK PASSWORD 7. Then the cameras connected to the DVR are displayed on the screen.
-
Page 54: Appendix: How To Connect To A Network
VT-H Series APPENDIX: How to connect to a network A. How to set the IP address of the DVR and open the TCP port of the router? Connect network cable between DVR and Router or ADSL modem. Default network settings on DVR are... - Page 55 VT-H Series Open your web browser. Enter the router IP address in the address bar (The router IP address is unique to the brand and model.), click GO. admin is Port Range Forwarding 8. Enter each field. Application: Enter a description of the DVR (Example: store1)
-
Page 56: How To Access The Dvr From Remote Pc
VT-H Series You can learn how to port forward many kinds of Routers from the below site. http://www.portforward.com/english/routers/port_forwarding/routerindex.htm B. How to access the DVR from Remote PC? • LAN Connection – Using a switching hub Connect to the system, using a hub (Switching hub) and an Ethernet... - Page 57 VT-H Series • Internet (ADSL) Connection using DDNS Connect to the system, using a Router or ADSL modem and an Ethernet cable (10BASE-T/100BASE-TX CAT 5 LAN cable) Go to SETUP>NETWORK. Set NETWORK TYPE as DHCP and DDNS SERVER as ON. And make sure that DDNS SERVER NAME is vitekddns1.com...
- Page 58 VT-H Series Domain Name: Input Domain Name for your DVR system (Note. Input only Domain Name and never input “vitekddns1.com”.) 5. Click the DUPLICATION CHECK button to see if the domain name is available. 6. If you see the screen “You can use the Domain name you entered” then click RETURN and click the REGISTER button to complete the registration.
- Page 59 Domain “You pantalla mira disponible. está dominio información observe CHECK DUPLICATION Click “vitekddns1.com.”) ingrese nunca DOMINIO NOMBRE únicamente Ingrese (Nota. para dominio nombre Ingrese Name: Domain espacios. 43000700XXX.) (Ejemplo. serie número Ingrese Number: Serial Series VT-H...
- Page 60 5445 port abra Router Setup menú vitekddns1.com debe SERVER DDNS NOMBRE asegúrese como SERVER DDNS DHCP como TYPE NETWORK Configure SETUP>NETWORK. cable) (10BASE-T/100BASE-TX Ethernet cable modem ADSL router usando sistema Conéctese • DDNS utilizando Conexión (ADSL) Internet Series VT-H...
- Page 61 Acceso capítulo (Vaya paquete. suplido network software client Corra Router cable) (10BASE-T/100BASE-TX conexión cable hub) (Switching usando sistema Conecte • switching Utilizando – Conección remota? desde accedo ¿Como http://www.portforward.com/english/routers/port_forwarding/routerindex.htm página. siguiente router otros mucho puertos redirigir aprender podrá Series VT-H...
- Page 62 5445) (Ejemplo: continuación necesita Puerto número primer Ingrese Start: store1) (Ejemplo: descripción Ingrese Application: campo. cada Ingrese Forwarding admin ñ definido está “GO” click haga modelo) banda única dirección dirección barra dirección Ingrese browser. dirección barra Abra Series VT-H...
- Page 63 Mask Subnet Gateway dirección encontrar router, mismo conectado Desde • DHCP Network • Port • 5445 Port: son: configurar Network valores modem. ADSL Router entre cable network Connect Router? Puerto abrir dirección configurar ¿Cómo network conectar Como APENDICE: Series VT-H...
- Page 64 Cuando PASSWORD SETUP>SYSTEM>NETWORK configure contraseña Ingrese Password: SETUP>NETWORK>PORT) configura numero Puerto numero Ingresar Port: Series VT-H...
- Page 65 Ingrese http://www.vitekddns1.com), pre-registro nombre dirección Ingrese visualizara. Connect ventana Cuando web-viewer. izquierda superior esquina CONNECT botón click Haga imagen como visualizado será Browser control. ActiveX baje “Install” Presione WebViewer. programa instalación empezar para pantalla superior parte “Click” Haga Series VT-H...
- Page 66 Ingrese ADDRESS. SETUP>SYSTEM>DESCRIPTION>IP desde dirección Ingrese viewer. web-browser través remota, ubicación desde vivo monitoreo característica tiene Browser visualizador – Network viewer. client network idioma Seleccione idioma Configuración video. visualización pantalla Configure Series VT-H...
- Page 67 Video Configuración grabación. proceder para necesario espacio cantidad utilizado local disco Selecciona almacenados. canales selecciona grabación condiciones Configura grabación Configuración Series VT-H...
- Page 68 Display perdida. conexión dirección utilizando conectarse intentar automáticamente puede usuario función, esta selecciona usuario reconnection: Automatic imagen. capturar puede almacenado grabación lugar Especifica Path: Save contraseña. ingresar necesitara seleccionadas, opciones Series VT-H...
- Page 69 Seleccione seguridad) (Opción Option: Security automática. conexión guardan donde ruta seguridad, opciones Configure general Configuración Configuración dialogo cuadro visualizará SETUP. click Haga sistema Configuración 5-6. almacenado. canal Muestra Channel: registra. seguridad copia archive carpeta Muestra path: File Series VT-H...
- Page 70 Desplácese respaldo.. proceso empezar para tiempo escala entre Desplácese remoto. grabado video reproduzca network vía unidad Conéctese AVI. formato usando duro disco remotamente almacenarse puede video remoto video Backup Series VT-H...
- Page 71 Video remoto. desde video reproducción Búsqueda MODE visualizarse DISPLAY pantalla canal Selecciona BUTTON PLAYBACK reproducción Botones obscuro azul almacenados datos TIMELINE muestra tiempo barra oscuro. azul seleccionada fecha CALENDAR claro azul almacenado video SEARCH fechas muestra calendario Series VT-H...
- Page 72 CAPTURE modo desde imagen Captura vivo. modo LIVE búsqueda modo Cambio DISCONNECT network Desconección usuario. interface inferior parte tiempo barra seleccionados datos grabación TIME & DATE tiempo Visualización Description Function Button Fuciones Remota Búsqueda Modo 5-5. Series VT-H...
- Page 73 Cuando capturado. canal click Haga JPEG. extensión archivo almacenada vivo, pantalla modo capturada puede imagen vivo pantalla modo imagen Capturar operaciones. panel ocultar pantalla únicamente visualizar para maximización • botón Click Haga – completa Pantalla Visualización Series VT-H...
- Page 74 USAGE viewer. network configuración menú Visualización SETUP rojo. color pone botón desconectada alarma Cuando DVR. salida alarma on/off botón ALARM video. parar Reproducir PLAY/PAUSE vivo modo imagen Captura CAPTURE remota cámara PAN/TILT/ZOOM/FOCUS FOCUS características Control PAN/TILT/ZOOM/ Series VT-H...
- Page 75 Seleccione MODE DISPLAY Búsqueda. modo vivo modo Cambio SEARCH network conexión Conectar/Desconectar CONNECT/DISCONNECT actual. hora fecha Visualización TIME & DATE Description Function Button funciones. vivo monitoreo Modo 5-3. Series VT-H...
- Page 76 2000, Windows O/S: • 1024x768 Resolución: • recomendable.) mayor (64MB 16MB memoria: • recomendable.) mayor (512MB 256MB Memoria: • mayor 1.2Ghz Pentium Intel CPU: Mínimos Requerimientos 5-1. vez. usuario acceso recomendable banda ancho bajo redes simultáneamente. accedes pueden Series VT-H...
- Page 77 Título SMI: Archivo video. archive exclusive Formato DVR: Archivo USB. dispositivo copiados serán archivos Tres USB. memoria dispositivo clip video adjunto automáticamente copiarse para Software video). exclusivo (Reproductor Reproductor reproducido puede formato video): exclusivo (Formato Series VT-H...
- Page 78 USB. almacenamiento dispositivo datos transferencia efectuará ARCH tecla oprimir DOWN teclas utilizando pantalla lista archivos coloque Seleccione video. imagines archivos lista recuperar para seleccionar botón Presione archivo búsqueda Pantalla 5.2.1. Ilustración Series VT-H...
- Page 79 Archivo Pantalla 4.1.2. Ilustración menú. este (ARCHIVE) archivados datos lista encontrar podrá usuario duro. disco almacenará este video, fijas imágenes seleccionar puede usuario video. fijas imágenes almacenar desea preguntara Reproducción, Modo Vivo modo Archivo Pantalla 4.1.1. Ilustración Series VT-H...
- Page 80 – Adelante Saltar/Paso guardado. video pausar reproducir para Pulse PLAY/PAUSE atrás. segundos desplaza reproducción posición – atrás. Saltar/Paso pantalla.. derecha inferior parte normal) veces normal), Veces (normal), como muestra reproducción inversa Velocidad velocidad footage retroceder Presione Series VT-H...
- Page 81 ESC. botón presionando búsqueda lista retornar puede reproducción, búsqueda cambia modo almacenado, evento reproducción Durante Reproducción Modo 3-3. Archivo búsqueda Pantalla 3.2.7. Ilustración Series VT-H...
- Page 82 Búsqueda 3-2-7. Ingresos registro Pantalla 3.2.6. Ilustración artículo. sistema ingresos lista puede usuario INGRESOS LISTA 3-2-6. Menú. presionando duro disco almacenado dato último acceder puede ULTIMO 3-2-5. Menú. presionando duro disco almacenado dato primer acceder puede PRIMERO 3-2-4. Series VT-H...
- Page 83 Puede 3-2-3. tiempo Línea Pantalla 3.2.4. Ilustración almacenado. video reproducir para Presione video. reproducir iniciar desea punto desde (azul) seleccione tiempo, línea través moverse para derecha/f/rew, left//F/ADV izquierda tecla utilice canal, seleccionado Abajo. Arriba teclas Series VT-H...
- Page 84 DOWN RIGHT, LEFT, teclas usando video inicio fecha Seleccione almacenado. video encontrar para utilizada tiempo línea búsqueda ventana tiempo. Línea Búsqueda 3-2-2. evento búsqueda Pantalla 3.2.2. Ilustración Series VT-H...
- Page 85 Búsqueda 3-2-1. Búsqueda Ventana 3.2.1. Ilustración pantalla. mostrados ARCHIVE LOG, TIME, SPECIFIC TIME, LAST TIME, FIRST EVENT, TIMELINE, como búsqueda funciones diferentes tener Esta controles. usando contraseña Ingrese 4-2-1. ilustración muestra como contraseña preguntar búsqueda, botón presione Cuando Series VT-H...
- Page 86 (alarma alarma Cuando alarma. Indicador alarma caso Indica marcha movimiento Grabación marcha alarma sensor Grabación marcha manual Grabación marcha continua Grabación Descripción indicador Vivo ventana ICONS 3.1.1. Tabla Series VT-H...
- Page 87 Varios vivo. pantalla disposición muestra 4.1.1 Ilustración vivo. menú configuración seleccionadas están cámaras video entradas vivo, ventana vivo Ventana 3-1. BUSQUEDA VIVO DISPOSITIVO HACIA DESDE CONFIGURAR GRABAR – almacenamiento Configuración 2.6.3. Ilustración Almacenamiento–Actualización Configuración 2.6.2. Ilustración Series VT-H...
- Page 88 Inserte USB. memoria usando otro FROM configuración cargar puede usuario SETUP LOAD proceso. iniciar para pulse frontal panel memoria dispositivo Inserte USB. memoria dispositivo Device actual configuración guardar puede usuario SETUP SAVE automáticamente. reiniciará completado, actualización Después automáticamente. Series VT-H...
- Page 89 Item Almacenamiento Configuración 2.6.1. Tabla mismo. formateo iniciar (HDD) duro disco grabación modo configurar puede usuario Almacenamiento 2-6. conexión para ADSL contraseña PASSWORD ADSL conexión para usuario Descripción Item ADSL 2.5.3. Tabla ADSL Network configuración Pantalla 2.5.4. Ilustración Series VT-H...
- Page 90 (servidor/router) configuración cuando utilizada configuración Esta DHCP. servidor desde dirección requerirá automáticamente activado DHCP DHCP. servidor automáticamente asignada dirección DHCP DHCP 2-5-2-2. servidor dirección mask Subnet MASK SUBNET Series VT-H...
- Page 91 LAN. fuera grabador acensar poder para router) habilitados estar deben direccionado Puerto función router, asignada esta dirección router. modem medio asignada dirección local, local Router/Modem: red). administrador (Contacte red. administrador asignada fija 2-5-2-1. Redes Tipos 2-5-2. Series VT-H...
- Page 92 DDNS servidor nombre DDNS. servidor desde dominio dirección nombre usando Activar/desactivar DDNS DVR. este para asignada Mask Subnet Registrar Mask: Subnet DVR. este para asignada Gateway Registrar Gateway: DVR. este para asignada dirección Registrar Series VT-H...
- Page 93 Activar ACCESS CLIENT 5445) (Default: puerto Número PORT Description Item Network configuración pantalla Menú 2.5.1. Tabla network. parámetros configuración Pantalla Network 2-5. hora. Fecha configuración Pantalla 2.4.4. Ilustración información Pantalla 2.4.3. Ilustración Series VT-H...
- Page 94 (MM/DD/HH) final ubique Cuando DLS. inicio tiempo configurar para SELEC botón presione datos ingrese después (MM/DD/HH) inicio cursor mueva encender seleccionar Después derecha. izquierda botón utilizando solar) (ahorrador para apagado encendido configurar puede usuario Series VT-H...
- Page 95 LOAD sistema. información para Presione DESCRIPTION ubicación. cada cambiar para usados abajo arriba botones derecha. izquierda botones presionando letra número posición hacia mueva botón Presione sistema. nombre Descripción Item Sistema Configuración – Menú Funciones 2.4.1. Tabla Sistema 2-4. Series VT-H...
- Page 96 Seleccionar [SUN SAT]: canales. todos tiempo zona toda aplicable SEL, botón utilizando grabación modo Seleccionar [ALL]: grabación. configurar opciones navegar para botones Utilice grabación. menú SCHEDULE seleccione calendario, grabación configurar Para Calendario Grabación 2-3-2. Series VT-H...
- Page 97 Seleccionando Movimiento Zonas 2-3-1. Grabación Menú Pantalla 2.3.1. Ilustración 3.3.3. ilustración pantalla muestra como aparecerá pantalla menú, opción esta selecciona grabación. calendario Configuración SCHEDULE Series VT-H...
- Page 98 RATE FRAME deseado. canal preferidos cuadros Seleccione funciones. siguientes aplicar para canal Seleccione CHANNEL 352x240(NTSC)/352X288(PAL). 704x480(NTSC)/704X576(PAL) resolución Selección RESOLUTION Descripción Función Menú Grabación Configuración Menú 2.3.1. Tabla Grabación Modo – Configuración 2-3. Series VT-H...
- Page 99 CONTRAST pantalla. visibilidad nivel Ajuste interno. alerta sonido Habilitar/Deshabilitar BEEP EVENT secuencial TIME modo canal visualización Tiempo SEQ-DWELL canales. imágenes secuencia Habilitar/Deshabilitar SEQUENCE imagen. pantalla Habilitar/Deshabilitar Descripción Item Vivo Video Configuración 2.2.1. Tabla Vivo Modo – Configuración 2-2. Series VT-H...
- Page 100 Duration, Alarm Alarm, Record, Post-Event Pre-Record, type, Sensor sensitivity, Motion zone, Motion Recoding, Quality, rate, Frame CHANNEL RESOLUTION RECORD ALARM ERROR MODE SCREEN SATURATION HUE, CONTRAST, BRIGHTNESS, LIST, DISPLAY, CHANNEL CONTRAST BEEP EVENT TIME SEQ-DWEL SEQUENCE LIVE SETUP Series VT-H...
- Page 101 Ilustración inmediatamente. nueva contraseña asignando unidad proteger recomendamos (SEL). tecla oprimiendo después veces tecla oprimiendo activado puede cual 1111, predeterminado Este contraseña. requerirá grabador SETUP, tecla oprimir Principal Pantalla Configuración 2-1. DVR. inicial configuración detalla siguientes secciones Configuración Series VT-H...
- Page 102 Cuando abierto. Normalmente N/O: Operacional ---: energía. aplique únicamente. secas SENSOR Entradas ADVERTENCIA deseado. sensor número magnético) sensor calor, sensor percepción infrarrojo, rayo (sensor sensor señales líneas Conecte SENSORES: ENTRADAS connections alarm Sensor 1-3-3. Series VT-H...
- Page 103 Conexión Router cable) (10BASE-T/100BASE-TX Internet cable hub) (Switching empleando sistema, Conectando • switching Empleando – Conexión Cruzado Tipo Cable hub. switcher cruzado, cable empleando directa, unidad Conectando hub. switcher • cruzado, cable Empleando – Conexión Network Conexiones 1-3-2. Series VT-H...
- Page 104 Conector Monitor. Conéctese PAL. NTSC formato Compuesto Video Salida VIDEO (NTSC/PAL) cámara cable Conectar video. entrada conectores Cuatro VIDEO Trasero Panel Conexiones Tabla Trasero Panel Ilustración VT-H160 VT-H80 VT-H40 Básicas Conexiones 1-3-1. conexiones trasero Panel 1-3. Series VT-H...
- Page 105 Reproducción – pausa Durante atrás. hacia segundos Reproducción – Reproducción Durante F/REW: identificación. número entrar para & canales Selección Números: grabación manualmente Cancelar Iniciar REC: número. después pulse DVR, encuentra remoto control identificación número Cuando Remoto Control 1-2. Series VT-H...
- Page 106 Este frontal. panel izquierdo lado ubicado Este sistema. grabando está cuando encendida está frontal sistema. Encendido funcionando está cuando encendida está frontal Descripción Nombre Puerto Frontal 1.1. Tabla FRONTAL PANEL 1-1. FUNCIÓN & NOMBRE Series VT-H...
- Page 107 ACCESO seguridad...........38 copia Archivo Reproducción 4-3. USB........37 Dispositivo Videos Fijas Imágenes Copia 4-2. video..............36 fijas Imágenes Archivar 4-1........ARCHIVOS RECUPERACIÓN ALMACENAMIENTO ..................35 Reproducción Modo 3-3. Archivo....................Búsqueda 3-2-7....................INGRESOS LISTA 3-2-6........................ULTIMO 3-2-5. PRIMERO........................ 3-2-4. Series VT-H...
- Page 108 Modo – Configuración 2-3...............17 Vivo Modo – Configuración 2-2............15 Principal Pantalla Configuración 2-1..................CONFIGURACIÓN Básicas..................12 Conexiones 1-3-1................12 conexiones trasero Panel 1-3....................11 Remoto Control 1-2.....................10 FRONTAL PANEL 1-1....................FUNCIÓN & NOMBRE INDICE Series VT-H...
- Page 109 PTZF Respaldo, Búsqueda, Live, (1:1) Remoto Cliente (RJ-45) Ethernet base-TX 10/100 Network Interface Network DDNS) (Gratuito Dinámico Teclado Control & Control Remota Entrada Método Usuario Texto Menú Display Foto & Video Network Respaldo Foto & Video drive Flash Series VT-H...
- Page 110 Output & Input Audio & NTSC/PAL Señal Formato Seleccionable VGA: 1Canal BNC, Canal Monitor Principal Salida Salida Video Perdida Video NTSC/PAL Señal Formato Canales Canales Canales Entrada Nivel Canal, Entrada (16Canales) (8Canales) (4Canales) ARTICULO VT-H160 VT-H80 VT-H40 ESPECIFICASIONES Series VT-H...
- Page 111 Manual Cliente Software Poder Cable Adaptador 2EA) (AAA Baterias1.5V Remoto Control VT-H Serie Grabador descritos. componentes todos contenga revisar asegúrese paquete este adquirir continuación. descritos componentes principal unidad contiene paquete Este Componentes autorizado. personal abierta unidad anulada puede garantía VITEK.
- Page 112 Cuando operación. adecuada para importancia suma digital grabador este instalación para lugar gabinete. plano lugar instalado debe artículo Este uso. instalación seguridad para requisitos capítulo Este seguridad instalación para Requerimientos Operación Sistema Componentes Gratuito Dinámico movimiento detección Grabación Series VT-H...
- Page 113 Respaldo respaldo. network, reproducción, grabación, simúlatenos, QUADPLEX Operación H.264 Video Compresión Principales Características adecuadamente. conectado esté asegúrese cable daño cualquier prevenir Para PRECAUCIÓN (UPS). voltaje control equipo utilice menos eléctricas, Series VT-H...
- Page 114 áreas unidad esta ubicar golpes. vibración exponer inestables. lugares ubicar (UPS). voltaje control equipo utilice menos eléctricas, tormentas tormentas, existan cuando usar operando. encuentre cuando equipo este cerca líquidos otros agua contenga objetos ubicar unidad. esta objetos introducir Series VT-H...
- Page 115 Para ADVERTENCIA manipulando. esté persona eléctrico shock causar para suficiente unidad, esta dentro voltaje alto presencia usuario alerta señal Esta dispositivo. encuentran escritas instrucciones servicio mantenimiento importante operación usuario alerta señal Esta SIMBOLOGIA SEGURIDAD PRECAUCIONES Series VT-H...
- Page 116 • 250GB Almacenamiento Capacidad • Sata Duro Disco Soporte • Internet través remota Visualización • vivo Visualización Grabación • Estática Dinámica Direciones Compatible • H.264 Compresión • BNC, Salida Video Entradas • H.264 Compresión Canales Digital Grabadora Video VT-H Serie...
Need help?
Do you have a question about the VT-H and is the answer not in the manual?
Questions and answers