Aruba 2930M Manual
- Installation and getting started manual (100 pages) ,
- Installation, safety, and regulatory information (8 pages)
Advertisement
All product documentation
For the latest release of hardware and software documentation for your Aruba 2930M switch, visit the website at the following link and use the search tool on the resulting destination page to locate the publications you want: https://www.hpe.com/networking/ResourceFinder
- Aruba 2930M Switches Installation and Getting Started Guide
- START HERE: Installation, Safety, and Regulatory Information for the Aruba 2930M Switches (This document)
- ArubaOS-Switch Power Over Ethernet (PoE/PoE+) Planning and Implementation Guide
- ArubaOS-Switch and ArubaOS-CX Transceiver Guide
- Aruba 2930M and 3810M Switch Power Supply Quick Setup Guide and Safety/Regulatory Information
- All ArubaOS-switch operating system software manuals
See the remaining contents of this guide for important presetup information.
Applicable products
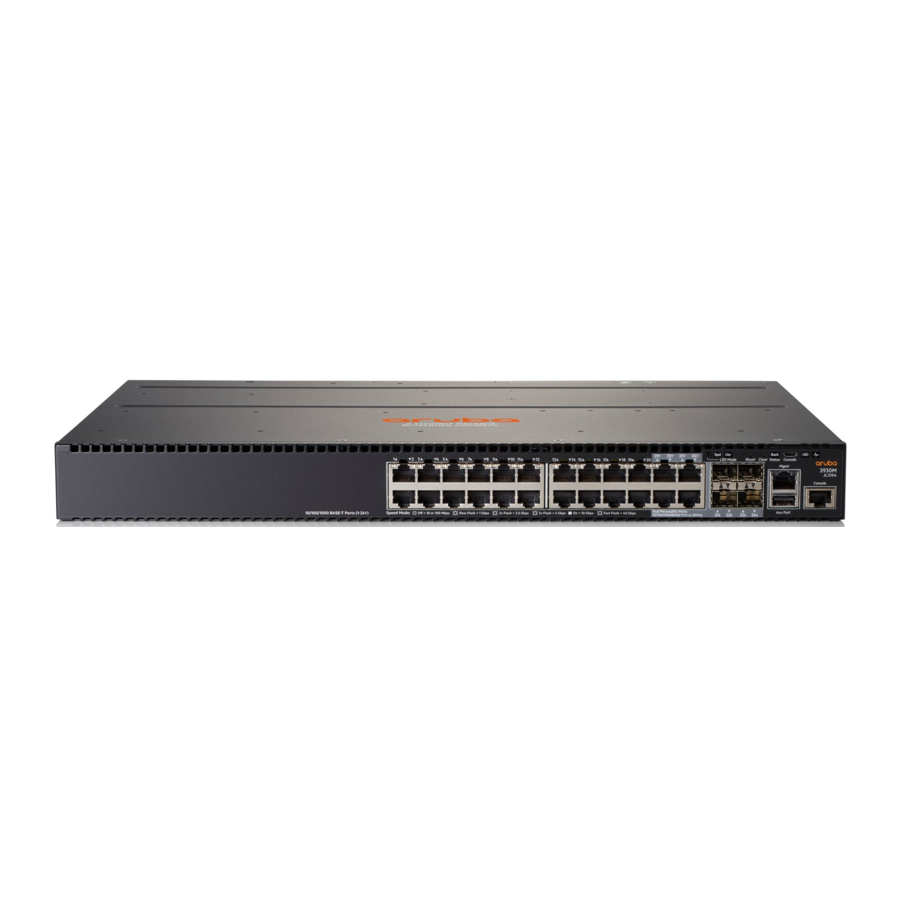
| JL319A Aruba 2930M 24G 1-slot Switch | JL325A Aruba 2930 2-port Stacking Module |
| JL320A Aruba 2930M 24G PoE+ 1-slot Switch | JL078A Aruba 3810M/2930M 1-Port QSFP+ 40GbE Module |
| JL321A Aruba 2930M 48G 1-slot Switch | JL081A Aruba 3810M/2930M 4 HPE Smart Rate 1G/ 2.5G/5G/10G PoE+ Module |
| JL322A Aruba 2930M 48G PoE+ 1-slot Switch | JL083A Aruba 3810M/2930M 4-Port 100M/1G/10G SFP+ MACsec Module |
| JL323A Aruba 2930M 40G 8 HPE Smart Rate PoE + 1-slot Switch | JL085A Aruba X371 12VDC 250W 100-240VAC Power supply |
| JL324A Aruba 2930M 24 HPE Smart Rate PoE+ 1slot Switch | JL086A Aruba X372 54VDC 680W 100-240VAC Power Supply |
| R0M67A Aruba 2930M 40G 8 HPE Smart Rate PoE Class 6 1-slot Switch R0M68A Aruba 2930M 24 HPE Smart Rate PoE Class 6 1-slot Switch | JL087A Aruba X372 54VDC 1050W 110-240VAC Power Supply |
Installation precautions and guidelines
To help avoid personal injury or product damage when installing your switch, read the following installation precautions and guidelines.
This section provides precautions and guidelines to observe when installing your switch. For full installation instructions, see the Aruba 2930M Switches Installation and Getting Started Guide at http://h17007.www1.hpe.com/us/en/ networking/library/index.aspx?cat=switches&subcat=2930M&type=7. (Scroll to the Installation section and select the latest version of the above-mentioned guide.)

- Do not mount the switch on a wall or under a table or under another horizontal surface.
- Mount devices installed in a rack or cabinet as low as possible. Put the heaviest devices at the bottom and progressively lighter devices positioned higher.
- To prevent the rack or cabinet from becoming unstable and/or falling over, ensure that it is adequately secured.

- Do not ship any switch in a rack without checking for shipping restrictions in theInstallation and Getting Started Guide for your switch. Otherwise, you may void the switch warranty.
- Ensure that the power source circuits are properly grounded. Then connect the switch to the power source by using the power cord supplied with the switch. For more information on power cords, see Power cords.
- When installing the switch, ensure that the AC outlet is near the switch and easily accessible in case the switch must be powered off.
- Ensure that the power cord and network cables at the switch mounting location do not create a tripping hazard.
- Do not install the switch in an environment where the operating ambient temperature exceeds its specification. (See the environmental operating temperature information in theInstallation and Getting Started Guide for your switch product. Visit http://www.hpe.com/networking/ResourceFinder and locate the installation guide by using the search tool on the resulting destination page. )
- Ensure that the switch does not overload the power circuits, wiring, and over-current protection. To determine the possibility of overloading the supply circuits, add the ampere ratings of all devices installed on the same circuit as the switch. Then compare the total with the rating limit for the circuit. The maximum ampere ratings for a device are usually printed near the device AC power connectors.
- Avoid blocking any ventilation openings on the sides, rear, or front of the switch.
- Ensure that the air flow around the switch is not restricted. Leave at least 3 inches (7.6 cm) for cooling. For the air flow direction, see theInstallation and Getting Started Guide for your product at http:// www.hpe.com/networking/ResourceFinder. (Locate the installation guide by using the search tool on the resulting destination page.)
- If a power supply must be removed, and then reinstalled, wait at least 5 seconds before reinstallation. Otherwise, damage to the switch may occur. The power supply needs this time to bleed off any retained power.
- Install cover plates on any slot that is not in use

- Use only supported Aruba SFP transceivers.
- The 2930M switch front panel transceiver slots support only SFP transceivers. To use SFP+ or QSFP+ transceivers with the switch, install an optional uplink module on the rear panel of the switch.
- For more information, visit http://www.hpe.com/networking/ResourceFinder and use the provided search tool on the resulting destination page to locate the latest versions of these publications:
- Aruba 2930M Installation and Getting Started Guide
- ArubaOS-Switch and ArubaOS-CX Transceiver Guide
Power cords
Aruba includes the power cord intended for use with your Aruba switch. Different countries/regions may require different power cords. For a list of the power cords that apply to your 2930M switch, see the section that lists power cords in the latest edition of the Aruba 2930M Switch Series Installation and Getting Started Guide. To access this guide online:
- Click http:// h17007.www1.hpe.com/us/en/networking/library/index.aspx?cat=switches&subcat=2930M&type=7.
- Scroll to the "Installation" section, where you will see a list of hardware installation documents.
- Select the latest edition of the Aruba 2930M Switch Series Installation and Getting Started Guide.
Only Aruba-approved power cords may be used with Aruba devices. See the power cord documentation provided in the latest version of the Aruba 2930M Switch Series Installation Guide at http:// h17007.www1.hpe.com/us/en/networking/library/index.aspx?cat=switches&subcat=2930M&type=7. Lost or damaged power cords must be replaced only with Aruba-approved power cords. If your installation requires a different power cord than the one supplied with the switch and/or power supply, use a power cord that displays the mark of the safety agency that defines the regulations for power cords in your country or region. The mark is your assurance that the power cord can be used safely with the switch and power supply.
Do not use a damaged or nonrecommended power cord with your switch. Using such power cords voids the switch and power supply warranty. It can also cause serious electrical problems, including injury or death to personnel, and damage to the switch and other property. If you cannot verify that you have a power cord approved for use with your switch model, contact your authorized Aruba dealer or sales representative for assistance.
Power supply instructions
During the installation, ensure that AC power is NOT connected to the Power Supply.

Shock hazard

To completely remove power from the switch, disconnect all power cords.
For more information, see the Power over Ethernet (PoE/PoE+) Planning and Implementation Guide. To access this guide, visit http://www.hpe.com/networking/ResourceFinder and use the search tool on the resulting destination page to locate the guide.
Interior Wiring Warning
FOR INDOOR USE ONLY. The switch, AC power cord and all conncting cables are not designed for outdoor use.
Preview of installing a 2930M switch
This section previews the steps for installing the switch. To find detailed switch installation steps, information on configuration tools, and other instructions and information, see the Aruba 2930M Switches Installation and Getting Started Guide. (Visit https://www.hpe.com/networking/ResourceFinder and use the search tool on the resulting destination page.)
- Prepare the installation site.
- Unpack the switch and verify that you have received the correct parts.
- Connect power to the switch and observe the switch self-test. then remove power from the switch.
- Mount the switch.
Do not mount the switch on a wall, under a table, or under another horizontal surface.
- Connect the switch to a power source.
- Connect the network cables.
- (Optional) Install SFP transceivers.
- Configure the switch for network operation.
For related publications, see All product documentation.
Documents / Resources
References

Download manual
Here you can download full pdf version of manual, it may contain additional safety instructions, warranty information, FCC rules, etc.
Advertisement


Need help?
Do you have a question about the 2930M and is the answer not in the manual?
Questions and answers