
Related Manuals for Aruba 8320


Summary of Contents for Aruba 8320
- Page 1 Aruba 8320 Switch Quick Setup Guide and Safety/Regulatory Information a Hewlett Packard Enterprise company *5200-4501* Part Number: 5200-4501 Published: February, 2018 Edition: 1, Printed in Taiwan 150200001925A R01...
- Page 2 Links to third-party websites take you outside the Hewlett Packard Enterprise website. Hewlett Packard Enterprise has no control over and is not responsible for information outside the Hewlett Packard Enterprise website. Applicable products Aruba 8320 48 SFP/SFP+ 6 QSFP+ AC Switch JL479A Aruba 8320 32 QSFP+ AC Switch...
-
Page 3: Table Of Contents
....................Connecting the switch to the network ....................... SFP/SFP+/QSFP+ installation notes ......................Switch operating system software ......................Chapter 4 Aruba 8320 safety and regulatory information......Regulatory information ..........................Aruba 8320 switch safety and regulatory information ................Power supply instructions ......................... -
Page 4: Chapter 1 Before You Begin
Chapter 1 Before you begin Installation precautions and guidelines To avoid personal injury or product damage when installing your switch, read the installation precautions and guidelines below. • Do not mount the switch on a wall, under a table, or under any other horizontal surface. •... -
Page 5: Chapter 2 Prepare For Installation
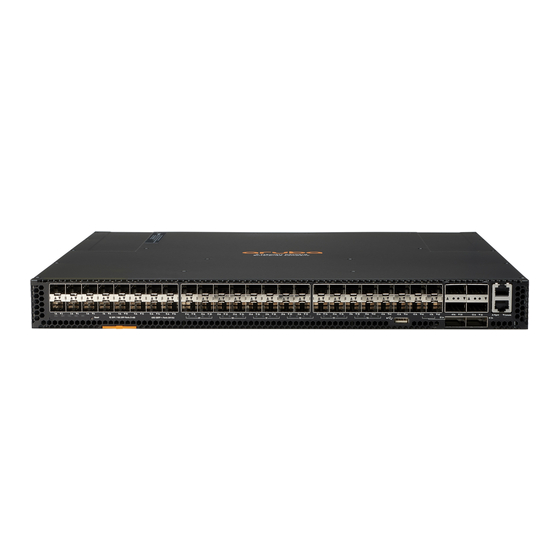
Aruba X371 400W 100-240VAC Power Supply (JL480A) 4. Power on the switch. An Aruba 8320 switch does not contain a power on/off switch. It is turned on by connecting the AC power cord to the switch and to an AC power source. - Page 6 Aruba 8320 48 SFP/SFP+ 6 QSFP+ AC Switch (JL479A) Upper Port LEDs: Off, unless a network cable is connected and the port is receiving link beat. Lower Port LEDs: Off, unless a network cable is connected and the port is receiving link beat.
- Page 7 Aruba 8320 32 QSFP+ AC Switch (JL579A) UID LED: Locator or Unit Identification LED. Off after power on. Upper Port LEDs: Off, unless a network cable is connected and the port is receiving link beat. The other three port lane LEDs are not used by the product and should remain off throughout the product's operation.
- Page 8 Off, unless a network cable is connected and the port is receiving link beat. UID LED Locator or Unit Identification LED. Off after power on. Fan LED: Green after power on. Global Status LED: Green in the default configuration. Aruba 8320 Switch Quick Setup Guide and Safety/Regulatory Information...
- Page 9 PS2 LED: Green after power on. PS1 LED: Green after power on. Switch product label. Pull the tab out to view the product label information. 5. Remove the power cord from the switch and from the power source. Chapter 2 Prepare for installation...
-
Page 10: Chapter 3 Mount The Switch And Connect To The Network
Do not mount the switch on a wall, under a table, or under any other horizontal surface. Mounting the switch in a two-post rack The JL482A Aruba X472 2-Post Rackmount Bracket Kit (included with the switch) includes these items: •... - Page 11 Aruba 8320 48 SFP/SFP+ 6 QSFP+ AC Switch (JL479A) Aruba 8320 32 QSFP+ AC Switch (JL579A) Aruba 8320 48XGT 6 QSFP+ AC Switch (JL581A) 2. Use the four number 12-24 screws to secure the brackets to the rack. 3. Go to Connecting the switch to the network.
-
Page 12: Mounting The Switch In A Four-Post Rack
Procedure 1. Using the JL483A Aruba X474 4-Post Rackmount Bracket Kit, use a #1 Phillips (cross-head) screwdriver and attach the front- and rear-post rack mount brackets to the switch with the included 8-mm M4 screws. -
Page 13: Connecting The Switch To The Network
Gather the following: • An RJ-45 console cable (not included). A DB9-to-RJ-45 console cable can be ordered from HPE: JL448A, Aruba X2C2 RJ45 to DB9 Console Cable. • Network cable (not included) for connection to the switch RJ-45 Mgmt port. - Page 14 For cabling specifications for your switch, see the Aruba 8320 Switch Installation and Getting Started Guide at http://www.hpe.com/support/manuals. Procedure 1. Connect an RJ-45 to DB9 console cable to a workstation running suitable terminal emulation software and configure these settings: •...
- Page 15 6. By default, the management interface is disabled and set to operate as a DHCP client. If you prefer to use static addressing, define an IP address, default gateway, and DNS server with the commands ip address, default-gateway and nameserver. Enable the management port using the no shutdown command. For example, these commands set the management IP to 192.168.1.10 with a mask of 24 bits, the default gateway to 192.168.1.100, and the DNS server to 192.168.1.99: switch(config)# interface mgmt...
- Page 16 11. Insert SFP or SFP+ transceivers in the SFP+ slots, and QSFP+ transceivers in the QSFP+ slots on the switch front panel. 12. Connect network cables to any of the transceivers installed on the switch front panel. Aruba 8320 Switch Quick Setup Guide and Safety/Regulatory Information...
-
Page 17: Sfp/Sfp+/Qsfp+ Installation Notes
Non-Aruba SFP/SFP+/QSFP+ transceivers are not supported. Use of supported Aruba products ensures that your network maintains optimal performance and reliability. If you require additional transceivers, contact an Aruba sales representative or an authorized reseller. The following resources can help you to find transceiver support information for your switch model: •... -
Page 18: Chapter 4 Aruba 8320 Safety And Regulatory Information
For important safety, environmental, and regulatory information, see Safety and Compliance Information for Server, Storage, Power, Networking, and Rack Products, available at http://www.hpe.com/support/Safety-Compliance- EnterpriseProducts. Aruba 8320 switch safety and regulatory information Aruba 8320 Switch Series (JL479A, JL579A, and JL581A) Environmental • Operating Temperature: 0°C to 40°C (32°F to 104°F) up to 3.0 km (10,000 ft) - Page 19 6A – 3A • Frequency range: 50 -60 Hz Power consumption Aruba 8320 48 SFP/SFP+ 6 QSFP+ AC Switch (JL479A) Max: 357.37 W Aruba 8320 32 QSFP+ AC Switch (JL579A) Max: 310 W Aruba 8320 48XGT 6 QSFP+ AC Switch (JL581A)
-
Page 20: Power Supply Instructions
For important safety, environmental, and regulatory information, see Safety and Compliance Information for Server, Storage, Power, Networking, and Rack Products, available at http://www.hpe.com/support/Safety-Compliance-EnterpriseProducts Japan VCCI Class A Aruba 8320 Switch Quick Setup Guide and Safety/Regulatory Information... -
Page 21: Korea Emc Class A Statement
Directive 2011/65/EU on the restriction of the use of certain hazardous substances in electrical and electronic equipment and carries the CE marking accordingly. For Conducted and Radiated Immunity in accordance with EN55024, the Aruba 8320 switch products are limited to Performance Criteria A with shielded cable for HPE Smart Rate ports. -
Page 22: Manufacturer And Local Representative Information
Дата изготовления – Дата изготовления включена в серийный номер изделия, CCYMPPPZZZ (формат серийного номера Aruba для данного изделия). Дата изготовления указана как YM в серийном номере, где Y соответствует году с началом отсчета в каждом новом десятилетии, начиная с 2010, а M соответствует...
Need help?
Do you have a question about the 8320 and is the answer not in the manual?
Questions and answers