Directed Viper 5706V Manual
- User manual (25 pages) ,
- Owner's manual (63 pages)
Advertisement
- 1 Additional Guide Information
- 2 Important information
- 3 Getting Started
- 4 Responder LC Remote Control
- 5 Control Center
- 6 Status Screen Icons
- 7 Using your System
- 8 Basic Commands (Direct Access)
- 9 Responder LC Configuration
- 10 1-way Companion Remote Control
- 11 Battery Information (Responder LC)
- 12 Patent Information
- 13 Warning! Safety First
- 14 Documents / Resources
Congratulations on the purchase of your state-of-the-art security and remote start system. Reading this Owner's Guide prior to using your system will help maximize the use of your system and its many features. For any additional questions please contact your authorized Directed dealer or contact Directed at 1-800-753-0600 (US only).
Additional Guide Information
Only basic commands, features and essential information are covered in this compact guide. Your product has many advanced features which are not discussed here, please consult the expanded online version for these on the website listed on the back cover. Most sections in this guide also contain additional information which can be found in the expanded online version.
Important information
|
|
 Read the Warning! Safety First sections of this manual prior to operating this system.
Your Warranty
Your system comes with a warranty. The warranty terms are detailed at the end of this guide. Make sure that you receive the proof of purchase from your dealer, indicating the product was installed by an authorized Directed dealer.
Replacement remote controls
Please see your authorized dealer or visit us at www.directedstore. com to order additional remote controls. Remote control part numbers are found on the back of the device.
Getting Started
Due to transit and storage time prior to your purchase, the battery charge on your remote control may have depleted. To ensure proper operation, check the battery level and connect the included USB cable between it and a computer if not fully charged. The display indicates the charging status and then when the battery is fully charged.
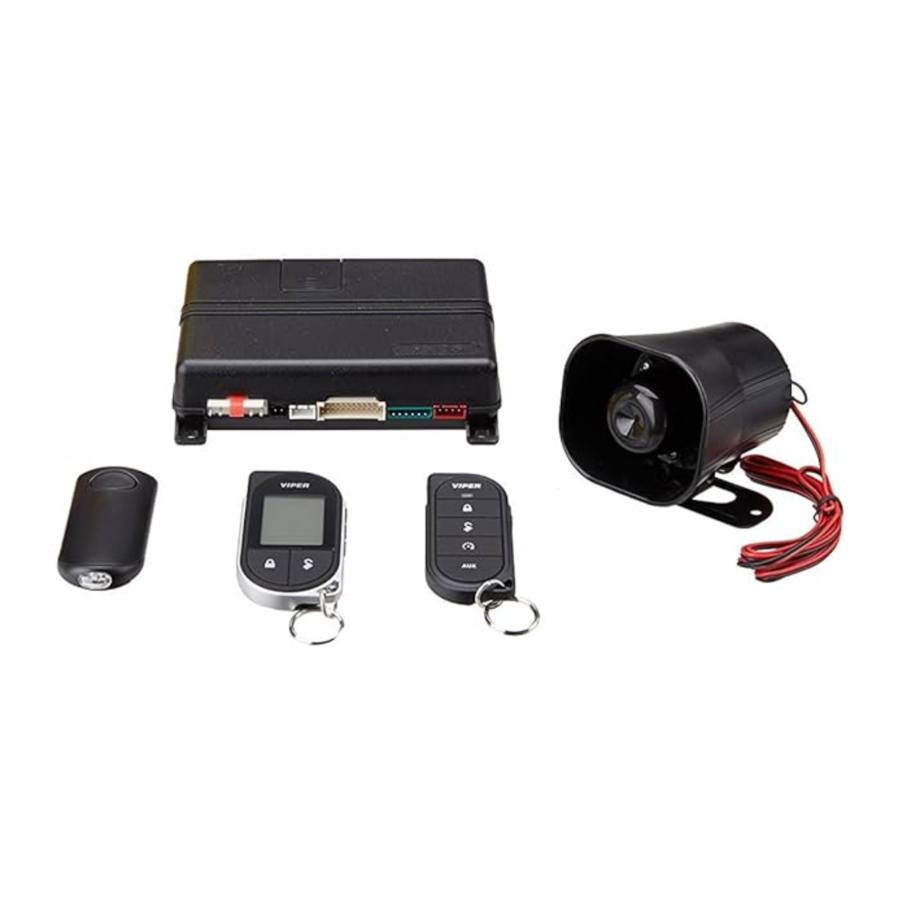
Responder LC Remote Control
| Feature | Description |
| Internal Antenna | Used for transmitting and receiving information |
Display | Status screen - the upper portion of the display contains status icons for the System, Siren, Alarm zones, Remote Start and Remote Control. Text field - the lower portion of display - shows the Clock, Runtime or Temperature during Remote Start, as well as Command confirmations, Page messages and programming menus |
Command buttons (4) | Used to perform arming, disarming, auxiliary channel and remote start commands |
Function button  | Used to access function levels for commands, configuration menus for programming, Car Selection, and to request reports. |
| Mini-USB Port | The USB cable plugs into this port (located on remote control side). |
Control Center

The Control Center, typically located on the upper part of the front windshield sends and receives commands or messages to and from your system. It consists of:
- The In-vehicle system antenna, for 2 way communication.
- The Status LED, as a visual indicator of the system's status.
- The Control button, for placing the system into Valet Mode* and to perform the Emergency Override** operation.
* See "Remote and System Operations" in online guide.
** See "Alarm Features" in online guide.
Status Screen Icons
![]()
The table below describes all the status screen icons.
![]()
![]()
![]()
* This icon not present until the Car 2 is turned on in the Setup Remote configuration menu.
** This icon not present until the remote is paired with an optional garage door opener.
Using your System
Commands and Confirmations
Commands, Basic or Advanced, are used to activate system features and are performed by pressing one of the Command buttons. Basic commands control the most often used security and remote start features while Advanced commands control more specialized features and request reports.
Confirmations for Basic or Advanced commands are indicated first by siren chirps and parking light flashes, and then by Text, Icons and beeps or tones on the remote control. A description of each feature confirmation is found in the following Basic command and Advanced command sections.
Performing Commands
Perform Basic commands by pressing one of the command buttons while in the Direct Access level. Direct access is available while the text field displays the Clock, Temperature or Runtime. Perform Advanced commands by first accessing one of the Function Levels and then pressing one of the command buttons while within a level. Function Levels are available when the text field displays LEVEL 1,2,3 or 4.
Advanced command example: Silent Arm
- Press the
![]() button once to access Function Level 1, the text field will display LEVEL 1 .
button once to access Function Level 1, the text field will display LEVEL 1 . - Press the
![]() button while LEVEL 1 text is still on to perform the Silent Arm command.
button while LEVEL 1 text is still on to perform the Silent Arm command. - The Responder LC remote will display SILENT ARMED in the text field and update the status screen icons.
 button once to access Function Level 1, the text field will display
 Responder LC Command table

Fault Condition Alerts
If, when performing a command, a condition exists that does not allow activation of an Alarm feature* or Remote Start feature**, the NOT AVAILABLE or REMOTE START ERROR text and a fault tone will play.
* See this section and "Feature not Available" in online guide.
** See this section and "Remote Start Error" in online guide.
Basic Commands (Direct Access)
Arm

Press and release 
The alarm arms, doors lock (if connected), and the siren chirps and parking lights flash once. The ARMED text and beeps play to confirm and the System Status Icons update. If Valet mode* is On, the doors lock and the VALET text and tone play. Exit Valet mode to arm the alarm normally.
If a trigger zone fault is detected the siren chirps once again and the Trigger Zone Fault report** plays.
To Arm and Panic
Press and hold ![]()
The alarm Arms (or Locks in Valet) and, after 2 seconds, sounds the siren and flashes the parking lights. The PANIC text and siren tones play to confirm. Press the ![]() or
or  button to stop the output.
Disarm
Press and release ![]()
The alarm disarms, doors unlock (if connected), and the siren chirps and parking lights flash twice. The DISARM text and beeps play to confirm and the system status icons update. If Valet mode* is On, the doors unlock and the VALET text and tone play.
More than 2 siren chirps and remote beeps indicate a trigger has occurred. The DISARM text is replaced by the Alarm report.**
AUX/Trunk
Press and hold 
The Trunk opens (if connected) when this button is pressed for 2 seconds. The TRUNK text and tones play to confirm.
Remote Start
Press and release ![]()
Activates (or if On, deactivates) the remote starter. The engine and parking lights turn On and the REMOTE START ON text and tones play, or the engine and parking lights turn Off and the REMOTE START OFF text and tones play to confirm, the Remote Start status icons update. The ![]() icon will display in the status screen and the text field will display the Runtime, Temperature or Clock as programmed. If Remote Start fails to activate, REMOTE START ERROR text and a fault tone play while the parking lights flash to identify the reason.***
icon will display in the status screen and the text field will display the Runtime, Temperature or Clock as programmed. If Remote Start fails to activate, REMOTE START ERROR text and a fault tone play while the parking lights flash to identify the reason.***
* See "Remote and System Operations" in online guide.
** See "Alarm Features" in online guide.
*** See "Remote Start Error" in online guide.
For Manual transmission vehicles see "Manual Transmission Start (MTS mode)" in online guide.
Responder LC Configuration
Operations of the Responder LC and how it communicates messages are set in the configuration Main Menu.
Navigating menus and options
Navigating menus and features, changing options, and exiting are performed using the remote control buttons. The following instructions discuss how to access and configure the settings.
Button operation
- To access menus, set options, and to perform actions that are displayed in the text field, use the
![]() button.
button. - To scroll the menu lists in the text fielduse the
![]() buttons.
buttons. - To exit configuration: use the
![]() or
or ![]() buttons.
buttons.
 button.
 buttons.
Access menu items
- Press and hold the
![]() button for 8 seconds, the remote will beep once, MAIN MENU is displayed. (If Car 2 is on, ignore the Car Select text and beep after three seconds).
button for 8 seconds, the remote will beep once, MAIN MENU is displayed. (If Car 2 is on, ignore the Car Select text and beep after three seconds). - Release the
![]() button to display the Main Menu item list, SETUP REMOTE is displayed.
button to display the Main Menu item list, SETUP REMOTE is displayed. - The Main Menu has been accessed and configuring can begin. Use the following process to view the Main Menu features, options and settings in the text field. The following actions are commonly used throughout the configuration operation.
- Press the
![]() or
or ![]() buttons to change the feature or option that is displayed in the text field.
buttons to change the feature or option that is displayed in the text field. - Press the
![]() button to choose the feature in the text field and view its options. Press it when the desired feature or option is in the text field to set it as the new setting.
button to choose the feature in the text field and view its options. Press it when the desired feature or option is in the text field to set it as the new setting.
 or
or  buttons to change the feature or option that is displayed in the text field.
1-way Companion Remote Control

Using the 1 way companion remote
The companion 1 way remote commands the system features as shown in the previous table, but without the message display of the Responder LC remote. Siren chirps and parking light flashes are used to indicate that a command has been received and activated as described in the Basic and Advanced command sections.
Accessing Commands
Similar to the Responder LC remote, Basic commands are performed when a command button is pressed directly. To perform Advanced Commands press the ![]() button one to four times to access function levels,
button one to four times to access function levels, ![]() x4 in the table for example implies pressing
x4 in the table for example implies pressing ![]() four times. The LED flashes in groups for a few seconds to indicate the level. Press the desired command button while the LED is flashing to perform the command.
four times. The LED flashes in groups for a few seconds to indicate the level. Press the desired command button while the LED is flashing to perform the command.
Battery Information (Responder LC)
The Responder LC remote control is powered by an internal rechargeable battery that can be serviced only through an authorized Directed dealer.

When charging, NEVER use a cable other than the one provided or plug into an unspecified source. Injury, severe damage or explosion may occur when connected to any other products or used in a way not intended.
Battery Information (1-Way)
The 1way companion remote is powered by one 3V coin cell lithium battery (PN CR-2032) that will last approximately one year under normal use.
Battery Disposal
Directed cares about the environment. If you need to dispose of the battery, please do so in accordance with your municipal requirements for battery disposal.
Patent Information
This product is covered by one or more of the following United States patents:
Remote Start Patents: 5,349,931; 5,872,519; 5,914,667; 5,952,933; 5,945,936;
5,990,786; 6,028,372; 6,467,448; 6,561,151; 7,191,053; 7,483,783
Vehicle Security Patents:
5,467,070; 5,532,670; 5,534,845; 5,563,576; 5,646,591;
5,650,774; 5,673,017; 5,712,638; 5,872,519; 5,914,667; 5,952,933; 5,945,936; 5,990,786; 6,028,505; 6,452,484
Other patents pending.
Warning! Safety First
Please read the safety warnings below before proceeding. Improper use of the product may be dangerous or illegal.
Installation
Due to the complexity of this system, installation of this product must only be performed by an authorized Directed dealer. If you have any questions, ask your retailer or contact Directed directly at 1-800-753-0600.
Remote Start Capable
When properly installed, this system can start the vehicle via a command signal from the remote control transmitter. Therefore, never operate the system in an enclosed area or partially enclosed area without ventilation (such as a garage). When parking in an enclosed or partially enclosed area or when having the vehicle serviced, the remote start system must be disabled using the installed menu wheel. It is the user's sole responsibility to properly handle and keep out of reach from children all remote control transmitters to assure that the system does not unintentionally remote start the vehicle. THE USER MUST INSTALL A CARBON MONOXIDE DETECTOR IN OR ABOUT THE LIVING AREA
ADJACENT TO THE VEHICLE. ALL DOORS LEADING FROM ADJACENT LIVING AREAS TO THE ENCLOSED OR PARTIALLY ENCLOSED VEHICLE STORAGE AREA MUST AT ALL TIMES REMAIN CLOSED. These precautions are the sole responsibility of the user.
Manual Transmission Vehicles
Remote starters on manual transmission vehicles operate differently than those with automatic transmission because you must leave your car in neutral. You must read this Owner's Guide to familiarize yourself with the proper procedures regarding manual transmission remote starters. If you have any questions, ask your authorized Directed dealer or contact Directed at 1-800-753-0600.
Before remote starting a manual transmission vehicle, be sure to:
- Leave the vehicle in neutral and be sure no one is standing in front or behind the vehicle.
- Only remote start on a flat surface
- Have the parking brake fully engaged
It is the responsibility of the owner to ensure the parking/emergency brake properly functions. Failure to do so can result in personal injury or property damage. We recommend the owner have the parking / emergency brake system inspected and adjusted by a qualified automotive shop biannually.
Use of this product in a manner contrary to its intended mode of operation may result in property damage, personal injury, or death.
- Never remotely start the vehicle with the vehicle in gear, and
- Never remotely start the vehicle with the keys in the ignition. The user must also have the neutral safety feature of the vehicle periodically checked, wherein the vehicle must not remotely start while the car is in gear. This testing should be performed by an authorized Directed dealer in accordance with the Safety Check outlined in the product installation guide. If the vehicle starts in gear, cease remote start operation immediately and consult with the authorized Directed dealer to fix the problem.
After the remote start module has been installed, contact your authorized dealer to have him or her test the remote start module by performing the Safety Check outlined in the product installation guide. If the vehicle starts when performing the Neutral Safety Shutdown Circuit test, the remote start unit has not been properly installed. The remote start module must be removed or the installer must properly reinstall the remote start system so that the vehicle does not start in gear. All installations must be performed by an authorized Directed dealer.
OPERATION OF THE REMOTE START MODULE IF THE VEHICLE STARTS IN GEAR IS CONTRARY TO ITS INTENDED MODE OF OPERATION. OPERATING THE REMOTE START SYSTEM UNDER THESE CONDITIONS MAY RESULT IN PROPERTY DAMAGE OR PERSONAL INJURY. YOU MUST IMMEDIATELY CEASE THE USE OF THE UNIT AND SEEK THE ASSISTANCE OF
AN AUTHORIZED Directed DEALER TO REPAIR OR DISCONNECT THE INSTALLED REMOTE START MODULE. DIRECTED WILL NOT BE HELD RESPONSIBLE OR PAY FOR INSTALLATION OR REINSTALLATION COSTS.
This product is designed for fuel injected vehicles only. Use of this product in a standard transmission vehicle must be in strict accordance with this guide.
This product should not be installed in any convertible vehicles, soft or hard top with a manual transmission. Installation in such vehicles may pose certain risk.
Interference
All radio devices are subject to interference which could affect proper performance.
Upgrades and Batteries
Any upgrades to this product and/or installation of batteries must be performed by an authorized dealer. Do not attempt to perform any unauthorized modifications to this product.
Water/Heat Resistance
This product is not designed to be water and/or heat-resistant. Please take care to keep this product dry and away from heat sources. Any damage from water or heat will void the warranty.
For further details relating to warranty information of Directed products, please visit the support section of Directed's website at: www.directed.com
This product may be covered by a Guaranteed Protection Plan ("GPP"). See your authorized Directed dealer for details of the plan or call Directed Customer Service at 1-800-876-0800.
Documents / Resources
References
Download manual
Here you can download full pdf version of manual, it may contain additional safety instructions, warranty information, FCC rules, etc.
Advertisement


Need help?
Do you have a question about the Viper 5706V and is the answer not in the manual?
Questions and answers