Table of Contents
Advertisement
Quick Links
Advertisement
Table of Contents
Troubleshooting

Related Manuals for Delta Electronics AC Motor Drive VFD007S23A


Summary of Contents for Delta Electronics AC Motor Drive VFD007S23A
-
Page 2: Preface
Thank you for choosing DELTA’s high-performance VFD-S Series. The VFD-S Series is manufactured with high-quality components and materials and incorporate the latest microprocessor technology available. This manual is to be used for the installation, parameter setting, troubleshooting, and daily maintenance of the AC motor drive. To guarantee safe operation of the equipment, read the following safety guidelines before connecting power to the AC motor drive. - Page 3 WARNING! DO NOT use Hi-pot test for internal components. The semi-conductor used in the AC motor drive is easily damaged by high-pressure. There are highly sensitive MOS components on the printed circuit boards. These components are especially sensitive to static electricity. To prevent damage to these components, do not touch these components or the circuit boards with metal objects or your bare hands.
-
Page 4: Table Of Contents
Preface ...i Table of Contents ...iii Chapter 1 Introduction ...1-1 1.1 Receiving and Inspection... 1-1 1.1.1 Nameplate Information... 1-1 1.1.2 Model Explanation ... 1-1 1.1.3 Series Number Explanation ... 1-2 1.1.4 Drive Frames ... 1-2 1.2 Appearances... 1-2 1.3 Installation Steps ... 1-3 1.4 Storage ... - Page 5 Chapter 3 Start Up ...3-1 3.1 Preparations before Start-up... 3-1 3.2 Operation Method ... 3-2 3.3 Trial Run ... 3-2 Chapter 4 Digital Keypad Operation ...4-1 4.1 Description of the Digital Keypad... 4-1 4.2 Explanation of LED Indicators... 4-1 4.3 Explanations of Display Messages ... 4-1 4.4 How to Operate the Digital Keypad...
- Page 6 7.9 Motor cannot Run ... 7-6 7.10 Motor Speed cannot be Changed ... 7-7 7.11 Motor Stalls during Acceleration ... 7-8 7.12 The Motor does not Run as Expected ... 7-8 7.13 Electromagnetic/Induction Noise ... 7-9 7.14 Environmental Condition... 7-9 7.15 Affecting Other Machines ...
- Page 7 Appendix C How to Select the Right AC Motor Drive... C-1 C.1 Capacity Formulas ...C-2 C.2 General Precautions ...C-4 C.3 How to Choose a Suitable Motor...C-5 Appendix D CE ... D-1...
-
Page 8: Chapter 1 Introduction
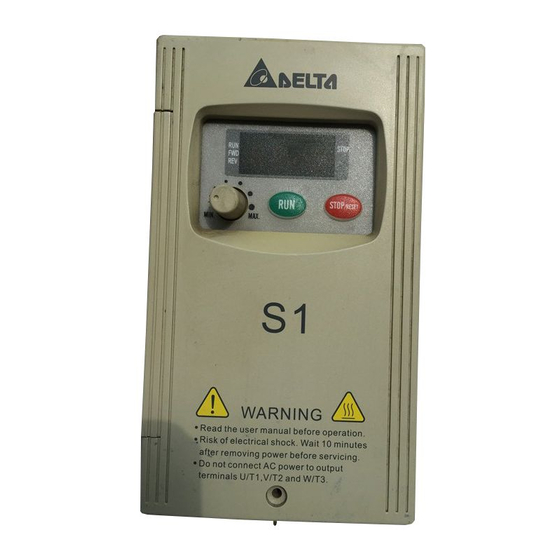
MODEL : VFD007S23A INPUT : 3PH 200-240V 50/60Hz 5.1A OUTPUT : 3PH 0-240V 4.2A 1.6kVA 0.75kW/1HP Frequency Range : 1-400Hz 007S23A0T7010001 DELTA ELECTRONICS INC. Version Type Input Voltage 11:Single phase 115V 21:Single phase 230V 23:Three phase 230V 43:Three phase 460V... -
Page 9: Chapter 1 Introduction|Vfd-S Series
Chapter 1 Introduction|VFD-S Series 1.1.3 Series Number Explanation 007S23A 230V 3-phase 1HP(0.75kW) If the nameplate information does not correspond to your purchase order or if there are any problems, please contact your distributor. 1.1.4 Drive Frames Frame Power range 0.25-2hp (0.2-1.5kW) 1-5hp (0.75-3.7kW) -
Page 10: Installation Steps
1.3 Installation Steps KNOB CASE HEAT SINK DIVISION PLATE SCREW Revision August 2006, SE08, SW V2.61 COVER SCREW Installation Steps Remove front cover screw and open. Remove Division Plate. If using optional conduit bracket, please refer to next page. Connect AC Input Power and motor leads. Never connect the AC drive output terminals U/T1, V/T2, W/T3 to main AC Input power. -
Page 11: Storage
Chapter 1 Introduction|VFD-S Series DIVISION PLATE SCREW 1.4 Storage The AC motor drive should be kept in the shipping carton or crate before installation. In order to retain the warranty coverage, the AC motor drive should be stored properly when it is not to be used for an extended period of time. - Page 12 If the AC motor drive is stored for more than 3 months, the temperature should not be higher than 30 °C. Storage longer than one year is not recommended, it could result in the degradation of the electrolytic capacitors. When the AC motor drive is not used for a long time after installation on building sites or places with humidity and dust, it’s best to move the AC motor drive to an environment as stated above.
- Page 13 Chapter 1 Introduction|VFD-S Series This page intentionally left blank. Revision August 2006, SE08, SW V2.61...
-
Page 14: Chapter 2 Installation And Wiring
2.1 Ambient Conditions Install the AC motor drive in an environment with the following conditions: Operation Air Temperature: Relative Humidity: Atmosphere pressure: Installation Site Altitude: Vibration: Storage Temperature: Transportation Relative Humidity: Atmosphere pressure: Vibration: Pollution Degree 2: good for a factory type environment. CAUTION! Operating, storing or transporting the AC motor drive outside these conditions may cause damage to the AC motor drive. -
Page 15: Chapter 2 Installation And Wiring|Vfd-S Series
Chapter 2 Installation and Wiring|VFD-S Series When installing multiple AC motor drives in the same cabinet, they should be adjacent in a row with enough space. When installing one AC motor drive below another one, use a metal separation barrier between the AC motor drives to prevent mutual heating. Refer to figure below for details. -
Page 16: Dimensions
2.3 Dimensions (Dimensions are in millimeter and [inch]) Frame S1: VFD002S11A, VFD002S21A, VFD002S23A 85.0 [3.35] 74.0 [2.92] Revision August 2006, SE08, SW V2.61 Chapter 2 Installation and Wiring|VFD-S Series 5.8 [0.23] 88.0 [3.47] 5.0 [0.20] 5.0 [0.20] 13.0 [0.51]... - Page 17 Chapter 2 Installation and Wiring|VFD-S Series Frame S1: VFD002S11B, VFD002S21B 8 5 .0 [3 .3 5] 5 . 8 [0. 23 ] 88 .0 [3 .4 7 ] 74 .0 [2 .9 2] 1 3 .0 [0 .5 1] 73 .0 [2 .8 8 ] 67 .8 [2 .6 7] 13 .0 [0 .5 1] 5 .
- Page 18 Chapter 2 Installation and Wiring|VFD-S Series Frame S1: VFD004S11A, VFD004S21A, VFD004S23A 85 .0 [3 .3 5] 5. 8 [0. 23 ] 10 2. 0 [ 4. 02] 74 .0 [2 .9 2] 2. 8 [0. 11 ] 5. 0 [0. 20 ] 5 .
- Page 19 Chapter 2 Installation and Wiring|VFD-S Series Frame S1: VFD004S11B, VFD004S21B 85 .0 [3 .3 5] 74 .0 [2 .9 2 ] 74 .0 [2 .9 2 ] 73 .0 [2 .8 8] 5. 8 [0. 23 ] 10 2. 0 [ 4. 02] 67 .8 [2 .6 7] 5.
- Page 20 Chapter 2 Installation and Wiring|VFD-S Series Frame S1: VFD007S21A, VFD007S23A 85 .0 [3 .3 5] 5. 8 [0. 23 ] 12 4. 0 [ 4. 89] 74 .0 [2 .9 2] 2. 8 [0. 11 ] 5. 0 [0. 20 ] 5.
- Page 21 Chapter 2 Installation and Wiring|VFD-S Series Frame S1: VFD007S21B 85 .0 [3 .3 5] 74 .0 [2 .9 2] 74 .0 [2 .9 2] 73 .0 [2 .8 8] 5. 8 [0. 23 ] 67 .8 [2 .6 7] 5. 0 [0. 20 ] 5.
- Page 22 Chapter 2 Installation and Wiring|VFD-S Series Frame S1: VFD004S43A, VFD004S43E, VFD007S43A, VFD007S43E 85 .0 [3 .3 5] 5. 8 [0. 23 ] 12 6. 0 [ 4. 96] 74 .0 [2 .9 2] 3. 0 [0. 12 ] 5. 0 [0. 20 ] 5.
- Page 23 Chapter 2 Installation and Wiring|VFD-S Series Frame S1: VFD004S43B, VFD007S43B 85 .0 [3 .3 5] 74 .0 [2 .9 2] 73 .0 [2 .8 8] 2-10 5 . 8 [0. 23 ] 67 .8 [2 .6 7] 5. 0 [0. 2 0 ] 5.
- Page 24 Chapter 2 Installation and Wiring|VFD-S Series Frame S1: VFD002S21E, VFD004S21E, VFD007S21E, VFD015S23D 85 .0 [3 .3 5] 5. 8 [ 0. 23 ] 12 7. 0 [ 5. 00] 74 .0 [2 .9 2] 8. 5 [ 0. 33 ] 5.
- Page 25 Chapter 2 Installation and Wiring|VFD-S Series Frame S2: VFD007S11A 10 0. 0 [ 3. 94] 86 .5 [3 .4 1] 5. 4 [0. 21 ] 12 9. 0 [ 5. 08] 5. 5 [0. 22 ] 5. 5 [0. 22 ] 2-12 Revision August 2006, SE08, SW V2.61...
- Page 26 Chapter 2 Installation and Wiring|VFD-S Series Frame S2: VFD007S11B 10 0. 0 [ 3. 94] 86 .5 [3 .4 1] 5. 4 [0. 21 ] 12 9. 0 [ 5. 08] 73 .0 [2 .8 8] 67 .8 [2 .6 7] 53 .5 [2 .11] 5.
- Page 27 Chapter 2 Installation and Wiring|VFD-S Series Frame S2: VFD015S21D, VFD015S21E, VFD015S43D, VFD015S43E, VFD022S21D, VFD022S21E, VFD022S23D, VFD022S43D, VFD022S43E 10 0 . 0 [ 3. 9 4] 5. 4 [0. 21 ] 12 9. 3 [ 5 . 09] 86 .5 [3 .4 1] 8.
- Page 28 Chapter 2 Installation and Wiring|VFD-S Series Frame S2: VFD015S21U, VFD015S43U, VFD022S21U, VFD022S43U 5.4 [0.21] 129.3 [5.09] 100.0 [3.94] 86.5 [3.41] 8.5 [0.33] 67.8 [2.67] 53.9 [2.12] 73.0 [2.88] 5.5 [0.22] 5.5 [0.22] Revision August 2006, SE08, SW V2.61 2-15...
-
Page 29: Wiring
Chapter 2 Installation and Wiring|VFD-S Series 2.4 Wiring After removing the front cover, check if the power and control terminals are clear of debris. Be sure to observe the following precautions when wiring. General Wiring Information Applicable Codes All VFD-S series are Underwriters Laboratories, Inc. (UL) and Canadian Underwriters Laboratories (cUL) listed, and therefore comply with the requirements of the National Electrical Code (NEC) and the Canadian Electrical Code (CEC). -
Page 30: Basic Wiring
2.4.1 Basic Wiring Make sure that power is only applied to the R/L1, S/L2, T/L3 terminals. Failure to comply may result in damage to the equipment. The voltage and current should lie within the range as indicated on the nameplate. Check the following items after completing the wiring: Are all connections correct? No loose wires? - Page 31 Chapter 2 Installation and Wiring|VFD-S Series For VFDXXXSXXA/B/D/U Main Circuit Power R/L1 S/L2 T/L3 Recommended Circuit when power supply is turned OFF by a fault output 2-18 R/L1 S/L2 T/L3 4.7k 4.7k 4.7k 4.7k 4.7k 4.7k Grounding resistance less than 100 Revision August 2006, SE08, SW V2.61...
- Page 32 For VFDXXXSXXE NPN (sink mode) Main Circuit Power R/L1 S/L2 T/L3 Recommended Circuit when power supply is turned OFF by a fault output Factory default Forward/Stop Reverse/Stop Reset Multi-step 1 Multi-step 2 Multi-step 3 Comm. signal (sink) Analog voltage ~ 0 10VDC Potentiometer Pot.
- Page 33 Chapter 2 Installation and Wiring|VFD-S Series For VFDXXXSXXE PNP (source mode) Main Circuit Power R/L1 S/L2 T/L3 Recommended Circuit when power supply is turned OFF by a fault output Common signal (source) Forward/Stop Reverse/Stop Reset Multi-step 1 Multi-step 2 Multi-step 3 Analog voltage ~...
-
Page 34: External Wiring
2.4.2 External Wiring Power Supply FUSE/NFB Magnetic contactor Input AC Line Reactor Zero-phase Reactor EMI Filter R/L1 S/L2 T/L3 +2/B1 U/T1 V/T2 W/T3 Zero-phase Reactor Output AC Line Reactor Motor Revision August 2006, SE08, SW V2.61 Chapter 2 Installation and Wiring|VFD-S Series Items Please follow the specific power Power... -
Page 35: Main Terminals Connections
Chapter 2 Installation and Wiring|VFD-S Series 2.4.3 Main Terminals Connections Terminal Symbol R/L1, S/L2, T/L3 L/L1, N/L2 U/T1, V/T2, W/T3 +2/B1, B2 +2/B1, +1 Mains power terminals (R/L1, S/L2, T/L3 and L/L1, N/L2) Connect these terminals via a non-fuse breaker or earth leakage breaker to 3-phase AC power (some models to 1-phase AC power) for circuit protection. - Page 36 DO NOT connect phase-compensation capacitors or surge absorbers at the output terminals of AC motor drives. With long motor cables, high capacitive switching current peaks can cause over-current, high leakage current or lower current readout accuracy. To prevent this, the motor cable should be less than 20m for 3.7kW models and below.
-
Page 37: Control Terminals
Chapter 2 Installation and Wiring|VFD-S Series 2.4.4 Control Terminals Control Terminal Wiring (Factory Setting) A. XXXSXXA/B/D/U AFM M0 Operation freq. setting potentiometer VR : 3K~5K Corrector potentiometer VR : 1K~5K Freq. meter 0~10 VDC Full scale voltmeter B. XXXSXXE Wire Gauge: 24-16 AWG Wire Type: Copper Only Torque: 2 kgf-cm (1.7 in-lbf) Terminal symbols and functions... - Page 38 Terminal Terminal Function Symbol Multi-function input 4 Multi-function Input 5 +17V DC Voltage Source Digital Signal Common Analog output meter Multi-function Relay output (N.O.) a Multi-function Relay output (N.C.) b Multi-function Relay common Multi-function Output 1 (Photocoupler) Multi-function output common Max. 48Vdc 50mA +10V Potentiometer power supply Revision August 2006, SE08, SW V2.61...
- Page 39 Chapter 2 Installation and Wiring|VFD-S Series Terminal Terminal Function Symbol Analog voltage Input (AVI/ACI) Control signal wiring size: 18 AWG (0.75 mm Analog input terminals (AVI, GND) Analog input signals are easily affected by external noise. Use shielded wiring and keep it as short as possible (<20m) with proper grounding.
- Page 40 Digital outputs (MO1, MCM) Make sure to connect the digital outputs to the right polarity, see wiring diagrams. When connecting a relay to the digital outputs, connect a surge absorber or fly-back diode across the coil and check the polarity. General Keep control wiring as far as possible from the power wiring and in separate conduits to avoid interference.
-
Page 41: Main Circuit Terminals
Chapter 2 Installation and Wiring|VFD-S Series 2.4.5 Main Circuit Terminals VFD002S11A/11B, VFD004S11A/11B Power Terminal: Torque: 12 kgf-cm (10 lbf-in) Wire Gauge: 14-20 AWG (2.1-0.5mm Wire Type: Copper only, 75 2-28 Power terminal AC Input Line Motor Ter minal Conne ction Groun d Br ak ing Resi stor Revision August 2006, SE08, SW V2.61... - Page 42 VFD002S21B/23A, VFD004S21B/23A/43A/43B/43E, VFD007S21B/23A/43A/43B/43E, VFD015S23D Power Terminal: Torque: 12 kgf-cm (10 lbf-in) Wire Gauge: 14-20 AWG (2.1-0.5mm Wire Type: Copper only, 75 Revision August 2006, SE08, SW V2.61 Chapter 2 Installation and Wiring|VFD-S Series Power terminal AC Input Line Motor Ter minal Conne ction Br ak ing G roun d...
- Page 43 Chapter 2 Installation and Wiring|VFD-S Series VFD002S21A/E, VFD004S21A/E, VFD007S21A/E Power Terminal: Torque: 12 kgf-cm (10 lbf-in) Wire Gauge: 14-20 AWG (2.1-0.5mm Wire Type: Copper only, 75 2-30 Power terminal AC Input Line Terminal Motor Conne ction Brak ing Groun d DC Reactor Res istor Revision August 2006, SE08, SW V2.61...
- Page 44 Chapter 2 Installation and Wiring|VFD-S Series VFD007S11A/B Power terminal AC Input Line Motor Terminal Conne ction G roun d Brak ing Resi stor Power Terminal: Torque: 20 kgf-cm (17.4 lbf-in) Wire Gauge: 10-18 AWG (5.3-0.8mm Wire Type: stranded copper only, 75 Revision August 2006, SE08, SW V2.61 2-31...
- Page 45 Chapter 2 Installation and Wiring|VFD-S Series VFD015S21U/43D/43E/43U, VFD022S21U/23D/43D/43E/43U Power Terminal: Torque: 20 kgf-cm (17.4 lbf-in) Wire Gauge: 10-18 AWG (5.3-0.8mm Wire Type: stranded copper only, 75 2-32 Power terminal AC Input Line Terminal Groun d Revision August 2006, SE08, SW V2.61 Motor Conne ction Br ak ing...
- Page 46 VFD015S21D/E, VFD022S21D/E Power Terminal: Torque: 20 kgf-cm (17.4 lbf-in) Wire Gauge: 10-18 AWG (5.3-0.8mm Wire Type: stranded copper only, 75 Revision August 2006, SE08, SW V2.61 Chapter 2 Installation and Wiring|VFD-S Series Power terminal AC Input Line Ter minal G roun d Motor Conne ction Br ak ing...
- Page 47 Chapter 2 Installation and Wiring|VFD-S Series This page intentionally left blank 2-34 Revision August 2006, SE08, SW V2.61...
-
Page 48: Chapter 3 Start Up
3.1 Preparations before Start-up Carefully check the following items before proceeding. Make sure that the wiring is correct. In particular, check that the output terminals U/T1, V/T2, W/T3 are NOT connected to power and that the drive is well grounded. Verify that there are no short-circuits between terminals and from terminals to ground or mains power. -
Page 49: Chapter 3 Start Up| Vfd-S Series
Chapter 3 Start Up| VFD-S Series 3.2 Operation Method Refer to 4.2 How to operate the digital keypad and chapter 5 parameters for setting. Please choose a suitable method depending on application and operation rule. The operation is usually done as shown in the following table. - Page 50 NOTE 1. Stop running immediately if any fault occurs and refer to the troubleshooting guide for solving the problem. 2. Do NOT touch output terminals U/T1, V/T2, W/T3 when power is still applied to R/L1, S/L2, T/L3 even when the AC motor drive has stopped. The DC-link capacitors may still be charged to hazardous voltage levels, even if the power has been turned off.
- Page 51 Chapter 3 Start Up| VFD-S Series This page intentionally left blank Revision August 2006, SE08, SW V2.61...
-
Page 52: Chapter 4 Digital Keypad Operation
4.1 Description of the Digital Keypad LED indication Light during RUN, STOP, FWD and REV operation. Potentiometer for frequency setting. Could be the Master Frequency input by setting Pr.2-00. MIN. MAX. Mode Key Change between different display modes. 4.2 Explanation of LED Indicators 4.3 Explanations of Display Messages Display Message Displays the AC drive Master Frequency. -
Page 53: Chapter 4 Digital Keypad Operation|Vfd-S Series
Chapter 4 Digital Keypad Operation|VFD-S Series Display Message The internal PLC process step currently being performed. Displays the DC-BUS voltage Displays the output voltage Displays the AC motor drive forward run status. Displays the AC motor drive reverse run status. The counter value (C). -
Page 54: How To Operate The Digital Keypad
4.4 How to Operate the Digital Keypad Setting Mode START Note: In the selection mode, press Setting parameters NOTE: In the parameter setting mode, you can press To shift data START (When operation source is digital keypad) Setting direction Revision August 2006, SE08, SW V2.61 Chapter 4 Digital Keypad Operation|VFD-S Series to set the parameters. - Page 55 Chapter 4 Digital Keypad Operation|VFD-S Series This page intentionally left blank Revision August 2006, SE08, SW V2.61...
-
Page 56: Chapter 5 Parameters
The VFD-S parameters are divided into 11 groups by property for easy setting. In most applications, the user can finish all parameter settings before start-up without the need for re-adjustment during operation. The 11 groups are as follows: Group 0: User Parameters Group 1: Basic Parameters... -
Page 57: Chapter 5 Parameters|Vfd-S Series
Chapter 5 Parameters|VFD-S Series 5.1 Summary of Parameter Settings : The parameter can be set during operation. Group 0 User Parameters Explanation 0-00 Identity Code of the AC Motor Drive 0-01 Rated Current Display of the AC Motor Drive 0-02 Parameter Reset 0-03 Start-up Display Selection 0-04 Content of Multi-Function Display... - Page 58 Explanation 1-05 Minimum Output Frequency (Fmin) Minimum Output Voltage (Vmin) 1-06 1-07 Output Frequency Upper Limit 1-08 Output Frequency Lower Limit 1-09 Accel Time 1 1-10 Decel Time 1 1-11 Accel Time 2 1-12 Decel Time 2 1-13 Jog Acceleration / Deceleration Time 1-14 Jog Frequency Auto acceleration / deceleration (refer 1-15...
- Page 59 Chapter 5 Parameters|VFD-S Series Explanation Source of Master Frequency 2-00 Command Source of Operation 2-01 Command 2-02 Stop Method 2-03 PWM Carrier Frequency Selections 2-04 Motor Direction Control 2-05 Loss of ACI Signal 2-06 Analog Auxiliary Frequency Operation Group 3 Output Function Parameters Settings d4: Master Frequency operated by RS-485 serial communication...
- Page 60 Explanation 3-00 Analog Output Signal 3-01 Analog Output Gain 3-02 Desired Frequency Attained 3-03 Terminal Count Value 3-04 Preliminary Count Value Multi-Function Output Terminal 1 3-05 (Photocoupler Output) Multi-Function Output Terminal 2 3-06 (Relay Output) Group 4 Input Function Parameters Explanation 4-00 Potentiometer Bias Frequency Potentiometer Bias...
- Page 61 Chapter 5 Parameters|VFD-S Series Explanation Multi-Function Input Terminal 2 (M2) 4-05 Multi-Function Input Terminal 3 (M3) 4-06 Multi-Function Input Terminal 4 (M4) 4-07 4-08 Multi-Function Input Terminal 5(M5) 4-09 Line Start Lockout 4-10 Up/Down Mode Accel/Decel Rate of Change of 4-11 UP/DOWN Operation with Constant Speed...
- Page 62 Explanation 5-02 3rd Step Speed Freq. 5-03 4th Step Speed Freq. 5-04 5th Step Speed Freq. 5-05 6th Step Speed Freq. 5-06 7th Step Speed Freq. 5-07 PLC Mode 5-08 PLC Forward/ Reverse Motion 5-09 Time Duration of Zero Step Speed 5-10 Time Duration of 1st Step Speed 5-11...
- Page 63 Chapter 5 Parameters|VFD-S Series Explanation 6-05 Over-Torque Detection Time Electronic Thermal Overload Relay 6-06 Selection Electronic Thermal 6-07 Characteristic 6-08 Present Fault Record 6-09 Second Most Recent Fault Record 6-10 Third Most Recent Fault Record Settings d0.1 to d10.0 Sec d0 to d2 d30 to d600 Sec d0: No fault...
- Page 64 Group 7 Motor Parameters Explanation 7-00 Motor Rated Current Motor No-Load Current 7-01 Torque Compensation 7-02 7-03 Slip Compensation Group 8 Special Parameters Explanation 8-00 DC Braking Voltage Level 8-01 DC Braking Time during Start-Up 8-02 DC Braking time during Stopping 8-03 Start-Point for DC Braking Momentary Power Loss Operation...
- Page 65 Chapter 5 Parameters|VFD-S Series Explanation Communication 9-00 Address 9-01 Transmission Speed 9-01 Transmission Speed Transmission Fault 9-02 Treatment 9-03 Time-out Detection Communication 9-04 Protocol Group A PID Parameters Explanation A-00 Input terminal for PID Feedback A-01 Gain over PID Detection value A-02 Proportional Gain (P) A-03...
- Page 66 Explanation A-07 PID Output Freq. Limit A-08 Feedback Signal Detection Time Treatment of the Erroneous A-09 Feedback Signals A-10 Sleep Frequency A-11 Wakeup Frequency A-12 Sleep Period A-13 PID User Defined Revision August 2006, SE08, SW V2.61 Chapter 5 Parameters|VFD-S Series Settings d0 to d110% d0.0 to d650 seconds...
-
Page 67: Parameter Settings For Applications
Chapter 5 Parameters|VFD-S Series 5.2 Parameter Settings for Applications Speed Search Applications Windmill, winding Restart free- machine, fan and all running motor inertia loads DC Braking before Running Applications When e.g. windmills, Keep the free- fans and pumps rotate running motor at standstill. - Page 68 Two-wire/three-wire Applications To run, stop, forward and General application reverse by external terminals Frequency Hold Applications Acceleration/ General application deceleration pause Auto Restart after Fault Applications For continuous and Air conditioners, reliable operation remote pumps without operator intervention Emergency Stop by DC Braking Applications Emergency stop High-speed rotors...
- Page 69 Chapter 5 Parameters|VFD-S Series Over-torque Setting Applications To protect Pumps, fans and machines and to extruders have continuous/ reliable operation Upper/Lower Limit Frequency Applications Control the motor Pump and fan speed within upper/lower limit Skip Frequency Setting Applications To prevent Pumps and fans machine vibrations Carrier Frequency Setting...
- Page 70 Output Signal during Running Applications Provide a signal for General application running status Output Signal in Zero Speed Applications Provide a signal for General application running status Output Signal at Desired Frequency Applications Provide a signal for General application running status Over-torque Detection Applications To protect...
- Page 71 Chapter 5 Parameters|VFD-S Series Output Signal when Frequency Attained Applications Provide a signal for General application running status Output Signal for Base Block Applications Provide a signal for General application running status Overheat Warning for Heat Sink Applications General application For safety Multi-function Analog Output Applications...
-
Page 72: Description Of Parameter Settings
5.3 Description of Parameter Settings Group 0: User Parameters 0-00 Identity Code of the AC Motor Drive Settings Read Only 0-01 Rated Current Display of the AC motor drive Settings Read Only Pr. 0-00 displays the identity code of the AC motor drive. The capacity, rated current, rated voltage and the max. - Page 73 Chapter 5 Parameters|VFD-S Series Display forward/reverse command (Frd/rEv) 0-04 Content of Multi-function Display Settings d0 Display the user-defined unit (u) Display the counter value (C) Display the content of PLC time (1.tt) Display the DC BUS voltage (U) Display the output voltage (E) Display frequency commands of PID (P) Display analog feedback signal value (b) (%) Display the user-defined unit, where unit = H X Pr.0-5-...
- Page 74 0-07 Password Input Settings d0 to d999 Pr.0-07 and Pr.0-08 work together to provide data security for the AC drive. When Pr.0-08 is set to a value other than 0, a password must be entered to alter the values of parameters. The password is the number set in Pr.0-08, which ranges from 1 to 999.
- Page 75 Chapter 5 Parameters|VFD-S Series 0-08 Displays 0 when entering correct password into Pr.0-07. Memory Mode Selections 0-09 Settings d0 to d63 This parameter is determined to save frequency, operation direction and parameter setting after power off or not. Setting method: input to this parameter after converting binary 6-bit to decimal. Refer to following two tables for detail.
- Page 76 bit 5 bit4 When Pr. 0-09 is set to b5=0, Pr. 0-09 setting will be saved after power on again. When Pr. 0-02 is set to d10, all parameters (includes Pr.0-09) will be set to factory setting. Revision August 2006, SE08, SW V2.61 Bit 3 bit 1 Setting for Pr.
- Page 77 Chapter 5 Parameters|VFD-S Series Group 1: Basic Parameters Maximum Output Frequency (Fmax) 1-00 Settings d50.0 to d400 Hz This parameter determines the AC motor drive’s Maximum Output Frequency. All the AC motor drive frequency command sources (analog inputs 0 to +10V and 4 to 20mA) are scaled to correspond to the output frequency range.
- Page 78 This parameter sets the Mid-Point Voltage of any V/f curve. With this setting, the V/f ratio between Minimum Frequency and Mid-Point Frequency can be determined. This parameter must be equal to or greater than Minimum Output Voltage (Pr.1-06) and equal to or less than Maximum Output Voltage (Pr.1-02).
- Page 79 Chapter 5 Parameters|VFD-S Series If the Upper Limit of Output Frequency is 50Hz and the Maximum Output Frequency is 60Hz, the Maximum Output Frequency will be limited to 50Hz. If the Lower Limit of Output Frequency is 10Hz, and the Minimum Output Frequency (Pr.1-05) is set at 1.0Hz, then any Command Frequency between 1-10Hz will generate a 10Hz output from the drive.
- Page 80 The JOG function can be selected using Multi-function Input terminals (Pr.4-04 to Pr.4-08) if programmed for Jog (d10). When the Jog terminal is “closed”, the AC drive will accelerate from Minimum Output Frequency (Pr.1-05) to Jog Frequency (Pr.1-14). When the Jog terminal “open”, the AC drive will decelerate from Jog Frequency to zero.
- Page 81 Chapter 5 Parameters|VFD-S Series 1-16 Acceleration S-Curve 1-17 Deceleration S-Curve Settings d0 to d7 These two parameters allow you to configure whether the acceleration and/or deceleration ramps are linear or S-shaped. The S-curve is enabled when set at d1-d7. Setting d1 offers the quickest S-curve and d7 offers the longest and smoothest S-curve.
- Page 82 Group 2: Operation Method Parameters 2-00 Source of Master Frequency Command Settings This parameter sets the Frequency Command Source of the AC drive. If the Frequency Command Source is external (DC 0 to +10V or 4 to 20mA), please make sure the (AVI) terminal jumper is in the proper position as shown below.
- Page 83 Chapter 5 Parameters|VFD-S Series 2-01 Source of Operation Command Settings When the AC drive is controlled by an external source, please refer to parameter group 4 for detailed explanations on related parameter settings. 2-02 Stop Method Settings The parameter determines how the motor is stopped when the AC motor drive receives a valid stop command or detects External Fault.
- Page 84 Frequency output frequency motor speed operation command 2-03 PWM Carrier Frequency Selections Power Setting Range Factory Setting This parameter determines the PWM carrier frequency of the AC motor drive. Carrier Acoustic Frequency Noise Significant 3kHz 10kHz Minimal From the table, we see that the PWM carrier frequency has a significant influence on the electromagnetic noise, AC motor drive heat dissipation, and motor acoustic noise.
- Page 85 Chapter 5 Parameters|VFD-S Series 2-05 Loss of ACI Signal (4-20mA) Settings This parameter is only effective when the Source of Frequency is commanded by a 4 to 20mA signal. The ACI input is considered lost when the ACI signal falls below 2mA. 2-06 Analog Auxiliary Frequency Operation Settings...
- Page 86 Group 3: Output Function Parameters 3-00 Analog Output Signal (AFM) Settings This parameter sets the function of the AFM output 0~+10VDC (ACM is common). The voltage output type for this analog signal is PWM. It needs to read value by the movable coil meter and is not suitable for A/D signal conversion.
- Page 87 Chapter 5 Parameters|VFD-S Series 3-02 Desired Frequency Attained Settings d1.0 to d400 Hz If a multi-function output terminal is set to function as Desired Frequency Attained (Pr.3-05 or 3-06=d9), then the output will be activated when the programmed frequency is attained. Max.
- Page 88 Display (Pr.0-04=d1) Counter Trigger Signal Multi-function Input Terminal Preliminary Counter Value Attained Output (Pr. 3-04=d3) (Pr. 3-05 to Pr. 3-06=d15) Terminal Count Value Attained Output (Pr.3-03=d5) (Pr.3-05 to Pr.3-06=d14) 3-05 Multi-function Output Terminal 1 (Photocoupler output) 3-06 Multi-function Output Terminal 2 (relay output) Settings d0 to d18 Setting Function...
- Page 89 Chapter 5 Parameters|VFD-S Series Setting Function PLC Program Running PLC Program Step Completed PLC Program Completed PLC Operation Paused Terminal Count Value Attained Preliminary Counter Value Attained AC Motor Drive Ready FWD Command Indication REV Command Indication 5-34 Description the output will be activated when the PLC program is running.
- Page 90 Group 4: Input Function Parameters 4-00 Potentiometer Bias Frequency Settings d0.0 to d100.0% 4-01 Potentiometer Bias Polarity Settings 4-02 Potentiometer Frequency Gain Settings d1 to d200% 4-03 Potentiometer Reverse Motion Enable Settings Pr.4-00 to Pr.4-03 are used when the source of frequency command is the analog signal (0 to +10V DC or 4 to 20 mA DC).
- Page 91 Chapter 5 Parameters|VFD-S Series Example 3: The example also shows the popular method. The whole scale of the potentiometer can be used as desired. In addition to signals of 0 to 10V and4 to 20mA, the popular voltage signals also include signals of 0 to 5V, 20 to 4mA or that under 10V.
- Page 92 Example 6: In this example, a negative bias is used to provide a noise margin. Also a potentiometer frequency gain is used to allow the Maximum Output Frequency to be reached. Max. Pr.1-00 Output Freq. 60Hz Negative bias 6Hz Example 7: In this example, the potentiometer is programmed to run a motor is both forward and reverse direction.
- Page 93 Chapter 5 Parameters|VFD-S Series Max. Output Pr.1-00 Freq. 60Hz anti-slope 4-04 Multi-function Input Terminal (M0, M1) Settings d0 to d29 4-05 Multi-function Input Terminal (M2) 4-06 Multi-function Input Terminal (M3) 4-07 Multi-function Input Terminal (M4) 4-08 Multi-function Input Terminal (M5) Parameters &...
- Page 94 Explanations: d0 Parameter Disable: Enter value (d0) to disable any Multi-Function Input Terminal: M1 (Pr.4-04), M2 (Pr.4-05), M3 (Pr.4- 06), M4 (Pr.4-07) or M5 (Pr.4-08). NOTE The purpose of this function is to provide isolation for unused Multi-Function Input Terminals. Any unused terminals should be programmed to d0 to insure they have no effect on drive operation.
- Page 95 Chapter 5 Parameters|VFD-S Series NOTE When value d3 is selected for Pr. 4-04, this will over ride any value entered in Pr.4-05, since Pr.4-05 must be used for three wire control as shown above. d4, d5 External Faults: Parameter values d4, d5 programs Multi-Function Input Terminals: M1 (Pr. 4-04), M2 (Pr. 4-05), M3 (Pr.
- Page 96 D7 Multi-step 1 D8 Multi-step 2 D9 Multi-step 3 These three inputs select the multi-step speeds defined by Pr.5-00 to Pr.5-06 as shown in the following diagram. Pr.5-07 to Pr.5-16 can also control output speed by programming the AC drive’s internal PLC function.
- Page 97 Chapter 5 Parameters|VFD-S Series Frequency Acceleration inhibit Mx-GND Operation command d12 First or Second Acceleration/Deceleration Time Selection: Parameter value d12 programs a Multi-Function Input Terminal: M1 (Pr.4-04), M2 (Pr.4-05), M3 (Pr.4-06), M4 (Pr.4-07) or M5 (Pr.4-08) to control selection of First or Second Acceleration/deceleration time.
- Page 98 setting by d13 setting by d14 NOTE When a Base-Block signal is received, the AC drive will stop all output and the motor will free run. When base block control is deactivated, the AC drive will start its speed search function and synchronize with the motor speed, and then accelerate to Master Frequency.
- Page 99 Chapter 5 Parameters|VFD-S Series PLC operation setting by d17 setting by d18 NOTE Pr.5-00 to Pr.5-16 define the PLC program. d19 Counter Trigger: Parameter value d19 programs Multi-Function Input Terminal: M1 (Pr.4-04), M2 (Pr.4-05), M3 (Pr.4- 06), M4 (Pr.4-07) or M5 (Pr.4-08) to increase the AC drive’s internal counter. When an input is received, the counter is increased by 1.
- Page 100 d20 Counter Reset: Parameter value d20 programs Multi-Function Input Terminal: M1 (Pr.4-04), M2 (Pr. 4-05), M3 (Pr.4- 06), M4 (Pr.4-07) or M5 (Pr.4-08) to reset the counter. Reset counter d20 reset the counter value. d21 Select ACI / Deselect AVI: Parameter value d21 allows the user to select the input type ACI or AVI via an external switch.
- Page 101 Chapter 5 Parameters|VFD-S Series d29 M0: 0: RUN 1: STOP, M1: no function, Direction is controlled by keypad 4-09 Line Start Lockout Settings When enabled, the AC drive will not start when powered up with run commands applied. To start in Line Start Lockout mode, the AC drive must see the run command go from stop to run after power up.
- Page 102 Group 5: Multi-step speeds and PLC (Process Logic Control) parameters 5-00 1st Step Speed Frequency 5-01 2nd Step Speed Frequency 5-02 3rd Step Speed Frequency 5-03 4th Step Speed Frequency 5-04 5th Step Speed Frequency 5-05 6th Step Speed Frequency 5-06 7th Step Speed Frequency Settings...
- Page 103 Chapter 5 Parameters|VFD-S Series Frequency 60Hz 50Hz 40Hz 30Hz 20Hz 15Hz Master 10Hz Freq. 5-09 Program operation command Program operation output indication Program step complete Program operation completed NOTE The above diagram shows one complete PLC cycle. To restart the cycle, turn the PLC program off and then back on.
- Page 104 Example 3 (Pr. 5-07 = d3) Execute one cycle step by step: The example shows how the PLC can perform one cycle at a time, within a complete cycle. Each step will use the acceleration/deceleration times in Pr.1-09 to Pr.1-12. It should be noticed that the time each step spends at its intended frequency is diminished, due to the time spent during acceleration/deceleration.
- Page 105 Chapter 5 Parameters|VFD-S Series Example 5 (Pr. 5-07 = d1 Execute one cycle of the PLC program): In this example, the PLC program runs continuously. It should be noted that the times of reserve motion may be shorter than expected, due to the acceleration/deceleration times. Frequency 60Hz 50Hz...
- Page 106 Weights Direction The setting value = bit7 x 2 +bit6 x 2 = 0 x 2 +1 x 2 +0 x 2 = 0+64+0+0+0+4+0+0 = 68 Setting Pr.5-08 as d68. 5-09 Time Duration of Zero Step Speed 5-10 Time Duration of 1st Step Speed 5-11 Time Duration of 2nd Step Speed 5-12...
- Page 107 Chapter 5 Parameters|VFD-S Series Group 6: Protection Parameters 6-00 Over-Voltage Stall Prevention Settings d0 During deceleration, the motor DC bus voltage may exceed its Maximum Allowable Value due to motor regeneration. When this function is enabled, the AC drive will stop decelerating. Maintaining a constant output frequency when it happens.
- Page 108 DC bus voltage Over-voltage detection level Pr.6-01 Output Freq. 6-02 Over-Current Stall Prevention Level Settings d20 to d150% A setting of 100% is equal to the Rated Output Current of the drive. During acceleration and steady-state operation, the AC drive output current may increase abruptly to exceed the value specified by Pr.6-02 due to rapid acceleration or excessive load on the motor.
- Page 109 Chapter 5 Parameters|VFD-S Series 6-03 Over-Torque Detection Mode (OL2) Settings 6-04 Over-Torque Detection Level Settings d30 to d200% This setting is proportional to the Rated Output Current of the drive. 6-05 Over-Torque Detection Time Settings d0.1 to d10.0 sec If a Multi-Function Output Terminal is set as Over-Torque Detection Indication and the output current exceeds the Over-Torque Detection Level (Pr.6-04, Factory Setting: 150%), the Over- Torque Detection Time (Pr.6-05, Factory setting: 0.1) and the setting of multi-function terminal is Over-Torque Detection Indication, the contact will be “close”.
- Page 110 Operation time(min) 20 40 60 80 100 120 140 160 180 200 6-08 Present Fault Record 6-09 Second Most Recent Fault Record 6-10 Third Most Recent Fault Record Readings Revision August 2006, SE08, SW V2.61 60Hz or more 50Hz 10Hz No fault Over-current (oc) Over-voltage (ov)
- Page 111 Chapter 5 Parameters|VFD-S Series Pr.6-08 to 6-10 store records of the three most recent faults that had occurred. Use the reset key to reset the drive when the fault no longer exits. 5-56 Software protection enable (codE) Reserved CPU failure (cF3.1) CPU failure (cF3.2) CPU failure (cF3.3) CPU failure (cF3.4)
- Page 112 Group 7: Motor Parameters 7-00 Motor Rated Current Settings d30 to d120% This parameter will limit the AC drive output current in order to prevent the motor from overheating. Motor No-load Current 7-01 Settings d0 to d90% The rated current of the AC drive is regarded as 100%. Motor setting of no-load current will effect the slip compensation.
- Page 113 Chapter 5 Parameters|VFD-S Series Group 8: Special Parameters 8-00 DC Braking Current Level Settings d0 to d30% This parameter determines the level of DC Braking Voltage Level output to the motor during start-up and stopping. When setting DC Braking Voltage, the Maximum Output Voltage (Pr.1- 02) is regarded as 100%.
- Page 114 DC Braking during Start-up is used for loads that may move before AC drive starts, such as fans and pumps. These loads may also be moving in the wrong direction. Under such circumstances, DC Braking can be executed to hold the load in position before applying a forward motion.
- Page 115 Chapter 5 Parameters|VFD-S Series Following a power failure, the AC drive will start its speed search operation, only if the output current is greater than the value determined by Pr.8-07. When the output current is less than that of Pr.8-07, the AC drive output frequency is at a “speed synchronization point”. The drive will start to accelerate or decelerate back to the operating frequency at which it was running prior to the power failure.
- Page 116 8-15 Automatic Voltage Regulation (AVR) Settings AVR function automatically regulates the AC drive output voltage to the Maximum Output Voltage (Pr.1-02). For instance, if Pr.1-02 is set at 200 VAC and the input voltage is at 200V to 264VAC, then the Maximum Output Voltage will automatically be reduced to a maximum of 200 VAC.
- Page 117 Chapter 5 Parameters|VFD-S Series Group 9: Communication Parameters 9-00 Communication Address Settings d1 to d254 If the AC drive is controlled by RS-485 serial communication, the communication address must be set via this parameter. Computer 9-01 Transmission Speed Settings Users can set parameters and control the operation of the AC drive via the RS-485 serial interface of a personal computer.
- Page 118 9-03 Time-out Detection Settings If this function is enabled, the timer will start counting once the first valid Modbus communication signal is received after power-up or reset. The timer will reset to 0 after each valid Modbus communication message is received. If the watchdog timer reaches the value set in Pr.
- Page 119 Chapter 5 Parameters|VFD-S Series Terminal Unit). Users can select the desired mode along with the serial port communication protocol in Pr. 9-04. Code Description: ASCII mode: Each 8-bit data is the combination of two ASCII characters. For example, a 1-byte data: 64 Hex, shown as ‘64’...
- Page 120 ( 8.N.2 ) Start ( 8.E.1 ) Start ( 8.O.1 ) Start 3. Communication Protocol 3.1 Communication Data Frame: ASCII mode: Start character ‘:’ (3AH) ADR 1 Communication address: 8-bit address consists of 2 ASCII codes ADR 0 CMD1 Command code: 8-bit command consists of 2 ASCII codes CMD0 Contents of data:...
- Page 121 Chapter 5 Parameters|VFD-S Series 3.2 ADR (Communication Address) Valid communication addresses are in the range of 0 to 254. A communication address equal to 0, means broadcast to all AC drives (AMD). In this case, the AMD will not reply any message to the master device.
- Page 122 RTU mode: Command message: Starting data address Number of data (count by word) CRC CHK Low CRC CHK High (2) 06H: single write, write single data to register. Example: writing data 6000(1770H) to register 0100H. AMD address is 01H. ASCII mode: Command message: ADR 1 ADR 0...
- Page 123 Chapter 5 Parameters|VFD-S Series ASCII Mode: Command message: ADR 1 ADR 0 CMD1 CMD0 Starting Data address Number of data (count by word) Number of data (count by byte) Data content of address 0500H Data content of address 0501H LRC CHK 1 LRC CHK 0 END1 END0...
- Page 124 ASCII mode: LRC (Longitudinal Redundancy Check) is calculated by summing up, module 256, the values of the bytes from ADR1 to last data character then calculating the hexadecimal representation of the 2’s-complement negation of the sum. For example, reading 1 word from address 0401H of the AC drive with address 01H Starting data address Number of data LRC CHK 1...
- Page 125 Chapter 5 Parameters|VFD-S Series Step 5: Repeat step 3 and 4 until eight shifts have been performed. When this is done, a complete 8-bit byte will have been processed. Step 6: Repeat step 2 to 5 for the next 8-bit byte of the command message. Continue doing this until all bytes have been processed.
- Page 126 Content Address Command 2000H 2001H 2002H Status 2100H monitor Read only Revision August 2006, SE08, SW V2.61 Functions Bit 0-1 00: No function 01: Stop 10: Run 11: Jog + Run Bit 2-3 Not used 00: No function 01: FWD Bit 4-5 10: REV 11: Change direction...
- Page 127 Chapter 5 Parameters|VFD-S Series Content Address 2101H 2102H 2103H 2104H 2105H 2106H 2107H 2108H 2109H 210AH 3.6 Exception response: The AC motor drive is expected to return a normal response after receiving command messages from the master device. The following depicts the conditions when no normal response is replied to the master device.
- Page 128 Example of an exception response of command code 06H and exception code 02H: ASCII mode: ADR 1 ADR 0 CMD1 CMD0 Exception code LRC CHK 1 LRC CHK 0 END1 END0 The explanation of exception codes: Exception code Illegal command code: The command code received in the command message is not available for the AC drive.
- Page 129 Chapter 5 Parameters|VFD-S Series 3.7 Communication program of PC: The following is a simple example of how to write a communication program for Modbus ASCII mode on a PC in C language. #include<stdio.h> #include<dos.h> #include<conio.h> #include<process.h> #define PORT 0x03F8 /* the address of COM1 */ /* the address offset value relative to COM1 */ #define THR 0x0000 #define RDR 0x0000...
- Page 130 Group A: PID Control A-00 Input Terminal for PID Feedback Settings Select an input terminal to serve as the PID feedback location. Please verify the feedback location is different from the Frequency Set Point location and J1 for selecting ACI or AVI must be in the correct position.
- Page 131 Chapter 5 Parameters|VFD-S Series When this parameter is set to gain =1, PID output is Derivative time. At this time, error value – error value of the preceding item= additional respond speed and it is easy to have over compensation situation. A-05 Upper Bound for Integral Control Settings...
- Page 132 This parameter selects the operation of the drive upon a loss of PID feedback signal. Sleep Frequency A-10 Settings d0.0 to d400Hz A-11 Wakeup Frequency Settings d0.0 to d400Hz A-12 Sleep Period Settings d0.0 to d650 seconds These parameters determine sleep functions of the AC drive. If the command frequency falls below the sleep frequency, for the specified time in Pr.
- Page 133 Chapter 5 Parameters|VFD-S Series the setting frequency of parameters, such as Max. operation frequency, 1 they are still needed to set with actual value. Target Value A-02 If the input range of sensor is 0~SI_max, output range is SO_min~SO_max and then Input Per output SO_max-SO_min...
-
Page 134: Chapter 6 Fault Code Information
The AC motor drive has a comprehensive fault diagnostic system that includes several different alarms and fault messages. Once a fault is detected, the corresponding protective functions will be activated. The following faults are displayed as shown on the AC motor drive digital keypad display. The three most recent faults can be read from the digital keypad or communication. -
Page 135: Chapter 6 Fault Code Information|Vfd-S Series
Chapter 6 Fault Code Information|VFD-S Series Fault Fault Descriptions Name Overheating Heat sink temperature too high Low voltage The AC motor drive detects that the DC bus voltage has fallen below its minimum value. Overload The AC motor drive detects excessive drive output current. - Page 136 Fault Fault Descriptions Name Over-current during constant speed operation External Fault Internal EEPROM can not be programmed. Internal EEPROM can not be programmed. Drive’s internal circuitry abnormal. OH error OV error LV error Current detection error DC BUS detection error Current detection error Ground fault External Base Block.
-
Page 137: Reset
Chapter 6 Fault Code Information|VFD-S Series Fault Fault Descriptions Name Communication Error Software protection failure Password is locked. Analog feedback error or ACI open circuit Phase Loss PID feedback error 6.2 Reset There are three methods to reset the AC motor drive after solving the fault: STOP/RESET Press key on keypad. -
Page 138: Chapter 7 Troubleshooting
7.1 Over Current (OC) Remove short circuit or ground fault Reduce the load or increase the power of AC motor drive No Reduce torque compensation Reduce torque compensation Maybe AC motor drive has malfunction or error due to noise. Please contact with DELTA. -
Page 139: Chapter 7 Troubleshooting |Vfd-S Series
Chapter 7 Troubleshooting |VFD-S Series 7.2 Ground Fault Ground fault 7.3 Over Voltage (OV) Reduce voltage to be within spec. Maybe AC motor drive has malfunction or misoperation due to noise. Please contact with DELTA. Reduce moment of inertia Need to check control method. Please contact DELTA. Is output circuit(cable or motor) of AC motor drive grounded? -
Page 140: Low Voltage (Lv)
7.4 Low Voltage (Lv) Low voltage Is input power correct? Or power cut, including momentary power loss Check if there is any malfunction component or disconnection power supply circuit Check if voltage is within specification Check if there is heavy load with high start current in the same power system Check if Lv occurs when... -
Page 141: Over Heat (Oh)
Chapter 7 Troubleshooting |VFD-S Series 7.5 Over Heat (OH) AC motor drive overheats Heat sink overheats Check if temperature of heat sink is greater than 90 Is load too large If cooling fan functions normally Check if cooling fan is jammed Check if surrounding temperature is within specification Adjust surrounding temperature... -
Page 142: Keypad Display Is Abnormal
7.7 Keypad Display is Abnormal Abnormal display or no display Cycle power to AC motor drive Display normal? AC motor drive works normally 7.8 Phase Loss (PHL) Check wiring at R, S and T terminals Check if the screws of terminals are tightened Check if the input voltage of R, S, T is unbalanced Maybe AC motor drive has malfunction or misoperation due to noise. -
Page 143: Motor Cannot Run
Chapter 7 Troubleshooting |VFD-S Series 7.9 Motor cannot Run Motor cannot run Reset after clearing fault and then RUN It can run when no faults occur Press RUN key to check if it can run Press UP key to set frequency Check if input FWD or REV command Press UP to... -
Page 144: Motor Speed Cannot Be Changed
7.10 Motor Speed cannot be Changed Modify the setting If the setting of Pr.05-17toPr.05-31 is too high If finished with executing Pr.05-15 If the setting of Pr.05-00 to Pr.05-14 are the same Revision August 2006, SE08, SW V2.61 Motor can run but cannot change speed Check if the setting of the max. -
Page 145: Motor Stalls During Acceleration
Chapter 7 Troubleshooting |VFD-S Series 7.11 Motor Stalls during Acceleration Motor stalls during acceleration Thicken or shorten the wiring between the motor or AC motor drive Reduce load or increase the capacity of AC motor drive 7.12 The Motor does not Run as Expected Motor does not run as expected Run in low speed continuously... -
Page 146: Electromagnetic/Induction Noise
7.13 Electromagnetic/Induction Noise Many sources of noise surround AC motor drives and penetrate it by radiation or conduction. It may cause malfunctioning of the control circuits and even damage the AC motor drive. Of course, there are solutions to increase the noise tolerance of an AC motor drive. But this has its limits. Therefore, solving it from the outside as follows will be the best. -
Page 147: Affecting Other Machines
Chapter 7 Troubleshooting |VFD-S Series Store within a relative humidity range of 0% to 90% and non-condensing environment. Use an air conditioner and/or exsiccator. 7.15 Affecting Other Machines An AC motor drive may affect the operation of other machines due to many reasons. Some solutions are: High Harmonics at Power Side High harmonics at power side during running can be improved by:... -
Page 148: Chapter 8 Maintenance And Inspections
Chapter 8 Maintenance and Inspections Modern AC motor drives are based on solid-state electronics technology. Preventive maintenance is required to keep the AC motor drive in its optimal condition, and to ensure a long life. It is recommended to have a qualified technician perform a check-up of the AC motor drive regularly. Daily Inspection: Basic check-up items to detect if there were any abnormalities during operation are: Whether the motors are operating as expected. -
Page 149: Chapter 8 Maintenance And Inspections|Vfd-S Series
Chapter 8 Maintenance and Inspections|VFD-S Series Periodical Maintenance Ambient environment Check Items Check the ambient temperature, humidity, vibration and see if there is any dust, gas, oil or water drops Check for any dangerous objects near drive and motor Voltage Check Items Check if the voltage of main circuit and control circuit is... - Page 150 Check Items Check partsfor deformity or damaged If there is any color change caused by overheating Check for dust and dirt Main circuit Check Items If there are any loose or missing screws If machine or insulator is deformed, cracked, damaged or with changed color change due to overheating or ageing Check for dust and dirt...
- Page 151 Chapter 8 Maintenance and Inspections|VFD-S Series DC capacity of main circuit Check Items If there is any leakage of liquid, change of color, cracks or deformation Measure static capacity when required Resistor of main circuit Check Items If there is any peculiar smell or insulator cracks due to overheating If there is any disconnection...
- Page 152 Printed circuit board and connector of main circuit Check Items If there are any loose screws and connectors If there is any peculiar smell and color change If there is any crack, damage, deformation or corrosion If there is any leaked liquid or deformation in capacitors Cooling fan of cooling system Check Items...
- Page 153 Chapter 8 Maintenance and Inspections|VFD-S Series This page intentionally left blank Revision August 2006, SE08, SW V2.61...
-
Page 154: Appendix A Specifications
Voltage Class Model Number VFD-XXXS Max. Applicable Motor Output (kW) Max. Applicable Motor Output (HP) Rated Output Capacity (KVA) Rated Output Current (A) Maximum Output Voltage (V) Rated Frequency (Hz) Rated Input Current (A) Input Current for 1-phase model drive to be used as 3-phase model drive Rated Voltage/Frequency Voltage/Freq. - Page 155 Appendix A Specifications|VFD-S Series Installation Location Pollution Degree Ambient Temperature Storage Temperature Ambient Humidity Vibration Altitude 1,000 m or below, keep from corrosive gasses, liquid and dust ° ° C to 40 C (Non-Condensing and not frozen) ° ° C to 60 Below 90% RH (non-condensing) 9.80665m/s (1G) less than 20Hz, 5.88m/s...
-
Page 156: B.1 All Brake Resistors & Brake Units Used In Ac Motor Drives
B.1 All Brake Resistors & Brake Units Used in AC Motor Drives Note: Please only use DELTA resistors and recommended values. Other resistors and values will void Delta’s warranty. Please contact your nearest Delta representative for use of special resistors. The brake unit should be at least 10 cm away from AC motor drive to avoid possible interference. -
Page 157: B.1.1 Dimensions And Weights For Brake Resistors
Appendix B Accessories|VFD-S Series installation and operation. B.1.1 Dimensions and Weights for Brake resistors (Dimensions are in millimeter) Order P/N: BR080W200, BR080W750, BR300W70, BR300W100, BR300W250, BR300W400, BR400W150, BR400W040 Model no. BR080W200 BR080W750 BR300W70 BR300W100 BR300W250 BR300W400 BR400W150 BR400W040 Max. Weight (g) Revision August 2006, SE08, SW V2.61... -
Page 158: B.2 Emi Filters
B.2 EMI Filters The DELTA VFD-S Series 0.25-3HP, 115V, 230V, 460V AC drive uses DELTA EMI Filter. Use the table below to find the appropriate filter for your DELTA VFD-S drive. Model of AC Motor Drive VFD002S21A/B, VFD004S21A/B, VFD007S21A/B VFD015S21D/U, VFD022S21D/U VFD004S43A/B, VFD007S43A/B VFD002S11A/B, VFD004S11A/B VFD002S23A, VFD004S23A, VFD007S23A... - Page 159 Appendix B Accessories|VFD-S Series Use the cable with shielding (double shielding is the best). The shielding on both ends of the motor cable should be grounded with the minimum length and maximum contact area. Remove any paint on metal saddle for good ground contact with the plate and shielding. Remove any paint on metal saddle for good ground contact with the plate and shielding.
- Page 160 The length of motor cable When motor is driven by an AC motor drive of PWM type, the motor terminals will experience surge voltages easily due to components conversion of AC motor drive and cable capacitance. When the motor cable is very long (especially for the 460V series), surge voltages may reduce insulation quality.
-
Page 161: B.2.1 Dimensions
Appendix B Accessories|VFD-S Series If the length is too long, the stray capacitance between cables will increase and may cause leakage current. It will activate the protection of over current, increase leakage current or not insure the correction of current display. The worst case is that AC motor drive may damage. - Page 162 Appendix B Accessories|VFD-S Series Order P/N: RF022S21BA (1.97) (3.94) (1.06) (2.91) (9.49) (8.98) (8.98) (0.59) (0.94) (0.22) Revision August 2006, SE08, SW V2.61...
- Page 163 Appendix B Accessories|VFD-S Series Order P/N: 12DKT1W3S Order P/N: 08TDT1W4S Revision August 2006, SE08, SW V2.61...
- Page 164 Appendix B Accessories|VFD-S Series Order P/N: 22DRT1W3S Order P/N: 35DRT1W3C Revision August 2006, SE08, SW V2.61...
-
Page 165: B.3.1 Ac Input Reactor Recommended Value
Appendix B Accessories|VFD-S Series B.3 AC Reactor B.3.1 AC Input Reactor Recommended Value 230V, 50/60Hz, 1-Phase 0.75 B-10 Fundamental Max. continuous Amps Amps Inductance (mH) 3~5% impedance 1.25 Revision August 2006, SE08, SW V2.61... -
Page 166: B.3.2 Ac Output Reactor Recommended Value
460V, 50/60Hz, 3-Phase Fundamental 0.75 B.3.2 AC Output Reactor Recommended Value 115V/230V, 50/60Hz, 3-Phase Fundamental 0.75 460V, 50/60Hz, 3-Phase Fundamental 0.75 B.3.3 Applications for AC Reactor Connected in input circuit Application 1 When more than one AC motor drive is connected to the same mains power, and one of them is ON during operation. - Page 167 Appendix B Accessories|VFD-S Series B-12 may be damaged when over current occurs during operation. Revision August 2006, SE08, SW V2.61...
- Page 168 Correct wiring Application 2 Silicon rectifier and AC motor drive are connected to the same power. Correct wiring power Revision August 2006, SE08, SW V2.61 reactor AC motor drive AC motor drive AC motor drive Switching spikes will be generated when the silicon rectifier switches on/off.
- Page 169 Appendix B Accessories|VFD-S Series Application 3 Used to improve the input power factor, to reduce harmonics and provide protection from AC line disturbances. (surges, switching spikes, short interruptions, etc.). The AC line reactor should be installed when the power supply capacity is 500kVA or more and exceeds 6 times the inverter capacity, or the mains wiring distance Correct wiring...
-
Page 170: B.4 Dc Choke Recommended Values
B.4 DC Choke Recommended Values 230V DC Choke Input voltage 230Vac 50/60Hz 0.75 3-Phase 230Vac 50/60Hz 0.75 1-Phase 460V DC Choke Input voltage 460Vac 0.75 50/60Hz 3-Phase Revision August 2006, SE08, SW V2.61 Appendix B Accessories|VFD-S Series DC Amps Inductance (mh) DC Amps Inductance (mh) MTE CAT. -
Page 171: B.5 Zero Phase Reactor (Rf220X00A)
Appendix B Accessories|VFD-S Series B.5 Zero Phase Reactor (RF220X00A) Dimensions are in millimeter and (inch) Wiring Method Please wind each wire 4 times around the core. The reactor must be put at inverter output as close as possible. Power Supply B-16 Motor Qty. -
Page 172: B.6 Din Rail-Dr01
B.6 Din Rail-DR01 (Dimensions are in millimeter) Models Screw Size VFD002S11A/B M4*22 VFD002S21A/B/E M4*22 VFD002S23A/B M4*22 VFD004S11A/B M4*12 VFD004S21A/B/E M4*12 VFD004S23A/B M4*12 VFD004S43A/B/E M4*12 VFD007S21A/B/E M4*12 VFD007S23A/B M4*12 VFD007S43A/B/E M4*12 VFD015S23D M4*12 Revision August 2006, SE08, SW V2.61 Appendix B Accessories|VFD-S Series To install the Din Rail Adapter use the specified screws for different models. -
Page 173: B.7 Remote Controller Rc-01
Appendix B Accessories|VFD-S Series B.7 Remote Controller RC-01 (Dimensions are in millimeter) AFM GND VFD-S Programming Pr. 2-00 and Pr. 2-01 set to d01 Pr. 4-04 set to d02 (M0, M1 set at RUN/STOP and FWD/REV) Pr. 4-05 set to d06 (M2 set for reset) Pr. -
Page 174: B.8 Conduit Bracket (Bk-S)
Appendix B Accessories|VFD-S Series B.8 Conduit Bracket (BK-S) (Dimensions are in millimeter) 73.0(2.87) Revision August 2006, SE08, SW V2.61 B-19... -
Page 175: B.9 Non-Fuse Circuit Breaker Chart
Appendix B Accessories|VFD-S Series B.9 Non-fuse Circuit Breaker Chart Per UL 508C, paragraph 45.8.4, part a: For 1-phase drives, the current rating of the breaker shall be 4 times maximum input current rating. For 3-phase drives, the current rating of the breaker shall be 4 times maximum output current rating. -
Page 176: Appendix C How To Select The Right Ac Motor Drive
Appendix C How to Select the Right AC Motor Drive The choice of the right AC motor drive for the application is very important and has great influence on its lifetime and the performance. If the capacity of AC motor drive is too large, it cannot offer complete protection to the motor and it may be damaged. -
Page 177: C.1 Capacity Formulas
Appendix D CE|VFD-S Series C.1 Capacity Formulas 1. When one AC motor drive operates one motor The starting capacity should be less than 1.5x rated capacity of AC motor drive The starting capacity is ⎛ × ⎜ ⎜ η ϕ ×... - Page 178 Error! Reference source not found. Error! Reference source not found.|VFD-S Series 2.3 When it is running continuously The requirement of load capacity should be less than the capacity of the AC motor drive(kVA) The requirement of load capacity is × η...
-
Page 179: C.2 General Precautions
Appendix D CE|VFD-S Series C.2 General Precautions Selection Note When the AC Motor Drive is connected directly to a large-capacity power transformer (600kVA or above) or when phase lead capacitors are switched, excess peak currents may occur in the power input circuit and the rectifier section might be damaged. To avoid this, use an AC input reactor (optional) before AC Motor Drive mains input to reduce the current and improve the input power efficiency. -
Page 180: C.3 How To Choose A Suitable Motor
Error! Reference source not found. Error! Reference source not found.|VFD-S Series If the stall prevention function is activated, the accel./decel. time is automatically extended to a length that the AC Motor Drive can handle. If the motor needs to decelerate within a certain time with high load inertia that can’t be handled by the AC Motor Drive in the required time, either use an external brake resistor and/or brake unit, depending on the model, (to shorten deceleration time only) or increase the capacity for both the motor and the AC Motor Drive. - Page 181 Appendix D CE|VFD-S Series If 100% continuous torque is required at low speed, it may be necessary to use a special inverter duty motor. Motor dynamic balance and rotor endurance should be considered if the operating speed exceeds the rated speed (60Hz) of a standard motor. Motor torque characteristics vary when an AC Motor Drive instead of commercial power supply drives the motor.
- Page 182 Error! Reference source not found. Error! Reference source not found.|VFD-S Series Gear reduction motor: The lubricating method of reduction gearbox and speed range for continuous operation will be different and depending on brand. The lubricating function for operating long time at low speed and for high-speed operation needs to be considered carefully.
- Page 183 Appendix D CE|VFD-S Series AC motor drive 60 seconds 60 seconds 0 3 20 Frequency (Hz) Base freq.: 60Hz V/F for 220V/60Hz 0 3 20 Frequency (Hz) Base freq.: 50Hz V/F for 220V/50Hz 60 seconds Motor 60 seconds 0 3 20 Frequency (Hz) Base freq.: 60Hz V/F for 220V/60Hz...
-
Page 184: Appendix D Ce
Appendix D CE DELTA ELECTRONICS, INC. EC Declaration of Conformity According to the Low Voltage Directive 73/23/EEC and the Amendment Directive 93/68/EEC For the following equipment: AC Motor Drive (Product Name) VFD002S11A/B, VFD004S11A/B, VFD007S11A/B, VFD022S21A/B, VFD002S23B, VFD004S23B, VFD007S23A/B, VFD022S23A/B/D, VFD004S43A/B/E, VFD007S43A/B/E, VFD015S43A/B/D/E/U,... - Page 185 Appendix D CE|VFD-S Series DELTA ELECTRONICS, INC. EC Declaration of Conformity According to the Low Voltage Directive 89/336/EEC and the Amendment Directive 93/68/EEC For the following equipment: AC Motor Drive (Product Name) VFD002S11A/B, VFD004S11A/B, VFD007S11A/B, VFD022S21A/B, VFD002S23B, VFD004S23B, VFD007S23A/B, VFD022S23A/B/D, VFD004S43A/B/E, VFD007S43A/B/E, VFD015S43A/B/D/E/U,...
Need help?
Do you have a question about the AC Motor Drive VFD007S23A and is the answer not in the manual?
Questions and answers