Tennant 7300, 8300 Manual
- Parts manual (324 pages) ,
- Operator's manual (126 pages) ,
- Instruction bulletin (4 pages)
Advertisement
INTRODUCTION
 NOTE: DO NOT DISCARD the Parts List from the Instruction Bulletin. Place the Parts List in the appropriate place in your machine manual for future reference. Retaining the Parts List will make it easier to reorder individual parts and will save you the cost of ordering an entire kit.
NOTE: Numbers in parenthesis ( ) are reference numbers for parts listed in Bill of Materials.
Installation instructions for kit number 387467
SYNOPSIS / PROBLEM
This kit contains the parts needed to replace a standard drain assembly with an ES™ drain assembly on the model sweeper/scrubber. Please follow step-by-step instructions.
SPECIAL TOOLS / CONSIDERATIONS: NONE
(Estimated time to complete: 0.5 hour)
PREPARATION
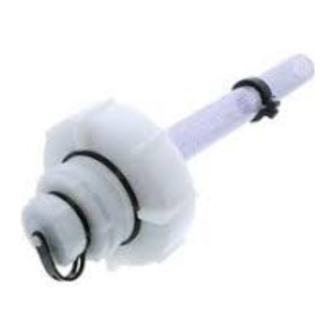
(Refer to FIG. 1).

FIG. 1 - ES™ DRAIN ASSEMBLY KIT 387467
FOR SAFETY: Before leaving or servicing machine, stop on level surface and set parking brake. Then turn off machine and remove key.
- The tank should be empty before replacing drain assembly. Check and drain tank if necessary.
- Remove the old drain assembly from the tank.
INSTALLATION
(Refer to FIG. 1)
- Mount the hose seal (10) in the center of the cover insert (11). Mount the lid gasket (8) around the edge of the cover insert (11). (Refer to FIG. 1)

- Slide the lid gasket (16) over the hose, and onto the end of the drain hose assembly (17). (Refer to FIG. 1)

- Install the new lid assembly onto the drain hose assembly (17). (Refer to FIG. 1)

- Mount the hose clamp (12) to the end of the drain hose assembly (17) with the hex screw (13), flat washers (14) and lock nut (15). (Refer to FIG. 1)

- Mount the assembly cover (7) over top of the new lid assembly with the drain cap gasket (9). Thread the drain cap (6) onto the insert cover (11) Mount the cap retainer strap (5) to the drain hose (17).
(Refer to FIG. 1)


- Mount the cap gasket (3) inside of the tank drain cap (2) with the retaining ring (4). Secure the tank drain cap to the retaining strap (5). (Refer to FIG. 1)
![]()
- Install the new drain assembly in place of the old assembly. Hand tighten the new drain assembly.
![]()


BILL OF MATERIALS FOR ES™ DRAIN ASSEMBLY KIT 387467
| Ref. | TENNANT Part No. | Description | Qty. |
| 1 | 32501 | Kit, cap, drain | 1 |
| 2 | 32613 | Cap, tank, drain, 2.25 thread pye | 1 |
| 3 | 32614 | Gasket, cap | 1 |
| 4 | 32669 | Ring, retaining, ext, 0.75d, Ss | 1 |
| 5 | 32508 | Strap | 1 |
| 6 | 14880 | Cap, tank, drain, 3.85 thread pye | 1 |
| 7 | 223674 | Cover assy | 1 |
| 8 | 375200 | Gasket, lid | 1 |
| 9 | 79320 | Gasket, cap, drain | 1 |
| 10 | 41421 | Seal | 1 |
| 11 | 14864 | Cover, insert | 1 |
| 12 | 41454 | Clamp, hose, plstc, 1.60d X 0.62w | 1 |
| 13 | 12316 | Screw, hex, M05 X 0.8 X 25, Ss | 1 |
| 14 | 01683 | Washer, flt, #10 Ss | 1 |
| 15 | 09739 | Nut, hex, lock, M05 X 0.8, NI, Ss | 1 |
| 16 | 41451 | Gasket, lid | 1 |
| 17 | 386423 | Hose assy, drain | 1 |
Documents / ResourcesDownload manual
Here you can download full pdf version of manual, it may contain additional safety instructions, warranty information, FCC rules, etc.
Advertisement


Need help?
Do you have a question about the 7300 and is the answer not in the manual?
Questions and answers