Wren Kitchens LINEA Base Cabinet Fittings Manual
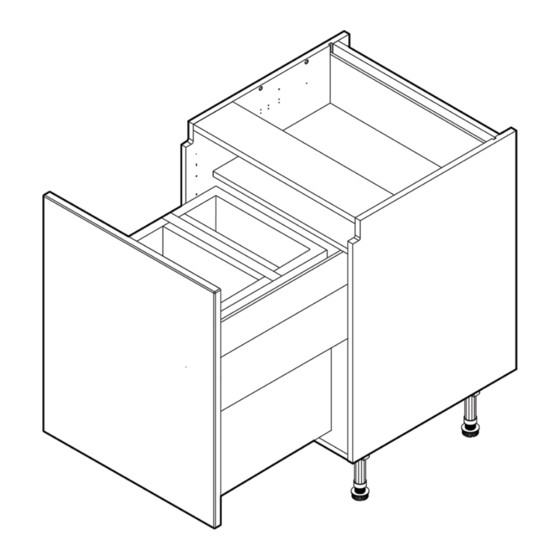
Base with trash can door, open top, 4 legs
Hide thumbs
Also See for LINEA Base Cabinet:
- Fittings manual (8 pages) ,
- Fittings manual (7 pages) ,
- Fittings manual (14 pages)
Advertisement
Quick Links
L I N E A / M I L A N O
Base Cabinet
Base with Trash Can (Door, Open Top, 4 Legs) - Fitting Guide
Cabinet Parts
32x 5/8"
Screws
1x
Space Plug
Tools Required
Drill
Stud Finder
6x 1 1/4"
Screws
Cover Caps
4x
Shelf Pegs
Jigsaw
Mallet
Screwdriver
18x
4x
Legs
1x
5x
Shelf
Door Buffers
Clamp
2x
Toe Kick Clips
2x
L-Brackets
Spirit Level
Tape Measure
Page 1
Advertisement

Related Manuals for Wren Kitchens LINEA Base Cabinet


Summary of Contents for Wren Kitchens LINEA Base Cabinet
- Page 1 L I N E A / M I L A N O Base Cabinet Base with Trash Can (Door, Open Top, 4 Legs) - Fitting Guide Cabinet Parts 32x 5/8” 6x 1 1/4” Screws Screws Cover Caps Legs Toe Kick Clips Space Plug Shelf Pegs Shelf...
- Page 2 Remember to take care when unpacking. Please keep your workspace clean, clear and tidy when working. This will help keep all items safe from any damages. Any un-needed cardboard or plastic should be flattened down and placed in the trash can.
- Page 3 Notching out the side panel (if required) In order to allow for any horizontal pipework running behind the cabinet, some cabinets will require the back of the cabinet side to be notched out. Create a notch for the horizontal pipes at the back of the end panels using a jigsaw.
- Page 4 Screws and fixings for attaching the cabinet to the wall are not provided, as these vary depending on the wall material and construction. Check that the appropriate fixings for the wall construction have been used. Before drilling into the wall, you MUST check for any hidden services or pipework within the walls.
- Page 5 Before attaching the cabinets together, ensure that the linea/milano profile cutout of both cabinets align. Securing adjacent cabinets Clamp together the two cabinets, checking that the front edges are level and flush. Using the screws provided, 1 x 1 1/4” screw should be fixed into each corner of the carcase side.
- Page 6 Placing the trash can into position Position the trash can back into position within the cabinet. Adding the door buffers Remove the masking tape and position 1x door buffer at the top and bottom corners of the cabinet, as illustrated in the image. Cleaning the cabinet Finally, the cabinet should be thoroughly cleaned with a vacuum or dustpan and...
Need help?
Do you have a question about the LINEA Base Cabinet and is the answer not in the manual?
Questions and answers