Advertisement
Quick Links
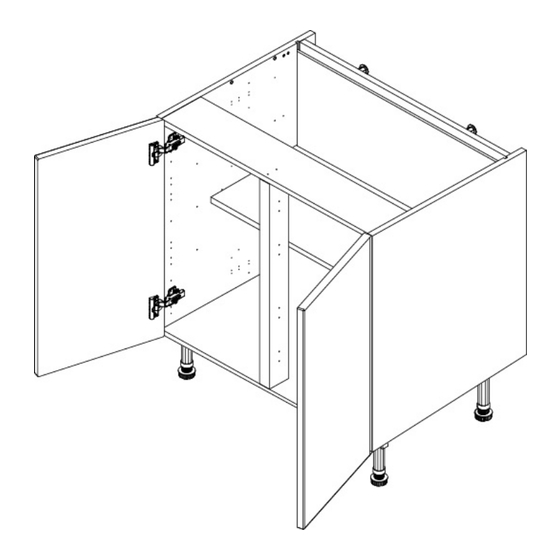
E A S Y - F I T S O F T C L O S E
Base Unit
700 - 1000, 2 Door, Fitting Guide
700 - 800
Unit Parts
32x 15mm
6X 30mm
18x Cover
screws
screws
Tools Required
Drill
Jigsaw
5x Legs
5x Leg
Caps
Brackets
Mallet
900 - 1000
2x Plinth
2x Space
4x Shelf
Clips
Plug
Screwdriver
Clamp
1x Shelf
5x Door Buffers
Pegs
Tape Measure
Spirit Level
2x L-Brackets
Page 1
Advertisement

Subscribe to Our Youtube Channel
Related Manuals for Wren Kitchens Base Unit 700


Summary of Contents for Wren Kitchens Base Unit 700
- Page 1 E A S Y - F I T S O F T C L O S E Base Unit 700 - 1000, 2 Door, Fitting Guide 700 - 800 900 - 1000 Unit Parts 32x 15mm 6X 30mm 18x Cover 5x Legs 5x Leg 2x Plinth...
- Page 2 Remember to take care when unpacking. Please keep your workspace clean, clear and tidy when working. This will help keep all items safe from any damages. Any waste cardboard or plastic should be flattened down and placed in the bin. Removing the frontals Before installing the unit, remove the frontals by pulling the release catch.
- Page 3 Fixing the leg bases Secure each of the leg brackets into place with 4x15mm screws per bracket. Inserting the legs Push each leg firmly down into the leg bracket. Adjusting each leg to 155mm. Adjust the legs to the correct height by turning clockwise or anti-clockwise.
- Page 4 No screws or wall plugs are provided for attaching the unit to the wall. This is due to variations in wall construction. Before drilling into the wall you MUST check for any hidden services or pipework within the walls. Drilling the pilot holes Drill 2 pilot hole through the back panel making sure to lightly mark the wall to indicate where the wall fixing should be...
- Page 5 Securing to adjacent units Clamp together the two units, checking the front edges are level and flush. Using the screws provided, 1x30mm screw should be fixed into each corner of the carcase side. The screws can be concealed by placing them behind the shelf or behind the hinge plates.
- Page 6 Adding the door buffers Position 1x door buffer at the top and bottom on the carcase where the frontal’s corners meet the carcase, as illustrated in the image. Removing the hinge cover cap Use a flathead screwdriver to remove the hinge cover cap by inserting it into the slot of the cover cap and twisting.
- Page 7 Altering the soft-close Fit the hinge cover caps to the hinges by pressing down to secure. Adjust the soft-close to suit (if required). The soft-close is adjusted by turning the screw at the top of the hinge clockwise or anti-clockwise. Cleaning the unit Finally, the unit should be thoroughly cleaned to remove any debris that may have...
Need help?
Do you have a question about the Base Unit 700 and is the answer not in the manual?
Questions and answers