Table of Contents
Advertisement
Quick Links
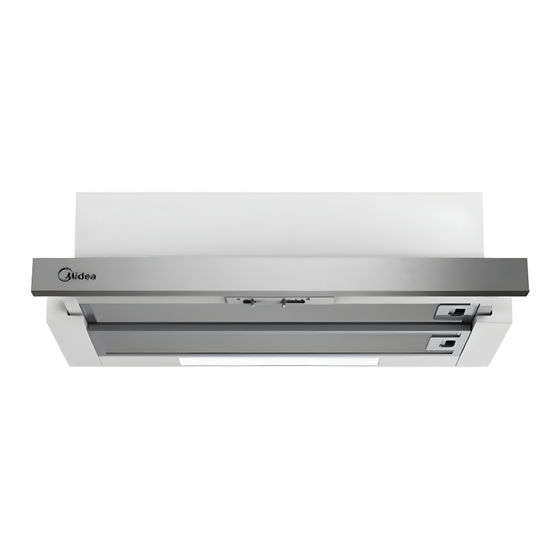
Cooker Hood
USER MANUAL
60L07
Warning notices: Before using this product, please read this manual carefully and keep it for future reference.
The design and speci cations are subject to change without prior notice for product improvement.
Consult with your dealer or manufacturer for details.
The diagram above is just for reference. Please take the appearance of the actual product as the standard.
Advertisement
Table of Contents

Summary of Contents for Midea 60L07
- Page 1 Cooker Hood USER MANUAL 60L07 Warning notices: Before using this product, please read this manual carefully and keep it for future reference. The design and speci cations are subject to change without prior notice for product improvement. Consult with your dealer or manufacturer for details.
-
Page 2: Table Of Contents
THANK YOU LETTER Thank you for choosing Midea! Before using your new Midea product, please read this manual thoroughly to ensure that you know how to operate the features and functions that your new appliance offers in a safe way. -
Page 3: Safety Instructions
SAFETY INSTRUCTIONS Intended Use The following safety guidelines are intended to prevent unforeseen risks or damage from unsafe or incorrect operation of the appliance. Please check the packaging and appliance on arrival to make sure everything is intact to ensure safe operation. If you nd any damage, please contact the retailer or dealer. - Page 4 WARNING The instructions for Use apply to several versions of this appliance. Accordingly, ● you may find descriptions of individual features that do not apply to your specific appliance. The manufacturer will not be held liable for any damages resulting from incorrect or ●...
-
Page 5: Specifications
The ap pliance uses 4 hob elements at most. ● Prohibit the fire directly bake the hood. ● Discharging type of this cooker hood is external discharge. ● SPECIFICATIONS Model 60L07 Voltage /Frequency 220V-240V~/50Hz Rated power 111.5W Lighting power 1.5W Motor input power... -
Page 6: Product Overview
PRODUCT OVERVIEW Components Ref. Qty. Product Components Hood Body,complete with: Controls, Light, Blower,Filter. The Activated Charcoal filter (optional) Flange (optional) Screws 5 x 50 Wall Plugs Dimensions unit:mm Min. Min. 650mm 650mm OPTIONAL 43/80... -
Page 7: Product Installation
OPTIONAL28/25/18 PRODUCT INSTALLATION Method 1 OPTIONAL28/25/18 According to the figure, make sure the position of hood in the cabinet. The wood ● strips should be line up with the 4 keyholes slots on the top of the range hood. On the cabinet, install 4 screws (supplied) according to the relative position of 4 key holes on the bottom of hood. - Page 8 Information When cutting or drilling into wall or ceiling, do not damage electrical wiring or other hidden utilities. Method 2 In the installation surface in cabinet don’t adapt to install the cooker hood, then as ● per fig, fix the position of cooker hood on the wall. On the wall, install 2 screws ( supplied ) according to the relative position of 2 key ●...
-
Page 9: Recirculation Mode
Choose A Venting Mode Here two venting modes, extraction-air mode and recirculation mode, before installing should be select one of them. Extraction-air mode, the air is discharged out of the house by a pipe. Recirculation mode, the air is purified and discharged into the house. Recirculation mode Extraction-air mode Information... -
Page 10: Operation Instructions
OPERATION INSTRUCTIONS Speed Adjustment. Operation Check beforehand Check the safe condition of the appliance: Check whether there are visible defects. ● Check that all parts of the appliance have been securely fitted. ● Switching on/off In the right part of the cooker hood. (For some models) ●... -
Page 11: Cleaning And Maintenance
CLEANING AND MAINTENANCE Grease Filters CLEANING METAL SELF-SUPPORTING GREASE FILTERS The filters must be cleaned every 2 months of operation, or ● more frequently for particularly heavy usage, and can be washed in a dishwasher. Pull the comfort panels to open them. ●... - Page 12 Lighting LIGHT REPLACEMENT Changing the light Lightning inside the appliance is provided by a 1.5W LED light. ● To replace the LED light, proceed as follows: Disconnect the appliance from the mains or switch off the circuit breaker. ● Remove the metal filters (see Cleaning and Replacing Filters) . ●...
-
Page 13: Troubleshooting
TROUBLESHOOTING Problem Possible reason Solution The blades are blocked. Check the blades ● The capacitor is damaged. Replace capacitor. ● Light on, but motor The motor is damaged. Replace motor. ● does not work The internal wiring of motor Replace motor. ●... -
Page 14: Trademarks, Copyrights And Legal Statement
Midea may constitute trademark infringement or unfair competition in violation of relevant laws. This manual is created by Midea and Midea reserves all copyrights thereof. No entity or individual may use, duplicate, modify, distribute in whole or in part this manual, or bundle or sell with other products without the prior written consent of Midea. -
Page 15: Package Information
European Economic Area. Further information are provided on request. You can contact our Data Protection MideaDPO@midea.com. To exercise your rights such as right to object your personal date being processed for direct marketing purposes, please contact us via MideaDPO@midea.com. To nd further information, please follow the QR Code. - Page 16 2023 16173000A? V1.0...


Need help?
Do you have a question about the 60L07 and is the answer not in the manual?
Questions and answers