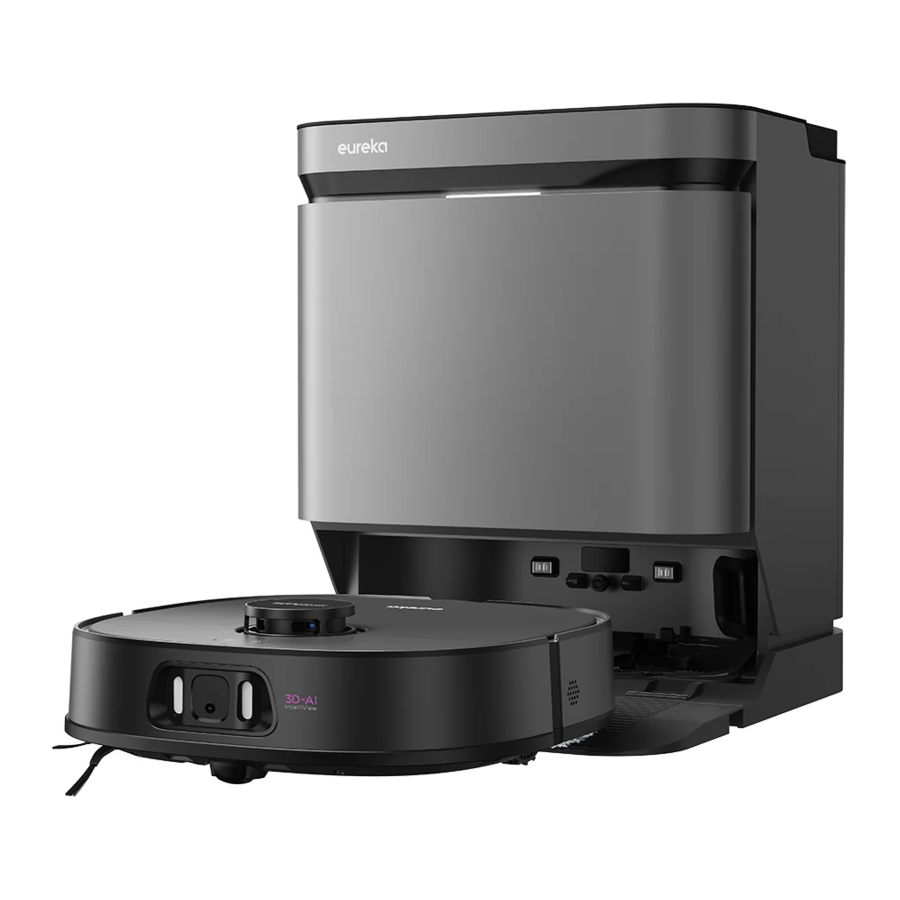
Eureka J15 Pro Ultra (NERJ15ULTRABK, NERJ15ULTRAWH) Manual
- Instruction manual (36 pages)
Advertisement
SYMBOLS
 | [symbol IEC 60417-5957 (2004-12)] | for indoor use only |
 | [symbol ISO 7000-0790 (2004-01)] | read operator's manual |
 | [symbol IEC 60417-5031 (2002-10)] | direct current |
 | time-lag miniature fuse-link where X is the symbol for the time/current characteristic as given in IEC 60127 | |
 | [symbol IEC 60417-5032 (2002-10)] | alternating current |
 | SMPS incorporating a short-circuit-proof safety isolating transformer (inherently or non-inherently) | |
 | SMPS (Switch mode power supply unit) | |
TECHNICAL DATA
| Product Model | NERJ15ULTRABK NERJ15ULTRAWH |
| Host Charging Voltage | 19.5V ⎓ |
| Host Rated Voltage | 14.4V ⎓ |
| Host Rated Power | 65W |
| Base Station Model | R23W02EDS01 |
| Base Station Input | 220-240V~, 50-60Hz |
| Charging and Hot Drying | 146W |
| Charging and Cold Drying | 46W |
| Heating Power | 940W |
| Dust Collection Mode | 1000W |
| Charging Input Power | 42W |
| Charging Output Power | 36.1W |
| Base Station Output | 19.5V ⎓, 1.85A |
| Battery Model | BP14452I |
| Battery Rated Voltage | 14.4V ⎓ |
| Battery Capacity | 5200mAh 74.88Wh |
| Charging Limit Voltage | 16.8V ⎓ |
IN THE BOX
Components in Package

Introduction to Parts of Robot Vacuum

Introduction to Base Station

PREPARATIONS BEFORE USE
Placement of the Base Station
- Place the base station on a hard surface against a wall, with clear space of at least 5cm on the left and right sides and 80cm in front.
- Plug the power cord into an electrical outlet. The wind the excess cable around the power cord storage slot on the back to avoid affecting the proper function of the robot vacuum.


NOTES
- Do not expose the base under direct sunlight.
- Do not cover the signal transmission area of the base station with objects such as stickers.
- Do not place the base on floors with carpet or other soft coverings.
- Please keep the charging area dry.
Installation of Side Brush to Robot Vacuum
- Turn the robot over. Press the side brush downward into the slot.
![]()
- To remove: grab the rubber legs of the side brush with both hands (be careful not to pull the hair bundle vigorously) and pull it out.
![]()


Installation of the Mop
- As shown in the figure, align the mop pad centrally with the mop pad plate and apply it evenly.
![]()
- Press the mop into the robot to complete the installation.


Power on & Charge
Press and hold the " " button of robot for three seconds to turn it on. Wait for the power indicator to remain on, and place the robot against the base station as shown in the figure for charging. To facilitate daily use, please keep the robot charged.

NOTES
- If you manually put the robot vacuum into the base station, ensure that the side with the charging contacts is placed against the base station as shown.
- Before the first cleaning, ensure that the robot is fully charged.
Tips
Before first use, manually put the robot in the base station, and the robot will automatically turn on.
After power-on, the robot will automatically pair with the base station. If the white status indicator of base station flashes fast, it means that the base station is disconnected from the robot. See the solution for "the base station indicator flashes white rapidly" in Troubleshooting.
Preparing the Cleaning Area
Before using the robot vacuum, please make sure the area to be cleaned is free from items that may be tangled/stuck with the robot vacuum (such as wires, hard objects, iron nails, glasses and other sharp fragments), and items that may be dragged or knocked down by the robot vacuum (such as valuable objects, fragile objects and dangerous objects likely to fall). This helps ensure that the robot vacuum does not cause personal injury or property damage.

Preparations of the Water Tank
NOTES
Do not add hot water or unauthorized detergent into the tank to prevent potential damage.
- To add clean water, remove the clean water tank on the right, open the cover, and fill the tank with clean water to the MAX mark. Then reinstall the tank.

- To empty the dirty water, remove the Waste water tank on the left, open the cover, and pour out the water.
![]()


Setting Up App
NOTES
- The app supports iOS versions 13.0 and above and Android versions 8.0 and above. The app is not available for use with tablets.
- This model does not support a WEP encrypted router.
- The home wireless network name and password must contain only letters, numbers and standard symbols.
- The network accessing configuration of the robot requires a wireless network of 2.4GHz frequency range.
- The robot must be connected to wireless network to enable controlling the robot using the app. Once you have set up the app and connected the robot to wireless network, the app can be used to control the robot in wireless network/2G/3G/4G/5G network environment.
- If your home wireless network password is changed or the router is replaced, the robot will show as offline in the app; you will need to reconnect the robot to wireless network following the wireless network connection instructions.
Download the App
Scan the following QR code or search for eureka robot to download the App. Follow the instructions in the app to create a new account or login.


Add Device
Click "+" in the App to add the device. Choose J15 Pro Ultra.
Follow the instructions on the app and continue until the app prompts that the connection is successful.

Connect the Device
- Connect your robot to the network that you plan to use for operating the robot. Make sure the robot is placed within good wireless network coverage.
- After assembling and powering on the robot, open the robot cover. Press and hold the wireless network pairing button for 3 seconds until you hear a beep. The network indicator light should start flashing. Follow instructions in app for next steps.
![]()

GETTING STARTED
NOTES
- Make sure that the mops are installed properly before use, otherwise the robot will not start normally.
- This product is intended for indoor use only. Do not use it outdoors.
- Do not submerge the robot vacuum in water. Doing so may damage the equipment, causing a short circuit or current leakage.
| Buttons under cover | Buttons on panel | ||
 Network configuration |  Reset |  |  |
| Press and hold the network configuration button, and the robot will enter the network configuration mode | Press the reset button with a toothpick and other pointer objects to restart the robot | Press the button to instruct the robot to return to the station; press and hold the button for 3 seconds to turn on or off the child lock | Press the button to start/pause robot operation; press and hold the button to turn on/off the robot |
| After long pressing the and buttons, the machine will enter Bluetooth pairing mode | |||
Status Indicators of Robot Vacuum
| Indicator | Light | Status |
| Solid white light | Vacuuming, patrolling |
| Blinking White Light | Charging | |
| Blinking Red Light | Fault | |
| Solid white light | Recharging |
| Solid Red Light | Low battery recharging | |
 | Fast Blinking White Light | Bluetooth pairing |
Start/Pause/Resume
Press and hold the power button "" for three seconds to turn the robot on/off.
Briefly Press "" to start/pause/resume cleaning or use your App to control.
Recharge
Press "" briefly. The robot vacuum will move from the current location to the base station for charging.
Emptying
After cleaning, the robot will return to the base station and automatically begin self-emptying. More self-emptying settings can be enabled in the app, such as manual emptying and automatic emptying frequency.
Please ensure the dust bag of the base station is not full.
Reset to Factory Settings
Simultaneously press and hold the network configuration button and recharging button "" on the robot until you hear a "Ding", and the robot will reset to factory settings and restart. You can also click "More" → "General" → "Reset to factory settings" in the App.
Mop Washing
To ensure the mopping effect, the robot will return to the base station halfway to clean the mop pad when mopping the floor, or you can manually set the cleaning frequency of mop on the App based on your needs.
After the robot completes the mopping task and returns to the base station, it will automatically clean the mop pad (the cleaning time is slightly longer).
Self-Cleaning of the base station
After the robot finishes mop washing, it will automatically perform self-cleaning of the cleaning tray. You can also manually set the self-cleaning frequency in the app. Then, the mop pads and cleaning tray will be automatically dried. Before the next cleaning task starts, the base station will first activate dust collection for the cleaning tray.
Mop Drying
After the robot finishes mop washing, it will automatically initiate mop drying process (hot air drying, by default). You can modify the functions in the app.
NOTES
- Do not remove the robot vacuum from the base station when it is washing the mop pad.
- Do not move the base station after the robot vacuum starts cleaning.
Status Indicators of Base Station

| Indicator | Light | Status |
| Base station status indicator | Solid White Light | Stand-by Cleaning mop Emptying of the dust bin |
| Breathing White Light | Bluetooth pairing | |
| Fast Blinking White Light | Bluetooth disconnected | |
| Breathing Purple Light | Base station is self-cleaning (Cleaning the cleaning tray) | |
| Blinking Red Light | Fault |
MAINTENANCE
Maintenance of Base Station
- Remove the cleaning tray from the bottom of the base station, then take off the left and right cleaning discs in turn, rinse them with clean water, and wipe them clean.

- Remove the self-cleaning assembly (roller) from the cleaning tray and rinse off any impurities adhering to it with clean water.
![]()
- Rinse the cleaning tray under the faucet and wipe it clean.
![]()
- Reassemble the left and right cleaning discs and self-cleaning assembly back into the cleaning tray in turn, and then reinstall them at the bottom of base station after drying.
![]()


Dust Bag Replacement
- Remove the dust collector cover.
![]()
- Pull the used disposable dust bag out of the dust collector.
![]()
- You can use a soft, dry cloth to wipe and clean the dust collector.
![]()
- Place a new dust bag, sliding the plastic card into the rails. Re-install the dust collector cover.
![]()


Maintenance of Dust Bin
(Clean as needed)
- Open the upper cover of robot and remove the dust bin.
![]()
- Push up the dust bin cover, and then dump the garbage downward.
![]()
- Lift the side buckle of the dust bin to remove the dust filters.
![]()
- The filters are washable and should be dried after washing before placing them back into the dust bin.
![]()


How to Use the Cleaning Brush
- Cut the hair entangled on the roller brush body with the blade.
- Brush off the cut hair with the brush.
![]()

Maintenance of Roller Brush
(Weekly cleaning is recommended)
- Press and hold the left and right release buttons on the cover plate of the roller brush and lift out the cover plate.
![]()
- Lift the red side of the roller brush to take it out.
![]()
- Pull out the end of caps the roller brush as shown below, and cut any hairs wrapped around the roller brush by using the cleaning brush in the accessories box. Then, clean the main brush and its cover plate by using the cleaning brush or a soft cloth.
![]()
- Wash the roller brush with water and dry it. After cleaning, install the roller brush and then the cover plate into the robot vacuum.
![]()


Cleaning of Side Brush
(Weekly cleaning is recommended)
Pull out the side brush. Remove dust on the side brush.

Cleaning of the Robot Sensors
(Clean as needed)
Wipe and clean all sensors of robot with a soft dry cloth, including:

- Line Laser/Camera Sensor
- Edge sensor at the right
- Cli sensors at the bottom
Cleaning of Driving Wheel
(Weekly cleaning is recommended)
Rotate the driving wheel back and forth to remove debris and clean it with the cleaning brush in the accessories box or a soft cloth.

TROUBLESHOOTING
| Common issues | Possible Causes | Solutions |
| Robot fails to charge | Robot is not in contact with charging contacts | Place the robot directly in front of the charging dock and press the recharging button |
| Robot fails to return for charging | Unreasonable placement of base station | Refer to the "Placement of the Base Station " section of the manual for details |
| Robot gets stuck | The robot is entangled and stuck by wires and other sundries on the ground | Clean up scattered wires and other sundries on the ground |
| The side brush and roller brush are stuck, and the machine cannot run normally | Remove the debris stuck in roller brush/side brush, and start the robot after it is placed on a level ground | |
| Robot is stuck around an obstacle | Clear obstacles/set custom restricted areas in the App | |
| Return for charging or stop working before cleaning is completed | Low battery | Click return to charge or manually put the robot back to the base |
| Failure to clean as scheduled | The scheduled cleaning in the App has been closed | Reset the cleaning schedule in the app. |
| The robot is in the Do Not Disturb mode | Turn off the Do Not Disturb mode or adjust the Do Not Disturb time period | |
| Robot suspended in mid-air | Left and right wheels suspended in the air | Place the robot on a level ground before starting |
| Robot keeps moving backward | The LiDAR sensor protective cover is stuck | Gently tap the protective cover to check it's able to rebound |
| There is an obstacle in front of the robot | Clear obstacles in time | |
| The bumper is stuck | After clearing obstacles or foreign objects, gently tap the bumper | |
| The cliff sensor is dusty | Clean the dust on the surface of cli sensor lens | |
| Robot has no voice prompt | Voice is set to low volume or muted | Turn up the volume in the App |
| App operation response delay | Network busy | Restart the router and reduce the number of connected users |
| Poor reception of mobile phone wireless network signal | Check the mobile phone settings | |
| Insu cient network bandwidth | Increase network bandwidth | |
| App displays "Bluetooth disconnected" or the base station indicator flashes white rapidly | Robot disconnected from base station | Method 1: Place the robot near the base station, power off both and restart them. Wait for automatic pairing. Method 2: Quickly remove and insert the dust bag 3 times or take out and put back the cleaning tray 3 times within the first 15 minutes after the base station is powered on (the base station indicator will breath white). Simultaneously press and hold the " " and "" until they flash white and you hear a "Ding".Wait for automatic pairing. Once the connection is successful, the base station indicator will remain white. |
| Dust leaks from the robot vacuum during operation | The inlet of the dust bin is stuck by small objects | Remove the small objects on the inlet |
| Device is displayed as "O ine" on the App | Please check the following issues:
| Please try the following solutions:
|
| App unable to scan QR code on the device | The QR code on the device is unclear or damaged | Enter the Eureka Robot App — Add Device Method 1: Select Add by Model and find the corresponding device; Method 2: Select Nearby Devices and search for nearby devices to add. |
| Robot does not respond to button operation with base station | Child lock turned on | Press and hold the recharge button "" on the robot for 3 seconds to deactivate the child lock. After that, the robot will give a voice prompt saying "Child lock released". |
| Tap the child lock switch button in the App to turn off child lock. After turning off, the robot will give a voice prompt saying "Child lock released" | ||
| Unable to clean mop | The clean water tank is empty | Remove the clean water tank and add water |
| The waste water tank is full | Remove the waste water tank and pour out waste water |
SAFETY INSTRUCTIONS
Warning for the machine
- This appliance can be used by children aged from 8 years and above and persons with reduced physical, sensory or mental capabilities or lack of experience and knowledge if they have been given supervision or instruction concerning use of the appliance in a safe way and understand the hazards involved.
Children shall not play with the appliance.
Cleaning and user maintenance shall not be made by children without supervision. - Plug must be removed from the socket-outlet before cleaning or maintaining the appliance. Switch off before cleaning or maintaining the appliance.
- If the supply cord is damaged, it must be replaced by the manufacturer, its service agent or similarly qualified persons in order to avoid a hazard.
![]()
For the purposes of recharging the battery, only use the detachable supply unit provided with this appliance.
Use only with R23W02EDSO1 supply unit.- This appliance contains batteries that are only replaceable by skilled persons.
- Do not bring the smart robot close to heat source, radiation or burning cigarette butts. It is strictly forbidden to vacuum the following objects:
- All liquids such as water and solvents;
- Lime, cement dust and other construction dust and garbage;
- Heat generating objects, such as unextinguished carbon butts, cigarette butts;
- Sharp fragments, such as glass, etc.;
- Flammable and explosive items, such as gasoline and alcohol products.
- Before using, please remove all fragile items from the ground (such as glasses, lamps, etc.), and items that may be tangled with the side brush, Roller brush and drive wheels(such as wires, curtains and other easily-entangled materials).
- Please pay attention to your hair and avoid entanglement on wheels or roller brushes when using, cleaning and maintaining the robot.
- Do not use this product at an altitude of more than 2000m.

Warning for base station
- "IMPORTANT SAFETY INSTRUCTIONS - SAVE THESE INSTRUCTIONS" and "DANGER - TO REDUCE THE RISK OF FIRE OR ELECTRIC SHOCK, CAREFULLY FOLLOW THESE INSTRUCTIONS".
- This appliance can be used by children aged from 8 years and above and persons with reduced physical, sensory or mental capabilities or lack of experience and knowledge if they have been given supervision or instruction concerning use of the appliance in a safe way and understand the hazards involved.
Children shall not play with the appliance.
Cleaning and user maintenance shall not be made by children without supervision. - Plug must be removed from the socket-outlet before cleaning or maintaining the appliance.
Switch off before cleaning or maintaining the appliance. - If the supply cord is damaged, it must be replaced by the manufacturer, its service agent or similarly qualified persons in order to avoid a hazard.
- Base station is only applicable to the product NERJI5ULTRABK/NERJI5ULTRAWH.
(Battery pack type: Li-ion, DC 14.4 V, 5200 mAh)
The base station will automatically start charging after Robot Vacuum Cleaner returned to the base. ![]()
The battery charger (Base Station) is not intended to charge non-rechargeable batteries.- The transformer is not intended for series/parallel connection.
- The device cannot be reset or replaced after a short-circuit or an overload.
Warning for battery
- The product must be powered off before removing the battery.
- Please note that do not disassemble the battery by yourself,
- If you need to replace it, please contact the after-sales service center.
- Please dispose of used battery according to local laws and regulations.
- Do not dismantle, open or shred the battery.
- Do not expose batteries to heat or fire. Avoid storage in direct sunlight.
- Do not short-circuit a battery.
- Do not store batteries haphazardly in a box or drawer where they may short-circuit each other or be short-circuited by other metal objects.
- Do not subject batteries to mechanical shock.
- In the event of a leaking, do not allow the liquid to come in contact with the skin or eyes. If contact has been made, wash the affected area with copious amounts of water and seek medical advice.
- Do not use any charger other than that specifically provided for use with the equipment.
- Do not use any battery which is not designed for use with the equipment.
- Do not mix cifferent manufacture, capacity, size or type within a device.
- Keep batteries out of the reach of children.
- Seek medical advice immediately if the battery has been swallowed.
- Keep batteries clean and dry.
- Do not leave a battery on prolonged charge when not in use.
- After extended periods of storage, it may be necessary to charge and discharge the batteries several times to obtain maximum performance.
- The batteries give their best performance when they are operated at normal room temperature (20°C ± 5°C ).
- Retain the original product literature for future reference.
- The battery may be irreversibly damaged if the battery is in low power for a long time. It is recommended that the battery retain sufficient power before storage.
Documents / Resources
References
Download manual
Here you can download full pdf version of manual, it may contain additional safety instructions, warranty information, FCC rules, etc.
Download Eureka J15 Pro Ultra (NERJ15ULTRABK, NERJ15ULTRAWH) Manual
Advertisement


Need help?
Do you have a question about the J15 Pro Ultra and is the answer not in the manual?
Questions and answers