Advertisement
- 1 THE BASICS
- 2 GETTING STARTED
- 3 GET CONNECTED
- 4 APPLE CARPLAY
- 5 ANDROID AUTO
- 6 HD RADIO
- 7 BLUETOOTH MUSIC
- 8 USB MEDIA
- 9 HDMI INPUT
- 10 A/V INPUT
- 11 BLUETOOTH PHONE
- 12 CAMERAS
- 13 ACCESSORY CONTROL
- 14 ENLIGHT10 RGB LIGHTING
- 15 iGO NAVIGATION
- 16 DISPLAY OFF
- 17 SETTINGS
- 18 CHECKING FIRMWARE VERSION
- 19 UPDATING SYSTEM FIRMWARE
- 20 AUDIO SETTINGS
- 21 BALANCE / GENERAL AUDIO SETTINGS
- 22 EQUALIZER AUDIO SETTINGS
- 23 CROSSOVER AUDIO SETTINGS
- 24 TIMING AUDIO SETTINGS
- 25 FACTORY EQ AUDIO SETTINGS
- 26 ADVANCED AUDIO SETTINGS
- 27 RESET BUTTON
- 28 TROUBLESHOOTING
- 29 SPECIFICATIONS
- 30 Documents / Resources
THE BASICS

GETTING STARTED

POWER UP!
With vehicle ignition in the ON or ACC position, Press and Hold the knob for 2 seconds put your HEIGH10+ to sleep; press once to wake.
The source will automatically default to the last source used prior to putting your HEIGH10+ to sleep.
You can adjust the audio volume at start-up in Audio Settings
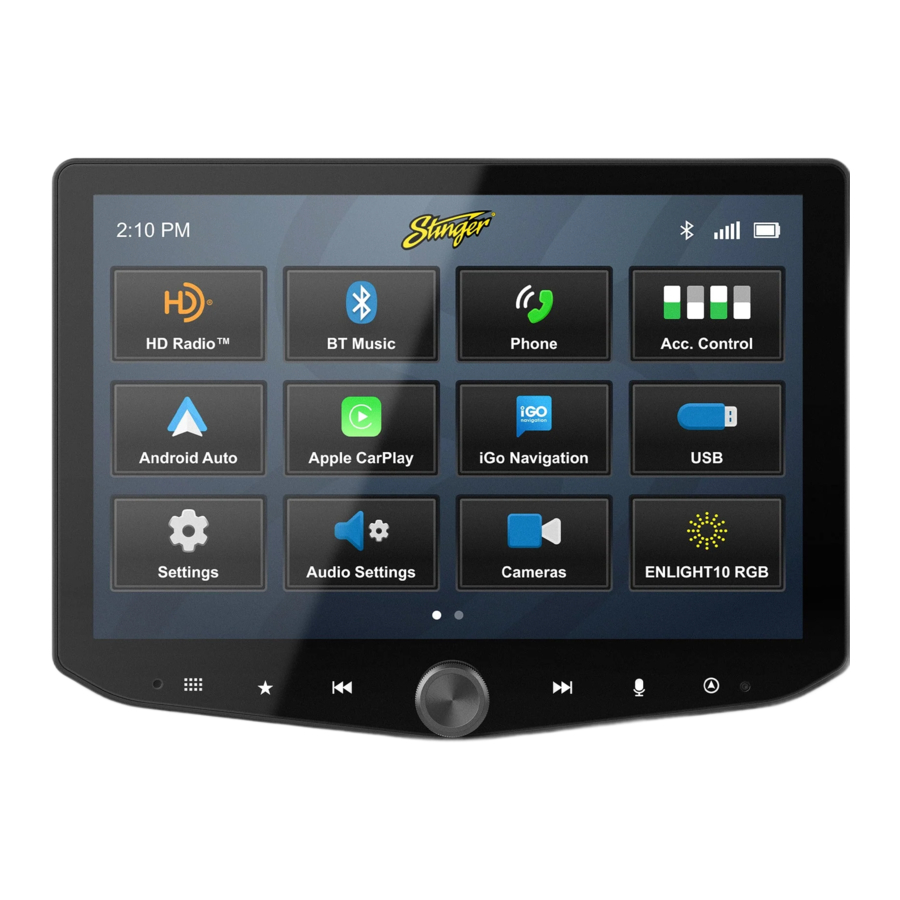
The Information Bar is located at the top of the screen. Depending on the SOURCE, it will provide information or content sensitive controls. Also, displays time, phone info and may contain BACK ARROW and EXIT buttons.
To select a SOURCE, press the HOME button. Sources that are not currently available are grayed out.
Customizable Quick Access Tabs can be accessed from any audio source by swiping up from the bottom of the screen. Tabs give direct access to sources, settings, and even head unit functions and can be customized in Settings > Users > Quick Access Tabs.

Tap a Quick Access Tab item to launch it immediately. Unavailable options are dimmed. Once opened, Tabs will auto close after 5 seconds
GET CONNECTED
- Tap +Connect a Device at the top of the screen or plug your device in.


- Make sure your device is in pairing mode and tap +Add a Device.


- Select your device from the list.


If your device does not appear in the device list, confirm it is discoverable and tap Available Devices to rescan.
- Confirm PIN Code on the head unit screen and the device.


- Select the connection type you want to use with your device (bluetooth / phone projection).

If you choose phone projection, your phone projection application will launch automatically.

APPLE CARPLAY™

You can use Apple CarPlay to get directions, make calls, send and receive messages, and more.
You need an iPhone 5 or later to use Apple CarPlay. Also, make sure that you're in an area that supports Apple CarPlay and that Siri is on. To turn on Siri on your phone, go to Settings > Siri & Search.
Set up Apple CarPlay
With the your vehicle running, plug your iPhone into the your head unit's USB-C port. Apple CarPlay will launch automatically.
You can also connect your iPhone wirelessly to enjoy Apple CarPlay. For detailed instructions see GET CONNECTED.
Using Apple CarPlay
If your iPhone is already connected, press HOME BUTTON > Apple CarPlay to launch Apple CarPlay.
The display will show available applications that are compatible with Apple CarPlay
o exit Apple CarPlay, press the Stinger Main Menu icon.
 NOTE: If Apple CarPlay will not launch, see Troubleshooting.
More Info
For details about Apple CarPlay, visit https://support.apple.com/en-us/HT205634
ANDROID AUTO™

You can use Android Auto to get directions, make calls, send and receive messages, and more.
Make sure your phone is running Android 5.0 (Lollipop) or later. Download the Android Auto app from Google Play on your device. Once the app is installed, open the app and follow the setup steps.
Set up Android Auto
With your vehicle running, but parked, connect your USB-C Android Phone into your head unit's USB-C port.
You can also connect your Android device wirelessly to enjoy Android Auto. For detailed instructions see GET CONNECTED.
Using Android Auto
If your Android device is already connected, press HOME BUTTON > Android Auto to launch Android Auto.
The display will show available applications that are compatible with Android Auto
To exit Android Auto, press the Stinger Main Menu icon.
NOTE: If Android Auto will not launch, see Troubleshooting.
More Info
For details about Android Auto, visit https://www.android.com/auto/
HD RADIO™

Press the HOME BUTTON > HD Radio to select the HD Radio source.
- Station Presets
To assign a preset, go to desired channel, press and hold a preset button for 2 seconds to store the station. A total of 15 FM & 10 AM stations can be stored in memory. - AM/FM
Press to cycle through AM/FM Presets. - Station Information Display
These two lines display Show /Artist / Track Name for current station.
- Tune / Seek Down
Tap to tune frequency down. If you are tuned to an HD Radio Station, press to tune to the next available SPS station. Press and hold to seek the next available radio station.
Note: When browsing SPS stations, hold to seek is disabled.
 Face buttons: Tap to cycle through presets, hold to seek.
- HD Station
Identification Displays currently tuned MPS & SPS channel. - Station Frequency Display
Displays currently tuned frequency. - Station Identifier / Audio Info
Indicates Station Call Numbers & Current audio mode (Mono / Stereo) - Tune / Seek Up
Tap to tune frequency up. If you are tuned to an HD Radio Station, press to tune to the next available SPS station. Press and hold to seek the next available radio station. - Album Art
Displays album art for currently playing track. - DX/LOC
Changes radio tuner sensitivity. Touch to toggle between distant (DX) and Local (LOC). - Seek Type
Touch to toggle between auto & analog seek modes. - Direct Tune
Touch to tune directly in the current band (FM/AM). Once the desired frequency is entered, tap go to tune. - HD Radio™ Settings
Tap to access HD Radio application settings.
![]()

Scan By Genre
Tap to select a genre. The head unit will display the HD Radio screen and scan for the next available station whose PTY genre listing matches the selected option.
Auto Presets
Tap to automatically program channel presets. This will reprogram all existing presets.
Receiver Sensitivity Boost
Tap the desired level of sensitivity. Higher sensitivity levels may result in undesired noise.
HD Radio™ Features
Toggle on/off to enable/disable HD Radio features like SPS substations, station metadata, artist experience, and more.
Artist Experience
Toggle on/off to enable/disable HD Radio Artist Experience.
BLUETOOTH MUSIC

Press the HOME BUTTON > BT Music to select the Bluetooth Music source.
- Playback Progress Indicator
Shows progress in current track. - Song / Program Information
Displays information for the current track. - Phone Selector Area
If multiple compatible devices are connected, you can switch between them by tapping the button with the desired device's name. - Album / Program Art
- Previous Track/Program
Touch once to restart current track, touch twice for previous track.
![]()
While BT Media is active, face buttons operate this way.

- Play/Pause
Touch to play or pause audio playback. - Next Track/Program
Touch to advance to the next track or program. - Toggle Replay Modes
- Toggle Randomize Modes
USB MEDIA

Press the HOME BUTTON > USB Media to select the USB Media source.
- Playback Progress Indicator
Shows progress in current file, touch anywhere on the bar to immediately navigate to that segment of the file. - File Quality Information
- Song / Program Information
- Album / Program Art
- Previous File
Touch to play the previous file that is the same media type. - Play/Pause
Touch to play or pause playback
- Next File
Touch to playback to the next file that is the same media type.
![]()
While USB is active, face buttons operate this way. - Toggle Randomize Modes
- Toggle Replay Modes
- File Browser
From the USB Root Menu you can browse Audio, Video, and Image files. Touch to select a file to view/play. - Search for File


- File
Tap to view / play content. - Folder
- Breadcrumb / Path
- Home Folder
- Previous Folder
- File Filters
Only one filter can be active at a time.
USB VIDEO PLAYBACK
When playing a USB video file, the application controls will auto-hide. To access the application controls, touch anywhere on the screen.

USB PHOTO VIEWING
When viewing USB images, the application controls will auto-hide. To access the application controls, touch anywhere on the screen.

HDMI INPUT
Press the HOME BUTTON > HDMI to switch to the HDMI input. The HDMI input can be used for an external DVD player, streaming sticks, media players, smartphone mirroring. You can only view HDMI content with the vehicle in Park and the parking brake ON. When viewing HDMI content, the Information Bar will auto-hide. To access the Information Bar, touch anywhere on the screen.

A/V INPUT
Press the HOME BUTTON > AV IN to switch to the AV input. You can only view the AV input with the vehicle in Park and the parking brake ON. When viewing the AV IN, the Information Bar will auto-hide. To access the Information Bar, touch anywhere on the screen.


Driver is prohibited by law from viewing a video signal on any in-dash monitor while the vehicle is in motion.
BLUETOOTH PHONE

Press the HOME BUTTON > Phone to launch the Bluetooth Phone app.
- Backspace / Clear
Tap to delete the last character entered. Hold to clear entire entry. - Call / Answer / End Call Button
Dial the number entered on the phone or number pad. Answer incoming calls. While connected, changes to End Call, when tapped in this mode, ends currently connected call. - Dialing Window
Displays currently dialed number.
- Contact Search Button
Press to search contacts. - BACK Button
Tap to navigate to previous application. - Favorites
Customizable list of favorite contacts. - Phone Selector
When two compatible phones are connected, tap to choose active phone.
- Call Log
Recent Dialed, Received, and Missed Calls - Contacts
List of contacts from paired phone. Not supported by all phones. - Direct Dial
Direct Dial is the default phone view. Make and receive calls here. - Phone Settings
Tap here to access phone settings. - EXIT Button
Close the phone app and return to your previously playing SOURCE. - Phone Info Area
Shows connected, active phone information. - Number Pad
Tap to show number pad for dialing phone numbers. - Speaker / Phone
Switches phone call audio between car speakers and phone handset. - Swap Call
Tap to switch between active and held call.
Pairing a Device
- Select Settings from the phone menu and tap Device.

- Make sure your device is in pairing mode and tap +Add a Device.

- Select your device from the list.

You can tap available devices to rescan


- Confirm PIN Code on the head unit screen and the device.

- Select the connection type you want to use with your device (bluetooth / phone projection).

If you choose phone projection, your phone will be accessible through your phone projection application (Apple CarPlay / Android Auto).


BT Device Settings
Once a device is paired and connected, you can adjust its settings from the Phone settings menu item.

Device List
Access a list of all devices in memory, connect, add, and delete devices from this menu.
Autoconnect
Once a device has been paired, it will automatically connect whenever the system is turned on and the device is within range. You can disable this feature by toggling Autoconnect OFF
Microphone
Set control to external if an external microphone is installed. Set to Internal to use the microphone located on the front of the display.
Microphone Gain
Adjusts the volume (sensitivity) of the microphone when using handsfree phone.
Contacts
While a device is paired, Contacts can be accessed by selecting Contacts from the Phone main menu. It may take several minutes to load all contacts. When a contact is selected from the list, all associated numbers (Home/Work/ Mobile, etc.) will be displayed on the right side of the screen. Touch the number you want to dial.

- Favorites
The Favorites list can be accessed from the Phone main menu. - Setting Favorites
To add a contact number to the Favorites list, touch the STAR button to the right to the desired phone number. - Search Contacts
To Search your contact list, select the SEARCH icon on the Phone Selector area.
Call Log
The Call Log lists recently dialed, received, and missed calls.

- Call Type Filter
You can select which type of call you want to browse by tapping Dialed, Receieved, or Missed Calls on the left. - Dialing a Number From Call Log
Tap the contact or phone number to dial a number.
CAMERAS

Press the HOME BUTTON > Cameras to select the Cameras app.
- Camera Selection Bar
If there are optional cameras installed, you may view them at anytime using the camera selection bar at the bottom of the screen. - Back Arrow
Touch to exit camera view. - Settings
Touch to access Camera Settings.
![]()
Press the HOME BUTTON > Settings > Cameras to access camera settings.

Set Up a Custom Camera
- Tap Camera Setup
- Tap a Trigger's Label Button

Once you tap the label button it will turn red and you'll have around 5 seconds to choose a label. - Assign a Label

Once you assign a label, that camera's trigger and settings will be active. Your assigned Camera will now appear on the Camera Selection Bar.


Reverse Camera Audio
When set to ON and a microphone is connected, back up camera audio will be heard through the vehicle's speakers.
Mute Audio in Reverse
When set to ON the system will mute any audio playback while in reverse.
Switch to Forward Camera After Reverse
When set to ON the front camera will turn on after shifting from Reverse gear and remain On until the speed reaches above 5MPH or the display is touched
ACCESSORY CONTROL

Press the HOME BUTTON > Acc. Control to launch the Accessory Control app.
Accessory Control allows you to assign but tons to control compatible hardware without installing physical controls. For instructions refer to your HEIGH10+ installation guide.
*Recommended Hardware https://stingersolutions.com/products/switchhub-4-channel-100-amp-solidstate-relay
Once your accessories are installed according to the HEIGH10+ Installation guide, you're ready to set up your accessories.
- Setup
Tap the setup button to begin setting up your new accessory. Assign a name and an icon to your accessory and confirm. - Accessory Control Button
Touch to turn accessory ON/OFF. - Accessory Settings Button
Touch to access accessory settings. - Accessory Settings
Change accessory name, icon and button behavior
ENLIGHT10 RGB LIGHTING

We know that the best time for adventure is after the sun goes down. That's why we've got a wide selection of Dynamic LED lighting to help you see and be seen when the ride gets dark. Illuminate your ride and benefit from superior visibility with enLIGHT10. Learn more at https://stingersolutions.com/pages/enlight10

iGO NAVIGATION
To access the option al iGO Navigation app, press Navigation from the Home menu or press the [NAVIGATION] button on your HEIGH10+'s face.
To add navigation, ask your dealer about Stinger's pre-loaded iGO Navigation SD Card (Part Number: SE-P24)

DISPLAY OFF
Press HOME BUTTON > Display Off to turn off your HEIGH10+ display. This is useful at night to prevent eye fatigue. Tap anywhere on the screen to turn the display back on.

SETTINGS

Press the HOME BUTTON > Settings to access the IX210 Head Unit Settings.
- SYSTEM OPTIONS
Beep
Your IX210 Head Unit plays a feedback sound when you touch the unit. This controls feedback sound volume.
Clock
Change GPS Time Zone and Time Display Format (12/24 HR).
Compass
Toggle Compass display on/off.
Microphone
Set control to external if an external microphone is installed. Set to Internal to use the microphone located on the front of the display.
Microphone Gain
Adjusts the volume (sensitivity) of the microphone when using hands-free phone.
System Language
Change display language (English/ Spanish/French).
- DISPLAY OPTIONS

Auto Brightness
Your IX210 unit can adjust brightness to suit external conditions. Toggle on/off. Only works if illumination wire is connected.
Display Brightness
Adjust overall display brightness with arrows or the slider control.

Face Button Color
Select the face button color you like and hold "Favorite" to save that color.
Face Button Brightness
Adjust face button brightness with arrows or the slider control.
System Highlights
Change the highlight colors for active buttons & system controls.
Background

You can select from one of ten available backgrounds or upload one of your own. Make sure a thumb drive with a compatible image (1280 x 800 Jpg/ Png) is inserted into an available USB port. Tap one of the available + Buttons and a pop up menu showing available images will appear. Select the desired background and tap ADD


- CAMERAS
Camera Setup
Your IX210 Head Unit supports up to four cameras, each with their own trigger. Your Head Unit comes with a preset reverse camera slot, and three more customizable slots that are activated in the Cameras application once they are labeled and their video format set up.
- Tap Camera Setup
![]()
- Tap a Trigger's Label Button
![]()
Once you tap the label button it will turn red and you'll have around 5 seconds to choose a label. - Assign Label
![]()
Once you assign a label, that camera's trigger and settings will be active. - Reverse Camera Audio
When set to ON and a microphone is connected, back up camera audio will be heard through the vehicle's speakers.
Mute Audio In Reverse
When set to ON the system will mute source audio playback while in reverse: camera audio still plays.
Switch to Front Camera after Reverse
When set to ON the front camera will turn on after shifting from Reverse gear and remain On until the speed reaches above 5MPH or the display is touched.


- USER
Quick Access Tab
The Quick Access Tab is customizable and can be configured to include favorite sources, settings, or functions.
![]()
- Select a tab position from the bottom row.
- Select the desired source or setting from the options on the top rows.
Favorite Key
You can program your favorite key with a variety of Sources, Settings, and Functions.
![]()


- Select the desired source or function.
- Tap BACK or EXIT to save your selection.
- DEVICES
Device List
Your IX210 can store multiple phones and even connect to multiple bluetooth devices at once.
Add a New Device- Tap Device List
![]()
- Make sure your device is in pairing mode and tap +Add a Device.
![]()
- Tap Device List


- Select your device from the list.
![]()
If your device does not appear in the device list, confirm it is discoverable and tap Available Devices to rescan. - Confirm PIN Code on the head unit screen and the device.
![]()
- Select the connection type you want to use (bluetooth / phone projection).
![]()
![]()
If you choose phone projection, your phone projection application (Apple CarPlay/Android Auto) will launch automatically.


Connect to a Saved Device
A list of previously connected devices is available under Known Devices.
- Make sure bluetooth is enabled on your mobile device.
- Press the phone projection or bluetooth button to connect to your device.
![]()

Disconnect a Device
Tap the DISCONNECT button to disconnect a connected device.

Delete a Device
Tap the DELETE button to delete a known device.

Apple CarPlay Options
You can change the orientation of Apple CarPlay's interface by toggling the Steering Wheel control left or right.
USB-C Settings
You can set your head unit's USB -C connection to charge only or enable Apple CarPlay / Android Auto through the USB-C port.
- INSTALLER
Master Reset
Touch the Master Reset item to restore your head unit to factory settings. This action will reset isntaller settings, user settings, and PAC Integrations.
Steering Wheel Control
Your IX210 can reassign any of your steering wheel buttons to any available head unit from this menu.
Assign a Function to Steering Wheel Column Button
- Touch the function you want to assign to a steering wheel column button.
![]()
The button will turn red for ~10 seconds. This indicates it is ready to be programmed.

- Touch the button on the steering wheel that you want to assign to the chosen function.
![]()
When your function is programmed successfully, its short press button will have a small green programmed indicator.

Assign a Function to Long Press on a Steering Wheel Column Button
You can assign a long press behavior to any programmed steering wheel button.
- Touch the long press button for the steering wheel button you want to create a long press action for.
![]()
In this case, the function you assign the long press to will use the button you assigned Volume Up to.

- Touch the function you want to assign to your long press action. In this example, we are going to assign the favorite function to long press on our assigned volume up button.
![]()
When successfully programmed, your long press function will be highlighted and active.
![]()
![information]() Note: You can only assign a long press function for a button you've already programmed. Any function with a green light is available for long press programming.
Note: You can only assign a long press function for a button you've already programmed. Any function with a green light is available for long press programming.


NOTE: Some buttons already have long press functions by default. Volume Up and Down, and Next / Last Preset have unique long press behaviors in some apps.
Amp Remote Out
There are two options for automatically turning on external amplifiers. ACC turns on the external amp when Ignition ACC is on. The Power Off option will turn off your external amplifier whenever the head unit is asleep or off.
Wake Countdown
Your Horizon10 can wake when the doors of your car are unlocked and turn off after a set period if you don't turn the car on. This control sets the amount of time your radio will be on after door lock, but before the ignition is started.
iGO Navigation APK Update
See SE-P24 instruction guide.
DM Smart DSP Update
Make sure a thumb drive containing your update is inserted into an available USB port and tap DM Smart DSP Update.
DM Control Update
Make sure a thumb drive containing your update is inserted into an available USB port and tap DM Control Update.
Echo Cancellation
Select the option that corresponds to your audio system configuration to eliminate echoing.
Manage Apps
You can toggle applications on and off from this menu.
User Settings Import
Your IX210 can load settings from a USB drive. Insert a drive with a valid settings file into an available USB port and touch User Settings Import.
User Settings Export
Your IX210 can save its settings for later import. Insert a thumb drive into an available USB port and touch User Settings Export. Your IX210 will automatically add a date to your settings file name.
Load Defaults
All presets and user settings are reset to factory defaults.
System Information
Touch System Information to access application build numbers for support.
System Firmware Update
Checking and updating the System Firmware and optional PAC Integration is an important step for proper operation. This should be done first before setting any system and vehicle settings as those settings may be lost after an update. Make sure a thumb drive containing your firmware update is inserted into an available USB port and tap System Firmware Update. You can find firmware updates on the HORIZON10 Product Page

CHECKING FIRMWARE VERSION
Checking and updating the Sytem Firmware and PAC Integration is an important step for proper operation. This should be done first before setting any system and vehicle settings as well, as those settings may be lost after an update.
- Check your firmware version first by navigating to SETTINGS > SYSTEM > INSTALLER > System Information and tap the control.


- Note the APP and System Versions and head over to the HORIZON10 product page on stingerelectronics.com.
Select the New Firmware Tab on the product page. The most current firmware will be listed with a date. The 8 digits of the APP Version is the APP Version date code (YYYYMMDD). The 6 digits of the System Version is the version date (YYMMDD). If the date code of either the APP or System firmware is older than the current firmware on the website, proceed to Updating System Firmware.


UPDATING SYSTEM FIRMWARE
- Format a USB Drive
In order to prepare a USB Flash Drive for use with your HORIZON10 system, the USB drive must be formatted to FAT32 / MS-DOS(FAT).
Windows PC- Insert a 4GB+ USB Drive
![]()
- Open File Explorer
- Right click on USB Drive and select Format
![]()
- Select FAT 32 (Default) File System
![]()
- Deselect Quick Format
![]()
- Click Start
- Insert a 4GB+ USB Drive


MAC OSX
- Insert a 4GB+ USB Drive
- Launch the Disk Utility App from the Utilities folder
![]()
- Select the USB drive from the External List and click Erase
![]()
- Select MS-DOS(FAT) from the format drop-down menu and click Erase
![]()


- Download Firmware
Download the firmware file from StingerSolutions.com. Transfer the firmware file as-is onto the formatted USBdrive. The file must be in the root directory of the USB drive. Do not unzip the file. - Install System Update
Insert the USB drive into any USB port on the radio.
![information]() NOTE: When updating the firmware, all settings will be reset to factory defaults. Station presets, EQ presets, audio/ crossover settings, time alignment, camera settings will all be overwritten. You can export user settings to the same USB drive you prepared earlier from the Installer menu. Your HORIZON10 will automatically detect the firmware file, either when you plug it into your powered radio or on startup. If it doesn't, navigate to SETTINGS > SYSTEM > INSTALLER > System Firmware Update and tap the control while your USB drive is inserted. Tap Update Firmware on the popup. The update will take 6 - 8 minutes.
NOTE: When updating the firmware, all settings will be reset to factory defaults. Station presets, EQ presets, audio/ crossover settings, time alignment, camera settings will all be overwritten. You can export user settings to the same USB drive you prepared earlier from the Installer menu. Your HORIZON10 will automatically detect the firmware file, either when you plug it into your powered radio or on startup. If it doesn't, navigate to SETTINGS > SYSTEM > INSTALLER > System Firmware Update and tap the control while your USB drive is inserted. Tap Update Firmware on the popup. The update will take 6 - 8 minutes.
![information]() NOTE: Do not attempt to stop an update. DO NOT turn off power. The system will be damaged if power is lost during the update process.
NOTE: Do not attempt to stop an update. DO NOT turn off power. The system will be damaged if power is lost during the update process.
![]()

- Nap Time
Once the System Reset is complete, turn the vehicle off, remove the key, lock the car using the factory key fob, and let the vehicle sit for 10 minutes. This will ensure that the vehicle data-bus goes to sleep and the Integration APK will function as intended. - Confirm Firmware Update
Confirm firmware update by accessing System Information in Installer settings. Note the APP Version and visit the HORIZON10 page at StingerSolutions.com Select the Firmware Tab on the product page. The most current firmware will be listed. The 8 digits of the APP Version listing is the update date code (YYYYMMDD).
AUDIO SETTINGS

- Balance & General Settings
Adjust Fade, Balance, Loudness, and Subwoofer settings quickly from this menu. - Equalizer
15 band graphic equalizer with multiple customizable preset slots. - Crossover
Internal electronic variable crossover with 6 customizable preset slots.
- Time Correction
Compensate for uneven distances between speakers and listener. - Factory EQ
Quickly set popular equalizer settings for a variety of Genres. - Advanced Audio Settings
Defeat, Source Volume and Source Gain Settings
BALANCE / GENERAL AUDIO SETTINGS

Press the HOME BUTTON > Audio Settings > Balance to select the Balance/ General Audio Settings
- Reset
Press to set balance and fade to zero. - Balance
Using left/right arrows, adjust speaker balance left/right. You can also drag the set point to the desired fade & balance. - Fader
Using up/down arrows, adjust speaker fade front/rear - Battery Voltage
Shows current battery voltage.
- Loudness
When ON, boosts +3db fot frequencies between 100Hz & 2000Hz - Subwoofer
Turns subwoofer output ON/OFF. - Phase
Changes phase of subwoofer signal. - Subwoofer Level
Use left/right arrows or drag slider to adjust volume level of subwoofer.
EQUALIZER AUDIO SETTINGS

Press the HOME BUTTON > Audio Settings > Balance to select the Equalizer Audio Settings
- Programmable Presets
There are 6 user Presets that can be used to save EQ settings. This is usefull for having EQ settings for differnet types of music, volume levels or for different sources. When you are done adjusting the EQ, touch and hold a Preset location to save the settings. The Preset will highlight.
- Up/Down Volume Arrows
Adjust frequency volume by tapping the up/down arrows. - Frequency Volume Slider
Drag slider to adjust frequency Volume.
CROSSOVER AUDIO SETTINGS

Press the HOME BUTTON > Audio Settings > Crossover to select the Crossover Audio Settings
- Audio Channel Selection
Select Front 1 (White), Front 2 (Teal), Rear (Red), or Subwoofer (Amber) channels to set crossover setting. - High/Low Pass Switch
Select which frequencies you want to modify settings for with this control. - Slope
Adjust the slope of the crossover for selected audio channel. - Frequency
Adjust crossover frequency for selected audio channel and pass.
- Level
Adjusts signal level for selected audio channel. - Programmable Presets
Touch and hold a Preset location to save your settings. The Preset will highlight.
TIMING AUDIO SETTINGS

Press the HOME BUTTON > Audio Settings > Timing to select the Timing Audio Settings
- Programmable Presets
- -/+ Distance Controls
Time Correction Instructions
Time Correction compensates for the uneven distances between the speakers and a listeners ears. Time Correction delays signals from the closest speaker(s), so that all the sound arrives at the listening position at the same time, giving the listener a more accurate, lifelike stereo image. To set Time Correction, select a listening position, for example the drivers seat headrest. Measure from each speaker to the listening position (be sure to mark those measurements down!). Set Units to Inches and input recorded distances for each speaker using the +/- buttons.
FACTORY EQ AUDIO SETTINGS
Press the HOME BUTTON > Audio Settings > Factory EQ to select Factory EQ Audio Settings.

Selecting Factory EQ from the Audio Menu Bar will access factory equalizer presets for different music types. When a Factory EQ preset is selected, it can be fine-tuned using the Equalizer and then re-saved as a User Preset.
ADVANCED AUDIO SETTINGS
Press the HOME BUTTON > Audio Settings > Factory EQ to select Advanced Audio Settings.
Defeat [ON/OFF]
![Defeat [ON/OFF]](http://static-data2.manualslib.com/pdf7/366/36539/3653890-stinger/images/stinger-heigh10-defeat-on-off-83352.jpg "Stinger - HEIGH10+ - Defeat [ON/OFF]")
When set to ON, will defeat/ disable all equalizer, crossover, and speaker settings. This is useful when connecting to a Digital Signal Processor (DSP) When defeat is on, other audio settings will be
Source Gain Settings

Make gain/volume adjustments for individual sources. For example, if AM/FM is much louder than BT Music, lower AM/FM and/or raise BT Music to even out volume levels.
Volume Settings

Selecting Volume Settings from the Advanced Audio Settings will access the following Volume settings: Start Volume, Bluetooth, Navigation and Siri Voice
Reset Audio Settings

Selecting this will reset all of your audio settings after you confirm your selection. This action cannot be undone.
RESET BUTTON

The Reset Button is located on the lower right hand corner of the display. To reset the unit, make sure it's on, use a paper clip or similar to push the reset button for 2 seconds and release. The reset will take a few minutes, do not disconnect power during this time.
TROUBLESHOOTING
General
Black Screen w. Audio
Touch the screen anywhere as it may have been turned off. Ensure the cables on the back of the screen are fully locked into place and also properly connected at the back of the radio module. Check for damaged/kinked cables.
Bluetooth
Device will not Pair
Ensure Bluetooth is turned ON in your device settings. Delete all unused devices. Delete any "Stinger" device. Restart/Reboot device and try pairing again.
Music Volume is low
- Turn up volume on device
- Turn up volume on head unit.
- Turn up Phone Volume.
Phone Volume is low
- Turn up volume on device.
- Turn up volume on head unit.
- Turn up BT Volume Gain.
- Turn up Microphone Gain
Cameras
Rear Camera not displaying in reverse
- Make sure rear camera trigger is ON
- If display is showing NO SIGNAL in reverse, ensure camera RCA is plugged into the correct RCA input (CAMERA IN).
- Confirm camera has power and ground.
- Confirm camera trigger is receiving positve 12V.
Installed Camera not showing Video
- Make sure the correct video format (NTSC, PAL, etc.) is selected.
User Note: Backgrounds
Your HEIGH10+ head unit utilizes a Liquid Crystal Display (LCD) panel to display clear, crisp images in a variety of lighting conditions. Your HEIGH10+ unit is optimized to provide the highest quality image in a variety of use cases, but you should be aware that certain contrast ratios and backgrounds can cause temporary image retention. When customizing your background, avoid images that include high contrast static patterns; these images can cause temporary image retention in LCD panels through repeated use. Retained images should vanish within 10-40 minutes of normal operation. If you see from your custom background, we strongly suggest you choose another option, or use one of the included HEIGH10+ background options to ensure uninterrupted enjoyment. :)
Apple CarPlay
Restart your Phone
A common first step to take when you're having connection issues is to restart your device.
- Turn your phone off.
- Wait 30 seconds.
- Turn your phone back on
Make sure your operating system is up to date
Apple often releases updates to your phone's operating system, known as iOS®, to keep it secure and working at its best. These software updates are important. Not updating your iPhone can lead to software issues and glitches, like CarPlay not working. For step by step instructions, visit https://support.apple.com/enus/118575
Make sure CarPlay is turned on
If your iPhone isn't connecting to Apple CarPlay, the feature may not be enabled on your device or you may have turned it off and need to turn it back on. Here's how: Go to Settings > General > CarPlay > My Cars, then select your car to reconnect it to the app. Make sure to turn on the Allow CarPlay When Locked option, too, so that CarPlay works when your phone is locked. If your car is already connected, tap your car, then tap Forget This Car. Then connect it again. If you've turned off CarPlay in Screen Time, go to Settings > Screen Time > Content & Privacy Restrictions. If you've turned on Content & Privacy Restrictions, tap Allowed Apps and confirm that CarPlay is enabled. (Tap the button until it's green.)
Confirm Siri is turned on
CarPlay won't work unless Siri® is turned on. To turn it on, go to Settings > Siri & Search on your iPhone, then confirm that Listen for "Hey Siri" is on. Make sure to include the Allow Siri When Locked option, too, so that CarPlay works when your iPhone is locked.
Make sure Bluetooth is connected
If you're using a wireless CarPlay connection, go to Settings > Bluetooth to confirm that Bluetooth® is turned on. Then go to Settings > Wi-Fi to check that Wi-Fi is also turned on. Finally, go to Settings > General > CarPlay and check that Auto-Join is turned on.
Check your USB cable
Make sure the wire isn't frayed or broken. Try using it with another device—if it doesn't work, you probably have a faulty USB cable and need to replace it. Also, make sure you're plugged into the correct USB-C port for phone projection.
Android Auto
Restart your Phone
A common first step to take when you're having connection issues is to restart your device.
- Turn your phone off.
- Wait 30 seconds.
- Turn your phone back on
Make sure your operating system is up to date
You can find your device's Android version number, security update level, and Google Play system level in your Settings app. You'll get notifications when updates are available for you. You can also check for updates there as well For step by step instructions, visit https://support.google.com/android/answer/7680439
Make sure Bluetooth is connected
If you're using a wireless Android Auto connection, go to Settings > Bluetooth to confirm that Bluetooth® is turned on. Check your USB cable Not all USB cables will work with all cars. For the best quality and reliability when you connect to Android Auto try a high-quality USB cable.
SPECIFICATIONS
General
Operating Voltage: 10.5VDC to 16VDC Grounding system; Negative Ground Max current consumption: 15A fused
Dimensions
Radio Module: 177.7 mm x 112.96 mm x 50 mm (W x H x D)
Display: 247.2 mm x 180.56 mm x 36.19 mm (W x H x D)
Display
10.1-inch Diagonal
16:10 aspect ratio
1280 x 800
Pixels: 1,024,000
Active area 216.96 (W) x 135.6 (H) mm
Operating Temperature (C) -20° to 70°
Audio
Load impedance: 4Ω nominal / 2Ω allowable
Continuous power output: 18W x 4ch/4Ω 20Hz to 20KHz, 1%THD at 14.4V
Speaker level adjustment: 0-40 steps
Audio Preamp Output level: 4.5Vrms typical, 7vrms maximum without distortion.
Audio Preamp 8 Channels: Front 1 Left, Front1 Right, Front 2 Left, Front 2 Right, Rear Left, Rear Right, Subwoofer Left, Subwoofer Right.
Equalizer: (15-band) 25Hz/40Hz/63Hz/100Hz/160Hz/250Hz/400Hz/630Hz/1KHz/1.6KHz/2.5KHz/4KHz/6.3K Hz/10KHz/16KHz
Gain: ±6dB (0.5dB/step)
Crossover level: 10 steps
Front1 and Rear output:
HPF: 25Hz/40Hz/63Hz/80Hz/100Hz/160H z/250Hz/500Hz/1kHz/3.5kHz/5kHz/bypass
Slope: 6dB, 12dB, 18dB
Level: 0-15,1db/step
Front2 output:
HPF: 25Hz/40Hz/63Hz/80Hz/100Hz/160H z/250Hz/500Hz/1kHz/3.5kHz/5kHz/bypass
LPF: 25Hz/40Hz/63Hz/80Hz/100Hz/160H z/250Hz/500Hz/1kHz/3.5kHz/5kHz/bypass
Slope: 6dB, 12dB, 18dB level: 0-15,1db/step Subwoofer Pre-lineout: 4.5Vrms typical, 7vrms maximum without distortion
LPF: 25Hz/40Hz/63Hz/80Hz/100Hz/160H z/250Hz
Slope: 6dB, 12dB, 18dB
Gain: 0db to 15dB (1dB/step)
Subwoofer level: 0-15, 1db/Step
Phase: 0 or 180
Time Alignment for 8 channels: 0 to 133 steps for inches and 0-99 steps for 9.9ms
U s e r P r e s e t E Q: R o c k, H i p - H o p, Electronics, Jazz, Pop, Flat.
Source Gain: default 0db, -10 to 10 adjustable, 0.35db/Step.
Volume Settings: Main Volume, Phone Volume, Navigation Volume, Voice Volume, Ringtone Volume adjustable separately.
USB
USB 2.0 (two)
Max current supply 1.5A
Max storage size: 128GB
USB Class: A
Supports: Video/Audio/Image Media Playback, Charging, and Firmware Update
USB 3.0 (one)
Max current supply 3A
Max storage size: 128GB
USB Class: C
MSC (Mass Storage Class), MTP (Media Transfer Protocol)
File system: FAT32, NTFS
Supports: Apple CarPlay, Android Auto, Video/Audio/Image Media Playback, Charging, and Firmware Update
Bluetooth
V5.1 dual
4dBm Class2
2.4GHz to 2.48GHz
Wifi
Support IEEE 802.11a/b/g/n/ac
Support 802.11ac 1x1, Wave-2 compliant with MU-MIMO STA mode
Complete 802.11n MIMO solution for 2.4GHz and 5Ghz band
HD Radio™ FM Tuner
87.9MHz to 107.9MHz
Usable sensitive 3dBuV (mono S/N: 30dB)
SNR: 65dB
AM Tuner
530KHz to 1710KHz
Usable sensitive 25dBuV (mono S/N: 20dB)
SNR: 58dB
4 Camera Video Inputs
NTSC, PAL, AHD 25 & 30 fps Mirror Camera Image
Accessory Control
4x Accessory Control w. custom icon, name, & switch behavior
HDMI Input
Supported HDMI Resolutions: 640*480p, 720*480p, 1280*720p, 1920*1080i, 1920*1080p
Audio
MPEG-1 Audio Layer-3 (.mp3)
FLAC (.flac)
MPEG-2 Advanced Audio (.aac)
MPEG-4 Audio (.m4a)
Windows Audio (.wav)
OGG Audio (.ogg)
MP1
MP2
AAC
AMR-NB
AMR-WB
APE
PCM / ADPCM
VORBIS
OPUS
WMA
AC3/DDP
Video
MPEG-4 Video, H.264 (.mp4)
Microsoft AVI (.avi)
MPG Video (.mpg)
MPEG Video 1/2 (.mpeg)
VOB DVD (.vob)
Flash Video (.flv)
MPEG-1
MPEG-2
H.263
H.264
H.265 (HEVC)
WMV 7/8
VC-1
VP8
M-JPEG
Image
JPEG (.jpg)
CompuServe GIF (.gif)
PNG (.png)
JPEG (.jpeg)
Bitmap (.bmp)
Background Image (User)
File Format: JPG / PNG
Resolution: 1280 x 800
This guide is based on firmware version 6229_iX210_10-24-2024
User Note: Backgrounds
Your HEIGH10+ head unit utilizes a Liquid Crystal Display (LCD) panel to display clear, crisp images in a variety of lighting conditions. Your HEIGH10+ unit is optimized to provide the highest quality image in a variety of use cases, but you should be aware that certain contrast ratios and backgrounds can cause temporary image retention. When customizing your background, avoid images that include high contrast static patterns; these images can cause temporary image retention in LCD panels through repeated use. Retained images should vanish within 10-40 minutes of normal operation. If you see from your custom background, we strongly suggest you choose another option, or use one of the included HEIGH10+ background options to ensure uninterrupted enjoyment. :)
Visit stingersolutions.com for updates and further information.
TECHNICAL SUPPORT:
800-477-2267
support@aampglobal.com
CUSTOMER SOLUTIONS:
800-477-2267
customersolutions@aampglobal.com
Stinger is a Power Brand of AAMP Global
15500 Lightwave Drive, Suite 202 Clearwater, Florida 33760
Documents / Resources
References
![www.android.com]() Android Auto | Android
Android Auto | Android![stingersolutions.com]() Collections
Collectionshttps://support.apple.com/en-us/HT205634
![stingersolutions.com]() enLIGHT10
enLIGHT10![stingerelectronics.com.]() Stinger - Define Your Drive
Stinger - Define Your Drive![stingersolutions.com]() Stinger - Define Your Drive
Stinger - Define Your DriveCheck & update your Android version - Android Help

Download manual
Here you can download full pdf version of manual, it may contain additional safety instructions, warranty information, FCC rules, etc.
Advertisement


Need help?
Do you have a question about the HEIGH10+ and is the answer not in the manual?
Questions and answers