
Related Manuals for Stinger HEIGH10 SRK-JW18EH


Summary of Contents for Stinger HEIGH10 SRK-JW18EH
- Page 1 PN: UN1810 ® ® ® SRK-JW18EH INTEGRATED MULTIMEDIA DISPLAY FOR JEEP WRANGLER JL & GLADIATOR JT ® USER GUIDE...
-
Page 2: Table Of Contents
® ® WELCOME TO YOUR NEW ® Enjoy the ride THE BASICS THE SOURCES GENERAL SETTINGS TECH SPECS The Controls........4 AM/FM Radio......18 Settings........36 Reset Button......45 Getting Started......6 Bluetooth Phone.......19 Clock........36 Troubleshooting......46 Selecting a Source.....7 Specifications......48 Pairing a Device....20 System Settings.......36 Setting the Clock......7 BT Device Settings....21 Illumination......37... -
Page 3: The Controls
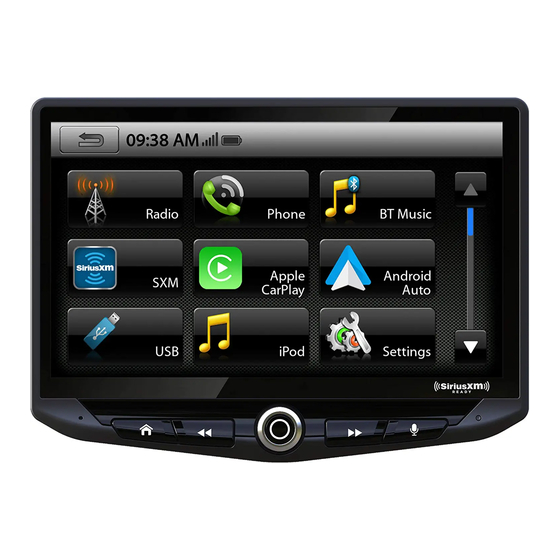
® ® THE CONTROLS Home Button Voice Button Access the Home Menu Launches voice control Tune/Track Down Button Tune/Track Up Button Multifunction Knob Media control: Previous, Back, Seek Press & hold to Power On/Off Media control: Next, Forward, Seek Turn to adjust Volume Up/Down Press &... -
Page 4: Getting Started
® ® GETTING STARTED SELECTING A SOURCE Temperature/ To select a source, press the HOME Time Information Bar Source/Info button. The HOME MENU displays all Sources, along with Settings, Audio, Camera and Vehicle options. SOURCES that are not currently available are dimmed out. QUICK TIP There are multiple ways to scroll... -
Page 5: Climate Control
® ® CUSTOMIZING THE TABS CLIMATE CONTROL HOME BUTTON > CLIMATE HOME BUTTON > SETTINGS > TABS If your Jeep is equipped with Automatic Climate Controls, you can view and adjust The Tabs can be configured to provide quick access to your favorite sources the climate control settings from the touchscreen display as well as operate the or settings. -
Page 6: Vehicle Info
® ® Vehicle Info > Gauges Vehicle Info HOME BUTTON > Vehicle Info Selecting Vehicle Info from the HOME Menu or Tabs will display information Selecting Gauges from the Vehicle Info Menu will display eight gauges that and status for various vehicle systems. can be user defined and saved. -
Page 7: Performance
® ® Vehicle Info > Performance Vehicle Info > Off-Road Selecting Performance from the Vehicle Info Menu will display a digital Selecting Off-Road from the Vehicle Info Menu will display digital pitch and roll speedometer and tachomoter along with performance measurement options. gauges along with the vehicle's GPS position, altitude and compass heading. -
Page 8: Vehicle Settings
® ® Vehicle Info > User Settings Vehicle Settings HOME BUTTON > Settings > Vehicle Settings The Vehicle Settings are all the factory vehicle settings retained from the factory radio. Since these are factory settings, with the exception of the PAC Enabled Settings, these are all explained in detail in the uConnect section of the... -
Page 9: Factory Cameras
® ® Factory Cameras Factory USB Ports HOME BUTTON > USB HOME BUTTON > Camera The factory rear camera will continue Apple CarPlay and Android Auto require a dedicated USB port. The factory to automatically display when in USB port inside the center console will function for Apple Carplay/Android reverse and can also be activated at Auto, and all other USB ports can be used for USB thumb drives and charging any time by selecting Camera from... -
Page 10: Am/Fm Radio
® ® AM/FM RADIO Bluetooth PHONE Press the HOME BUTTON > Radio to select the Radio Press the HOME BUTTON > Phone to select the Phone Station Presets - To assign a preset, go ST Indicator - Indicates when the Number Pad - Touch to launch Device Info - Displays the name of to the desired station, and press and... -
Page 11: Pairing A Device
® ® Bluetooth PHONE Bluetooth PHONE Pairing a Device Select Pair when prompted. Select Settings from the Phone main menu to go to BT Device Settings. Confirm the Key Code on device and select Pair on the device. Select Devices on the BT Device settings page. -
Page 12: Contacts/Call Log
® ® Bluetooth PHONE Bluetooth MUSIC Search Contacts Contacts While a device is paired, Contacts can be accessed by selecting Contacts from the Phone main menu. It may take several minutes to load all contacts. When a contact is selected from the list, all associated numbers (Home/Work/ Mobile) will be displayed on the left side of the screen. -
Page 13: Siriusxm
® ® SiriusXM Satelite Radio SiriusXM Satelite Radio ® (OPTIONAL) Only SiriusXM brings you more of what you love to listen to, all in one place. Get over 140 channels, including commercial-free music plus the best sports, news, talk, comedy and entertainment. Welcome to the world of satellite radio. A SiriusXM Vehicle Tuner and Subscription are required. -
Page 14: Siriusxm Replay
® ® SiriusXM Satelite Radio SiriusXM Satelite Radio Return to SiriusXM main screen SiriusXM Replay™ Channels [CH] Replay allows you to pause, rewind Displays a list of availble SiriusXM and replay up to 1 hour of live SiriusXM channels in numerical order. Swipe up/ Satellite Radio. -
Page 15: Usb Media
® ® SiriusXM Satelite Radio USB Media Parental Control Keyboard Icon The SiriusXM Parental Control feature allows you to prevent access to inappropriate mature content for a younger listener. When enabled, the Parental Control feature requires you to enter a passscode to access the channels that are rated as Mature Channels. -
Page 16: Apple Carplay
3. Select Customize. 4. Use the add or delete icons to add or remove apps. Tap and drag an app to change the icon order. To exit Apple CarPlay, press the Stinger Main Menu icon. For details about Apple CarPlay, visit https://support.apple.com/en-us/HT205634 StingerElectronics.com... -
Page 17: Ipod
® ® iPod HDMI INPUT ® Press the HOME BUTTON > HDMI to switch to the HDMI input. Track Detail View The HDMI input can be used for an external DVD player, streaming sticks, media players and smartphone mirroring. You can only view HDMI content with the vehicle in Park and the parking brake ON. -
Page 18: Cameras
HOME BUTTON > Cameras To add navigation, ask your dealer about When a camera is first activated, Stinger's pre-loaded iGO Navigation SD Card there will be menu bars at the top and (Part Number: SE-P14). bottom of the display. The top menu... -
Page 19: Settings
® ® SETTINGS SETTINGS EXIT current screen Press the HOME BUTTON > Settings Settings > System Settings > Apple CarPlay to access the Settings main menu. Device Mode [OFF-CarPlay-iPod] Determines how iPhone will be used when Clock plugged into USB port. OFF is charging only. System Settings Mic Gain [LOW-MED-HIGH] Illumination... - Page 20 ® ® SETTINGS SETTINGS Settings > Background Settings > Camera Settings Allows you to change the background Factory Camera [REAR] image. Touch image thumbnail to Select to change Factory Camera settings. select. You can upload up to 3 of your own images.
-
Page 21: Equalizer
® ® SOUND SETTINGS SOUND SETTINGS Sound Settings > Equalizer Selecting Equalizer from the Audio Menu Bar will bring up the 15 band graphic equalizer and presets. Frequency adjustments can be made by touching and sliding the frequency sliders up/down. Once the desired sound is acheived, it can be saved as a Preset. -
Page 22: Crossover
® ® SOUND SETTINGS SOUND SETTINGS Sound Settings > Crossover Sound Settings > Time Correction Graphical representation of crossover Select milliseconds or inches Slope, Frequency and Level. Selecting Crossover from the Audio Selecting Time Correction from the Audio Menu Bar will access the internal Menu Bar will access the Time Correction electronic variable crossover. -
Page 23: Toslink
® ® SOUND SETTINGS Reset Button Settings > Sound Settings > Advanced Settings Selecting Advanced Settings from The Reset Button is located on the the Audio Settings screen will access lower right hand corner of the display. the following settings: To reset the unit, the power must be on, use a paper clip or similar to push the Defeat [ON-OFF]... -
Page 24: Troubleshooting
..downloaded and installed on your device. with the SiriusXM Connect Vehicle Tuner. The You may also see this message briefly when Delete any "Stinger" device. Restart/ - Make sure you are plugged into USB 2 in tuner may be disconnected or damaged. -
Page 25: Specifications
® ® SPECIFICATIONS SPECIFICATIONS AUDIO/VIDEO FORMATS GENERAL AUDIO (cont.) HDMI INPUT Operating Voltage: 9.0VDC to 18VDC Subwoofer Preout Supported HDMI Resolutions: AUDIO Grounding system: Negative Ground LPF: 25Hz/40Hz/63Hz/80Hz/100Hz/160Hz/250H 640*480p, 720*480p, 1280*720p, Max current consumption: 10A fused Slope: 6dB, 12dB, 18dB 1920*1080i, 1920*1080p MPEG-1 Audio Layer-3 (.mp3) Gain: -14dB to 7dB (1dB/step) -
Page 26: Technical Support
If you do not agree, please discontinue use and contact STINGER. This product is intended for off-road use and passenger use only. Stinger is a Power Brand of AAMP Global ©2020 AAMP Global 15500 Lightwave Drive, Suite 202 UG-SRK18EH REV100420...
Need help?
Do you have a question about the HEIGH10 SRK-JW18EH and is the answer not in the manual?
Questions and answers