
Subscribe to Our Youtube Channel
Related Manuals for FS N8560-32C


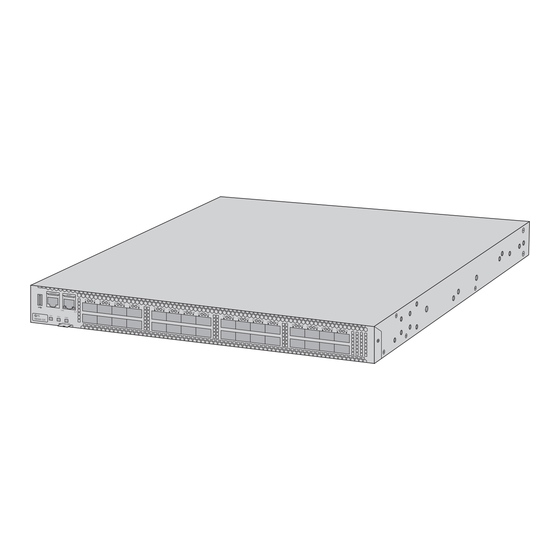
Summary of Contents for FS N8560-32C
- Page 1 N8560-32C L3 DATA CENTER SWITCH L3 SWITCH FÜR RECHENZENTREN SWITCH DE CENTRE DE DONNÉES L3 L�データセンタースイッチ Quick Start Guide V1.0 Quick-Start Anleitung Guide de Démarrage Rapide クイックスタートガイド...
- Page 2 N8560-32C N8560-32C o ers two options on power supply: AC or DC. The AC type supports front-to-back or back-to-front air ow. The DC type only supports front-to-back air ow.
- Page 3 M6 Screw x8 M6 Cage Nut x8 N8560-32C with DC power supplies DC Power Cable Set x2 Grounding Cable x1 Mounting Bracket x2 Slide Rail x2 Inner Rail x2 M4 Screw x12 M6 Screw x8 M6 Cage Nut x8 NOTE: 1.
- Page 4 12F 13F 14F 15F 18F 19F 20F 21F 22F 23F 26F 27F 28F 29F 30F 31F Link QSFP28 N8560-32C ASSET TAG CONSOLE QSFP28 Ports Description QSFP28 QSFP28 ports for 40/100G connection CONSOLE An RJ45 console port for serial management MGMT...
- Page 5 LEDs State Description The system is powered o . 1. One of the power supply modules or fan modules fails. 2. Two or more fans are not in the position. Solid Red 3. The internal temperature exceeds the warning working temperature.
- Page 6 Back Panel Port N8560-32C with AC power supplies PSU1 FAN1 FAN2 FAN3 FAN4 FAN5 PSU2 N8560-32C with DC power supplies PSU1 FAN1 FAN2 FAN3 FAN4 FAN5 PSU2 — — Port Description An ESD port for wearing the ESD wrist strap...
- Page 7 LEDs State Description The fan is powered o . Fan Status Solid Green The fan is operational. Solid Red The fan fails or stops. The power is o . Solid Green The power works normally. When the power supply is o , the voltage is 12VSB. Blinking Green The power supply doesn't output power when in a (1Hz)
- Page 8 Installation Requirements Before you begin the installation, make sure that you have the following: Phillips screwdriver. Standard-sized, 19" wide rack with a minimum of 1U height available. Category 5e or higher RJ45 Ethernet cables, ber optical cables and the console cable for connecting network devices.
- Page 9 Mounting the Switch Rack Mounting 1. Secure the mounting brackets and inner rails to the two sides of the switch with M4 screws. 2. Attach the slide rails to the rack using M6 screws and cage nuts.
- Page 10 3. Align the inner rails with the front of the slide rails. Slide the inner rails into the slide rails, keeping the pressure even on both sides. 4. Attach the switch to the rack using M6 screws and cage nuts.
- Page 11 Grounding the Switch FA N4 FA N3 FA N2 FA N1 PS U1 1. Connect one end of the grounding cable to a proper earth ground, such as the rack in which the switch is mounted. 2. Secure the grounding lug to the grounding point on the switch back panel with the washers and screws.
- Page 12 WARNING: Laser beams will cause eye damage. Do not look into bores of transceivers or optical bers without eye protection. Connecting the Console Port 1. Insert the RJ45 connector into the RJ45 CONSOLE port of the switch. 2. Connect the DB9 female connector of the console cable to the RS-232 serial port on the computer.
- Page 13 Connecting the USB Port Insert the Universal Serial Bus (USB) ash disk into the USB port for software and con guration backup and o ine software upgrade. Connecting the Power N8560-32C with AC power supplies...
- Page 14 N8560-32C with DC power supplies — 1. Plug the AC power cord/DC power cable set into the power port on the switch. 2. Connect the other end of the power cord/power cable set to the power source. Troubleshooting The Power System Is Faulty.
- Page 15 Product Warranty FS ensures our customers that for any damage or faulty items due to our workmanship, we will o er a free return within 30 days from the day you receive your goods. This excludes any custom-made items or tailored solutions.
- Page 16 Ihrem Netzwerk einsetzen können. N8560-32C Der N8560-32C bietet zwei Optionen für die Stromversorgung: AC oder DC. Der AC-Typ unterstützt den Luftstrom von vorne nach hinten oder von hinten nach vorne. Der Gleichstromtyp unterstützt nur den Luftstrom von vorne nach hinten.
- Page 17 M6-Schraube x8 M6-Kä gmutter x8 N8560-32C mit DC-Stromversorgungen DC-Netzkabel-Set x2 Erdungskabel x1 Montagehalterung x2 Gleitschiene x2 Innere Schiene x2 M4-Schraube x12 M6-Kä gmutter x8 HINWEIS: 1. Im Lieferumfang des Switches sind Staubschutzkappen enthalten. Bewahren Sie die Staubschutzkappen ordnungsgemäß auf und verwenden Sie sie zum Schutz der nicht genutzten Glasfaser-Ports.
- Page 18 10F 11F 12F 13F 14F 15F 18F 19F 20F 21F 22F 23F 26F 27F 28F 29F 30F 31F Link QSFP28 N8560-32C ASSET TAG CONSOLE QSFP28 Ports Beschreibung QSFP28 QSFP28-Ports für 40/100G-Verbindung CONSOLE Ein RJ45-Console-Port für die serielle Verwaltung MGMT Ein Ethernet-Management-Port Ein USB-Management-Port für Software- und Kon gurationssicherung...
- Page 19 LEDs Status Beschreibung Das System ist ausgeschaltet. 1. Eines der Netzteile oder Lüftermodule ist ausgefallen. 2. Zwei oder mehr Ventilatoren sind nicht in korrekter Position. Durchgehend rot 3. Die Innentemperatur überschreitet die zugelassene Arbeitstemperatur. Blinkt grün Das System wird initialisiert. Durchgehend grün Das System ist betriebsbereit.
- Page 20 Port an der Rückseite N8560-32C mit AC-Netzteilen PSU1 FAN1 FAN2 FAN3 FAN4 FAN5 PSU2 N8560-32C mit DC-Netzteilen PSU1 FAN1 FAN2 FAN3 FAN4 FAN5 PSU2 — — Port Beschreibung Ein ESD-Port zum anschließen und Tragen des ESD-Armbandes LEDs an der Rückseite...
- Page 21 LEDs Status Beschreibung Der Lüfter ist ausgeschaltet. Status des Durchgehend grün Der Lüfter ist betriebsbereit. Lüfters Durchgehend rot Der Lüfter ist ausgefallen oder stehengeblieben. Der Strom ist ausgeschaltet. Durchgehend grün Der Strom funktioniert normal. Wenn das Netzteil ausgeschaltet ist, beträgt die Blinkt grün Spannung 12 VSB.
- Page 22 Installationsvoraussetzungen Bevor Sie mit der Installation beginnen, vergewissern Sie sich, dass Sie Folgendes haben: Kreuzschlitzschraubendreher. Ein 19"-Rack in Standardgröße mit einer Mindesthöhe von 1 HE. RJ45-Ethernet-Kabel der Kategorie 5e oder höher, LWL-Kabel und das Console-Kabel für den Anschluss von Netzwerkgeräten. Betriebsumgebung: Die Betriebstemperatur beträgt 0 °C ~ 40 °C.
- Page 23 Montage des Switches Rack-Montage 1. Befestigen Sie die Montagehalterungen und Innenschienen mit M4-Schrauben an den beiden Seiten des Switches. 2. Befestigen Sie die Gleitschienen mit M6-Schrauben und Kä gmuttern am Rack.
- Page 24 3. Richten Sie die Innenschienen an der Vorderseite der Gleitschienen aus. Schieben Sie die Innenschienen in die Gleitschienen, wobei der Druck auf beiden Seiten gleichmäßig sein muss. 4. Befestigen Sie den Switch mit M6-Schrauben und Kä gmuttern am Rack.
- Page 25 Erdung des Switches FA N4 FA N3 FA N2 FA N1 PS U1 1. Schließen Sie ein Ende des Erdungskabels an eine geeignete Erdung an, z. B. an das Rack, in dem der Switch montiert ist. 2. Befestigen Sie die Erdungslasche mit den Unterlegscheiben und Schrauben am Erdungspunkt auf der Rückseite des Switches.
- Page 26 WARNUNG: Laserstrahlen können zu Augenschäden führen. Schauen Sie nicht ohne Augenschutz in die Bohrungen von Transceivern oder Glasfasern. Anschließen des Console-Port 1. Stecken Sie den RJ45-Steckverbinder in den RJ45-Console-Port des Switches. 2. Verbinden Sie die DB9-Buchse des Console-Kabels mit dem seriellen RS-232-Port des Computers.
- Page 27 Anschließen des USB-Ports Stecken Sie das USB-Laufwerk (Universal Serial Bus) in den USB-Port, um die Software und die Kon guration zu sichern und die Software o ine zu aktualisieren. Anschließen der Stromversorgung N8560-32C mit AC-Netzteilen...
- Page 28 N8560-32C mit DC-Netzteilen — 1. Stecken Sie das AC-Netzkabel/DC-Netzkabel-Set in den Netzanschluss des Switches. 2. Schließen Sie das andere Ende des Netzkabels an die Stromquelle an. Fehlerbehebung Das Stromversorgungssystem ist defekt. Die Anzeige an der Vorderseite des Hosts ist AUS. Die Statusanzeige des Lüftermoduls ist AUS und der Lüfter funktioniert nicht.
- Page 29 Kontakt https://www.fs.com/de/contact_us.html Produktgarantie FS garantiert seinen Kunden, dass wir bei Schäden oder fehlerhaften Artikeln, die auf unsere Verarbeitung zurückzuführen sind, eine kostenlose Rückgabe innerhalb von 30 Tagen nach Erhalt der Ware anbieten. Dies gilt nicht für Sonderanfertigungen oder maßgeschneiderte Lösungen.
- Page 30 N8560-32C Le N8560-32C o re deux options d’alimentation : AC ou DC. Le type AC prend en charge le ux d’air de l’avant vers l’arrière ou de l’arrière vers l’avant. Le type DC ne prend en charge que le ux d’air de l’avant vers l’arrière.
- Page 31 Vis M6 x8 Écrou M6 x8 N8560-32C avec alimentation DC Câble d'Alimentation DC x2 Câble de Mise à la Terre x1 Support de Montage x2 Rail Coulissant x2 Rail Intérieur x2 Vis M4 x12 Écrou M6 x8 NOTE : 1. Le switch est livré avec des bouchons anti-poussière. Conservez-les correctement et utilisez-les pour protéger les ports optiques inactifs.
- Page 32 14F 15F 18F 19F 20F 21F 22F 23F 26F 27F 28F 29F 30F 31F Link QSFP28 N8560-32C ASSET TAG CONSOLE QSFP28 Ports Description QSFP28 Ports QSFP28 pour une connexion 40/100G CONSOLE Port de console RJ45 pour la gestion en série...
- Page 33 État Description Éteint Le système est éteint. 1. L'un des modules d'alimentation ou des modules de ventilation est défaillant. Rouge 2. Deux ventilateurs ou plus ne sont pas en position. 3. La température interne dépasse la température de fonctionnement d’avertissement. Vert Clignotant Le système est en cours d'initialisation.
- Page 34 Port du Panneau Arrière N8560-32C avec blocs d'alimentation en courant alternatif (AC) PSU1 FAN1 FAN2 FAN3 FAN4 FAN5 PSU2 N8560-32C avec alimentations en courant continu (DC) PSU1 FAN1 FAN2 FAN3 FAN4 FAN5 PSU2 — — Port Description Port ESD pour attacher le bracelet ESD LED du Panneau Arrière...
- Page 35 Description État Éteint Le ventilateur est éteint. État du Vert Le ventilateur est opérationnel. Ventilateur Rouge Le ventilateur est défaillant ou interrompu. Éteint L'alimentation est coupée. Vert L'alimentation fonctionne normalement. Lorsque l'alimentation est coupée, la tension est de Vert Clignotant 12VSB.
- Page 36 Conditions d'Installation Avant de procéder à l'installation, assurez-vous que vous disposez des éléments suivants : Tournevis Phillips. Un rack standard de 19 pouces de large avec une hauteur minimale de 1U disponible. Câbles Ethernet RJ45 de catégorie 5e ou supérieure, câbles à bre optique et câble de console pour la connexion des périphériques réseau.
- Page 37 Installation du Switch Installation en Rack 1. Fixez les supports de montage et les rails intérieurs aux deux côtés du switch à l'aide de vis M4. 2. Fixezles rails coulissants au rack à l'aide de vis M6 et d'écrous à cage.
- Page 38 3. Alignez les rails intérieurs avec la partie avant des rails coulissants. Faites glisser les rails intérieurs dans les rails coulissants, en exerçant une pression uniforme des deux côtés. 4. Fixez le switch au rack à l'aide de vis M6 et d'écrous à cage.
- Page 39 Mise à la Terre du Switch FA N4 FA N3 FA N2 FA N1 PS U1 1. Connectez une extrémité du câble de mise à la terre à une terre appropriée, telle que le rack dans lequel le switch est installé. 2.
- Page 40 AVERTISSEMENT : Les faisceaux laser peuvent provoquer des lésions oculaires. Ne pas regarder directement dans les alésages des émetteurs-récepteurs ou des bres optiques sans protection oculaire. Connexion du Port Console 1. Insérez le connecteur RJ45 dans le port CONSOLE RJ45 du switch. 2.
- Page 41 Connexion du Port USB Insérez le dispositif USB (Universal Serial Bus) dans le port USB pour la sauvegarde, la con guration ou la mise à jour hors ligne du logiciel. Connexion de l'Alimentation N8560-32C avec alimentation en courant alternatif (AC)
- Page 42 N8560-32C avec alimentation en courant continu (DC) — 1. Branchez le câble d'alimentation AC/DC dans le port d'alimentation du switch. 2. Branchez l'autre extrémité du câble d'alimentation à la source d'alimentation. Dépannage Le Système d'Alimentation est Défectueux. L'indicateur LED sur le panneau frontal est éteint. L'indicateur LED du module de ventilation est éteint et le ventilateur ne fonctionne pas.
- Page 43 Garantie du Produit FS garantit à ses clients que tout article endommagé ou défectueux en raison de sa fabrication pourra être retourné gratuitement dans un délai de 30 jours à compter de la date de réception de la marchandise. Cette garantie ne s'applique pas aux articles fabriqués sur mesure ou aux solutions personnalisées.
- Page 44 イントロダクション この度は、L�データセンタースイッチをお選びいただき、ありがとうございます。本ガ イドは、スイッチのレイアウトを理解し、ネットワークへの導入方法を説明することを目 的としています。 N8560-32C N����-��Cは電源に�つのオプションがあります: ACまたはDCです。ACタイプは前面か ら背面、または背面から前面へのエアフローに対応します。DCタイプは前面から背面への エアフローにのみ対応しています。 電源タイプ エアフローの方向 電源モジュールのモデル ファンモジュールモデル 前から後ろへ GW-CRPS550N2C AFM-N32C-FB 後ろから前へ GW-CRPS550N2RC M1HFAN III-R 前から後ろへ U1D-D10800-DRB AFM-N32C-FB 後ろから前へ サポート対象外 アクセサリー AC電源付きN����-��C AC電源コードx� 接地ケーブル x� マウントブラケット x� スライドレール x� インナーレール x� M�ネジ x��...
- Page 45 M�ネジ x� M�ケージナット x� DC電源付きN����-��C DC電源ケーブルセットx� 接地ケーブル x� マウントブラケット x� スライドレール x� インナーレール x� M�ネジ x�� M�ケージナット x� 注: �. スイッチには防塵プラグが付属しています。ダストプラグは適切に保管し、 アイドル状態の光ポートを保護するために使用してください。 �. アクセサリーはイラストと異なる場合がありますので、現物をご了承ください。 注: この電源コードは他の機器には使用できません。また、他の電源コードはこの 機器に使用しないでください。...
- Page 46 MGMT CONSOLE MGMT 10F 11F 12F 13F 14F 15F 18F 19F 20F 21F 22F 23F 26F 27F 28F 29F 30F 31F Link QSFP28 N8560-32C ASSET TAG CONSOLE QSFP28 ポート 説明 QSFP�� ��/���G接続用QSFP��ポート CONSOLE シリアル管理用RJ��コンソールポート MGMT イーサネット管理ポート ソフトウェアと構成のバックアップとオフライン ソフトウェアアップ グレード用のUSB管理ポート フロントパネルLED...
- Page 47 状態 説明 オフ システムの電源がオフになっています。 �. 電源モジュールまたはファンモジュールの�つが故障 しました。 赤色点灯 �. このポジションには�つ以上のファンがありません。 �. 内部温度が警告動作温度を超えています。 緑色点滅 システムを初期化中です。 緑色点灯 システムは稼働中です。 �. 温度がしきい値を超えています。 �. このポジションにはファンが�つのみです。 点灯(アンバー) �. デュアル電源装置の�つが電源コードに接続されてい ません。 赤色点灯 電源モジュールが異常な状態です。 緑色点灯 電源モジュールは動作しています。 デュアル電源装置の�つが電源コードに接続されていま 点灯(アンバー) せん。 �. ファンが異常な状態になっています。 赤色点灯 �. このポジションにはファンが�つ未満です。 緑色点灯 ファンは動作しています。 点灯(アンバー) ファンが異常に動作します。 Link オフ...
- Page 48 バックパネルポート AC電源付きN����-��C PSU1 FAN1 FAN2 FAN3 FAN4 FAN5 PSU2 DC電源付きN����-��C PSU1 FAN1 FAN2 FAN3 FAN4 FAN5 PSU2 — — ポート 説明 ESDリストストラップ装着用のESDポート バックパネルLED AC電源付きN����-��C PSU1 FAN1 FAN2 FAN3 FAN4 FAN5 PSU2 電源ステータス ファンのステータス 電源ステータス DC電源付きN����-��C PSU1 FAN1 FAN2 FAN3 FAN4 FAN5 PSU2 —...
- Page 49 状態 説明 オフ ファンの電源がオフになっています。 ファンのス 緑色点灯 ファンは作動しています。 テータス 赤色点灯 ファンが故障または停止します。 オフ 電源が切れています。 緑色点灯 電源は正常に作動します。 電源がオフの場合、電圧は��VSBです。コールドバッ 緑色点滅(�Hz) クアップ状態では、電源装置は電力を出力しません。 電源ステー �. 過電流、過電圧、ファン故障などのエラーが発生し タス(AC) ました。 点灯(アンバー) �. 冗長構成のAC電源がプラグアウトされています。 アラームが発生したが、電源モジュールは動作し続け アンバー点滅 ています。アラームの原因は、高電力、高電流、高 (�Hz) 温、またはファン回転速度の低下である可能性があり ます。 オフ DC電源モジュールが接続されていません。 緑色点灯 DC電源はオンで正常に動作しています。 緑色点滅 DC電源が存在しているか、��Vsbに接続されています。 電源ステー �. DC電源モジュールが抜かれているか、紛失しました。 タス(DC) 点灯(アンバー) �.
- Page 50 設置要件 設置を開始する前に、次のものが揃っていることを確認してください。: プラスドライバー。 標準サイズ、幅��インチ、高さ�U以上のラックが利用可能です。 カテゴリー�e以上のRJ��イーサネットケーブル、光ファイバケーブル、ネットワーク 機器接続用コンソールケーブル。 サイト環境: 動作温度は�℃ ~ ��℃です。 設置場所は換気が十分である必要があります。スイッチの周囲に適切な空気の流れが あることを確認してください。 スイッチは、デバイスから側面まで少なくとも�U(��.��mm)離して設置する必要があ ります。 危険な状態を避けるために、スイッチが水平で安定していることを確認してください。 粉塵の多い環境に装置を設置しないでください。 設置場所は、水漏れや水滴、多露、湿気のない場所に設置してください。 ラックと作業台が適切に接地されていることを確認してください。...
- Page 51 スイッチの取り付け ラック取り付け �.マウントブラケットとインナーレールをスイッチの両側面にM�ネジで固定します。 �. M�ネジとケージナットを使用して、スライドレールをラックに取り付けます。...
- Page 52 �. インナーレールをスライドレールの前面に合わせます。インナーレールをスライドレー ルにスライドさせます。 �. M�ネジとケージナットを使用して、スイッチをラックに取り付けます。...
- Page 53 スイッチの接地 FA N4 FA N3 FA N2 FA N1 PS U1 �. アース線の一端を、スイッチが取り付けられているラックなどの適切なアースに接続し ます。 �. ワッシャとネジを使用して、接地ラグをスイッチバックパネルの接地ポイントに固定し ます。 ご注意: すべての電源接続が切断されていない限り、アース接続を取り外さない でください。 QSFP��ポートの接続 まず互換性のあるQSFP��トランシーバーを取り付け、光ファイバケーブルをトランシー バーに接続するか、DACケーブルをQSFP��ポートに直接接続します。...
- Page 54 警告: レーザー光線は目に損傷を与える可能性があります。目を保護しないでト ランシーバーや光ファイバの穴をのぞき込まないでください。 コンソールポートの接続 �. RJ��コネクタをスイッチのRJ��コンソールポートに挿入します。 �. コンソールケーブルのDB�メスコネクタをコンピュータのRS-���シリアルポートに接続 します。 MGMTポートの接続 �. 標準のRJ��イーサネットケーブルの一端をコンピュータに接続します。 �. ケーブルのもう一方の端をスイッチのMGMTポートに接続します。...
- Page 55 USBポートの接続 ソフトウェアと設定のバックアップとオフライン ソフトウェアアップグレードのために、 ユニバーサルシリアルバス(USB)フラッシュディスクをUSBポートに挿入します。 電源の接続 AC電源付きN����-��C...
- Page 56 DC電源付きN����-��C — �. AC電源コード/DC電源ケーブルセットをスイッチの電源ポートに差し込みます。 �. 電源コード/電源ケーブルセットのもう一方の端を電源に接続します。 トラブルシューティング 電源システムに障害がある ホストのフロントパネルのインジケータが消灯しています。ファンモジュールのステータ スインジケータがオフで、ファンが動作しません。電源モジュールのインジケータが消灯 しています。まず、電源モジュールの電源コードを外すかどうかを確認してください: �. キャビネットのケーブルは正しく接続されています。 �. キャビネットの電源ソケットは電源モジュールに緩く接続されています。 �. 電源モジュールが正しく取り付けられています。 シリアルポートのコンソールに出力がない、または読みにくい文字が出 力される �. シリアルポートケーブルが正しく接続されているか、シリアルポートケーブルが外れて いないか、接続されているシリアルポートとハイパーターミナルで設定されているシリア ルポートが一致しているかを確認してください。 �. シリアルポートのパラメータ設定が説明書に記載されている設定と一致しているか確認 してください。 新しく挿入したサービスカードモジュールの電源がオンにならない �. モジュールが正しく挿入されているか確認してください。 �. チェックが正常であるにもかかわらず、新しく挿入したモジュールの電源がオンになら ない場合は、テクニカルサポートにお問い合わせください。...
- Page 57 オンラインリソース ダウンロード https://www.fs.com/jp/products_support.html ヘルプセンター https://www.fs.com/jp/service/fs_support.html お問い合わせ https://www.fs.com/jp/contact_us.html 製品保証 FSは、お客様が弊社の仕上がりに起因する損傷または不良品について、製品を受け取った 日から��日以内に無料で返品できることを保証します。これには、カスタムメイドのアイ テムやカスタマイズされたソリューションは含まれません。 保証: この製品には、材料または製造上の欠陥に対する�年間の限定保証が付いて います。保証の詳細については、以下のサイトをご参照ください: https://www.fs.com/jp/policies/warranty.html 返品: 返品を希望される場合は、以下のサイトで返品方法に関する情報をご確認 ください: https://www.fs.com/jp/policies/day_return_policy.html...
- Page 58 Warning:This is a class A product. In a domestic environment, this product may cause radio interference, in which case the user may be required to take adequate measures. FS.COM GmbH hereby declares that this device is in compliance with the Directive 2014/30/EU, 2011/65/EU and (EU)2015/863. A copy of the EU Declaration of Conformity is available at www.fs.com/company/quality_control.html.
- Page 59 FS.COM GmbH déclare par la présente que ce dispositif est conforme à la Directive 2014/30/EU, 2011/65/EU et (EU)2015/863. Une copie de la Déclaration de Conformité de l'UE est disponible à l'adresse suivante https://www.fs.com/fr/company/quality_control.html. FS.COM GmbH NOVA Gewerbepark Building 7, Am G ld 7, 85375 Neufahrn bei Munich, Germany...
- Page 60 UKCA N8560-32C (Front-to-Back Air ow/DC Power) Hereby, FS.COM Innovation Ltd declares that this device is in compliance with the Directive SI 2016 No. 1091 and SI 2012 NO. 3032. FS.COM INNOVATION LTD Unit 8, Urban Express Park, Union Way, Aston, Birmingham, B6 7FH, United Kingdom...
- Page 61 Waste Electrical and Electronic Equipment (WEEE) N8560-32C (Front-to-Back Air ow/DC Power, Front-to-Back Air ow/AC Power, Back-to-Front Air ow/AC Power) This appliance is labelled in accordance with European Directive 2012/19/EU concerning waste electrical and electronic equipment (WEEE). The Directive determines the framework for the return and recycling of used appliances as applicable throughout the European Union.
- Page 62 If you think batteries could have been swallowed or placed inside any part of the body, seek immediate medical attention. Q.C. PASSED Copyright © 2023 FS.COM All Rights Reserved.
Need help?
Do you have a question about the N8560-32C and is the answer not in the manual?
Questions and answers