Advertisement
Quick Links
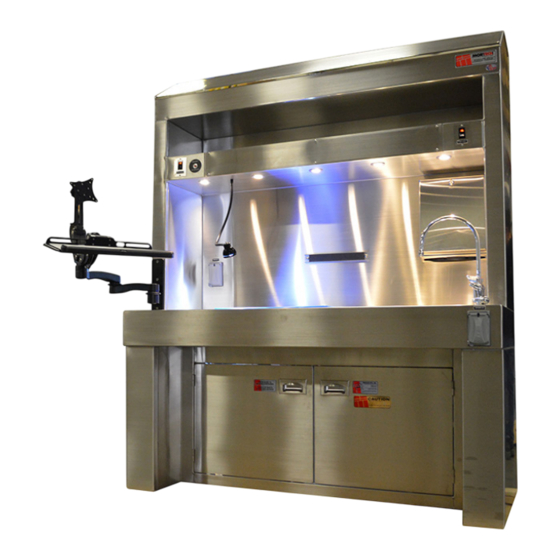
MODEL GL100
ELEVATING PATHOLOGY
WORKSTATION
CAUTION
• Inspect unit and all components
for any loosening that may have
occurred during shipping •
ATTENTION
Review entire manual before
starting assembly
ATTENTION
All images and Drawing in this manual
may not represent your model.
Refer to your particular project for
exact specifications
Mortech™ Manufacturing Inc.
411 North Aerojet Avenue, Azusa, CA 91702
(626) 334-1471 www.mortechmfg.com
Technical Users' Manual
Installation and Operating Instructions
CAUTION
DO NOT USE CLEANERS
•
CONTAINING CHLORINE WHEN
CLEANING STAINLESS STEEL
WARNING
Biohazard Label is place on the
equipment signifying the potentially
infectiousness due to the samples
or reagents
•
Advertisement

Related Manuals for MORTECH GL100


Summary of Contents for MORTECH GL100
- Page 1 Technical Users’ Manual Installation and Operating Instructions MODEL GL100 ELEVATING PATHOLOGY WORKSTATION CAUTION CAUTION • Inspect unit and all components DO NOT USE CLEANERS • for any loosening that may have CONTAINING CHLORINE WHEN occurred during shipping • CLEANING STAINLESS STEEL •...
- Page 2 • Is unit draining properly? WARNING • Are all nuts, bolts, and pins secured in place? It is crucial that any work performed on Mortech If unit has an issue contact Mortech Manufacturing Inc. Manufacturing Inc. manufactured items are carried out...
- Page 3 GL100 Elevating Pathology Workstation Installation UPPER ASSEMBLY REMOVE (6) SCREWS HOLDING UPPER ASSEMBLY TO REMOVE. LOWER ASSEMBLY DISCONNECT ALL ELECTRICAL LINES (CONDUIT AND S-O CORD) TO SEPARATE THE UPPER ASSEMBLY FROM THE LOWER ASSEMBLY. (ELECTRICAL LINES NOT SHOWN AS THESE WILL DIFFER DEPENDING ON OPTIONS PROVIDED TO THE STATION).
- Page 4 Installation GL100 Elevating Pathology Workstation Figure-G UTILITY REQUIREMENT NOTES: 1: FLUSH LINES CLEAR BEFORE CONNECTING TO STATION. 2: PLUMBER TO PROVIDE SHUT OFF VALVES FOR WATER CONNECTIONS AND P-TRAP FOR DRAIN. 3: ELECTRICIAN TO PROVIDE LIQUID TIGHT JUNCTION BOX AND CONDUIT CONNECTIONS PER LOCAL CODES.
- Page 5 GL100 Elevating Pathology Workstation Plumbing Parts listing GL105 Elevating Pathology Workstation Exhaust Duct Electrical Conduit 1-1/2-Drain Air Gap Pressure Zone Assembly Cold Water Wye Strainer Hot Water Connect to Reduced Pressure Zone Assembly and then connect to building drain. SAMPLE CONNECTION TO BUILDING 1-1/2”/3.8 cm “Y”...
- Page 6 Std. 1013; AWWA Std. C511; CSA B64.4. Shall be a Watts Regulator Co. Series 009. †Does not indicate approval status. Refer to Page 2 for approved 1 Mortech™ Manufacturing Inc. 411 North Aerojet Avenue, Azusa, CA 91702 (626) 334-1471 www.mortechmfg.com...
- Page 7 Plug: ................Bronze Gasket:................NBR Standard Screen: ....#20 mesh, 304 stainless steel D WYE STRAINER PLUMBED INTO A GL100 IMPORTANT Before Service and Maintenance: Shut water off before checking and cleaning the Wye Strainer fitting screen located inside the fitting.
- Page 8 CAUTION: Solenoid must be fully reassembled as the hous- ing and internal parts are part of and complete the magnetic circuit. Place insulating washer at each end of coil if required. Mortech™ Manufacturing Inc. 411 North Aerojet Avenue, Azusa, CA 91702 (626) 334-1471 www.mortechmfg.com...
- Page 9 GL100 Elevating Pathology Workstation Installation Exhaust Duct Allow for elevation on the disposal connection. Electrical Conduit Hot Water Disposal Connect both Cold Water to drain ELECTRICAL CONNECTION INSTRUCTIONS Figure-J Step 1: (Refer to Figure-I) Connect electrical lines from station to building. Units are provided with watertight conduit lines for connection.
- Page 10 Installation GL100 Elevating Pathology Workstation GL105 BELLOW ASSEMBLY FOR EXHAUST Fastening the clamp Figure-1 Figure-3 Slide one end of the clamp into the fastening end (Figure-1) by lifting the tightening screw upward and placing underneath. (Figure-2) Take out necessary slack.
- Page 11 GL100 Elevating Pathology Workstation Installation GL105 BELLOW ASSEMBLY FOR EXHAUST Figure-2 Figure-1 Place fastened clamp (as shown on previous page) Place bellow over the exhaust vent. (Figure-1) around the bottom of the bellow that overlaps the Slide downward enough to get a good seal.
- Page 12 Parts listing GL100 Elevating Pathology Workstation 1/2" G TO STATION. S FOR WATER CONNECTIONS AND P-TRAP UNCTION BOX AND CONDUIT 600-650CFM @ 0.50 W.G. 18" 24" 18" 1 1/2" JUNCTION BOX FOR HARDWIRE CONNECTION (1) 115V/60Hz/1 /15A (STATION) (1) 115V/60Hz/1 /15A (DISPOSER) 4"...
- Page 13 Contact plumber to diagnose problem OTHERWISE DISCLOSED IN WHOLE OR PROJECT DECIMALS .XX FRACTIONS 1/16" IN PART TO ANYONE WITHOUT WRITTEN AUTHORIZATION FROM MORTECH MFG. Replace faucet gasket seals DECIMALS .XXX .005 APPROVALS DATE DO NOT SCALE DRAWING DRAWN BY...
- Page 14 USE OF TRAINED AND QUALIFIED PERSONNEL System installation, operation, and repair should only be done Mortech Manufacturing Inc. by persons having sufficient knowledge of the lift system and Phone: (800) 410-0100 • (626) 334-1471 the contents of this manual.
- Page 15 Suspa Lift System MOVOTEC E-Drive “Bolt-On” Lift System OBSERVE DUTY CYCLE The term duty cycle refers to the amount of time that a mo- tor or system is in motion versus the amount of time that it is resting. The lift system is not designed to operate continuously without rest.
- Page 16 Suspa Lift System MOVOTEC E-Drive “Bolt-On” Lift System tubing and into the pressure elements. The gear motor will CB600 Series “Bolt-On” lift cylinders are used with system automatically shut off once the programmed pump lower part numbers (MQS-00005E to MQS-00007E) shown in the limit is reached.
- Page 17 150mA , respectively. the gear motor and cable connections from possible damage. The motor cover or any additional items can be purchased by contacting: Mortech Manufacturing Inc. Phone: (800) 410-0100 info@ mortechmfg.com www.mortechmfg.com Motor Controller Placement - There should be enough...
- Page 18 OPERATING THIS PRODUCT. FAILURE TO FOLLOW problem cannot be easily corrected, disconnect the system THE INSTRUCTIONS IN THIS MANUAL COULD from power immediately and contact MORTECH RESULT IN FIRE, PROPERTY DAMAGE, ELECTRIC MANUFACTURING INC. technical support. SHOCK, PERSONAL INJURY OR DEATH.
- Page 19 Suspa Lift System MOVOTEC E-Drive “Bolt-On” Lift System deceleration zone provides a good indicator for the user NOTICE-Do not dismantle the system unless authorized that the lift system is about to reach its fully extended or by Suspa® Incorporated. Attempting to repair the system retracted height.
- Page 20 Add load to system. Mortech™ Mfg. Inc. for tube shortening instructions. Cylinder Mounting Screws Too Long Reduce cylinder mounting screw length. Flexible Tubing Lengths Too Long Contact Mortech™ Mfg. Inc. for tubing change or tube shortening instructions. MARCH 2008 MFGSUSPA LIFT SYSTEM...
- Page 21 GL100 Elevating Pathology Workstation Parts listing Suspa Lift System MOVOTEC E-Drive “Bolt-On” Lift System Inspection and Maintenance (as defined below) within the Applicable Warranty Period after the date of manufacture of the item by Suspa® Incorporated or, if applicable, by Suspa® Incorporated’s...
- Page 22 Suspa Lift System Parts listing GL100 MOVOTEC E-Drive “Bolt-On” Lift System Elevating Pathology Workstation MOVOTEC MOTOR COUPLER Lift Systems Controller Reset Procedure REPLACEMENT INSTRUCTIONS Remove load from lift cylinders and/or structure. Disconnect The following instructions can be used to perform the reset power cord, motor, and switch cables from the motor procedure on motorized lift units (E-Drive and ELS II).
- Page 23 GL100 Elevating Pathology Workstation Parts listing COVER PLATE SCREWS BACKDRAFT VENTILATION ACCESS COVER PLATE BACKDRAFT VENTILATION ACCESS COVER PLATE To access the ventilation remove the cover plate screws and the plate can be detached.
- Page 24 A complete collection of our product drawings is available for download at the InSinkErator Revit/CAD Library, which can be found at www.insinkerator.com/foodservice. Product information is also accessible on The KCL CADalog. More information is available from KCL at www.kclcad.com. Mortech™ Manufacturing Inc. 411 North Aerojet Avenue, Azusa, CA 91702 (626) 334-1471 www.mortechmfg.com...
- Page 25 GL100 Elevating Pathology Workstation Installation Installation GL105 Elevating Pathology Workstation BLUE TAPE (COLD WATER) RED TAPE (HOT WATER) CONNECT TO Figure-G1 Plumbing outlet marked and ready for hook-up. Located inside unit. CONNECT TO PLUMBING CONNECTION INSTRUCTIONS STEP 1: (Refer to Figure-G) Flush out all water lines prior to connection.
- Page 26 HP Rating: 1HP-120V 2HP-240V-277V Max Amp: 16 Amp Termination: Side Actuator Material: Thermoplastic Body Material: Thermoplastic Strap Material: Steel Standards and Certifications: UL/CSA GROUND 110V 220V GROUND Mortech™ Manufacturing Inc. 411 North Aerojet Avenue, Azusa, CA 91702 (626) 334-1471 www.mortechmfg.com...
- Page 27 • Patented Quick-Fit™ Key Hole Mount for Easy Installation • Patented Universal-Fit™ Adapter Technology • Lockable Tab • Premium Powdercoat Finish • Spring Hinge Closure • UL Listed & 2008 NEC Compliant Mortech™ Manufacturing Inc. 411 North Aerojet Avenue, Azusa, CA 91702 (626) 334-1471 www.mortechmfg.com...
- Page 28 4. Apply teflon tape or pipe joint compound to threads of Note: To order replacement parts, order the B-50-P parts kit. supply lines. Connect supply lines with 1⁄2” NPT piping. (For repair of no.7) Mortech™ Manufacturing Inc. 411 North Aerojet Avenue, Azusa, CA 91702 (626) 334-1471 www.mortechmfg.com...
- Page 29 T & S BRASS AND BRONZE WORKS, INC. MODEL # 013E 72” hose T & S BRASS AND BRONZE WORKS, INC. MODEL # 002858-40 Spray valve assemby Mortech™ Manufacturing Inc. 411 North Aerojet Avenue, Azusa, CA 91702 (626) 334-1471 www.mortechmfg.com...
- Page 30 400 C-fold or 525 multifold paper towels without adjustment or use of adapters. Manufacturer’s service and parts manual shall be provided to the building owner/manager upon request. Mortech™ Manufacturing Inc. 411 North Aerojet Avenue, Azusa, CA 91702 (626) 334-1471 www.mortechmfg.com...
- Page 31 18 x 12 x 0.75 thick LW386 20 x 15 x 0.75 thick LW387 Photo Blue Board 20 x 15 x 0.50 thick LW389 All measurements in inches LW386 LW387 LW385 LW389 Mortech™ Manufacturing Inc. 411 North Aerojet Avenue, Azusa, CA 91702 (626) 334-1471 www.mortechmfg.com...
- Page 32 • 2-power, high clarity magnification. • Optional 4-power, 1” diameter secondary lens inset available **. • Color: Black. • 2” x 4” dual lens, shade mount attachment Mortech™ Manufacturing Inc. 411 North Aerojet Avenue, Azusa, CA 91702 (626) 334-1471 www.mortechmfg.com...
- Page 33 40 watts of illumination • White finish • Electronic LED driver (120 volts, 60 Hz) ensures no flickering soft white light and quit operation without interfering with other home electronics Mortech™ Manufacturing Inc. 411 North Aerojet Avenue, Azusa, CA 91702 (626) 334-1471 www.mortechmfg.com...
- Page 34 Markings The outer surface of the conduit shall be clearly marked with a legible print legend in accordance with UL 1660 and CSA C22.2 No. 227.2. Mortech™ Manufacturing Inc. 411 North Aerojet Avenue, Azusa, CA 91702 (626) 334-1471 www.mortechmfg.com...
- Page 35 1.575 1.600 1.865 1.900 (53) 2.020 2.045 2.340 2.375 11.5 • Package lengths in excess of 100’ contain splices; these splices must be cut out before use. Mortech™ Manufacturing Inc. 411 North Aerojet Avenue, Azusa, CA 91702 (626) 334-1471 www.mortechmfg.com...
- Page 36 Bracket - Actuator WBL/MBL optional external gasket panel seal Base Phenolic (150°C) Rocker/Bracket Nylon 66 (105°C) Agency Certifications Select circuits and constructions with IEC approvals are avail- able. Consult factory. Mortech™ Manufacturing Inc. 411 North Aerojet Avenue, Azusa, CA 91702 (626) 334-1471 www.mortechmfg.com...
- Page 37 GL100 Elevating Pathology Workstation Accessories Digital Scale Evidence Screen The Ohaus Compact Scale Model LW485 is ideal when cost matters The screen is designed to prevent and dependable results are evidence from being accidentally a must. This uniquely designed washed down the drain. It is...
- Page 38 GL100 Elevating Pathology Workstation Maintenance MAINTENANCE INSTRUCTIONS The unit requires regular maintenance and follow the EFFECTIVE CLEANING METHODS manufactures directions. Commercial Cleaners - Many commercial cleaners DISINFECTING AND CLEANING compounded from phosphates, synthetic detergents, and Clean all surfaces of the stainless steel with a hard surface alkalis are available for the cleaning of severely soiled or disinfectant/cleaner such as Sheila Shine®...
- Page 39 GL100 Elevating Pathology Workstation Maintenance record MAINTENANCE RECORD Date...
- Page 40 Training record GL100 Elevating Pathology Workstation TRAINING RECORD Date...
- Page 41 Information in this Manual is subject to change without notice of (18) months from the date of shipment. Shipping and and does not represent a commitment on the part of Mortech Labor is not warranted. Items not manufactured by Mortech Manufacturing.
Need help?
Do you have a question about the GL100 and is the answer not in the manual?
Questions and answers