Advertisement
Quick Links
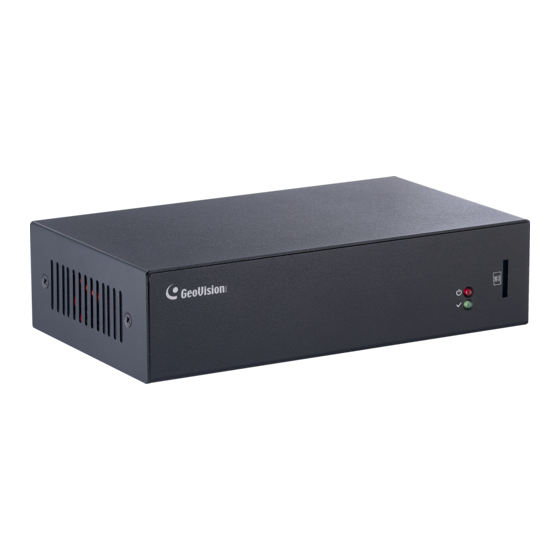
GV-Cloud Bridge Pro
1 Compatible Products .............................................................................................. 4
2 Packing List ............................................................................................................ 4
3 Overview .................................................................................................................. 5
4 GV-Cloud VMS Premium License .......................................................................... 6
5 Connecting to PC .................................................................................................... 8
6 Installing the SSD ................................................................................................... 8
7 Accessing GV-Cloud Bridge Pro ...........................................................................10
7.1 Assigning a Static IP Address ........................................................................ 11
7.2 Configuring the DDNS Domain Name ............................................................12
8 Operation Mode .....................................................................................................14
9 Live View ................................................................................................................15
10 General Settings ..................................................................................................17
10.1 Connecting to IP Cameras ...........................................................................17
10.2 Configuring Input / Output Settings ..............................................................18
10.3 Connecting to I/O Box ..................................................................................21
11 Service Settings ...................................................................................................22
11.1 Connecting to GV-Cloud VMS ......................................................................22
11.2 Connecting to GV-Cloud Access Control ......................................................24
11.3 Connecting to GV-Center V2 / Dispatch Server ............................................30
11.4 Connecting to GV-Recording Server / Video Gateway ..................................32
11.5 Connecting to GV-Eye ..................................................................................33
11.6 Live Broadcasting .........................................................................................35
12 System Settings ...................................................................................................38
12.1 Basic ............................................................................................................38
12.2 Account and Authority ..................................................................................39
12.3 Network Settings ..........................................................................................40
12.4 Date and Time ..............................................................................................40
12.5 RS-485.........................................................................................................41
12.6 Maintenance ................................................................................................42
13 Storage .................................................................................................................43
14 VPN .......................................................................................................................44
15 People and Vehicle Detection (PVD) ...................................................................50
16 Firmware Upgrade ...............................................................................................52
Contents
1
Advertisement

Related Manuals for GeoVision GV-Cloud Bridge Pro


Summary of Contents for GeoVision GV-Cloud Bridge Pro
- Page 1 4 GV-Cloud VMS Premium License ................6 5 Connecting to PC ....................8 6 Installing the SSD ....................8 7 Accessing GV-Cloud Bridge Pro ................10 7.1 Assigning a Static IP Address ................ 11 7.2 Configuring the DDNS Domain Name ............12 8 Operation Mode .....................14...
- Page 2 GV-Cloud Bridge Pro GV-Cloud Bridge Pro seamlessly integrates ONVIF and GV-IP cameras with GeoVision's software and mobile app, allowing for centralized management or cloud-based monitoring.
- Page 3 IP devices, and GeoVision software: GV-Cloud VMS, GV-Cloud Access Control, GV-Center V2 / Recording Server / Video Gateway / RTMP, and GV-VPN Box. Only one of the operation modes can be enabled at once. Note: The 4-ch People/Vehicle Detection by GV-Cloud Bridge Pro only works with GV-Center V2 V20.
- Page 4 1. To allow GV-IP Cameras without GV-Center V2 settings to connect to GV-Center V2, use GV-Cloud Bridge Pro. 2. To access 3rd party IP cameras using the GV-Eye app, use GV-Cloud Bridge Pro. 3. To allow 3rd party IP cameras to establish passive connections to GV-Recording Server / Video Gateway without port forwarding, use GV-Cloud Bridge Pro.
- Page 5 3 Overview Description Name The Red LED indicates the power is supplied. The Green LED indicates a network is connected. Insert a Micro SD card (SDHC / SDXC / UHS-I, Class 10, Linux ext4 Memory Card format). To format a SD card, see 13 Storage. Connect to up to 8 GV-DFK1355 readers via the RS-485 interface.
- Page 6 When both main stream and sub stream resolution exceeds the applied license: (1) The recordings will only be saved in the SSD or the memory card in GV-Cloud Bridge Pro based on the main stream resolution; (2) The License does not match event will be...
- Page 7 GV-Cloud VMS event logs of License not matched and Resolution not matched...
- Page 8 DC power adapter. Connecting two power sources simultaneously can damage the device. 6 Installing the SSD To install an SSD in GV-Cloud Bridge Pro using the optional SSD mounting kit, follow the steps below. The SSD mounting kit...
- Page 9 Loosen the 4 cover screws and take off Connect the SATA Power Cable to the the cover of GV-Cloud Bridge Pro. GV-Cloud Bridge Pro system board. Flip the mounting plate and attach it to the self-prepared SSD with 4 of the supplied screws.
- Page 10 1. The PC used to access the Web interface must be on the same LAN as the GV-Cloud Bridge Pro. 2. If the network does not have a DHCP server or is disabled, GV-Cloud Bridge Pro can be reached using its default IP address 192.168.0.10, see 7.1 Assigning a Static IP Address.
- Page 11 7.1 Assigning a Static IP Address When GV-Cloud Bridge Pro connects to LAN without a DHCP server, it is assigned a static IP address of 192.168.0.10. To avoid IP conflicts with other GeoVision devices, follow the steps below to assign a new IP address.
- Page 12 Pro when using a dynamic IP from a DHCP server. DDNS assigns a domain name to GV-Cloud Bridge Pro so that it can always be accessed using the domain name. Follow the steps below to apply for a domain name from GeoVision DDNS Server and enable the DDNS function.
- Page 13 Note: The registered username expires after three months of inactivity. Return to the GV-Cloud Bridge Pro Web interface and type the Hostname and Password registered on the DDNS Server. Click Apply. The GV-Cloud Bridge Pro can now be accessed using the domain name.
- Page 14 Once logged in, select Operation Mode from the left menu. You can connect to GeoVision software or services using one of four major operation modes. After selecting the desired mode, GV-Cloud Bridge Pro will reboot for the changes to take effect. You can only choose one operation mode at a time.
- Page 15 9 Live View Once a camera is connected to GV-Cloud Bridge Pro, you can see its live view and use the following functions for monitoring. For how to connect a camera, see 10.1 Connecting to IP Cameras. When you move the cursor over a channel, the following controls are available:...
- Page 16 Additionally, you can right-click the live view image, and select Stats to see the current Video (codec), Resolution, Audio (codec), Bitrate, FPS, and Client (the number of current connections to the camera) in use.
- Page 17 10 General Settings The following options are available under General Settings of the left menu. Procedures are detailed in the following sections: ◼ Video Settings: See 10.1 Connecting to IP Cameras. ◼ IO Settings: See 10.2 Configuring Input / Output Settings. ◼...
- Page 18 10.2 Configuring Input / Output Settings GV-Cloud Bridge Pro can manage up to eight input and eight output devices from cameras and GV-IO Boxes. The virtual inputs can be used to enable event alerts and start recordings when an input trigger is detected.
- Page 19 ◼ Name: Type a desired name for the input settings. ◼ Channel / IO Box: Specify the camera channel or IO Box number based on the selected source. ◼ Pin Number / IO Box Pin Number: Select the desired pin number for the input device based on the selected source.
- Page 20 10.2.2 Output Settings To configure an output device, follow the steps below. Select Output on the Virtual IO page. This page appears. To configure an output device, click Edit. Follow Steps 3 ~ 4 in 1.9.2.1 Input Settings. Note: To force a camera output to be triggered using the GV-Eye mobile app. See 8. Live View in GV-Eye Installation Guide.
- Page 21 10.3 Connecting to I/O Box GV-Cloud Bridge Pro can connect up to four GV-I/O Boxes. To connect to a GV-I/O Box, follow the steps below. In the left menu, click General Settings > IO BOX Settings. This page appears. To configure a GV-I/O Box, click Edit.
- Page 22 Cameras connected via GV-Cloud Bridge Pro can connect to GV-Cloud VMS, allowing for cloud-based monitoring. On GV-Cloud VMS Add your GV-Cloud Bridge Pro to the host list on GV-Cloud VMS first. For details, see 2.3 GV-Cloud VMS User’s Manual. Creating Hosts in On GV-Cloud Bridge Pro In the left menu, select Operation Mode >...
- Page 23 AI events from AI-capable GV/UA-IP cameras: Intrusion / PVD Motion / Cross Line / Enter Area / Leave Area. GV-Cloud Bridge Pro requires a memory card or SSD to record and notify GV-Cloud VMS of events. To ensure that a storage device is operational, go to Storage > Disk in the left menu and make sure the Status is OK.
- Page 24 11.2 Connecting to GV-Cloud Access Control The controller and reader connected via GV-Cloud Bridge Pro can connect to GV-Cloud Access Control, allowing for cloud-based monitoring. The procedures are as the following: • Step 1: Connect GV-Cloud Bridge Pro to GV-Cloud Access Control. See 11.2.1 Connecting to GV-Cloud Access Control.
- Page 25 GV-Cloud Bridge Pro. Click Apply. When the device is added to GV-Cloud Access Control, the State will display “Connected”. Add the GV-Cloud Bridge Pro to GV-Cloud Access Control. See 4.2.1 Adding a Device in GV-Cloud Access Control User’s Manual.
- Page 26 11.2.2 Connecting the Controller or Reader GV-Cloud Bridge Pro allows you to connect the GV-AS21xx or GV-AS41xx controller or the GV-DFK1355 reader to the GV-Cloud Access Controller. On the GV-Cloud Access Control page, click the Extended Device tab. To connect the GV-AS21xx / AS41 xx controller: In the left menu, click Service Settings >...
- Page 27 To connect the GV-DFK1355 reader: Using the RS-485 interface of GV-Cloud Bridge Pro, you can connect up to 8 GV-DFK1355 readers to GV-Cloud Access Control. Note: To define the sequence of multiple readers when connected to a single RS-485 interface, use the DFK1355 Setup AP. See 8.7 ID and Card Identifier Settings in GV-Card Reader User’s Manual.
- Page 28 For each reader, specify the door number/function from the Output dropdown list, as well as the channel number for video streams and snapshots from the Video/Snapshot dropdown list. Click Apply. When the reader is connected to GV-Cloud Access Control, the Status for each ID will display a checkmark.
- Page 29 11.2.3 Setting the Card Identifier To set the GV-DFK1355 reader to reader Unique Identification (UID) or GeoVision Identification (GID), click the Card tab on the GV-Cloud Access page.
- Page 30 11.3 Connecting to GV-Center V2 / Dispatch Server Cameras connected via GV-Cloud Bridge Pro can connect to GV-Center V2 or GV-Dispatch Server, allowing for centralized monitoring. In the left menu, select Operation Mode > CV2 / Video Gateway / RTMP or CV2 / Video Gateway / RTMP + PVD.
- Page 31 Note: GV-Center GV-Cloud Bridge Pro requires a memory card or SSD to record and notify GV-Center V2 of events. To ensure that a storage device is working properly, go to Storage > Disk in the left menu and make sure the Status is OK.
- Page 32 11.4 Connecting to GV-Recording Server / Video Gateway Cameras connected via GV-Cloud Bridge Pro can make a passive connection to the GV-Recording Server / Video Gateway, allowing for large-scale video recording and transmitting. Note: The support for GV-Recording Server / Video Gateway is coming soon.
- Page 33 11.5 Connecting to GV-Eye Cameras connected via GV-Cloud Bridge Pro can be monitored using the GV-Eye mobile app. Follow the steps below to enable the connection to GV-Eye. The GV-Relay QR code service on this page allows you to connect to the GV-Eye mobile app by scanning the QR code displayed.
- Page 34 Once the scanning is complete, type the name and login credentials of your GV-Cloud Bridge Pro. Click Get Information. All cameras from your GV-Cloud Bridge Pro are displayed. Select the cameras you want to view on GV-Eye and click Save. The selected cameras...
- Page 35 11.6 Live Broadcasting Cameras connected via GV-Cloud Bridge Pro can connect to YouTube or Twitch for live broadcasting. The user interfaces vary per platform. Locate the options specific to your platform. In the following procedures, we use YouTube as an example.
- Page 36 Make sure to disable Enable Auto-stop, and enable Enable DVR. The Stream Key and Stream URL are now available. On GV-Cloud Bridge Pro In the left menu, select Operation Mode > CV2 / Video Gateway / RTMP / VPN or CV2 / Video Gateway / RTMP / VPN + PVD.
- Page 37 10. Select PCM or MP3 for Audio, or select Mute for no sound. 11. Click Apply. You can now view the live view broadcast from the GV-Cloud Bridge Pro in the YouTube preview window. On YouTube 12. Click GO LIVE to begin streaming, and END STREAM to end streaming.
- Page 38 System Settings 12.1 Basic The Baisc page displays the firmware version, engine version, MAC address, and device name. You can also change the device name.
- Page 39 12.2 Account and Authority GV-Cloud Bridge Pro supports up to 32 user accounts. To manage user accounts, follow the steps below. Note: The ROOT account is created by default and cannot be removed. The account has full access to all functions.
- Page 40 For details, see 7.1 Assigning a Static IP Address or 7.2 Configuring the DDNS Domain Name. 12.4 Date and Time To configure the date and time of your GV-Cloud Bridge Pro, follow the steps below. In the left menu, click System Settings > Date / Time. This page appears. Select a desired Time Zone.
- Page 41 Optionally, you can also enable or disable Daylight Saving Time in the DST setting. 12.5 RS-485 Using the RS-485 interface of GV-Cloud Bridge Pro, you can connect up to 8 GV-DFK1355 readers to GV-Cloud Access Control. In the left menu, select System Settings > RS-485, and select DFK1355 as Mode.
- Page 42 12.6 Maintenance If GV-Cloud Bridge Pro is not functioning properly, you can reboot it or restore it to factory default settings. The Develop functions allow technicians to fix problems. You can also use the following two methods to load default settings for GV-Cloud Bridge Pro: On the device: Press and hold the Default button (No.
- Page 43 13 Storage When you insert a memory card or an SSD into GV-Cloud Bridge Pro, utilize the Disk page to format it. The page will display the current storage space status. To access the page, in the left menu, click Storage > Disk.
- Page 44 14 VPN The VPN function of GV-Cloud Bridge Pro allows users to create a virtual private network for devices on the same LAN, eliminating the need for port forwarding. The VPN capability is enabled in all operating modes, and you can select a specific VPN Box operation mode.
- Page 45 • Step 2: Create a VPN account on GV-Cloud • Step 3: Connect GV-Cloud Bridge Pro to the VPN account on GV-Cloud • Step 4: Map the IP addresses from IP devices to VPN IP addresses Note: The VPN function is not limited to IP cameras. Any network gadgets can connect.
- Page 46 Step 1. Sign up on GV-Cloud Visit GV-Cloud at https://www.gvaicloud.com/ and click Sign up. Type the necessary information and complete the sign-up procedure. Confirm the account by clicking the activation link sent via e-mail. Keep the attached registration information for logging in GV-Cloud later. For details, see Chapter 1 in GV-VPN Guide.
- Page 47 Enable the connection and give a Host Name to the setting. To connect to the VPN account on GV-Cloud, type the ID and Password created at Step 10. To configure a VPN IP for your GV-Cloud Bridge Pro, type a VPN IP ranging from 198.18.0.1 to 198.18.255.254.
- Page 48 Note: Depending on your network setup, you will see the following NAT types: Moderate / Restrict / Exceed limit / Unknown. For more details, see No.8, 3. Configuring GV-VPN on GV-VPN Guide. Step 4. Map the IP addresses of IP devices to VPN IP addresses 12.
- Page 49 17. Click Apply. The Host Name, VPN IP, and Target IP are displayed on each device entry. Once connected, the Status will display “Connected”. Note: Make sure the VPN IP address for GV-Cloud Bridge Pro and other devices does not repeat.
- Page 50 15 People and Vehicle Detection (PVD) GV-Cloud Bridge Pro can only detect people or vehicle in order to reduce false alarms. Up to 4 channels are supported. To access the page, select Intelligent in the left menu. On the left menu, select Intelligent > People > Vehicle Detection.
- Page 51 Note: The ratio for the minimum object size to the video image is 1/80 for both People and Vehicle detection. For example, for the video image that is set to 1920 x 1080, the minimum object size should be 24 x 24 pixels.
- Page 52 Download and install the GV-IP Device Utility. Locate your GV-Cloud Bridge Pro on the GV-IP Device Utility window, click its IP address, and select Configure. On the popup dialog box, click the Firmware Upgrade tab, and click Browse to locate the firmware file (.img) saved at your local computer.
- Page 53 © 2025 GeoVision, Inc. All rights reserved. Scan the following QR codes for product warranty and technical support policy: [Warranty] [Technical Support Policy]...
Need help?
Do you have a question about the GV-Cloud Bridge Pro and is the answer not in the manual?
Questions and answers