GeoVision GV-NVR Quick Start Manual
System lite
Hide thumbs
Also See for GV-NVR:
- Quick start manual (8 pages) ,
- User manual (88 pages) ,
- Quick start manual (9 pages)
Table of Contents
Advertisement
Quick Links
Download this manual
See also:
User Manual
Quick Start Guide
Quick Start Guide
The Vision of Security
GV-NVR System Lite
Thank you for purchasing GV-NVR System Lite. This guide is designed to assist the new user in getting immediate results from
the GV-NVR System Lite. For advanced information on how to use the GV-NVR System Lite, please refer to GV-NVR System Lite
User's Manual (GV-Desktop < Program button < Multicam Installation).
© 2010 July GeoVision Inc. All rights reserved.
1
1
RoHS
NVRL-QG-B
Basic Installation
Network
5
6
8
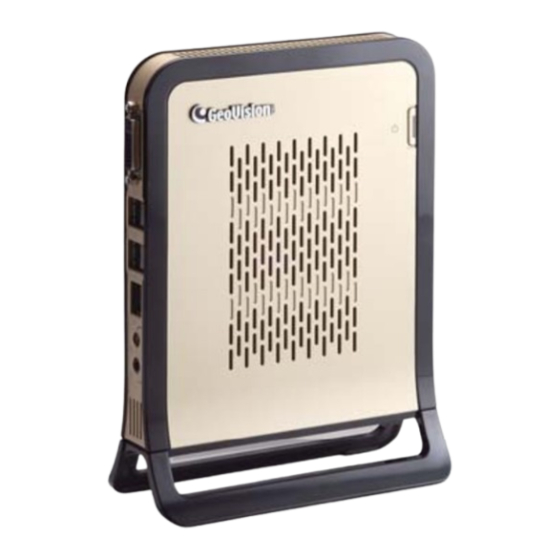
Left Side
Advertisement
Table of Contents

Related Manuals for GeoVision GV-NVR


Summary of Contents for GeoVision GV-NVR
- Page 1 RoHS Thank you for purchasing GV-NVR System Lite. This guide is designed to assist the new user in getting immediate results from the GV-NVR System Lite. For advanced information on how to use the GV-NVR System Lite, please refer to GV-NVR System Lite User's Manual (GV-Desktop <...
- Page 2 8. Using the supplied power adapter and power cord, connect the unit to the power outlet. The power of the GV-NVR System Lite will be automatically turn on once the GV-NVR System Lite is connected to the power outlet. Note: 1.
-
Page 3: Packing List
Note: The bundled software preinstalled in the GV-NVR System Lite (GV-Desktop < Program button < Multicam Installation) is a lite version, specially designed for the GV-NVR System Lite to implement the GV-IPCAM H.264: 1. It includes a lite version of video analysis applications, featuring Advanced Motion Detection, Privacy Mask and Scene Change Detection only. -
Page 4: Basic Configuration
Installing GV-IPCAM H.264 Configuring an IP Address The GV-NVR System Lite supports up to 4 channels and is exclusively designed for The GV-NVR System Lite has a default IP address to connect to the GV-IPCAM GV-IPCAM H.264. The GV-IPCAM H.264 can be automatically connected to the H.264 automatically. - Page 5 2. Check Install IP Camera, select the number of IP cameras you want to link to, and click Configure. This dialog box appears. Note: For these changes to be applied through the GV-NVR System Lite, it is required that the GV-IPCAM H.264 uses the default username and password that are admin.
- Page 6 Returning to GV-Desktop Click the Windows Start button, select All Programs, click GVCombo, and click Key The GV-NVR System Lite is protected by GV-Desktop that is limited to run the Lock Utility. selected programs. If you need to exit to Windows desktop, follow these steps.
-
Page 7: Main Screen
Click to call up I/O Control Panel Click to call up PTZ Control Panel The GV-NVR System Lite records audio and video to the internal hard drive. You can Status indicators for remote applications also use an external hard drive to expand recording space. You must format the hard Date / Time / Storage Space drive before you can use it. - Page 8 For details on setting camera properties, refer to Adjusting Individual Camera, For details, see 3.6 Adding the External Hard Drive to the Recording Path in Chapter 1, DVR User's Manual (GV-Desktop < Program button < Multicam GV-NVR System Lite User's Manual. Installation). Renaming the Camera You can give a new name for each camera.
-
Page 9: Recording Schedule Setup
Recording Schedule Setup Video Playback You can program recording to turn on and off at a specific time each day. You can play back video recorded during a particular date and time. 1. Click on the main screen, and select Schedule Edit. 1. -
Page 10: Video Files Backup
. Zoom in: Click the Zoom-in button, and then click on the area you want to Note: You have to connect a USB DVD RW device to the GV-NVR System Lite magnify. Each click will increase the zoom level. for video files backup. - Page 11 Playing Backup Files Open the backup folder, run EZViewLog500.exe, and then follow the instructions in the Play Back Video section.
-
Page 12: System Restoration
C. 4. Wait until the “Recover your partition now. Are you sure?” message appears. 1. Restart the GV-NVR System Lite. This image appears. Click OK to start the recovery. 2. Once the above image appears, keep on clicking the F8 button on the keyboard When the recovery process is complete, the confirmation message “The recovery...
Need help?
Do you have a question about the GV-NVR and is the answer not in the manual?
Questions and answers