Table of Contents
Advertisement
Quick Links
Advertisement
Table of Contents

Subscribe to Our Youtube Channel
Related Manuals for GeoVision GV-AI System V2


Summary of Contents for GeoVision GV-AI System V2
- Page 1 GV-AI System V2 User’s Manual AI-UM-A...
- Page 2 GeoVision. Every effort has been made to ensure that the information in this manual is accurate. GeoVision, Inc. makes no expressed or implied warranty of any kind and assumes no responsibility for errors or omissions. No liability is assumed for incidental or consequential damages arising from the use of the information or products contained herein.
- Page 3 GV-AI System V2 Welcome to the GV-AI System V2 User’s Manual. The Manual provides an overview of the GV-AI System V2 and its accessories. It also includes the instructions to guide you through the installation and use of the GV-AI System V2: •...
-
Page 4: Table Of Contents
3.1 Basic Installation ..................4 3.2 Installing the Hard Drive ................5 3.3 Turning on the Power ................. 10 3.4 Windows Setup Installation ................ 12 3.5 System Restoration..................14 3.6 Updating GV-AI System V2 ................ 15 Chapter 4 Troubleshooting ................. 16... -
Page 5: Safety Instructions
Safety Instructions Observe these safety instructions to help ensure against injury to yourself and damage to the product. Read ⚫ all safety and installation instructions before you operate the product. ⚫ Do not operate the product in high humidity areas or expose it to water or moisture. ⚫... -
Page 6: Chapter 1 Introduction
Chapter 1 Introduction 1.1 Packing List The GV-AI System V2 package includes the following items. If any of the items are missing or damaged, contact your dealer to arrange a replacement. Important: Please keep the original carton and all packing materials for future shipping need. -
Page 7: Chapter 2 Overview
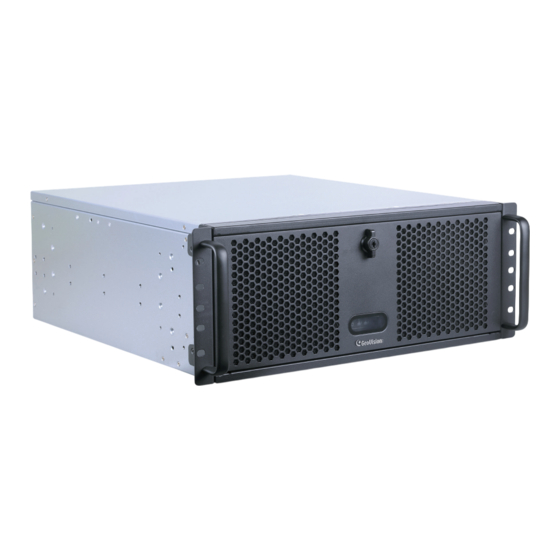
Chapter 2 Overview 2.1 Front View Figure 2-1 No. Name Name USB 3.0 (Type-A) x 2 Power LED Power Button HDD LED Reset Button LAN LED (not functional) -
Page 8: Rear View
Overview 2.2 Rear View Figure 2-2 No. Name Name Power Connector Power Switch ECO Switch ➢ Audio Jack x 6 PS/2 keyboard / mouse port ➢ Center Speaker Out (Orange) USB 2.0 (Type-A) x 4 ➢ Rear Speaker Out (Black) ➢... -
Page 9: Chapter 3 Getting Started
Chapter 3 Getting Started 3.1 Basic Installation This section describes all the equipment required to program and operate the GV-AI System Figure 3-1 1. Connect the mouse and keyboard to any of the USB ports or the PS/2 port. 2. Using the supplied power cord, connect one end to the AC input and the other end to the power outlet. -
Page 10: Installing The Hard Drive
Getting Started 3.2 Installing the Hard Drive Unscrew the two screws on each side of the system (a total of 4 screws). Figure 3-2 2. Pull out the motherboard tray. Figure 3-3 3. Unscrew the set screw on the top of the hard drive bracket. Figure 3-4... - Page 11 4. Turn the knob anticlockwise on the front panel and open the front panel. Figure 3-5 5. Turn the knob next to the fan and open the fan bracket. Figure 3-6...
- Page 12 Getting Started 6. Push the hard drive bracket to the right to loosen the bracket from the pads, and lift up the bracket. Figure 3-7 7. Place the hard drive onto the hard drive bracket. Align and tighten the two screws on each side to secure the hard drive (a total of four screws).
- Page 13 10. Align the hard drive bracket with the pads at the bottom of the system case. Carefully check if the pads all fit in the holes at the bottom of the bracket since the hard drives installed on the bracket may block the views. Figure 3-9 11.
- Page 14 Getting Started Tips: In Step 7, begin by installing a hard drive onto the bottom of the hard drive bracket. Leave one side of the screws partially tightened to make it easier to align the second hard drive on top. In Step 9, begin by connecting the SATA and power cable to the hard drive on the bottom of the hard drive bracket.
-
Page 15: Turning On The Power
3.3 Turning on the Power To turn on the power, follow these steps: 1. Turn on the monitor. Figure 3-11 2. Make sure the Power Switch is switched ON on the rear panel, and turn on the main power switch on the front panel. Rear panel Figure 3-12 Front panel... - Page 16 Getting Started GV-AI System V2 will run a series of self-tests, and later series of messages may be displayed as the various hardware and software subsystems are activated. Note: The series of self-tests will take around 20 seconds to 2 minutes, depending on the...
-
Page 17: Windows Setup Installation
3.4 Windows Setup Installation The Windows setup is preparing your computer for first use. 1. After the Windows starts, this setup screen appears. Select your language and click Next to continue. Figure 3-14 2. Select your regional settings and time zone and click Next to continue. Figure 3-15 3. - Page 18 Troubleshooting 4. Select between “Customize” and “Use Express settings” for your Windows 10 installation. 5. Type your account name. It is recommended that you create a password for your account and click Next. Figure 3-16 6. When the above setup process is complete, Windows will finalize your settings automatically in the background and restart.
-
Page 19: System Restoration
3.5 System Restoration You can restore the operating system and system software back-up files using Windows Tool. Refer to the instructions here. -
Page 20: Updating Gv-Ai System V2
Troubleshooting 3.6 Updating GV-AI System V2 If you like to update your GV-AI System V2, contact your dealer for more information. Before contacting your dealer, you may check software update news at our website: http://www.geovision.com.tw... -
Page 21: Chapter 4 Troubleshooting
3. Push the Power button again to turn the GV-AI System V2 back on. GV-AI System V2 is unable to start If your GV-AI System V2 is unable to start after you push the Power button, try these steps: 1. Remove the power cord from the power connector. - Page 22 Troubleshooting GV-AI System V2 suffers virus attack GV-AI System V2 is designed and optimized for Windows 10 platform. It may be vulnerable to newly created worms and exploits that attack any of the underlying operating system’s previously undocumented flaws. If your GV-AI System V2 suffers virus attack, try rebuilding the operating system and the software.
Need help?
Do you have a question about the GV-AI System V2 and is the answer not in the manual?
Questions and answers