
Related Manuals for ElectrIQ eiq-495KCSUW240VA


Summary of Contents for ElectrIQ eiq-495KCSUW240VA
- Page 1 USER MANUAL 49” LED MONITOR eiq-495KCSUW240VA Thank you for choosing electriQ. Please read the user manual before using this monitor and keep it safe for future reference. Visit our page www.electriQ.co.uk to view our entire range of Intelligent Electricals.
- Page 3 CONTENTS SAFETY WHAT IS SUPPLIED PREPARING FOR USE ATTACHING THE STAND WALL MOUNTING GETTING STARTED CONNECTIONS AVAILABLE MONITOR CONTROLS INITIAL SET UP NAVIGATING THE OSD OSD MENU GAME SETTINGS PICTURE SETTING COLOUR SETTINGS PIP (PICTURE IN PICTURE) PBP (PICTURE BY PICTURE) OSD SETTINGS OTHER SETTINGS SPECIFICATION...
- Page 4 SAFETY INFORMATION Read these instructions – All the safety and operating instructions should be read before this product is installed or operated. Keep these instructions – The safety and operating instructions should be retained for future reference. Heed all warnings – All warnings on the appliance and in the operating ...
- Page 5 to water or moisture, if anything accidentally penetrates the ventilation slots or if the set does not work normally. Do not remove the safety covers. There are no user serviceable parts inside. Do not block ventilation slots on the back cover. The monitor can be placed ...
- Page 6 WHAT IS SUPPLIED Monitor Power Cable DP Cable Bolts User Manual Stand Mount Adapter PREPARING THE MONITOR FOR USE Place the monitor on a firm and flat 10cm 10cm 10cm 30cm surface, leaving a space of at least 10cm around the unit and 30cm from the top of the unit to the ceiling or cabinet.
- Page 7 that they are unpacked and assembled by 2 people. electriQ and its distributors and dealers are not liable or responsible for damage or injury caused by improper installation, improper use or failure to observe these safety instructions. In such cases any guarantee will be void.
- Page 8 Please follow the instructions provided by the wall bracket manufacturer and ensure that all fixing bolts supplied are used. electriQ and its distributors and dealers are not liable or responsible for damage or injury caused by improper installation, improper use or failure to observe these safety instructions. In...
- Page 9 GETTING STARTED CONNECTIONS AVAILABLE ON THE MONITOR Power Connector: Insert the power cable Audio Output: Insert an Audio cable into the monitor to output sound to a device, such as headphones or speakers. Type-C Connector: Insert one end of the Type-C cable into the computer's Type-C output and connect the other end to the monitor's Type-c port.
- Page 10 INITIAL SETUP Attach the stand or wall mount the product following the guidance on the previous pages. Connect the source device (such as PC) using the correct cable. Connect the power cable to the monitor and plug into a suitable socket. Press the POWER button on the monitor or to turn it on.
- Page 11 OSD MENU NOTE: Due to continuous product development, the OSD menu shown may differ slightly from the product. The screen display (OSD) menu can be used to adjust the settings of the monitor and is shown on the screen after the monitor is powered on and the M button is pressed. Press the M button to enter the OSD menu.
- Page 12 PICTURE MODE 1920 180hz 1080 Picture Mode Standard Mode RTS/RPG Mode Off Picture Settings FPS Mode Off Game + MOBA Mode Off Audio Settings Movie Mode Off PIP/PBP Reading Mode Off I/O Settings Sub Menu Options Main Menu Off/On(Custom) Standard Mode Off/On(Custom)...
- Page 13 PICTURE SETTINGS 1920 180hz 1080 Picture Mode Brightness Contrast Picture Settings Off Game + Low Blue Light Audio Settings Sharpness PIP/PBP Gamma I/O Settings Sub Menu Options Main Menu Brightness 0-100 Contrast 0-100 Off/On Low Blue Light 0-100 Sharpness 1.8/2.0/2.2/2.4/2.6/S.curve Gamma Picture Settings Wide Screen/4:3/1:1/Auto...
- Page 14 GAME + 1920 180hz 1080 Picture Mode Off Adaptive-Sync Off Picture Settings Picture Enhancement Game + Game Aid Audio Settings PIP/PBP I/O Settings Sub Menu Options Main Menu Off/Auto/HDR Game/HDR Movie Adaptive-Sync Off/On Color Enhancement/CR Enhancement/ Shadow Balance/Night Vision Mode/ Picture Enhancement Game + Game Rush Mode/Super Resolution/...
- Page 15 AUDIO SETTINGS 1920 180hz 1080 Picture Mode Volume Audio Mute Off Picture Settings Reset Audio Settings Off Game + Audio Settings PIP/PBP I/O Settings Sub Menu Options Main Menu Volume 0-100 Audio Mute Off/On Audio Settings Off/On Reset Audio Settings...
- Page 16 PIP (Picture in Picture) / PBP (Picture by Picture) 1920 180hz 1080 Picture Mode PIP/PBP Mode Off Sub-Signal Source Picture Settings Audio Source Auto Game + PIP Position Top Right Audio Settings PIP Size Medium PIP/PBP Window Swap Off I/O Settings Sub Menu Options Main Menu...
- Page 17 I/O SETTINGS 1920 180hz 1080 Picture Mode Input Signal Auto HDMI EDID Mode Picture Settings DP EDID Mode DP 5K Game + Quick Boot Audio Settings Type-C DSC PIP/PBP USB-Switch Type-B I/O Settings Sub Menu Options Main Menu Input Signal Auto/Type-C/DP 1/DP 2/HDMI HDMI EDID Mode HDMI 2.1/HDMI 2.0...
- Page 18 SYSTEM SETTINGS 1920 180hz 1080 System Settings Language English OSD Time Out OSD H-Position OSD V-Position OSD Transparency Hotkey1 Setting Brightness Sub Menu Options Main Menu Language 简体中文/English/한국어 / Portugues do Brasilazil/ Deutsch/Nederland/ Suomi/Français/Eλληvικά/Indonesia/Italiano/ 日本語/Malaysia/Polskie/Português/Русский/ Español/ไทย/Українська/Tiếng Việt/ 繁体中文/Türkçe 0-60 OSD Time Out 0-100 OSD H-Position 0-100...
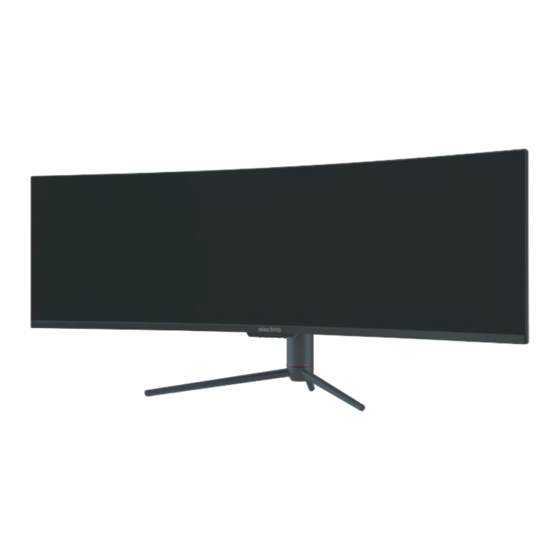
- Page 19 SPECIFICATION Product Model eiq-495KCSUW240VA Screen Size 49” (Diagonal) Panel Type VA Panel Aspect Ratio 32:9 Radius of Curve R1800 Power Supply 100-240V~ 50/60Hz 3.0A Power Consumption Typ. : 80W Dimensions 1198.5 x 288.8 x 565.9 mm Net / Gross Weight 11.5kg / 15.6kg...
- Page 20 TROUBLESHOOTING If the display fails or the performance changes dramatically, check the display in accordance with the following instructions. Remember to check the peripherals to pinpoint the source of the failure. Symptom Solution Power cannot be turned Check that both ends of the power cable are plugged ...
- Page 21 Please contact the local council for details of your local household waste recycling centres. electriQ UK SUPPORT Complete the online support form on www.electriQ.co.uk/support...
- Page 22 108.007.xxxxx 49C1S eiq-495KCSUW240VA El ectriQ 2024-7-20 140*19 7mm 封面封底120G铜版纸过光膜,内页80G铜版纸 彩色印刷,骑马订 唐喜阳 备注:不够页数在封面封底的内页加空白页...
Need help?
Do you have a question about the eiq-495KCSUW240VA and is the answer not in the manual?
Questions and answers