Advertisement
Quick Links
nordictrack.com
Model No. NTL39225.0
Serial No.
Write the serial number in the space
above for reference.
MEMBER CARE
For service at any time, go to
my.iFIT.com or scan the QR
code below. PLEASE DO NOT
CONTACT THE STORE.
CAUTION
Read all precautions and
instructions in this manual before
using this equipment. Keep this
manual for future reference.
Serial Number
Decal
USER'S MANUAL
Advertisement

Related Manuals for iFIT NordicTrack X24


Summary of Contents for iFIT NordicTrack X24
- Page 1 Write the serial number in the space above for reference. Serial Number Decal MEMBER CARE For service at any time, go to my.iFIT.com or scan the QR code below. PLEASE DO NOT CONTACT THE STORE. CAUTION Read all precautions and instructions in this manual before using this equipment.
- Page 2 The decals may not be shown at actual size. This decal is on both sides NORDICTRACK and IFIT are registered trademarks of iFIT Inc. The Bluetooth word mark and logos are regis- ® tered trademarks of Bluetooth SIG, Inc. and are used under license. Google Maps is a trademark of Google LLC.
- Page 3 To reduce the risk of burns, fire, electric shock, or injury to persons, read all important precautions and instructions in this manual and all warnings on your treadmill before using your treadmill. iFIT assumes no responsibility for personal injury or property damage sus- tained by or through the use of this product.
- Page 4 19. Read, understand, and test the emergency page 7, and HOW TO MOVE THE TREADMILL stop procedure before using the treadmill. on page 24.) You must be able to safely lift (See HOW TO TURN ON THE CONSOLE on 45 lbs. (20 kg) to raise, lower, or move the page 15.) Always wear the clip while using the treadmill.
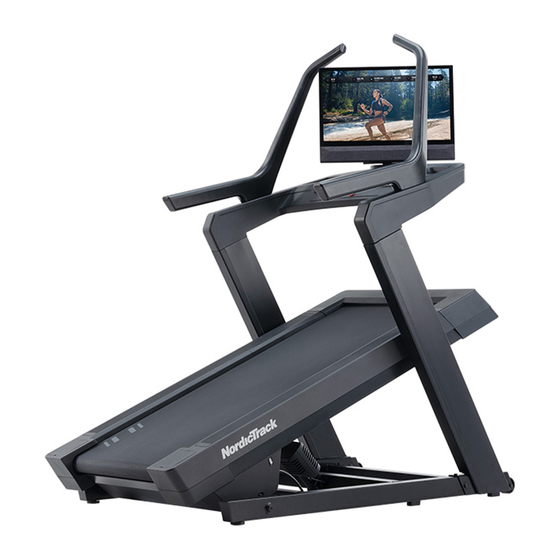
- Page 5 BEFORE YOU BEGIN Thank you for selecting the revolutionary reading this manual, please see the front cover of this NORDICTRACK X24 treadmill. The X24 treadmill manual. To help us assist you, note the product model ® offers a selection of features designed to make your number and serial number before contacting us (see workouts at home more effective and enjoyable.
- Page 6 PART IDENTIFICATION CHART Use the drawings below to identify small parts used for assembly. The number in parentheses below each draw- ing is the key number of the part, from the PART LIST near the end of this manual. The number after the key number is the quantity used for assembly.
- Page 7 ASSEMBLY • Assembly requires two persons. • To identify small parts, see page 6. • Place all parts in a cleared area and remove the • Assembly can be completed using the included packing materials. Do not dispose of the packing tools.
- Page 8 2. Make sure that the power cord is unplugged. Remove the six 3/8" x 3/4" Screws (18) from the Base (74) (only one side is shown). Keep the Screws. 3. Do not pinch any wires during this step. With the help of a second person, set the upright assembly (A) on the Base (74) as shown.
- Page 9 4. Connect the Base Wire (52) to the Upright Wire (75) in the Right Upright (83). IMPORTANT: The wire connectors should slide together easily and snap into place with an audible click. You must connect the wires properly for your treadmill to function properly.
- Page 10 6. Rotate the console assembly (B) so that it faces the opposite direction. Tighten two 5/16" x 3/4" Screws (84) into the Pivot Plate (111); start both Screws, and then firmly tighten them. See the inset drawing. Identify the Left Pivot Cover (96).
- Page 11 8. Rotate the console assembly (B) to the posi- tion shown. See the inset drawing. Connect the console ground wire (G) to the ground wire (H) in the handrail assembly (C). See the inset drawing. Next, connect the console wire (I) to the wire (J) in the handrail assembly (C).
- Page 12 10. If necessary, move the treadmill to the desired location (see page 27). After the treadmill is placed in the location where it will be used, make sure that the treadmill rests firmly on the floor. If the treadmill rocks even slightly, turn a Leveling Foot (77) as needed until the rocking motion is eliminated.
- Page 13 HOW TO PLUG IN THE POWER CORD USE A SURGE SUPPRESSOR devices, except for low-power devices such as cell phone chargers, into the surge suppressor or into Your treadmill, like other electronic equipment, can be an outlet on the same circuit. IMPORTANT: If the damaged by sudden voltage changes in your home’s treadmill is connected to an AFCI-equipped outlet power.
- Page 14 . With iFIT, ® you can choose from a changing selection of fea- tured workouts that automatically control the speed and incline of the treadmill as iFIT trainers guide you through immersive exercise sessions. ETNT39225...
- Page 15 0% before you fold the 4. Create or sign in to your iFIT account. treadmill. Follow the prompts on the screen to create an iFIT account or to log in to your iFIT account. Available subscription options will be shown.
- Page 16 5. Follow your progress. ture, a featured workout, a draw-your-own-map The console offers several display modes. The workout, or an iFIT workout. display mode that you select will determine which workout information is shown. HOW TO USE THE MANUAL MODE Drag upward on the screen to enter the fullscreen display mode.
- Page 17 (heart symbol). You must off the console (see page 15). be logged in to your iFIT account to save a fea- tured workout (see step 5 on page 20). When you select a workout, the screen will show...
- Page 18 To use a draw-your-own-map workout, you must be Touch the buttons on the screen to select the logged in to your iFIT account and the console must be desired map options. connected to a wireless network.
- Page 19 Touch Save New Workout. If desired, enter a title and description for the workout. To use an iFIT workout, you must be logged in to your iFIT account and the console must be connected to a wireless network. For more information about iFIT, 4.
- Page 20 To exit a menu, touch the back button (arrow symbol). You may be able to view and change settings in the following settings 5. Create a list of favorite iFIT workouts if desired. menus: To mark an iFIT workout as a favorite, simply view...
- Page 21 4. Customize the unit of measurement and other IMPORTANT: Keep pets, feet, and other objects settings. away from the treadmill while the incline sys- tem is calibrating. In an emergency, remove The console can display speed and distance in the key from the console to stop the incline either standard or metric units of measurement.
- Page 22 If you are having problems connecting to an encrypted network, make sure that your password is correct. If you have questions after following HOW TO USE AN OPTIONAL HEART RATE these instructions, go to my.iFIT.com for MONITOR assistance. Whether your goal is to burn fat or to strengthen your car- 3.
- Page 23 FCC INFORMATION This equipment has been tested and found to comply with the limits for a Class B digital device, pursuant to Part 15 of the FCC Rules. These limits are designed to provide reasonable protection against harmful interference in a residential installation. This equipment generates, uses, and can radiate radio frequency energy and, if not installed and used in accordance with the instructions, may cause harmful interference to radio communications.
- Page 24 HOW TO MOVE THE TREADMILL Carefully roll the treadmill to the desired location, and IMPORTANT: Before moving the treadmill, insert then lower the base to the floor. the key into the console, raise the incline to the maximum incline level, remove the key, and then Make sure that the treadmill rests firmly on the floor.
- Page 25 Make sure that the settings for your wireless net- chase an arc filter. work are correct. b. After the power cord has been plugged in, make sure that the key is inserted into the console. c. If you still have questions, go to my.iFIT.com.
- Page 26 b. Tilt the console SYMPTOM: The walking belt does not move (H) upward as If the console displays time and distance while a shown, and workout is running, but the walking belt does not move, use the small follow the steps below. hex key to tighten the two a.
- Page 27 SYMPTOM: The walking belt slows when walked on SYMPTOM: The walking belt is off-center a. Use only a surge suppressor that meets all of the a. First, remove the key and UNPLUG THE POWER specifications described on page 13. CORD. If the walking belt has shifted to the left, use the hex key to turn the indicated idler roller b.
- Page 28 EXERCISE GUIDELINES Aerobic Exercise—If your goal is to strengthen your WARNING: cardiovascular system, you must perform aerobic Before beginning this exercise, which is activity that requires large amounts or any exercise program, consult your physi- of oxygen for prolonged periods of time. For aerobic cian.
- Page 29 PART LIST Model No. NTL39225.0 R0724D Key No. Qty. Description Key No. Qty. Description 3/8" x 4 3/4" Screw Large Cushion #8 x 5/8" Screw Base Wire 3/8" Star Washer Small Cushion #8 x 5/8" Flat Head Screw Large Pivot Bushing #8 x 3/4"...
- Page 30 Key No. Qty. Description Key No. Qty. Description 1" Plastic Washer Pivot Bracket M3 x 12mm Screw Small Saddle Bracket Power Supply Pivot Cover Incline Motor Controller Large Saddle Bracket Standoff M6 x 16mm Screw M4 x 10mm Screw M30 Nut M6 x 25mm Screw Belly Pan Grommet Clip Nut...
- Page 31 EXPLODED DRAWING A Model No. NTL39225.0 R0724D...
- Page 32 EXPLODED DRAWING B Model No. NTL39225.0 R0724D...
- Page 33 EXPLODED DRAWING C Model No. NTL39225.0 R0724D...
- Page 34 EXPLODED DRAWING D Model No. NTL39225.0 R0724D...
- Page 35 EXPLODED DRAWING E Model No. NTL39225.0 R0724D...
- Page 36 (5) if the product is modified to alter functionality or capability without the written permission of iFIT, or (6) if the product is used for commercial or rental purposes. No other warranty beyond that specifically set forth above is authorized by iFIT.
Need help?
Do you have a question about the NordicTrack X24 and is the answer not in the manual?
Questions and answers